Page is loading ...

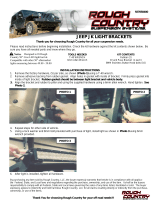
Thank you for choosing Rough Country for all your vehicle needs.
Please read instructions before beginning installation. Check the kit hardware against the kit contents shown below. Be
sure you have all needed parts and know where they go.
If question exist, please call us @1-800-222-7023. We will be happy to answer any questions concerning this product.
Check all fasteners for proper torque. Check to ensure for adequate clearance between all components.
Periodically check all hardware for tightness.
KIT CONTENTS:
Circuit Breaker x1
Circuit Board x1
Circuit Board Mount x1
Positive Wire x1
Negative Wire x1
Switch Panel x1
Cable Ties x10
Switch Panel Wiring Harness x1
Accessory Harness x1
50 Custom Stickers x1
Supplied Hardware and Allen Wrench x1
Switch Panel Mounting
Flat Mount x1
Adjustable Mount x1
Torque Specs:
Size Grade 5 Grade 8 Size Class 8.8 Class 10.9
5/16” 15 ft/lbs 20ft/lbs 6MM 5ft/lbs 9ft/lbs
3/8” 30 ft/lbs 35ft/lbs 8MM 18ft/lbs 23ft/lbs
7/16” 45 ft/lbs 60ft/lbs 10MM 32ft/lbs 45ft/lbs
1/2” 65 ft/lbs 90ft/lbs 12MM 55ft/lbs 75ft/lbs
9/16” 95 ft/lbs 130ft/lbs 14MM 85ft/lbs 120ft/lbs
5/8” 135ft/lbs 175ft/lbs 16MM 130ft/lbs 165ft/lbs
3/4” 185ft/lbs 280ft/lbs 18MM 170ft/lbs 240ft/lbs
8-Gang Switch Instructions
921709700

1. Locate the Circuit board mounting bracket. Secure the bracket to the desired location in an unobstructed area to
safely route the wiring. Use the supplied hardware to secure.
2. Place the Circuit board onto the mounting bracket. Route the supplied positive and negative wiring, accessory switch
wire and the switch panel wiring through the right side of bracket and the circuit board. See Photo 1.
3. Connect the switch wire connector and the switch panel connector wires onto the circuit board. See Photo 2.
4. Connect the white wire to ACC / Factory dimmer switch and the red wire to a Positive power source.
5. Connect the Positive and Negative wires to the circuit board. Remove the screw from the circuit board and place the
wire onto the terminal, place the screw into the terminal and tighten using a Phillips head bit. See Photo 3.
6. Install the circuit breaker in a accessible location. Secure using (2) of the supplied screws. Tighten using a Phillips
bit driver. See Photo 4.
7. Secure the positive cables on each terminal of the circuit breaker. Tighten using an 11mm socket. See Photo 5.
8. Place the clear cover over the circuit breaker. See Photo 6.
9. Connect the Positive and Negative wires to the battery.
Photo 1 Photo 2
Photo 3 Photo 4
Photo 5 Photo 6
Route the wiring through the circuit board. Connect the (2) plugs to the circuit board.
Connect the Positive and Negative wires. Install the circuit breaker.
Secure the positive cables circuit breaker. Place the clear cover over the circuit breaker.
INSTALLATION INSTRUCTONS

10. Secure the circuit breaker to the mounting bracket using (2) of the supplied nuts and bolts. Tighten using a Phillips
head bit and an 10mm wrench. See Photo 7.
11. Locate the Switch panel. See Photo 8.
12. Choose the mounting bracket that is best for your application and install onto the control panel using the supplied
screws. See Photos 9 and 10.
13. Mount the control panel into the desired location and connect the wiring harness together. Tighten the threaded nut
to secure and seal the connectors. See Photos 11 and 12.
Photo 7 Photo 8
Photo 9 Photo 10
Photo 11 Photo 12
Bolt the circuit breaker to the mounting bracket. Locate the Switch panel.
Install the desired mounting bracket. Install mounting bracket.
Mount the control panel. Secure the wiring to the control panel.

14. Connect the wiring from the products that will be used by the switch panel. Choose from the fused 5A, 10A, 20A,
30A slots for your application. See Photo 13.
15. Press each button on the switch panel to confirm the switched product is working properly.
16. Install the circuit breaker cover. See Photo 14.
17. Choose the appropriate sticker for each switched application and apply onto the switch panel. See Photo 15.
Photo 13 Photo 14
Photo 15
Photo 16
Connect the wiring from the products. Install the circuit breaker cover.
18. Apply 8 of the stickers that closely matches the switched application onto the buttons of the switch panel. See Photo
16.
(5) DIY Labels

Note Switch number as it coordinates with fuse panel and Amp
Positive Terminal
Negative Terminal
Switch Panel Connection
When LED light
is red, the fuse is
bad. Connect White wire to ACC
Connect Red wire to Positive
1-2 5A
3-4 10A
5-6 20A
7-8 30A
A
B
D
C
A-Red LED lights up to show the circuit is on.
B-Area for DIY placement of the selected labels.
C-Blue LED illumination area, back light for the label.
D-Manual power activation button, press to turn on/off. Function momentary.
1
2
3
4
5
6
7
8

Wire Connections
This switch panel control system has eight switch circuits, each has a maximum current rating. The total operating am-
perage of the connected accessories can not exceed 60 amps(600 watts). You may have multiple electrical devices or
auxiliary LED lights connected that total more than 60 amps, but you can not have them turned on at the same time. Oth-
erwise, the control box will be damaged. The switch panel comes configured with the following fuses:
Circuit 1 30A, Circuit 2 30A, Circuit 3 20A, Circuit 4 20A, Circuit 5 10A, Circuit 6 10A, Circuit 7 5A, Circuit 8 5A.
Spare Fuses
Spare fuses and fuse removal / install tool are supplied under the circuit breaker cover.
Dimmable Feature
Connecting the ‘White Wire’ to the ACC / Factory dimmer switch will allow the backlit brightness to be incrementally ad-
justed.
By purchasing any item sold by Rough Country, LLC, the buyer expressly warrants that he/she is in compliance with all
applicable, State, and Local laws and regulations regarding the purchase, ownership, and use of the item. It shall be the
buyers responsibility to comply with all Federal, State and Local laws governing the sales of any items
listed, illustrated or sold. The buyer expressly agrees to indemnify and hold harmless Rough Country,
LLC for all claims resulting directly or indirectly from the purchase, ownership, or use of the items.
/