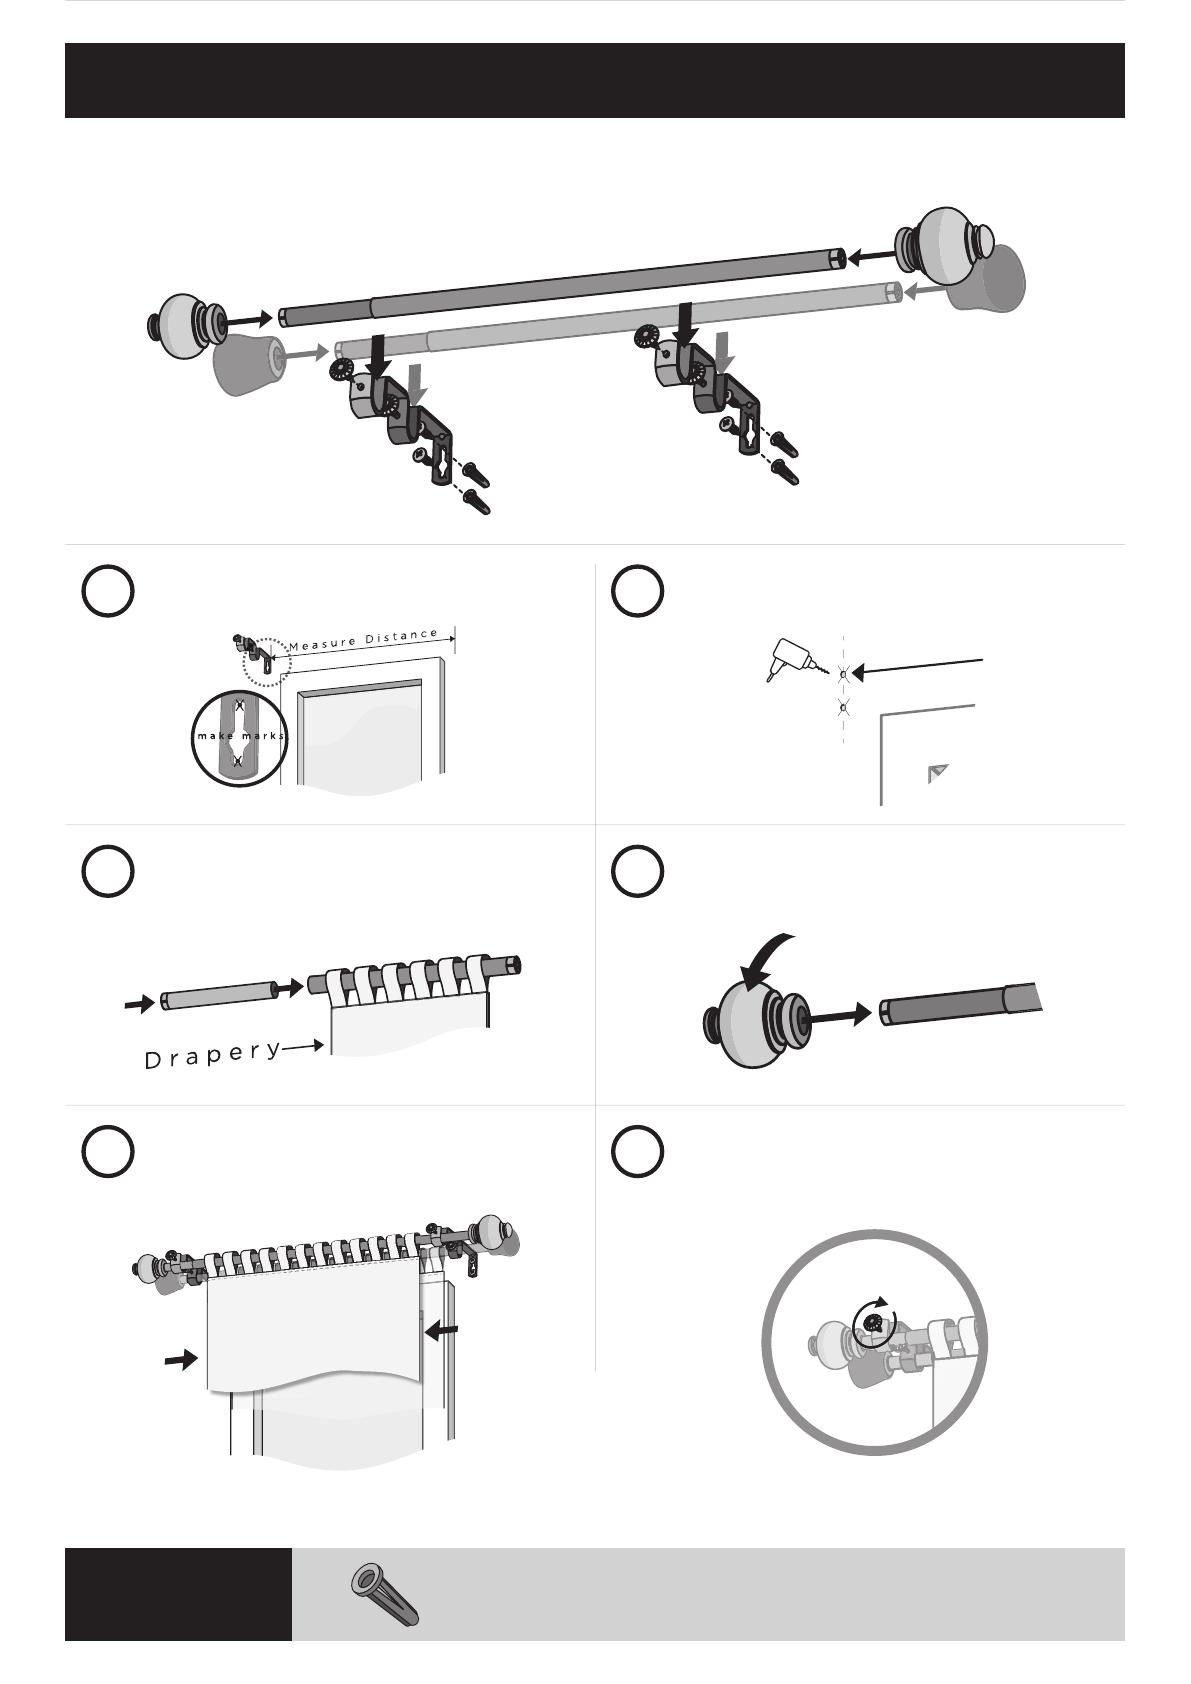
NOTE: Finial shown is for illustration purpose only.
It may not represent the style of nial purchased.
INSTALLATION INSTRUCTIONS FOR ROD SET
Screw nials onto rod. Rotate nial on rod for proper alignment if required.
4
Lock rods into position by tightening leveling screw by hand
until nger tight. this will prevent the rod from moving.
6
Extend rod to desired width. Lift rod with drapery and drop into brackets.
Adjust draperies to desired position.
5
Place brackets against wall at desired locations.
Mark screw holes with pencil. Be sure marks are level across opening.
1
If screws are going directly into wood trim or wall stubs, drill a 1/8” pilot hole at
pencil marks. If screwing into drywall, follow drywall anchor instruction in the
bottom of the page.
2
Assemble rod and sheer drapery treatment onto rod.
3
If screws are going directly into wood trim or wall studs - drill 1/8” (3mm) holes and install screws through bracket.
If screws are going into hollow wall - drill 3/16” (5mm) holes and push or lightly hammer plastic anchors into holes.
Then install screws through brackets. Do not tighten screws too much - just snug is best.
DRYWALL ANCHOR
INSTALLATION