EASY
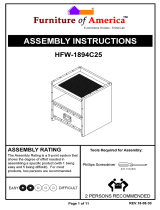
The Assembly Rating is a 5-point system that
shows the degree of effort needed in
assembling a specific product (with 1 being
easy and 5 being difficult). For some
products, two persons are recommended.
CM4641C
Assembly Instructions
Tools Required for Assembly:
Rev.14-08-25
Page 1 of 5
DIFFICULT
ASSEMBLY RATING
Phillips Screwdriver
(Not Included)
2 PERSONS RECOMMENDED

Page 2 of 5

Parts List
Hardware List
#1 x 1 pc
Inner Cross Leg
#2 x 1 pc
Outer Cross Leg
#3 x 1 pc
Base
#A x 6 pcs
Screw 6x35mm
#B x 4 pcs
Sticker
Before you begin, please read Page 2
of “Assembly and Care Advice”.
And remember, do not tighten until
each step is completed or instructed.
#C x 4 pcs
Flat Washer
MD
#D x 6 pcs
Wood Dowel
#4 x 1 pc
Table Top
Page 3 of 5
Wood dowel joints are meant to hold together the
two sides of the structure by acting as a
connector. By applying glue (#G) to the wood
dowel, it will make the joint stronger.
1. Remove one end of the wood dowel and
squeeze a drop of glue onto it. The glue
should cover the tip of the wood dowel.
2. Insert the glued end of the wood dowel into
its appropriate location. Use a rag or paper
towel to wipe any excess glue oozing
around the wood dowel.
3. Squeeze a drop of glue onto the end of the
wood dowel sticking out. The glue should
cover the tip of the wood dowel. Insert this
end of the wood dowel into the other part.
Both sides should now line up and touch.
4. Use the paper towel or rag to wipe off any
excess glue.
#E x 4 pcs
Screw 4x50mm
#F x 4 pcs
Screw 7x58mm
#G x 1 pc
Glue (Optional)

Page 4 of 5
I. With the help of another person,
carefully place the table top (#4)
facing down on a protected
surface.
II. Insert 4 wood dowels (#D) into
the pre-drilled holes of the table
top (#4).
III. Align the assembled cross legs
(#1 & #2) with the 4 wood dowels
(#D) and the pre-drilled holes on
the table top (#4).
IV. Insert 4 screws (#E) and 2
screws (#A) through the pre-
drilled holes of the cross legs (#1
& #2) using the Phillips
screwdriver to lock them with the
table top (#4).
#A x 4 pcs
#B x 4 pcs
Turn right (clockwise) to tighten
Turn right (clockwise) to tighten
I. Align the inner cross leg (#1)
with the pre-drilled holes on
the outer cross leg (#2).
II. Insert 4 screws (#A) through
the pre-drilled holes of the
outer cross leg (#2) using the
Phillips screwdriver to lock
them with the inner cross leg
(#1).
III. Apply the 4 stickers (#B) to
cover the bolt holes.
#A x 2 pcs
#D x 4 pcs
#E x 4 pcs

.
Carefully turn the completed table upright. Make sure the table is
rested on a flat surface and does not feel loose or wobbly. If it does,
double check that the screws are secured and properly tightened.
Turn right (clockwise) to tighten
Page 5 of 5
ASSEMBLY IS COMPLETED
#C x 4 pcs
#D x 2 pcs
#F x 4 pcs
I. Insert two wood dowels (#D) into
the pre-drilled holes on the center
of the assembled cross legs (#1 &
#2).
II. Align the base (#3) with the two
wood dowels (#D) and the pre-
drilled holes on the assembled
cross legs (#1 & #2).
III. Insert 4 flat washers (#C) onto 4
screws (#F). Then insert the
screws (#F) through the pre-drilled
holes of the base (#3) using the
Phillips screwdriver to lock them
with the assembled cross legs (#1
& #2).
/


