Page is loading ...

Thanks for purchasing one of our products.
Please read carefully the assembly instructions before the installation.
Do not discard this manual or any of the packaging material until the
unit has been completely assembled.
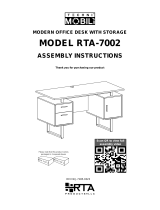
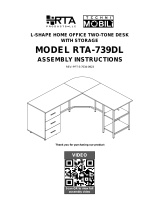
ASSEMBLY INSTRUCTIONS

A
C DB
F GE H
JI K L
PONM
TSR
Q
V
U

17
PART
QTY.
ITEM
1 2Pcs
Long Wooden Pin
Cam Lock &
Bolt Sets
10Sets
3
19
1Set
Sliders
Sets
Right
Left
a
b
a
b
PART
QTY.
ITEM
2
48Pcs
Short Wooden Pin
4
4Pcs
Screw - 5 x 8mm
(Euro Screw)
5
8Pcs
Screw TP 10#x1/2''
6
4Pcs
Screw - 3 x 16mm
7
6Pcs
Screw - 3.5 x 16mm
8
4Pcs
Screw - 4 x 38mm
9
17Pcs
Screw - 5 x 40mm
10 4Pcs
Cam lock Caps
11 9Pcs
Screw Caps
12 1Pcs
Cable Management
(Grommet)
Handle L Shape
(84mm)
M3.5x15mm Screw
1Set
13
Door Hinge Set
(Both parts come
joined together)
2Sets
15
a
b
16 1Pcs
L Bracket
2Pcs
Z Bracket
18 6Pcs
Plactic Feet
Handle L Shape
(84mm)
M3.6x19mm Screw
1Set14


1
- Install 48pcs of small Wooden Pins (2) into all panels as shown. Use a wooden or light rubber
hammer to avoid damage to the pins. Please pay close attention to which holes you have
to use, and do not join any parts yet!
2
- Attach all the bolts (3) to panels (A), (G) & (Q) as shown above. Please make sure to attach
them to the correct holes as some holes are intended for different hardware in subsequent steps.
2
B
D
C
H
M
N
R
S
E
F
I
L
L
K
J
O
3
A
Q
G
2
3

3
4
- Install the flat shaped sliders (19) on panels (C) and (D) using screws (4) as shown.
Flat Shaped
"L" Shaped
Separate the 4 pieces of the sliders (19) according to their shape:
- The flat shaped will be used in the next step (2 pieces, both left and right).
(Top)
(Front)
4
19

5
7
3
E
G
3
3
16
7
H
- Attach L Bracket (16) to the top edge of
panel (H) using screw (7) as shown.
7
16
6
- Assemble panels (B) and (H) using screws (9) as shown.
B
H
9
11
9
11
(Front)
(Top)

8
9
D
9
9
(Top)
(Front)
H
The panels from previous
step are shown here from
the right side
E
F
- First assemble the panel (E) to panel (D) using screws (9) and attach the plastic caps (11)
as shown. Then install the panel (F) to panel (D) by just pushing the wooden pins into the
holes.
9
11
D
9
11
The panels from previous
step are shown here from
the left side
11
11
- Assemble the panel (D) to the panel (H) using screws (9) and
attach the plastic caps (11) as shown.

10
11
C
9
18
- First assemble the panel (C) to the panel (E) using screws (9), and attach the plastic caps
(11) to panel (C), then install the plastic feet (18)to the bottom of panels (B), (D) and (E) as
shown.
9
11
V
- Insert the back panel (V) into the groves of the panels (C) and (D) as shown.
The panels from previous
step are shown here from
the right side
D
B
The panels from previous
step are shown here in
normal upright position
C
D
E
18
11

12
14
M
K
M
N
L
L
- Install 2 pcs of Long Wooden Pins (1) into
panel (M) as shown. Use a wooden or light
rubber hammer to avoid damage to the pins.
- Assemble the panel (M),(N) to the panel (K)
as shown.
- Assemble the panel (L) to the panel (M) as
shown.
M
15
13
1
1
O
- Assemble the panel (O) to the panel (K) as
shown.
K

16
17
I
9
9
J
Using screws (9), assemble panel (J) to panel (O), and then panel (O) to panel (K) and
attach the plastic caps (11) to panel (J), (O) and (I) as shown.
9
9
O
The panels from previous
step are shown here in
normal upright position
The panels from previous
step are shown here from
the back
O
K
11
11
J

18
19
- First install the grommet (12) into the hole of panel (O) from the inside, then assemble the
main panel (A) to panels (I), (J) and (O) using screws (9) as shown.
A
- First install and align the cam locks (3) into panels (B), (C), (D) and (H), and assemble the
main panel (A) as shown and as explained in page 4. Then attach the caps (10) to the cam
locks on panels (B), (C) and (D). Finally, secure the L Bracket (16) to the underside of main
panel (A) using screw (7) as shown.
3
10
The panels from previous
step are shown here
laying down showing the
underside
Main panel (A)
shown from the
underside
(Front)
(Right)
B
H
D
C

20
21
- On the back of the unit, install the corner Z brackets (17) to the top left corner and bottom
right corner using screws (6) as shown.
S
R
U
Q
T
- Using cam locks (3), and as shown and
explained in page 4, assemble drawer side
panels (S) and (R) to the drawer front panel
(Q). Then slide the bottom panel (U) thru the
groves on all panels as shown.
- Assemble the drawer back panel (T) to the
drawer side panels using screws (8) as
shown.
22
17
6
8
3
6
8
17
The unit is shown from
the back

23
25
- First install the hinges (15) to the door (P) using screws (5), then install the handle (14) using
its own screws. Make sure the handle is installed on the outside of the panel.
P
- Place the drawer upside-down and
using screws (7) as shown.
Please note that the wheels go towards the
back of the drawer and the sliders should not
protrude from the bottom, otherwise the
- First install the handle (13) to the drawer
front panel (Q) using the own handle screws,
then install the cam locks caps (10) as
shown.
24
19
7
7
14
14
5
15
13
13
10
7
10 13
15

26
Assemble the door (P) to the left panel (C) using
screws (5), and adjust the alignment if necessary:
(A): This screw adjusts the door up and down.
(B): This screw adjusts the door side to side.
(C): This screw adjusts the door's depth.
P
DONE! Before you start using, please read all the warnings in the next page.
Enjoy your new unit!
5
15
5
C

Do not exceed the weight limits.
Do not expose the surfaces to direct sunlight or to extreme environmental conditions.
Clean the surfaces preferable with a soft cloth damped with a solution of mild soap and water,
then dry with a clean towel.
If you decide to apply a cleaning agent, first test on a small area of the unit that is hidden from
view, for example, under the table top.
Do not sit on the tabletop.
Do not allow small children to climb over the unit, play underneath, or reach inside the drawers
and compartments without your supervision.
Before moving the unit within the same room or to an adjacent room:
a) Remove all objects from the tabletop, drawers and shelves that are heavy or might fall off.
b) The unit must be handled by at least 2 persons
c) Use both of your hands and bend your knees, not your backs.
To transport the unit to a location far away from its current location, it is recommended to
properly secure it to avoid breakage during transit.
The warranty does not extend to damages caused by accidents, own errors, incorrect assembly,
negligence, improper use, modifications, or not heeding the above warnings.
The warranty is valid only within the continental United States. If you reside in Hawaii, Puerto
Rico, U.S. Dependencies or other countries, please contact the supplier from where the unit was
purchased.
For details on the warranty, please refer to the Warranty Document included with the product,
or visit online:
technimobili.com/pages/techni-mobili-desk-warranty
50Kg (110 Lbs)
4.5Kg (10 Lbs)
5Kg (11 Lbs)
5Kg (11 Lbs)
5Kg (11 Lbs)
/