Page is loading ...

TOOLS REQUIRED TABLE OF CONTENTS
• Requires at least 493 lb (224 kg) of cement mix to fi ll a
volume of 3.7 ft
3
(0.105 m
3
).
• Requires 3+ days for concrete to cure, plus 3-4 hours
to complete assembly steps.
• 3+ people recommended for setup.
Pour le français, voir la page 2. Para el español, ver la página 3.
ASSEMBLY INSTRUCTIONS
MODEL 1008
Save this instruction in the event that the manufacturer has to be
contacted for replacement parts.
BEFORE ASSEMBLY:
CONTACT LIFETIME CUSTOMER SERVICE:
Call: 1-800-225-3865
7:00 am–5:00 pm (Monday–Friday) MST
and 9:00 am–1:00 pm Saturday MST
QUESTIONS?
Model Number: 1008
Product ID:
For Customer Service in Mainland
Europe and the United Kingdom,
E-mail: [email protected]
Live Chat:
www.lifetime.com
7/16" (11 mm)
(x2)
(x1)
(x1)
(x1)
1/2" (13 mm)
(x2)
(x1)
9/16" (14 mm)
(x2)
3/4" (19 mm)
(x2)
(x1)
(x1)
Cement Mix
493 lb (224 kg)
36" (x1)
Rebar
(x1)
(x1)
(x1)
(x1)
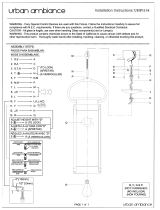
IN-GROUND
QUICK ADJUST
®
BASKETBALL SYSTEM
Icon Legend................................4
Warnings & Notices....................5
Initial Set Up..............................6
Pole Assembly..........................12
Backboard to Rim Assembly.......15
Backboard to Pole Assembly.......19
Parts Identifi er........................i - iv
Final Assembly..........................25
Height Adjustment....................31
Maintenance Instructions..........32
Warning Sticker........................33
Registration........................36
Warranty................................37
(x1)
COPY

5
WARNINGS & NOTICES / AVERTISSEMENTS ET AVIS / ADVERTENCIAS Y AVISOS
Most injuries are caused by misuse and/or not following instructions. Use caution when using this product.
To ensure safety, do not attempt to assemble this product without following the instructions carefully. Check entire box and inside all packing
material for parts and/or additional instruction material. Before beginning assembly, read the instructions and identify parts using the hardware
identifi er and parts list in this document. Proper and complete assembly, use and supervision are essential for proper operation and to reduce the
risk of accident or injury. A high probability of serious injury exists if this product is not installed, maintained, and operated properly.
FAILURE TO FOLLOW THESE WARNINGS MAY RESULT IN SERIOUS INJURY OR PROPERTY DAMAGE AND WILL VOID WARRANTY.
Owner must ensure that all players know and follow these rules for safe operation of the system.
• If using a ladder during assembly, use extreme caution.
• Two capable adults are recommended for this operation.
• Check base daily for leakage. Leaks will cause system to fall.
• Assemble the pole sections properly. Failure to do so could cause the pole sections to separate during play or transport.
• Minimum operational height is 6 ft 6 in (1.98m) to the bottom of the backboard.
SAFETY INSTRUCTIONS
La mayoría de las lesiones son causadas por el abuso y/o por el no seguir las instrucciones. Sea cauteloso al usar este producto.
Para su seguridad, no intente ensamblar este producto sin leer y seguir todas las instrucciones cuidadosamente. Revise la caja entera y todos los
materiales de embalaje en busca de piezas y / o material de instrucciones adicional. Antes de comenzar el ensamble, identifi que todas las piezas y el
equipo usando las listas de partes y equipo así como los identifi cadores en este documento. El ensamble correcto y completo, el uso y la supervisión
son esenciales para una orientación apropiada y para reducir el riesgo de un accidente o lesión. Existe una alta probabilidad de sufrir lesiones graves
si este producto no es instalado, mantenido y / o operado correctamente.
EL INCUMPLIMIENTO DE SEGUIR ESTAS ADVERTENCIAS PUEDE OCASIONAR EN LESIONES GRAVES Y/O DAÑO A LA PROPIEDAD Y ANULARÁ LA GARANTÍA.
El propietario debe asegurarse de que todos los jugadores conocen y seguir estas reglas para la operación segura del sistema.
• Si utiliza una escalera durante el ensamble, tenga mucho cuidado.
• Se recomienda la participación de dos adultos capaces para esta ensamble.
• Compruebe si hay fugas en la base. Las fugas pueden causar que el producto caiga.
• Ensamble las secciones del poste correctamente. De lo contrario, podría provocar que las secciones del poste se separaran
durante el juego o el transporte.
• Altura mínima de operación es 1,98m (6 ft 6 in) a la parte inferior del tablero.
INSTRUCCIONES DE SEGURIDAD
La majorité des accidents résultent d’une mauvaise utilisation et/ou du fait de n’avoir pas suivi les consignes. Observez toutes précautions utiles pendant
l’utilisation de ce produit.
Pour assurer votre sécurité, ne tentez pas d’assembler cet article sans avoir lu et suivi toutes les consignes attentivement. Vérifi ez la totalité de la
boîte et l’intérieur de tous les matériaux d’emballage pour trouver toutes les pièces et/ou matériau contenant des consignes supplémentaires. Avant
de commencer le montage, identifi ez toutes les pièces et tous les accessoires et faites-en l’inventaire en les comparant aux listes et identifi cateurs
de pièces et accessoires contenus dans ce document. Un assemblage correct et complet, ainsi que l’utilisation et la supervision correctes sont des
conditions essentielles à la bonne direction et diminuent les risques d’accident ou de blessure. Une haute probabilité d’accident grave résulte de
mauvaises conditions d’installation, maintenance et/ou utilisation.
LA NON-RESPECT DE CES AVERTISSEMENTS PEUT RÉSULTER EN ACCIDENTS GRAVES OU DOMMAGES MATÉRIELS ET ANNULER LA GARANTIE.
Le propriétaire doit veiller à ce que tous les joueurs connaissent et suivent ces règles pour une exploitation sûre du système.
• Agissez avec la plus grande prudence si vous employez une échelle pour l’assemblage.
• Il est recommandé que cet assemblage soit exécuté par deux personnes adultes.
• Vérifi ez quotidiennement la base au niveau de fuites. Les fuites peuvent causer la chute du système.
• Assemblez les sections de poteau correctement. La non-observation de cette consigne peut amener les sections de poteau à se séparer
pendant le jeu ou le déplacement.
• La hauteur minimale est 1,98 m (6 pi 6 po) au bas de la planche.
CONSIGNES DE SÉCURITÉ

6
INITIAL SET UP / PRÉPARATION INITIALE / PREPARACIÓN INICIAL
1
(x1)
(x1)
(x1)
(x1)
(x1)
HARDWARE REQUIRED / QUINCAILLERIE REQUISE / HERRAJE REQUERIDO
PARTS REQUIRED / PIÈCES REQUISES / PIEZAS REQUERIDAS
TOOLS REQUIRED / OUTILS REQUIS / HERRAMIENTAS REQUERIDAS
Metal Parts / Pièces en métal / Piezas de metal
3’ Rebar
3’ Barre d’armature
3’ Varilla corrugada
Cement
Mélange de béton
Mescla de concreto
(493 lb) (224 kg)
ALE (x1)

12
2
(x1)
(x1)
(x1)
POLE ASSEMBLY / ASSEMBLAGE DU POTEAU / ENSAMBLE DEL POSTE
PARTS REQUIRED / PIÈCES REQUISES / PIEZAS REQUERIDAS
Metal Parts / Pièces en métal / Piezas de metal
TOOLS REQUIRED / OUTILS REQUIS / HERRAMIENTAS REQUERIDAS
HARDWARE REQUIRED / QUINCAILLERIE REQUISE / HERRAJE REQUERIDO
Hardware Bag / Sac de quincaillerie / Bolsa de herraje
ADS (x2)*
CIH (x2)*
ABZ (x2)*
!
*Only one CIH, ABZ and ADS will be used in this section. The remaining hardware will be used later in the assembly.
*Seulement un des CIH, ABZ et ADS sera utilisé dans cette section. La quincaillerie restante sera utilisée plus tard a l’assemblage.
*Se utilizará solamente un CIH, ABZ y ADS en esta sección. Se utilizará el herraje restante más tarde en el ensamble.
BCO
ALH (x1)
ALF (x1)
Warning Sticker
Autocollant d’avertissement
Etiqueta adhesiva de advertencia

13
TOOLS AND HARDWARE REQUIRED / OUTILS ET QUINCAILLERIE REQUIS / HERRAMIENTAS Y HERRAJE REQUERIDOS
X SECTION 2 (CONTINUED) / SECTION 2 (SUITE) / SECCIÓN 2 (CONTINUACIÓN)
2.1
• Align the hole in the bottom of the Top Pole (ALH) with the slot in the top of the Middle Pole (ALF). Secure the Top Pole to
the Middle Pole with the hardware shown.
• Alignez le trou dans la partie inférieure du poteau supérieur (ALH) avec la fente dans la partie supérieure du poteau du
milieu (ALF). Attachez bien le poteau supérieur au poteau du milieu à l’aide de la quincaillerie illustrée.
• Alinee el agujero en la parte inferior del poste superior (ALH) con la ranura en la parte superior del poste intermedio (ALF).
Sujete el post superior al poste intermedio usando los herraje de fi jación ilustrados.
ADS (x1)
CIH (x1)
(x1)
ALH
ALF
ALH
ALF
ADS
CIH
!
• The Screw should be fl ush with the Pole,
but will spin freely once inserted.
• La vis doit ser au ras du poteau, mais
elle tournera librement une fois insérée.
• El tornillo debe estar a ras del poste,
mas girará libremente una vez insertado.

15
BCS
Metal Part / Pièce en métal / Pieza de metal
Hardware Bag / Sac de quincaillerie / Bolsa de herraje
TOOLS REQUIRED / OUTILS REQUIS / HERRAMIENTAS REQUERIDAS
PARTS REQUIRED / PIÈCES REQUISES / PIEZAS REQUERIDAS
3
Plastic Parts / Pièces en plastique / Piezas de plástico
AJJ (x1)
AJK (x1)
AJI (x1)
ALX (x1)
BDM (x1)
(2) (2) (1)
1/2”(13 mm) 7/16” (11 mm) 3/8” (10 mm)
AAS (x2)
ABS (x2)
ABD (x4)
ABK (x4)
AAB (x2)
AOX (x1)
ADQ (x2)
APK (x1)
AAC (x2)
HARDWARE REQUIRED / QUINCAILLERIE REQUISE / HERRAJE REQUERIDO
BACKBOARD TO RIM ASSEMBLY / ASSEMBLAGE DU PANNEAU À L’ANNEAU / ENSAMBLE DEL TABLERO AL ARO

16
X SECTION 3 (CONTINUED) / SECTION 3 (SUITE) / SECCIÓN 3 (CONTINUACIÓN)
TOOLS AND HARDWARE REQUIRED / OUTILS ET QUINCAILLERIE REQUIS / INSTRUMENTAL Y HERRAJE REQUERIDOS
3.1
ABS (x2)
AAB (x2)
AAS (x2)
(2)
7/16” (11 mm)
AJJ
AJK
APK
APK (x1)
• Slide the U-Bolt (BNP) through the Left and Right Backboard Brackets (AJJ & AJK). The U-Bolt must rest in the notches of the
Backboard Brackets as shown.
• Glissez le boulon en «U» (BNP) à travers les supports du panneau gauche et droit (AJJ et AJK). Le boulon en « U » doit rester dans
les encoches des supports du panneau.
• Deslice el perno en «U» (BNP) por los soportes izquierdo y derecho del tablero (AJJ y AJK). El perno en «U» debe restar en las
muescas en los soportes del tablero como se muestra.
Notch
Muesca
Encoche
3.2
90°
90°
BDM
ABS
BDM
AAB
AAB
ABS
AAS
AAS
• Fold up the sides of the Inner Guard (BDM) and place it between the Backboard Brackets as shown. Hand secure
the Backboard Brackets to the Inner Guard by using two Hex Bolts (AAS), two Galvanized Spacers (ABS), and two
Centerlock Nuts (AAB).
• Pliez les côtés de la protection intérieure (BDM) vers le haut et placez-la entre les supports de panneau, comme illustré.
Fixez les supports de panneau sur la protection intérieure à l’aide de deux boulons hexagonaux (AAS), deux pièces d’écartement
galvanisées (ABS) et deux ecrous de blocage (AAB).
• Doble los dos lados del protector interior (BDM) y colóquelo entre los soportes como se muestra. Sujete los soportes
al protector interior usando dos pernos hexagonales (AAS), dos espaciadores galvanizados (ABS), y dos tuercas de bloqueo
central (AAB).

17
X SECTION 3 (CONTINUED) / SECTION 3 (SUITE) / SECCIÓN 3 (CONTINUACIÓN)
TOOLS AND HARDWARE REQUIRED / OUTILS ET QUINCAILLERIE REQUIS / INSTRUMENTAL Y HERRAJE REQUERIDOS
AAC
ABK
ABK
APK
ABD
ABD
3.4
(2)
1/2” (13 mm)
• Connect the Rim (ALX) to the Backboard (AJI) with the hardware indicated.
• Attachez l’anneau (ALX) au panneau (AJI) en utilisant la quincaillerie indiquée.
• Sujete el aro (ALX) al tablero (AJI) usando el herraje indicado.
ABK (x4)
AAC (x2)
ABD (x4)
3.3
AJI
APK
AOX
• Place the Backboard Bracket Assembly and Rim Support Channel (AOX) to the Backboard (AJI) as shown.
• Mettez l’assemblage des supports du panneau et le canal de support de l’anneau (AOX) au panneau (AJI) comme illustré.
• Coloque el ensamblaje de los soportes del tablero y del canal de soporte del aro (AOX), al tablero (AJI) como se
muestra.
Rear View / Vue arriére / Vista trasera
ABK
ABD
ABD

18
X SECTION 3 (CONTINUED) / SECTION 3 (SUITE) / SECCIÓN 3 (CONTINUACIÓN)
TOOLS AND HARDWARE REQUIRED / OUTILS ET QUINCAILLERIE REQUIS / INSTRUMENTAL Y HERRAJE REQUERIDOS
3.5
• Bend the Left and Right Backboard Brackets (AJJ and AJK) outward by hand and position the holes in the Backboard
Brackets over the holes in the Backboard. Then securely fasten the Backboard Brackets to the Backboard with
the hardware shown.
• Pliez à la main les supports du panneau gauche et droit (AJJ and AJK) vers l’extérieur, et positionnez les trous dans
le supports sur les trous dans le panneau. Ensuite, attachez bien les supports au panneau à l’aide de la
quincaillerie indiquée.
• Pliegue a mano los soportes del tablero izquierdo y derecho (AJJ and AJK) hacia el exterior y posicione los agujeros en
los soportes encima de los agujeros en el tablero. Entonces, sujete bien los soportes al tablero usando el herraje
indicado.
ADQ
ADQ
AJI
(x1)
3/8" (10mm)
ADQ (x2)
AJK

19
BCR
TOOLS REQUIRED
4
AKC (x4)
BDN(x1)
BDL (x1)
10’0”
9’7”
8’0”
8’5”
8’10”
9’2”
DOWN
AAD (x4)
AAX (x4)
7 1/16” (18 cm)
7”
AQW (x1)
ABB (x1)
ABL (x4)
ABN (x4)
AKP (x1)
7.5'
8.0'
8.5'
9.0'
9.5'
10.0'
BACKBOARD TO POLE ASSEMBLY / ASSEMBLAGE DU PANNEAU AU POTEAU / ENSAMBLE DEL TABLERO AL POSTE
HARDWARE REQUIRED / QUINCAILLERIE REQUISE / HERRAJE REQUERIDO
Hardware Bag / Sac de quincaillerie / Bolsa de herraje
PARTS REQUIRED / PIÈCES REQUISES / PIEZAS REQUERIDAS
Metal Parts / Pièces en métal / Piezas de metal
Plastic Parts / Pièces en plastique / Piezas de plástico
TOOLS REQUIRED / OUTILS REQUIS / HERRAMIENTAS REQUERIDO
(x2) (x2)
3/4" (19 mm)
9/16" (14 mm)
(x1)
7 1/16" (17,9 cm)
7" (17,8 cm)
21 1/8” (53.6 cm)

20
X SECTION 4 (CONTINUED) / SECTION 4 (SUITE) / SECCIÓN 4 (CONTINUACIÓN)
TOOLS AND HARDWARE REQUIRED / OUTILS ET QUINCAILLERIE REQUIS / HERRAMIENTAS Y HERRAJE REQUERIDOS
4.1
(x2)
3/4" (19 mm)
ABL (x2)
AAX (x1)
7 1/16” (18 cm)
AAD (x1)
AKC
ABL
ABL
AAX
!
AKC
• Secure the Short Extension Arms (AKC) to the Backboard Brackets in the location shown with the hardware indicated.
• Attachez les bras de rallonge courts (AKC) aux supports du panneau à l’endroit indiqué à l’aide de la quincaillerie indiquée.
• Sujete los brazos de extensón cortos (AKC) a los soportes del tablero a la ubicación indicada usando el herraje indicado.
• Tighten the Centerlock Nut (AAX) until it is fl ush with the end of the Bolt.
• Serrez l’écrou de blocage central de (AAX) jusqu’à ce qu’il soit au ras de l’extrémité du boulon.
• Apriete la tuerca de bloqueo central de (AAX) hasta que esté a ras del extremo del perno.
AAD
(x1)
7 1/16" (17,9 cm)

i
Remove This Section / Enlevez cette section / Retire esta sección
This page intentionally left blank
Cette page est intentionnellement laissée en blanc
Esta página ha sido dejada en blanco intencionalmente
PARTS IDENTIFIER / IDENTIFICATEUR DE PIÈCES / IDENTIFICADOR DE PIEZAS

iii
BCO BCS BCR
AKZ (x1)
10’0”
9’7”
8’0”
8’5”
8’10”
9’2”
DOWN
BDN (x1)
BDM (x1)
Remove This Section / Enlevez cette section / Retire esta sección
Plastic Parts / Pièces en plastique / Piezas de plástico
HARDWARE REQUIRED / QUINCAILLERIE REQUISE / HERRAJE REQUERIDOS
PARTS IDENTIFIER / IDENTIFICATEUR DE PIÈCES / IDENTIFICADOR DE PIEZAS
AJI (x1)
AKP (x1)
7.5'
8.0'
8.5'
9.0'
9.5'
10.0'

iv
This page intentionally left blank
Cette page est intentionnellement laissée en blanc
Esta página ha sido dejada en blanco intencionalmente
Remove This Section / Enlevez cette section / Retire esta sección
PARTS IDENTIFIER / IDENTIFICADOR DE PIEZAS / IDENTIFICATEUR DE PIÈCES
PARTS IDENTIFIER / IDENTIFICATEUR DE PIÈCES / IDENTIFICADOR DE PIEZAS

22
X SECTION 4 (CONTINUED) / SECTION 4 (SUITE) / SECCIÓN 4 (CONTINUACIÓN)
TOOLS AND HARDWARE REQUIRED / OUTILS ET QUINCAILLERIE REQUIS / HERRAMIENTAS Y HERRAJE REQUERIDOS
4.4
• Insert the Dunk Latch and Outer Guard between the
Backboard Brackets (AJJ & AJK) and the Inner Guard (BDM).
• Insérez le loquet de dunk et la protection extérieure entre les
supports du panneau (AJJ et AJK) et la protection intéreiure (BDM).
• Inserte el cerrojo de donqueo y la protección externa entre
los soportes del tablero (AJJ y AJK) y la protección interna (BDM).
• Secure the Hex Bolt (AAD) through the Extension Arms (AKC), Spacers (ABL), and Backboard Brackets as shown.
• Faites glisser le boulon hexagonal (AAD) à travers les bras de rallonge (AKC), les pièces d’écartement (ABL), et les supports du
panneau comme illustré.
• Sujételos el perno hexagonal (AAD) por los brazos de extensión (AKC), los espaciadores (ABL) y los soportes del tablero como se
muestra.
4.5
3/4" (19 mm)
(x1)
7 1/16” (18 cm)
AAD (x1)
ABL (x2)
AAX (x1)
AKC
AKC
AAX
ABL
ABL
AAD
!
(x2)
• Tighten the Centerlock Nut (AAX) until it is fl ush with
the end of the Bolt.
• Serrez l’écrou de blocage central (AAX) jusqu’à ce
qu’il soit au ras de l’extrémité du boulon.
• Apriete la tuerca de bloqueo central (AAX) hasta que
esté a ras del extremo del perno.
7 1/16" (17,9 cm)
AJJ
AJK
BDM

23
X SECTION 4 (CONTINUED) / SECTION 4 (SUITE) / SECCIÓN 4 (CONTINUACIÓN)
TOOLS AND HARDWARE REQUIRED / OUTILS ET QUINCAILLERIE REQUIS / HERRAMIENTAS Y HERRAJE REQUERIDOS
4.6
• Lift the Dunk Latch (BDL) and Outer Guard (BDN) so the slots line up with the hole in the upper Extension Arms (AKC) closest to
the backboard. Secure them with Hex Bolt (AQW) and Centerlock Nut (AAB).
• Levez le loquet de dunk (BDL) et la protection extérieure (BDN) et alignez les fentes avec le trou dans les bras de rallonge (AKC)
le plus proche au panneau. Attachez-les bien à l’aide d’un boulon hexagonal (AQW) et l’écrou de blocage central (AAB).
• Levante el cerrojo de donqueo (BDL) y la protección externa (BDN) para alinear las ranuras con el agujero en los brazos de
extensión (AKC) más cercano al tablero. Sujételos usando el perno hexagonal (AQW) y la tuerca de bloqueo central (AAB).
AKC
AKC
AAB
AQW
!
• Tighten the Centerlock Nut (AAB) until it is fl ush with
the end of the Bolt.
• Serrez l’écrou de blocage central (AAB) jusqu’à ce
qu’il soit au ras de l’extrémité du boulon.
• Apriete la tuerca de bloqueo central (AAB) hasta que
esté a ras del extremo del perno.
7”
AQW (x1)
AAB (x1)
7" (17,8 cm)
(x2)
9/16" (14 mm)
BDN
BDL

25
5
AKZ (x1)
(x1)
(x3)
(x1)
(x1)
ADS (x1)*
ABZ (x1)*
CIH (x1)*
ALM (x1)
(x1)
BCO
FINAL ASSEMBLY / ASSEMBLAGE FINAL / ENSAMBLE FINAL
HARDWARE REQUIRED / QUINCAILLERIE REQUISE / HERRAJE REQUERIDO
Hardware Bag / Sac de quincaillerie / Bolsa de herraje
*This Hardware taken from the hardware bag used in Section 2
*Cette quincaillerie vient du sac de quincaillerie utilisé à la Section 2.
*Este herraje viene de la bolsa de herraje utilizada en la Sección 2
!
PARTS REQUIRED / PIÈCES REQUISES / PIEZAS REQUERIDAS
TOOLS REQUIRED / OUTILS REQUIS / HERRAMIENTAS REQUERIDO

26
TOOLS AND HARDWARE REQUIRED / OUTILS ET QUINCAILLERIE REQUIS / HERRAMIENTAS Y HERRAJE REQUERIDOS
X SECTION 5 (CONTINUED) / SECTION 5 (SUITE) / SECCIÓN 5 (CONTINUACIÓN)
5.1
• BEFORE CONTINUING: It is critical that the instructions in the following steps are followed exactly. Failure to properly orient
and align the pole sections will render the pole unusable. If the pole sections are assembled incorrectly, you will have to
purchase new pole sections from our Customer Service Department. If you have questions regarding the pole assembly,
please call our Customer Service Department for assistance.
• AVANT DE CONTINUER : Il est essentiel suivre les étapes suivantes dans les instructions exactement. Le non-respect d’orienter ou d’aligner
les sections de poteau correctement laissera le poteau inutilisable. Si les sections de poteau sont assemblées incorrectement, il faut
acheter des sections de poteau nouvelles de notre departement de services à la clientèle. Si vous avez de questions concernant
l’assemblage du poteau, veuillez contacter notre departement de services à la clientèle.
• ANTES DE CONTINUAR: Es critical seguir exactamente los pasos siguientes en las instrucciones. El no orientar y alinear correctemente
las secciones del poste dejará el poste inutilizable. Si las secciones del poste se ensamblen incorrectemente, tendrá que comprar
nuevas secciones del poste de nuestro departamento de servicios a clientes. Si tiene preguntas con respecto al ensamble del poste,
póngase en contacto con nuestro departamento de servicios a clientes.
• With the Backboard facing the playing surface, align the hole in the
Middle Pole (ALF) with the slot in the Bottom Pole (ALE) and slide the Middle Pole
over the Bottom Pole.
• Lorsque le panneau est tourné vers la surface de jeu, alignez le trou dans le
poteau du milieu (ALF) avec la fente dans le poteau inférieur (ALE), et faites glisser
le poteau du milieu sur le poteau inférieur.
• Con el tablero trasero frente a la superfi cie de juego, alinee el agujero en el
poste intermedio (ALF) con la ranura en el poste inferior (ALE), deslice el poste
intermedio sobre el poste inferior.
Playing Surface
Surface de jeu
Superfi cie de juego
WARNING / AVERTISSEMENT / ADVERTENCIA
Use extreme caution when standing on ladders to perform
assembly steps. Follow all warnings and cautions on the
ladder. Failure to follow all of these instructions and warnings
could lead to serious personal injury or property damage.
!
Prendre attention pendant l’utilisation des échelles
pour faire les étapes d’assemblage. Suivre tous les
avertissements de l’échelle. Le non-observation de suivre
toutes ces instructions et avertissements peut causer
des blessures graves personnelles ou endommager la
propriété.
Sea prudente al pararse en escaleras haciendo los
pasos de ensamble. Seguir todas las advertencias y
precauciones de la escalera. El incumplimiento de seguir
todas estas instrucciones y advertencias puede ocasionar
lesiones graves personales o daño a la propiedad.
(x3)
ALF
ALE
5.2
AT LEAST THREE ADULTS ARE REQUIRED. DO NOT ATTEMPT ASSEMBLY WITH FEWER THAN THREE ADULTS AND THREE LADDERS.
AU MOINS TROIS ADULTES SONT REQUIS. NE TENTEZ PAS D’ASSEMBLER CE SYSTÈME AVEC MOINS DE TROIS ADULTES ET TROIS ÉCHELLES.
TRES ADULTOS, POR LO MENOS, SON REQUERIDOS. NO INTENTE ENSAMBLAR ESTE SISTEMA CON MENOS DE TRES ADULTOS Y TRES
ESCALERAS.

28
TOOLS AND HARDWARE REQUIRED / OUTILS ET QUINCAILLERIE REQUIS / HERRAMIENTAS Y HERRAJE REQUERIDOS
X SECTION 5 (CONTINUED) / SECTION 5 (SUITE) / SECCIÓN 5 (CONTINUACIÓN)
5.4
x(1)
(x1)
(x1)
• While two people continue to hold the assembly in place, set the Wood Block on top of the Pole and strike it
fi rmly 5-6 times with a hammer or mallet. You must have wood on top of the Pole before hitting it with a hammer to
prevent scratching the powder coating. If the Middle Pole (ALF) does not completely cover the slots on the Bottom Pole (ALE)
after seating, DO NOT COMPLETE ASSEMBLY. Call our Customer Service Department.
• Pendant que deux adultes continuent à maintenir l’assemblage en place, mettez le bloc de bois sur le poteau, et
frappez fermement 5–6 fois avec un marteau ou un maillet en caoutchouc. Il faut placer le bloc en bois entre le poteau et le
marteau pour éviter de rayer la peinture en poudre. Si le poteau du milieu (ALF) ne couvre pas complètement les fentes dans le
poteau inférieur (ALE) après avoir frappé le poteau, NE PAS COMPLÉTER L’ASSEMBLAGE. Appelez notre département de services
à la clientèle.
• Mientras que dos adultos continuen a mantener el ensamble en su lugar, coloque el bloque de madera
encima del poste, y golpéelo fi rmemente 5–6 veces con un martillo o mazo de goma. Es preciso colocar el
bloque de madera encima del poste antes de golpearlo con un martillo para evitar rayar el recubrimiento de polvo. Si el poste
intermedio (ALF) no cubre por completo las ranuras en el poste inferior (ALE) después de colocarlo, NO FINALICE EL
ENSAMBLE. Póngase en contacto con nuestro departemento de servicios a clientes.
Scrap Wood
Morceau de bois
Plaquita de madera
WARNING
The Poles must be seated together! Even if the Poles cover
the slots before seating, they must be struck on a hard
surface fi ve to six times! Failure to seat the Poles correctly
could allow the Poles to separate during use, which could
lead to serious personal injuries or property damage.

29
TOOLS AND HARDWARE REQUIRED / OUTILS ET QUINCAILLERIE REQUIS / HERRAMIENTAS Y HERRAJE REQUERIDOS
X SECTION 5 (CONTINUED) / SECTION 5 (SUITE) / SECCIÓN 5 (CONTINUACIÓN)
5.5
(x1)
(x3)
ABZ (x1)
ABZ
ALE
ALF
ALM
!
• Secure the Middle Pole (ALF) and Bottom Pole (ALE) together with one Screw (ABZ). Then insert the Pole Cap (ALM) to
the Top Pole.
• Attachez bien le poteau du milieu (ALF) au poteau inférieur (ALE) à l’aide d’une vis (ABZ). Ensuite, insérez un
capuchon (ALM) dans le poteau supérieur.
• Sujete el poste intermedio (ALF) al poste inferior (ALE) con un tornillo (ABZ). Entonces, inserte un tapón de poste (ALM)
al poste superior.
• For ease of installation, chuck the Self-Drilling
Screws directly into the drill, or use a 3/8"(10 mm)
Hex Driver.
• Pour faciliter l’installation, mettez les vis
autotaraudeuses directlement dans la perceuse, ou
utilisez un tournevis à écrou de 3/8"/po (10 mm).
• Para facilitar la instalación, fi je los tornillos
autoroscantes directamente en el taladro, o use
una llave de tuerca de 3/8" (10 mm).
/