
MFL69890101 (1.0) www.lg.com
ENGLISH
USER GUIDE
LG-W281

1
About this user guide
Thank you for choosing this LG product. Please carefully read this user
guide before using the device for the first time to ensure safe and proper
use.
• Always use genuine LG accessories. The supplied items are designed
only for this de
vice and may not be compatible with other devices.
• This device is not suitable for people who have a visual impairment
due to the touchscr
een keyboard.
• Descriptions are based on the device default settings.
• Default apps on the device are subject to updates, and support for
these apps ma
y be withdrawn without prior notice. If you have any
questions about an app provided with the device, please contact a LG
Service Centre. For user-installed apps, please contact the relevant
service provider.
• Modifying the device’s operating system or installing software from
unof
ficial sources may damage the device and lead to data corruption
or data loss. Such actions will violate your LG licence agreement and
void your warranty.
• Some content and illustrations may differ from your device, depending
on the ar
ea, service provider, software version, or OS version, and are
subject to change without prior notice.
• Software, audio, wallpaper, images, and other media supplied with
your de
vice are licenced for limited use. If you extract and use these
materials for commercial or other purposes, you may be infringing
copyright laws. As a user, you are fully responsible for the illegal use
of media.
• Additional charges may incur for data services, such as messaging,
uploading,downloading, aut
o-syncing and location services. To void
additional charges, select a data plan suitable to your needs. Contact
your service provider to obtain additional details.
ENGLISH

2
Instructional notices
WARNING: Situations that could cause injury to the user and third
parties.
CAUTION: Situations that may cause minor injury or damage to the
device.
NOTE: Notices or additional information.

3
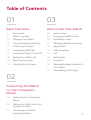
Table of Contents
01
Basic Functions
6 Accessories
7 Watch Overview
10 Charging Your Watch
12 Using the battery efficiently
13 If the Screen Freezes
13 Installing the SIM Card
17 Turning the Watch On and Off
18 Waking Your Watch Up
18 Dimming the Screen
18 Using the Touch Screen
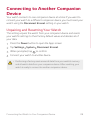
02
Connecting the Watch
to Your Companion
Device
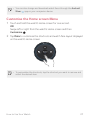
22 Setting Up Your Companion
Device
23 Pairing Your Watch with Your
Companion D
evice
24 Connecting to Another
Companion D
evice
03
How to Use Your Watch
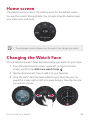
26 Home screen
26 Changing the Watch Face
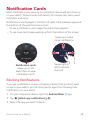
28 Notification Cards
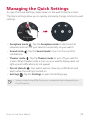
29 Managing the Quick Settings
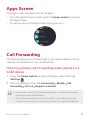
30 Apps Screen
30 Call Forwarding
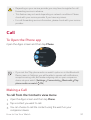
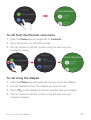
31 Call
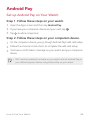
34 Android Pay
36 Google Fit
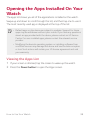
39 Opening the Apps Installed On
Y
our Watch
40 Downloading Other Apps

4Table of Contents
04
Tasks Using Voice
Command
42 Getting help from your Voice
Actions on Your Watch
42 Taking or Viewing a Note
43 Setting a Reminder
43 Seeing Your Step Count
44 Using the Heart Rate Sensor
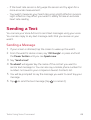
46 Sending a Text
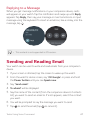
47 Sending and Reading Email
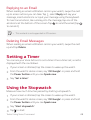
48 Setting a Timer
48 Using the Stopwatch
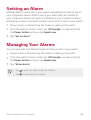
49 Setting an Alarm
49 Managing Your Alarms
05
Settings
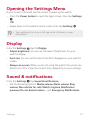
51 Opening the Settings Menu
51 Display
51 Sound & notifications
52 Apps
52 Gestures
52 Connectivity
55 Accessibility
55 Personalisation
56 System
06
More Information
58 Open Source Software Notice
Information
58 Trademarks
59 DECLARATION OF
C
ONFORMITY
59 Contact office for compliance
of this pr
oduct
59 Regulatory information
(Regul
ation ID number,
E-labeling, etc.)
59 How to Update Your Device
07
Safety Information
61 Safety tips
62 General safety & handling

Basic Functions
01

Basic Functions 6
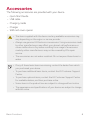
Accessories
The following accessories are provided with your device.
• Quick Start Guide
• USB cable
• Charging cradle
• Charger
• SIM card cover opener
• The items supplied with the device and any available accessories may
vary depending on the region or service provider.
• Always use genuine LG Electronics accessories. Using accessories made
by other manufacturers may affect your device’s call performance or
cause malfunctions. Any issues resulting from usage of accessories
made by other manufacturers may not be covered by LG’s repair
service.
• The accessories are not water-resistant. Do not expose these items to
water.
• If any of these basic items are missing, contact the dealer from which
you purchased your device.
• To purchase additional basic items, contact the LG Customer Support
Centre.
• To purchase optional items, contact the LG Customer Support Centre
for available dealers, and then purchase online.
• Some items in the product box are subject to change without notice.
• The appearance and specifications of your device are subject to change
without notice.

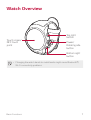
Basic Functions 7
Watch Overview
Power/
Rotating side
button
Top right
button
Bottom right
button
Touch screen/
NFC touch
point
• Changing the watch bands to metal bands might cause Bluetooth®/
Wi-Fi connectivity problems.

Basic Functions 8
Power/Rotating
side button
To turn the watch on:
• Press and hold for one second to turn the screen
on.
If it doesn't turn on, press and hold for a few
seconds until the LG logo appears.
When the screen is dimmed:
• Press once to wake the screen.
When the scr
een is on:
• Press to open the apps screen when you are on
the w
atch’s Home screen.
• Press to return to the previous when you are on
any o
ther screen.
• Press and hold for one second to get help from
your V
oice Actions.
Rotating the Power/Rotating side button:
• Rotate to browse the apps list on the Apps
scr
een.
• Rotate to show or hide notifications in the
w
atch’s Home screen.
If the screen freezes:
• Press and hold for more than 10 seconds until
the L
G logo appears to restart the watch.
Top right button
and Bottom
right button
When the watch’s Home screen is on:
• Press the T
op right button to launch the Fit
Workout app.
• Press the Bo
ttom right button to launch the
Android Pay app.
During a call:
• Press to control the volume.

Basic Functions 9
• To customise the buttons, press the Power/Rotating side button
to open the Apps screen and then tap Settings
Personalisation
Customise hardware buttons.
SIM card cover
Microphone
Heart rate sensor
Barometer
• Keep the microphone and barometer holes clear.
• Any damage to the barometer or microphone resulting from accidents,
unreasonable use, tampering or other causes not arising from defects
in material or workmanship may void the Limited Warranty.
• Excess force on the watch band may lead to breakage.
• Changing the watch bands to metal bands might cause Bluetooth®/
Wi-Fi connectivity problems.

Basic Functions 10
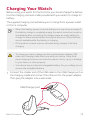
Charging Your Watch
Before using your watch for the first time, you should charge the battery.
Use the charging cord and cradle provided with your watch to charge its
battery.
The supplied charging cord will allow you to charge from a power outlet
or from a computer.
• When the battery power is low, the battery icon may show as empty. If
the battery charge is completely empty, the watch cannot be turned on
immediately after connecting the charger. Leave an empty battery to
charge for a few minutes before turning the device on. Some features
are not available while the battery is charging.
• If the product receives a phone call while being charged, it will stop
charging.
• To charge your device, always use the included power adapter, USB
cable, and charging cradle that come with your device. Using third-
party charging solutions can cause fire, electric shock, injury, or damage
to your device or other property.
• Your device has an internal rechargeable battery. For your safety, do not
remove the embedded battery.
1
Connect the smaller end of the USB cable to the USB/charger port on
the charging cradle and connect the other end to the power adapter.
Then plug the adapter into a wall outlet.
USB/Charger port

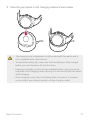
Basic Functions 11
2
Place the your device on the charging cradle as shown below.
• The charging cord is designed to only be used with the watch and is
not compatible with other devices.
• To maximise battery life, make sure that the battery is fully charged
before you use the device for the first time.
• Exposure to liquids or other foreign materials while using your device
may affect the charging cradle, causing it to disconnect from the watch
while charging.
• If the charging screen does not display after connection to a power
source, adjust your device’s position on the charging cradle.

Basic Functions 12
3
While your watch is charging, the screen will show the time, battery
percentage and charging progress (indicated by the ring around the
outside).
Time
Charging progress
Battery percentage
4
Once the battery is fully charged, remove it from the charging cradle.
• The watch may become warm while charging. If the device becomes
hotter than usual, discontinue charging until it cools.
• Battery Saver is automatically enabled at the 15% battery capacity
on your watch. In battery saver mode, the ambient display is changed
to off, Wi-Fi is set to off, and the cellular network is set to off on the
cellular network enabled devices.
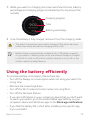
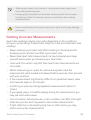
Using the battery efficiently
To minimise battery consumption, follow these tips.
• Turn off the Always-on screen option when not using your watch for
a long time.
• Minimise the screen brightness.
• Turn off the Wi-Fi network function when not using Wi-Fi.
• Turn off the Gestures feature.
• If you get notifications on your companion device that you don’t want
to see on your w
atch, go to the Android Wear app Settings on your
companion device and add those apps to the Block app notifications.
• If you feel the battery life is short after installing some specific app,
tr
y to uninstall it.

Basic Functions 13
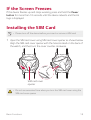
If the Screen Freezes
If the device freezes up and stops working, press and hold the Power
button for more than 10 seconds until the device reboots and the LG
logo is displayed.
Installing the SIM Card
• Please turn off the device before you insert or remove a SIM card.
1
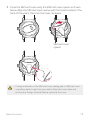
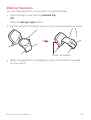
Open the SIM card cover using SIM card cover opener as shown below.
Align the SIM card cover opener with the holes located on the back of
the watch, and then turn the cover counter-clockwise.
SIM card cover
opener
• Do not use excessive force when you turn the SIM card cover using the
SIM card cover opener.

Basic Functions 14
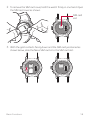
2
To remove the SIM card cover, hold the watch firmly in one hand. Open
the SIM card cover as shown.
SIM card
slot
3
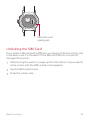
With the gold contacts facing down and the SIM card positioned as
shown below, slide the Nano SIM card in to the SIM card slot.

Basic Functions 15
4
Close the SIM card cover using the SIM card cover opener as shown
below. Align the SIM card cover opener with the holes located on the
back of the watch, then turn the cover clockwise.
SIM card cover
opener
• Foreign materials on the SIM card cover sealing pad or SIM card cover
may allow water to get into your watch. Keep the cover clean and
remove any foreign material before replacing the cover.

Basic Functions 16
SIM card cover
sealing pad
Unlocking the SIM Card
If you insert a SIM card with a PIN lock, you have to enter the unlock code
to be able to use it in the watch. If the SIM card PIN lock is turned off,
disregard this section.
1
After turning the watch on, swipe up from the bottom of your watch’s
Home screen until the SIM Locked screen appears.
2
Tap the SIM Locked screen.
3
Enter the unlock code.

Basic Functions 17
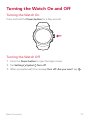
Turning the Watch On and Off
Turning the Watch On
Press and hold the Power button for a few seconds.
Turning the Watch Off
1
Press the Power button to open the Apps screen.
2
Tap Settings System Turn off.
3
When prompted with the message Turn off: Are you sure?, tap .

Basic Functions 18
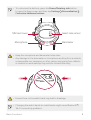
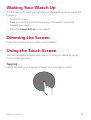
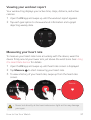
Waking Your Watch Up
If the screen is dimmed, you can wake up the watch by doing any of the
following:
• Touch the screen.
• Raise your wrist such that the display of the watch is pointing
tow
ards your eyes.
• Press the Po
wer button on the watch.
Dimming the Screen
Cover the screen with your palm until it vibrates.
Using the Touch Screen
You can familiarise yourself with how to control your device by using
touch screen gestures.
Tapping
Lightly tap with your fingertip to select or run an app or option.

Basic Functions 19
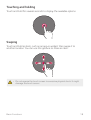
Touching and holding
Touch and hold for several seconds to display the available options.
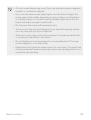
Swiping
Touch and hold an item, such as an app or widget, then swipe it to
another location. You can use this gesture to move an item.
• Do not expose the touch screen to excessive physical shock. It might
damage the touch sensor.
Page is loading ...
Page is loading ...
Page is loading ...
Page is loading ...
Page is loading ...
Page is loading ...
Page is loading ...
Page is loading ...
Page is loading ...
Page is loading ...
Page is loading ...
Page is loading ...
Page is loading ...
Page is loading ...
Page is loading ...
Page is loading ...
Page is loading ...
Page is loading ...
Page is loading ...
Page is loading ...
Page is loading ...
Page is loading ...
Page is loading ...
Page is loading ...
Page is loading ...
Page is loading ...
Page is loading ...
Page is loading ...
Page is loading ...
Page is loading ...
Page is loading ...
Page is loading ...
Page is loading ...
Page is loading ...
Page is loading ...
Page is loading ...
Page is loading ...
Page is loading ...
Page is loading ...
Page is loading ...
Page is loading ...
Page is loading ...
Page is loading ...
Page is loading ...
Page is loading ...
Page is loading ...
Page is loading ...
Page is loading ...
Page is loading ...
Page is loading ...
Page is loading ...
Page is loading ...
Page is loading ...
Page is loading ...
-
 1
1
-
 2
2
-
 3
3
-
 4
4
-
 5
5
-
 6
6
-
 7
7
-
 8
8
-
 9
9
-
 10
10
-
 11
11
-
 12
12
-
 13
13
-
 14
14
-
 15
15
-
 16
16
-
 17
17
-
 18
18
-
 19
19
-
 20
20
-
 21
21
-
 22
22
-
 23
23
-
 24
24
-
 25
25
-
 26
26
-
 27
27
-
 28
28
-
 29
29
-
 30
30
-
 31
31
-
 32
32
-
 33
33
-
 34
34
-
 35
35
-
 36
36
-
 37
37
-
 38
38
-
 39
39
-
 40
40
-
 41
41
-
 42
42
-
 43
43
-
 44
44
-
 45
45
-
 46
46
-
 47
47
-
 48
48
-
 49
49
-
 50
50
-
 51
51
-
 52
52
-
 53
53
-
 54
54
-
 55
55
-
 56
56
-
 57
57
-
 58
58
-
 59
59
-
 60
60
-
 61
61
-
 62
62
-
 63
63
-
 64
64
-
 65
65
-
 66
66
-
 67
67
-
 68
68
-
 69
69
-
 70
70
-
 71
71
-
 72
72
-
 73
73
-
 74
74


LG LGW281.AAREDB Owner's manual
- Type
- Owner's manual
- This manual is also suitable for
Ask a question and I''ll find the answer in the document
Finding information in a document is now easier with AI
Related papers
Other documents
-
 WONLEX GW700 Hard reset manual
-
LG G G Watch Style User guide
-
-
Verizon Wear24 User guide
-
 LIKUID L-4 PER4MANCE User manual
-
-
-
 TrackR Tp3Pk3BlEcoEngAmz User guide
-
Huawei PORSCHE DESIGN WATCH GT 2 User guide
-
Huawei Watch GT 2 Pro User manual


