Page is loading ...

0
10 10
20 20
30 30
40 40
50 50
0
10 10
20 20
30 30
40 40
50 50
0
10 10
20 20
30 30
40 40
0
10 10
20 20
30 30
40 40
50 50
T o insure accuracy, we recommend inspection and
verification of accuracy at regular intervals determined
by frequency and type of use.
0
10 10
20 20
30 30
40 40
50 50
S-LINE DIAL COMPARATOR GAUGE
KMC-1001
Model
No.
INSTRUCTION MANUAL
Thank you for purchasing the S-Line Dial Comparator Gauge.
Use with a comparator stand or attached to a bore gauge. Once the zero-point is preset, this high precision gauge
directly indicates the change in position when measuring a part.
● For safe and proper use of this product, please read this instruction manual before use and follow the procedures described. Please
keep manual where it is accessible to user for future reference.
● Keep this manual with the instrument if transferred or leased to a third party.
● For inquiries about this product, please contact dealer or Niigata Seiki at the address listed on the following page.
SAFETY NOTES
Please Observe
Always follow the procedures specified below in order to prevent
harm to yourself or others, and to prevent damage to property.
Indicates risk of personal injury or
property damage if not followed.
CAUTION:
Denotes a requirement – You MUST do.
Read the manual and follow all instructions.
Use of product other than as described in the
manual may cause accident.
Use only for taking measurements.
Use for any purpose other than measuring may
damage or wear the instrument. Improper use may
also cause accident.
Handle with care.
This is a precision instrument, please use
care when removing from the case.
Keep the supplied case and for storing the
gauge when not in use.
Clean and Store properly after use.
Clean the and Stem with a dry cloth to remove
any dirt before storage.
Do not use oil or lubricant on the Spindle.
Store in a dry location at a stable temperature in
the provided case.
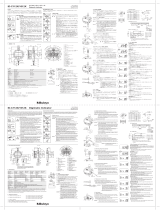
MOUNTING THE DIAL COMPARATOR
Dial Comparator Stem is φ8mm (h6 tolerance.)
Mounting clamp or stand should have a φ8mm (H7 tolerance) mounting hole.
ZERO SETTING USING FINE ADJ. KNOB
Remove the Cap at the top of the Gauge to access the Fine Adjust Knob. (Fig. 3)
Under the Cap, there is a knurled knob for adjusting Zero. (Fig. 4)
Set the Pointer to zero by turning the Knob as shown.
The Fine Adjust Knob can move the Pointer only within the range of the Dial. If you try to move it
beyond measurement range of the Dial, the Gauge may be damaged.
When zero point is set, replace the Cap on the Gauge. Use care not to disturb the Gauge and make sure the
Pointer has not shifted.
To reduce cosine error, make sure the Spindle is perpendicular to the surface being measured.
MEASUREMENT
To measure, raise the Spindle and gently lower onto the sample. The deviation from the reference
value (the height of the preset zero point) can be read directly off the Dial.
PROBE REPLACEMENT
Dial Comparator uses a Contact Point with a M2.5 thread.
To remove, push in on the Spindle all the way, and turn the Contact Point counter clockwise.
To replace with a new Contact Point, push in on the Spindle all the way, and screw in the new Point by
turning clockwise.
Make sure the Contact Point is secure for accurate measurements.
NOTICE
NOTE
Reference
Master
Stand
If Gauge does not operate properly, or if you have any questions,
please contact distributor or place of purchase.
Please note, manufacturer is unable to respond to inquires or provide
service directly. Please contact distributor or place of purchase.
REPAIRS AND SERVICE
AFTER USE CARE, STORAGE
SPECIFICATIONS
INSPECTION
Clean off any dust or dirt after use.
Do not lubricate.
Wipe any contamination from Spindle using a
dry cloth.
To clean other surfaces, wipe with a soft dry
cloth, or a cloth moistened with a mild cleaner.
Regularly check the Probe Tip for wear.
Measurement accuracy will be affected by worn
Probe. Regularly check for wear and replace
as required.
Store in provided case in a cool, dark, and dry location.
During storage, make sure there is no force on
the Spindle (such as pushed in, or lateral
force.)
Keep away from moisture and direct sunlight,
and keep secure from unauthorized personnel.
Applicable standards for reference: JIS B 7519, JIS B 7533, JIS B 7503, JIS Z 8103
Graduation
Meas. Range
Scale
Retrace Error
Meas. Force
0.001mm
0.1mm
50-0-50
0.5µm
1.11.5N
1.2µm
0.5µm
1040
Steel
180g
Max. Error
Repeat Acc'y
Useable Temp.
Contact Material
Weight
Turn the Fine Adj. Knob
clockwise to move the needle
in the negative direction, and
counter-clockwise to move the
needle in the positive direction.
Fig.4Fig.3Fig.2Fig.1
P ART IDENTIFICATION
Cap Fine Adj. Knob
under Cap
Pointer
Limit Marker
Cable Release
Stemφ8mm h6
Spindle
Contact PointM2.5
Pointer
Fine Adj.
Knob
Cap
Remove
Pos. Neg.
Fine Adj. Knob
Niigata seiki Co., Ltd.
5-3-14, Tsukanome, Sanjo, Niigata, Japan, 955-0055
Tel. : +81-256-33-5522 Fax. : +81-256-33-5518
MAIL intl.sales@niigataseiki.co.jp
URL http://www.niigataseiki.co.jp
Mount the Dial Comparator to the Stand or measuring Jig. Insert the Reference Master onto the Stand for
measurement. (Fig. 1)
Manually adjust the height until the Gauge is approximately at zero. (Fig. 2)

0
10 10
20 20
30 30
40 40
50 50
0
10 10
20 20
30 30
40 40
50 50
0
10 10
20 20
30 30
40 40
50 50
0
10 10
20 20
30 30
40 40
0
10 10
20 20
30 30
40 40
50 50
S
KMC-1001
φ8mm h6
φ8mm H7
1
2
3
4
M2.5
M 2.5
URL http://www.niigataseiki.co.jp
2003I405-K
JIS B 7519, JIS B 7533, JIS B 7503, JIS Z 8103
0.001mm
0.1mm
50-0-50
0.5µm
1.11.5N
1.2µm
0.5µm
1040
180g
4321
φ8mm h6
M2.5
/


