3700 W Pratt Avenue, Lincolnwood, IL 60712 • (800) 874-2333 • trim-tex.com
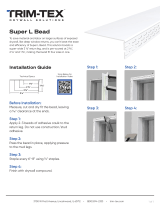
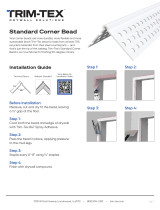
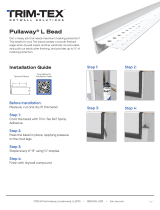
Installation Guide
Before Installation:
Use minimal drywall setback on outside
corners. Measure, cut and dry fit the bead,
leaving a ⁄” gap at the floor.
Step 1:
Coat both the bead and edge of drywall
with Trim-Tex 847 Spray Adhesive.
Step 2:
Press the bead in place, applying pressure
to the mud legs.
Step 3:
Staple every 6”-8” using ½” staples.
Step 4:
Finish with drywall compound.
Note:
When working with especially uneven framing — where applying extra pressure to the bead in order
to fit it onto the corner is necessary — installing Rigid Closed Angle Corner Bead with 847 Spray
Adhesive may not be useful. In these cases, use a laser or chalk line for precision, push the bead
into place and install with ½” staples only, every 2”-4”.
Step 1: Step 2:
1 of 1
Step 3: Step 4:
Technical Specs
Rigid Closed Angle
Corner Bead
Rigid Closed Angle Corner Bead’s sharp nose, mud-saving hole pattern
and 81-degree angle give drywallers the ability to easily transform warped
and twisted framing into perfectly straight corners. This also makes it the
perfect solution to transition from using metal corner bead to the superior
vinyl materials, as its high level of rigidity means the bead behaves more
like a metal bead without sacrificing durability or longevity.
Setback: Standard
¾" R. Bullnose
Installation
350 Chamfer
Installation
Standard
Installation
1 ⁄ "
81°
/


