Page is loading ...

NOTE: DIAGRAMS & ILLUSTRATIONS ARE NOT TO SCALE
HEARTH PRODUCTS
KITS AND ACCESSORIES
FIREBOX LINER PANEL KITS
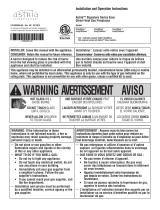
NOTICE
•READ ALL STEPS BEFORE STARTING INSTALLATION.
•LEAVE THESE INSTRUCTIONS WITH THE APPLIANCE.
•All warnings, precautions, and instructions in the Installation
Instructions and Care and Operation Instructions provided with the
appliance also apply to these instructions.
•If you encounter any problems, need clarification of these
instructions, or are not qualified to properly install this kit, contact
your local distributor or dealer.
CAUTION
RISK OF PERSONAL INJURY OR PROPERTY DAMAGE.
•Never operate fireplace without liner panels installed.
•These appliances are NOT approved for operation without
liner panels.
•Do NOT abuse glass doors by striking or slamming shut.
•Never operate fireplace with glass door assembly removed.
•Handle glass door assembly with extreme care. Replace
damaged glass door assembly with approved replacement
assembly only.
•Use only media approved for use with these fireplaces (as
applicable). Failure to use approved media may result in sooting,
delayed ignition, or other improper fireplace operation, and may
void the warranty.
DANGER
HOT GLASS WILL CAUSE BURNS.
DO NOT TOUCH GLASS UNTIL COOLED.
NEVER ALLOW CHILDREN TO TOUCH GLASS.
•Install only when fireplace is OFF and COLD.
•Fireplace surfaces get EXTREMELY HOT!
•The glass on the front of the fireplace reaches EXTREMELY HIGH
temperatures and can cause severe burns if touched. Even after
the gas is turned off, fireplace surfaces remain extremely hot.
•Keep children away from an operating fireplace. Closely
supervise children in any room where a fireplace is operating to
prevent contact with glass.
P/N 900005-02
Rev. NC 05/2014
INSTALLATION INSTRUCTIONS FOR FIREBOX LINER AND CONTEMPORARY FLOOR KITS
FOR USE WITH ENVY AND ENVY CD SERIES DIRECT-VENT GAS FIREPLACES
[MODELS ENVY35T(E/Y)N, ENVY40T(E/Y)N, ENVY45T(E/Y)N, ENVYCD35T(E/Y)N, ENVYCD40T(E/Y)N, AND ENVYCD45T(E/Y)N]
Required Tools
• 5/16 in. Hex Head Nut Driver (Porcelain Kit only)
• Safety Glasses
• Protective Work Gloves
NOTE: Turn OFF the appliance and allow it to cool completely
before proceeding.
GENERAL INFORMATION
This document contains installation instructions for firebox liner
and contemporary floor kits used with the ENVY and ENVY CD
series direct vent gas fireplaces.
Ceramic panels are fragile, as is the finish on the porcelain
panels. Use care to prevent breakage or marring the finish when
handling the panels.
DO NOT install the liner panels until the appliance installation is
complete, the gas line is connected and tested for leaks, and the
initial burner operation has been verified.
KIT CONTENTS
Porcelain
• Porcelain Panel, Left (1)
• Porcelain Panel, Right (1)
• Porcelain Panel, Rear (1)
• Porcelain Panel, Top (1)
• Porcelain Floor, Front (1)*
• Porcelain Floor, Rear (1)*
• Mounting Screws (5)
Ceramic
• Ceramic Panel, Left (1)
• Ceramic Panel, Right (1)
• Ceramic Panel, Rear (1)
• Ceramic Panel, Top (1)
Figure 1: Firebox Liner Panels
Porcelain Firebox Liner and Floor Panels
Ceramic Firebox Liner Panels
Left RightRear
Top
Left RightRear
Top
Rear Floor
Front Floor
*CD models only

2
INNOVATIVEHEARTHPRODUCTS•ENVYSERIESDIRECT-VENTGASFIREPLACES•ENVY/ENVYCD35/40/45•INSTALLATIONINSTRUCTIONS
Hot Fireplace Will Cause
Severe Burns
Never Allow Children to
Touch Glass or other Fire-
place Parts
WARNING
CAUTION
INSTALL ONLY WHEN FIREPLACE IS OFF AND COLD!
FIREBOX ACCESS
Use the following procedure to prepare the fireplace for liner
panel installation:
BARRIER AND DOOR REMOVAL
1. Remove the top louver.
2. Remove the left finish trim gap filler from between the finish
trim and the surround trim assembly (Figure 1). Remove
the right finish trim gap filler. Retain the finish trim gap
fillers for later reinstallation.
Figure 2: Finish Trim Gap Fillers
Surround
Trim
Assembly
Finish Trim
Finish Trim
Gap Filler
NOTE: Surround trim assembly not shown in inset
3. Remove the surround trim assembly by detaching it at the
top of the fireplace and lifting it 1 in. to disengage the side
tabs, then pulling it away from the fireplace exposing the
glass door (Figure 2). Retain the surround trim assembly
for later reinstallation.
Figure 3: Surround trim assembly
SCALE 0.200
Side Tabs
Surround Trim
Assembly
4. Locatethefour(4)spring-loadedlatches;twoaboveand
two below the glass door (Figure 3).
Figure 4: Glass Door
Latch
Latch
Latch
Latch (lower left,
not shown)
5. Release the lower latches, by pulling each handle out and
down to unhook it from the glass door.
6. Lightly press against the door, to hold it in position, while
releasing the two upper latches.
7. Carefully grip the door at the top and bottom, and
remove it from the fireplace. Retain the glass door for
later reinstallation.
8. (If installed) Remove the andirons. Retain the andirons in a
secure location for later reinstallation
9. (If installed) Remove the logs and retain them in a secure
location for later reinstallation.
10. (If installed) Remove the lava rock, or glass media away
from the firebox rear and side walls.
FIREBOX LINER PANELS INSTALLATION
Refer to the installation instructions for either the Porcelain Firebox
Liner Panels and Contemporary Floor or the Ceramic Firebox
Liner Panels.
NOTE: Firebox liner panels are fragile. Handle them with care to
prevent damaging the finish.

3
INNOVATIVEHEARTHPRODUCTS•ENVYSERIESDIRECT-VENTGASFIREPLACES•ENVY/ENVYCD35/40/45•INSTALLATIONINSTRUCTIONS
Porcelain Firebox Liner Panels and Contemporary Floor
1. Removethefour(4)porcelainreboxlinerpanelsfromthe
packing material.
1. (Contemporary Fireplaces Only) Remove the two (2) floor
panels from the packing material.
2. (Contemporary Fireplaces Only) If installed, remove
the pilot media shield. Retain it and the screw for later
reinstallation.
3. Identify the rear, left, right, and top firebox liner panels
(Figure 1).
4. (Contemporary Fireplaces Only) Identify the the front and
rear floor panels (Figure 1).
5. Carefully, install the rear firebox liner panel, upper edge first,
into the firebox, and position it against the rear wall with the
lower mounting tabs inserted into the mounting slots in the
firebox base. Insert the included 5/16 in. screw through the
upper mounting tab and use a nut driver to attach the rear
panel to the wall.
6. (Contemporary Fireplaces Only) Carefully, install the rear
floor panel flush with the rear firebox liner panel. Ensure
the mounting holes are aligned with the screw holes in the
firebox floor.
NOTE: Do not secure with screws.
7. (Contemporary Fireplaces Only) Carefully, install the front
floor panel flush with the burner. Ensure the mounting holes
are aligned with the screw holes in the firebox floor.
NOTE: Do not secure with screws.
8. Carefully, install the left side firebox liner panel, positioned
flush against the rear firebox liner panel.
NOTE: (Contemporary Fireplaces Only) The left side
firebox liner panel should be flush with the front and rear
floor panels.
9. Carefully, install the right side firebox liner panel, positioned
flush against the rear firebox liner panel.
NOTE: (Contemporary Fireplaces Only) The right side
firebox liner panel should be flush with the front and rear
floor panels.
10. Carefully, install the top firebox liner panel by inserting it
into the top of the firebox all the way to the rear. Ensure the
front corners are above the left and right firebox liner panels
and then slide the top firebox liner panel to the front as far
as it will go. Lower the rear of the top firebox liner panel to
rest on the left and right firebox liner panels.
NOTE: If having difficulty installing the top firebox liner
panel, lean the left and right side firebox liner panels in
to the center of the fireplace to create more room to aid
the installation.
11. Usingthefour(4)included5/16in.screws,securetheside
firebox liner and (Contemporary Fireplaces Only) floor
panels to the firebox floor.
12. (Contemporary Fireplaces Only) Install and secure the pilot
media cover with the included screw.
13. (Contemporary Fireplaces Only) Install the glass media.
14. Continue to Fireplace Reassembly.
NOTE: If installing porcelain firebox liner panels in
Traditional fireplaces, omit the media, pilot media cover, and
Contemporary floors.
Ceramic Firebox Liner Panels
NOTE: Ceramic firebox liner panels are only available for
traditional model ENVY fireplaces.
1. Removethefour(4)ceramicreboxlinerpanelsfromthe
packing materials.
2. Identify the rear, left, right, and top firebox liner panels
(Figure 1).
3. Carefully, install the rear firebox liner panel, upper edge first,
into the firebox, and position it against the rear wall.
4. While holding the rear firebox liner panel in position,
carefully install the left side firebox liner panel into
the firebox.
5. While holding the left side firebox liner panel in position,
carefully install the right side firebox liner panel into
the firebox.
6. While holding the side firebox liner panels in position,
carefully install the top firebox liner panel into the firebox.
NOTE: If having difficulty installing the top firebox liner
panel, lean the right side firebox liner panel in to the center
of the fireplace to create more room and aid the installation.
NOTE: Handle the firebox liner panel carefully. Do not apply
too much pressure to the center of the panel at any point in
the installation.
7. Ensure the top panel is positioned over both the left side and
right side firebox liner panels and that all panels are aligned
with the sides and rear of the firebox.
8. Continue to Fireplace Reassembly.
FIREPLACE REASSEMBLY
1. (If Previously Removed) Carefully, replace the ember base
and logs, and restore the lava rock to their original positions.
2. (If Previously Removed) Reinstall the andirons.
3. Carefully, position the glass door in front of the firebox
andhookthetwoupperspring-loadedlatchesoverthe
door frame.
4. Hookthetwolowerspring-loadedlatchesoverthe
door frame.
5. Useanammonia-freeglasscleanerandasoft,non-abrasive
cloth to remove fingerprints and smudges from the
glass door.
6. Locate the surround trim assembly mounting slots on the
left and right sides of the firebox. Align the surround trim
assembly with the mounting slots and press in and down
to install it. Reinstall the left and right side finish trim gap
fillers.
7. Useanammonia-freeglasscleanerandasoft,non-abrasive
cloth to remove fingerprints and smudges from the
surround trim assembly.

1508 Elm Hill Pike, Suite 108
Nashville, TN 37210
www.IHP.US.com
Innovative Hearth Products reserves the right to make changes at any time, without notice, in design, materials,
specifications, prices and also to discontinue colors, styles and products. Consult your local distributor for fireplace
code information.
INNOVATIVEHEARTHPRODUCTS•ENVYSERIESDIRECT-VENTGASFIREPLACES•ENVY/ENVYCD35/40/45•INSTALLATIONINSTRUCTIONS
Printed in U.S.A. © 2014 Innovative Hearth Products LLC
P/N 900005-02 Rev. NC 05/2014
REPLACEMENT PARTS
Model Catalog No.
Model No. Description
Envy35”
Models
H8728
LKP-BK-NVCD35
Contemporary
Porcelain,
Black
H8955
LKP-BK-NV35
Traditional
Porcelain,
Black
H8729
LKC-T-RD-NV35
Ceramic,
RedBrick
H8730
LKC-T-BF-NV35
Ceramic,
BuffBrick
Envy40”
Models
H8710
LKP-BK-NVCD40
Contemporary
Porcelain,
Black
H8956
LKP-BK-NV40
Traditional
Porcelain,
Black
H8711
LKC-T-RD-NV40
Ceramic,
RedBrick
H8712
LKC-T-BF-NV40
Ceramic,
BuffBrick
Envy45”
Models
H8731
LKP-BK-NVCD45
Contemporary
Porcelain,
Black
H8957
LKP-BK-NV45
Traditional
Porcelain,
Black
H8732
LKC-T-RD-NV45
Ceramic,
RedBrick
H8733
LKC-T-BF-NV45
Ceramic,
BuffBrick
Table 1: Porcelain And Ceramic Panel Catalog Numbers
/