Page is loading ...

Instructions
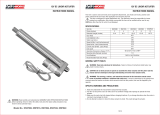
42/68285 EN
Electrical Linear Actuators for
Continuous Modulating Control
RSD10 ... RSD200 (Contrac)
Rated Force 10 kN ... 200 kN

2
Content
Device Identification . . . . . . . . . . . . . . . . . . . . . . . . . 2
Actuator ID Label . . . . . . . . . . . . . . . . . . . . . . . . . . . . 2
Application . . . . . . . . . . . . . . . . . . . . . . . . . . . . . . . . 2
General . . . . . . . . . . . . . . . . . . . . . . . . . . . . . . . . . . . 3
Proper use . . . . . . . . . . . . . . . . . . . . . . . . . . . . . . . . 3
Safety and precautions . . . . . . . . . . . . . . . . . . . . . . . . 3
Storage . . . . . . . . . . . . . . . . . . . . . . . . . . . . . . . . . . . 3
Long-time storage . . . . . . . . . . . . . . . . . . . . . . . . . . . 3
Delivery settings . . . . . . . . . . . . . . . . . . . . . . . . . . . . 3
Assemblies . . . . . . . . . . . . . . . . . . . . . . . . . . . . . . . . 4
Standard operation . . . . . . . . . . . . . . . . . . . . . . . . . . . 4
Handwheel mode . . . . . . . . . . . . . . . . . . . . . . . . . . . . 4
Technical Data . . . . . . . . . . . . . . . . . . . . . . . . . . . . . 5
RSD 10 ... RSD 20 . . . . . . . . . . . . . . . . . . . . . . . . . . . 5
RSD 50 ... RSD 100 . . . . . . . . . . . . . . . . . . . . . . . . . . 5
RSD 200 . . . . . . . . . . . . . . . . . . . . . . . . . . . . . . . . . . 6
Lubrication . . . . . . . . . . . . . . . . . . . . . . . . . . . . . . . . 6
Mounting position and oil level . . . . . . . . . . . . . . . . . . . 6
Lubricants . . . . . . . . . . . . . . . . . . . . . . . . . . . . . . . . . 8
Mounting . . . . . . . . . . . . . . . . . . . . . . . . . . . . . . . . . . 9
Actuator check . . . . . . . . . . . . . . . . . . . . . . . . . . . . . . 9
Mounting orientation . . . . . . . . . . . . . . . . . . . . . . . . . . 9
Mounting to the final control element . . . . . . . . . . . . . . . 9
Adapting the actuator stroke to the valve stroke . . . . . . . 9
Mounting the actuator to the valve . . . . . . . . . . . . . . . 10
Electrical Connection . . . . . . . . . . . . . . . . . . . . . . . 11
EBN853 / EBN861(Standard) . . . . . . . . . . . . . . . . . . . 11
EBN853 / EBN861(field bus communication ) . . . . . . . . 12
Wiring diagram for electronics in mounting rack . . . . . . . 12
Setup . . . . . . . . . . . . . . . . . . . . . . . . . . . . . . . . . . . . 13
Set-up via local control panel (LCP) . . . . . . . . . . . . . . . 13
Adjustment using the configuration program . . . . . . . . . 14
Functions and signals at the LCP . . . . . . . . . . . . . . . . 14
Maintenance . . . . . . . . . . . . . . . . . . . . . . . . . . . . . . 15
Motor and Gears . . . . . . . . . . . . . . . . . . . . . . . . . . . 15
Adjusting the Brake . . . . . . . . . . . . . . . . . . . . . . . . . 15
Replacing the Position Sensor . . . . . . . . . . . . . . . . . . 15
Troubleshooting . . . . . . . . . . . . . . . . . . . . . . . . . . . 17
Electrical test values . . . . . . . . . . . . . . . . . . . . . . . . . 17
Legend
1. Device Identification
1.1 Actuator ID Label
1. Actuator type
2. Device number / No. of non-standard version
3. Rated force / Year of manufacture
4. Permissible ambient temperature
5. Min./max. positioning travel / Min./max. speed
6. Filled-in oil type
7. Associated electronics
8. Not used
9. Not used
10.Available for customer-specific information
2. Application
Benutzen Sie diese Anweisung immer zusammen mit
der Anweisung für die jeweilige Elektronik
Danger
Indicates an imminently hazardous situation
which, if not avoided, will
result in death or serious injury
Warning
Indicates a potentially hazardous situation
which, if not avoided, could result in death or se-
rious injury or serious property damage.
Caution
Indicates a potentially hazardous situation
which, if not avoided, may result in minor or mo-
derate injury or property damage.
Important
Indicates useful hints or other special informati-
on which, if not observed, could lead to a decli-
ne in operating convenience or affect the
functionality.
1
Antrieb / Actuator: CONTRAC ....
2F-Nr./No NL
Made in Germany
3 F = Jahr/Year
CE
4t = IP 66
5 min......max. ....... max. .........
6 Öl / Oil:
7 Mit / With Elektronik/Electronics EBN ... / EBS ...
8
9
10
Automation
D-32425 Minden

3
3. General
3.1 Proper use
Linear actuators for continuous positioning are intended to be used exclusively for actuating final con-
trol elements (valves, vanes, etc.). Do not use these actuators for any other purpose. Otherwise, a ha-
zard of personal injury or of damage to or impairment of the operational reliability of the device may
arise.
3.2 Safety and precautions
When mounting the actuator in areas which may be accessed by unauthorized persons, take the requi-
red protective measures.
- Linear actuators perform movements for positioning vanes and valves. Handle properly and with ca-
re. Otherwise, a hazard of bruise injuries may arise.
- When changing the oil of the actuator, thoroughly remove any oil that may have run down on the
floor during the procedure to avoid accidents.
- Dispose of the waste oil in compliance with the respective local regulations. Make sure that no waste
oil reaches the water cycle
- Only qualified specialists who have been trained for these tasks are authorized to mount and adjust
the control actuator, and to make the electrical connection.
- When working on the actuator itself or its electronics always observe the locally valid accident pre-
vention regulations and the regulations concerning the construction of technical installations.
4. Storage
Linear actuators may be stored under moist and aggressive condition for a short time. The equipment
is protected against external corrosive influences. However, direct exposure to rain, snow, etc. must be
avoided
Interior areas of the actuator with risk of condensation are protected by desiccant placed in the follo-
wing locations:
Motor:. . . . . . . . . . . . . . . . . . . . . . . . . . . . under brake cover
Position sensor: . . . . . . . . . . . . . under position sensor cover
Electronics (delivered separately): . . . in terminal enclosure
The desiccant guarantees sufficient protection for approximately 150 days. It can be regenerated at a
temperature of 90° C within 4 h.
The desiccant must be removed prior to commissioning the actuator or the electronics.
4.1 Long-time storage
If you intend to store or transport the device for a longer time, we recommend to wrap it in plastic foil
and add desiccant. Regularly check if the desiccant is still active.
In the case of standstill periods of more than 6 months with extended thrust rod, the chromated spindle
surface must be treated with a corrosion inhibitor. Prior to re-commissioning the unit clean the thrust
rod to avoid damage to the stripper and thrust rod gasket.
5. Delivery settings
If not otherwise specified by the customer, linear actuators are delivered with the following standard
configuration:
Behavior in 0/100% position: Shut-off with rated torque
Setpoint function: Linear; setpoint = positioning value
Input (setpoint):
1)
4 ... 20 mA
Function: Positioner, parameter: setpoint
Output (actual value): 4 ... 20 mA 1)
Digital inputs:
1)
DI 1 switch-over manual/automatic and v.v.
DI 2 / DI 3 manual control +/-
Digital outputs:
1)
DO 1 ready to operate, DO 2/3 end position signalling
The configuration of your actuator may differ from the standard configuration specified above. It can be
called up for display using the configuration program.
1)
Not with fieldbus communication

4
6. Assemblies
Fig. 1: Basic design of RSD ..
6.1 Standard operation
The motor (1) triggered by the power electronics controls the axially fixed drive sleeve /nut assembly
via oil-lubricated spur gears. A ball bearing screw (see Figure 2) radially fixed by an anti-twist arrester
converts the rotary motion to a linear one. The screw (2) is the upper part of the thrust rod (3) and has
an adjustable mechanical stop. The brake (4) built in the motor acts as a retainer when the power is off.
Fig. 2: Ball bearing screw with nut, sectional drawing
6.2 Handwheel mode
The handwheel (5) allows you to move the actuator manually when the electrical power is off. It acts on
the drive sleeve, via a spiral-toothed gear wheel and a transmission gear. In order to move the thrust
rod, press down the handwheel lock (6) and hold it down while your are turning the handwheel. This
does not disengage the motor.
6.2.1 Direction of action:
- Turning the handwheel clockwise extends the thrust rod (3).
The handwheel transmission ensures that at least the rated force can be generated!
1
3
2
4
5
6
(not
shown)
7

5
7. Technical Data
7.1 RSD 10 ... RSD 20
Table 1:
7.2 RSD 50 ... RSD 100
Table 2:
RSD 10-5,0 RSD 10-10,0 RSD 20-5,0 RSD 20-7,5
Rated pos. force [kN] 10 20
Stand still force [kN] aprox. 1.2 x rated force
(break-away for a short time in end positions 2 x rated force)
Positioning speed [mm/s] 5.0 10.0 5.0 7.5
Servo motor MCS 71 BA MCS 71 BA MCS 71 BA MCS 80 BA
Weight:
max stroke 100 mm
max. stroke 300 mm
approx. 57 kg
approx. 82 kg
approx. 65 kg
approx. 90 kg
approx. 57 kg
approx. 82 kg
approx. 61 kg
approx. 86 kg
Electronic unit
For field installation:
For rack instalation:
EBN 853
EBS 852
Voltage supply AC 115 V (94 V ... 130 V) or
AC 230 V (190 V ... 260 V); 47,5 ... 63 Hz
max. current (AC 115/230 V): [A]
(at electronic unit)
3.4 A / 1.7 A 3.8 A / 1.9 A 4.8 A / 2.4 A 3.8 A / 1.9 A
Current during positioning approx. 40% ... 50% of Imax.
RSD 50-3,0 RSD 50-10,0 RSD 100-1,5 RSD 100-10,0
Rated pos. force [kN] 50 100
Stand still force [kN] aprox. 1.2 x rated force
(break-away for a short time in end positions 2 x rated force)
Positioning speed [mm/s] 0.1 ... 10.0 0.1 ... 10.0 0.1 ... 1.5 0.1 ... 10.0
Servo motor MC 90 BA MC 100 BA MC 90 BA MC 112 BA
Weight:
max stroke 120 mm
(150 mm at RSD 100
max. stroke 300 mm
approx. 130 kg
approx. 155 kg
approx. 146 kg
approx. 171 kg
approx. 240 kg
approx. 275 kg
approx. 242 kg
approx. 273 kg
Electronic unit
for field installation
for rack installation
EBN 853
EBS 852
EBN 861
EBS 862
EBN 853
EBS 852
EBN 861
EBS 862
Voltage supply AC 115 V
(94 V ... 130 V)
or
AC 230 V
(190 V ... 260
V);
47.5 ... 63 Hz
AC 230 V
(190 V ... 260 V);
47.5 ... 63 Hz
AC 115 V
(94 V ... 130 V) or
AC 230 V
(190 V ... 260 V);
47.5 ... 63 Hz
AC 230 V
(190 V ... 260 V);
47.5 ... 63 Hz
max. current (AC 115/230 V): [A]
(at electronic unit)
4.0 A / 2.0 A -- / 6.4 A 4.4 A / 2.2 A -- / 12.5 A
Current during positioning approx. 40% ... 50% von I
max.
approx. 40% ... 50% von I
max.

6
7.3 RSD 200
Table 3:
8. Lubrication
8.1 Mounting position and oil level
Prior to delivery the actuator is filled with the oil quantity specified for orientation IMV 1. When mounting
the actuator in another orientation, fill in the missing oil.
8.1.1 RSD 10 / RSD 20
Fig. 3: oil level; 1) = inspection screw, 2) = venting screw.
Table 4:
RSD 200-0,7 RSD 200-5,0
Rated pos. force [kN] 200
Stand stil force [kN] aprox. 1.2 x rated force (break-away for a short time in end
positions 2 x rated force)
Positioning speed [mm/s] 0.1 ... 0.7 0.1 ... 5.0
Servo motor MC 90 BA MC 112 BA
Weight:
max stroke 180 mm
max. stroke 300 mm
approx. 400 kg
approx. 460 kg
approx. 400 kg
approx. 460 kg
Electronic unit
for field installation
for rack installation
EBN 853
EBS 852
EBN 861
EBS 862
Voltage supply
(at electronic unit)
AC 115 V
(94 V ... 130 V) or
AC 230 V (190 V ... 260 V);
47.5 ... 63 Hz
AC 230 V
(190 V ... 260 V);
47.5 ... 63 Hz
max. current (AC 115 /AC 230 )V
at electronic unit: [A]
5.0 A / 2,5 A -- / 13.5 A
Current during positioning approx. 40% ... 50% of I
max.
IMV 1
IMV 3 IMB 5
IMB 5
1)
1)
1)
1)
1)
2)
2)
2)
2)
(r00017xa)
Type RSD 10 / RSD 20 RSD 10 / RSD 20 RSD 10 / RSD 20 RSD 10 / RSD 20
oil quantity, approx. [ltr]
max. stroke 100 mm
max. stroke 300 mm
3.8
6.4
5.4
8.8
3.8
6.4
3.8
6.7
oil level [mm] below
inspection screw with fully
retracted thrust rod
40 (0) 0 28 75

7
8.1.2 RSD 50
Fig. 4: oil level; 1) = inspection screw, 2) = venting screw
Table 5:
8.1.3 RSD 100
Fig. 5: oil level; 1) = inspection screw, 2) = venting screw
Table 6: .
IMV 1
IMV 3 IMB 5IMB 5
1)
1
2
1
2
1
2
(r00262xa)
Type RSD 50 RSD 50 RSD 50 RSD 50
oil quantity, appr. [ltr]
max. stroke 120 mm
max. stroke 300 mm
7
10
10
12
upon request 7
9.5
oil level [mm] below
inspection screw with
fully retracted thrust rod
49
0
(150 at 300 mm
stroke)
upon request 95
IMV 1
IMV 3 IMB 5IMB 5
1)
2)
1)
2)
1)
2)
(r00263x2)
oil quantity, approx. [ltr]
max. stroke 150 mm
max. stroke 300 mm
11
15
18
23
upon request
13
19
oil level [mm] below
inspection screw with
fully retracted thrust rod
47
15 (150 mm
stroke)
130 (300 mm
stroke)
upon request 43

8
8.1.4 RSD 200
Fig. 6: oil level; 1) = inspection screw, 2) = venting screw
Table 7:
After having mounted the actuator, replace the highest inspection screw with the separately delivered
vent screw.
8.2 Lubricants
Do not pollute or mix the synthetic oil Mobil SHC 629 with mineral oit. Clean the gearing carefully before
a possible change of oil type!
Table 8:
IMV 1
IMV 3 IMB 5IMB 5
1)
(r00262xa)
1)
2)
1)
2)
1)
2)
oil quantity, approx. [ltr]
max. Hub 180 mm
max. Hub 300 mm
15,5
19,5
23
28,5
upon request
18
24
oil level [mm] below
inspection screw with
fully retracted thrust rod
48
0 (180 mm stroke)
30 (300 mm stroke)
upon request 100
Ölsorten
ambient temperature factory filling when delivered alternative oil
- 10°C ... + 65°C
ESSO Spartan EP 220
(L-CKC acc. to ISO TR 3498)
Aral Degol BMB 220
BP Energol
GR-XP 220
Shell Omala 220
Mobilgear 630
-30°C ... +50°C
Mobil SHC 629

9
9. Mounting
9.1 Actuator check
Prior to mounting the actuator please verify if the device has been delivered in the configuration spec-
ified in your order and if it is suitable for the intended purpose. Check:
- if the positioning travel is sufficient for the valve stroke
- if it is filled with the proper oil type, see section 8.2 or oil label on actuator for details.
- if the proper oil quantity has been filled in
Fasten the separately delivered venting screw in the highest bore (depending on the mounting orienta-
tion).
9.2 Mounting orientation
All mounting orientations seen in Figure 3 to 6 are permissible. To facilitate mounting and maintenance,
however, it is recommended to use orientation IMV 1.
9.3 Mounting to the final control element
- Make sure that the actuator is accessible from all sides to ensure convenient handwheel operation,
electrical connection, and replacement of assemblies.
- Avoid direct exposure to rain, snow and other environmental influences. Select the mounting site
accordingly.
- When mounting the actuator close to heat sources use an insulating layer or shielding.
9.3.1 Valve design requirements
- Consider end position forces of up to 2.5 x the rated force when designing/selecting the valve.
9.4 Adapting the actuator stroke to the valve stroke
In factory, the stroke
+3...5 mm
specified on the actuator ID label is set. If it should be necessary to re-
adjust the stroke (observe the minimum and maximum stroke specified in section “Technical Data“)
proceed as described below:
- When mounting the actuator in an orientation other than IMV 1, refill oil according to the specifica-
tions.
- Fully extend the thrust rod using the handwheel until the internal stop is in contact with the drive
sleeve.
- Undo the screws of the thrust rod hood cover and remove the cover.
- Undo the screw plug in the thrust rod hood.
- The two Allen screws can now be accessed through the opening. Undo the screws.
- Retract the thrust rod using the handwheel until the actuator stroke matches the specified valve
stroke.
- Turn the internal stop (slotted ring nut) clockwise using a screw driver, until the stop gets in contact
with the drive sleeve. Then re-turn acround 3 times.
- Refasten the two Allen screws with the specified torque
RSD 10 / RSD 20: 26 Nm
RSD 50: 26 Nm
RSD 100: 40 Nm
RSD 200: 69 Nm
- Fasten the cover of the thrust rod hood, refasten the lateral screw plug, fill in the oil.

10
9.5 Mounting the actuator to the valve
- Completely retract the actuator thrust rod and put the actuator on the valve yoke.
- Make sure the valve stem is centrically aligned with the bore and at right angles to the actuator seat
(permissible parallel deviation < 0.1 mm referred to total stroke).
- Fasten the actuator to the yoke with screws of property class 8.8 (tensile strength 800 N|mm
2
; yield
strength 640 N/mm
2
)
- Use the handhweel to extend the thrust rod, link the rod with the valve stem via the clutch.
- Manually retract the thrust rod to check whether or not the external stop of the actuator is on the
housing flange before the valve cone gets in touch with the cover.
- If required, adjust with the clutch (only possible within certain limits!)
Fig. 7: Mounting RSD ... (example)
thrust rod
handwheel
servomotor
handwheel release
mechanical
position indicator
external limit stop
coupling
valve stem
valve
valve yoke
thrust rod hood
thrust rod hood
cover screw for
limit stop adjustment
fastening screws (8.8)
(
r00158e1
)

11
10. Electrical Connection
Each actuator requires a Contrac electronic unit. Proper actuator operation requires an actuator spe-
cific software loaded in the associated electronic unit. See electronic unit instructions for details. Com-
pare the data labels on both, electronic unit and actuator, in order to ensure a correct hardware and
software assignment.
The electrical connection is done with a combined plug on the actuator and with screw terminals on the
electronics.
See instructions 42/68-821 for wiring diagram for electronic units for mounting rack installation.
10.1 EBN853 / EBN861(Standard)
Fig. 8: Wiring diagram for standard triggering of of EBN853 / EBN861 (optionally with heater)
The following steps must be performed to switch the actuator to automatic mode (AUT):
- Activate digital inputs DI 1, DI 2 and DI 3 via the configuration program.
- Make sure that the supply voltage is available on digital input 1 (DI 1).
- Activate AUT mode via the configuration program.
10.1.1 Signal input and output (conventional control)
10.1.1.1 Standard
Fig. 9: ** Write-protected when applying +24 V DC to DI 1.
24V
Uv
30
+- -
+
RB
+-
31
I
U
26 27
1
+-+-+-
+
-
7
2
8
394
10 13
5 11 146 12 15
LN
Uv
24V
+
RB
+-
28 29
17 18 19 20 21 22
23
24
17 18 19 20 21 22
23
24
UVWBrBr
1212 3 13 14
M
3~
H1 H2
PE
single sided screening
in following wiring possible
r00350x1
Sub Distribution Board
screen grounded at both ends
Contrac Electronic Unit
Contrac Actuator
sensors
motor brake
heater
approx. 6 W
(option)
Han 10E Han 24E
MAN/AUT MAN(+) MAN(-)
ok/fail.
end pos. end pos.
out
setpoint
+HART
0/4...20mA
tranmitter
4...20 mA
act. value
0/4...20mA
mains supply
AC115 / 230 V
EBN861:
only AC230 V
ext. fuse
100%0%
DI1 DI2 DI3 DO1 DO2 DO32
Set Point (+ HART),
0/4...20mA
Act.Val.
0/4...20mA
Transmitter
4...20mA (Option)
End Pos. 0%
End Pos.
100%
Uv
24V
24V
+-
-
-
+
+
RB
RB
+-
+-
I
U
BE 1
BE 2
BE 3
BA 1
BA 2
BA 3
Uv
No
+- +- +- +
AUT**
-Y+Y
MAN
14
28
30
26
131211
9
10
8
7
6
4
32
1 5
15
29
31
27
No
No
Nc
Ok
(r00358e1)

12
10.1.2 Behind a step controller
Fig. 10: ** Write-protected when applying +24 V DC to DI 1.
Refer to Operating Instructions 42/68-820 (Power Electronics for Field-Mounting) and 42/68-821 (Rack-
Mounted Electronics) for installation details.
10.2 EBN853 / EBN861(field bus communication )
Fig. 11: Wiring diagram for EBN853 / EBN861
10.3 Wiring diagram for electronics in mounting rack
See instructions 42/68-821EN for detailed information.
Uv
24V
24V
+-
-
-
+
+
RB
RB
+-
+-
I
U
BE 1
BE 2
BE 3
BA 1
BA 2
BA 3
Uv
No
+- +- +- +
-Y+Y
14
28
30
26
131211
9
10
8
7
6
4
32
1 5
15
29
31
27
No
No
Nc
Ok
Act.Val.
0/4...20mA
Transmitter
4...20mA (Option)
End Pos. 0%
End Pos.
100%
controller
enable controller **
LN
Bus out
Bus in
28 29
30
BBAA
31
S1
17 18 19 20 21 22
23
24
UVWBr
H1
Br
H2
17 18 19 20 21 22
23
24
123 13 14
M
3~
PE
12
(r00010x1)
Contrac
Electronic Unit
Contrac
Actuator
red
green
red
green
Busabschluss-
möglichkeit
motor brake
sensors
bus terminals
Han 10E
mains supply
AC115 / 230 V
EBN861:
only AC230 V
ext. fuse
Han 24E
heater
approx. 6 W
(option)

13
11.Setup
The actuator only requires the basic settings (adaptation to the operating range) in order to be operated
with the standard or custumer specific configuration. Use the Local Control Panel (LCP) for these set-
tings. Use the appropriate configuration software for more detailed parameter changes or diagnosis
functions.
11.1Set-up via local control panel (LCP)
11.1.1Operating elements
1. Write-protect switch (Default setting: OFF)
2. LED for 100% position Indication if adjustment procedure, saved position, or fault by different
flash frequencies.
3. Drive buttons Press to cause drive motion
4. Reset button Press to restart processor
5. Power LED Indicates available mains supply
6. RS 232 socket Connection socket to PC
7. Potential toggle switch Connection of reference potential to the system or protective earth (by
default set to system) of electronic unit
8. LED for 0% position Indication if adjustment procedure, saved position, or fault by different
flash frequencies..
9. Accept button (0%) Press to define current position as 0%; simultaneously press push but-
ton 9 + 10 to complete the adjustment procedure.
10. Accept button (100%) Press to define current position as 100%; simultaneously press push
button 9 + 10 to complete the adjustment procedure
Figure 12: Local Control Panel (LCP)
The actuator range is not preset in factory!
11.1.2Setup procedure
- Undo the screws of the LCP cover
- Swing the cover to the side
11.1.3Initial situation
- Electronics connected to power supply and actuator
- Write-protect switch (1) set to “OFF” position
- Electronics in operating mode “MAN” (no signal on DI 1)
- No fault (if a fault occurs, both LEDs flash alternately at 4 Hz)
1
2
3
4
5
6
7
8
9
10
(r0110rxa)

14
11.1.4Setting
11.1.4.1 “Setting” mode
- Set electronics to “setting” mode by pressing both push buttons (3) simultaneously for approx. 5
seconds, until both LEDs (2 + 8) are flashing synchronously at approx. 4Hz. („setting mode“ is the
standard electronic unit status after passing the final factory test)
11.1.4.2 Defining first position (0% or 100%)
(Higher precision in 2nd position)
- Move to desired position by pressing one of the push buttons (3).
- To accept the position for 0% or 100%, press push button (10) or (9); the associated LED flashes at
approx. 2 Hz when value is correctly accepted, the other one continues to flash at approx. 4Hz
11.1.4.3 Defining second position (0% or 100%)
- Move to second position by pressing tho other of the push buttons (3).
- To accept the position, press push button (10) or (9); both LEDs (2) and (8) are flashing at approx. 2
Hz when values are accepted correctly.
11.1.4.4 Saving the settings
- Save the settings by simultaneously and shortly pressing the push buttons (10 + 9); the LEDs (2 + 8)
are „ON“ (without flashing) for approx. 5 sec before they extinguish and the setting procedure is
completed.
- If the selected range is too small for the actuator, both LEDs will flash again at 4Hz. Repeat the ad-
justment procedure with a wider range (min. positioning travel).
(See positioning travel specification on actuator ID label)
11.1.4.5 Correction after setup
- If the setting is to be corrected after accepting the first value, first press the Reset button (4) and
then repeat the setting.
- If the correction is to be re-done after saving the settings, the entire adjustment procedure must be
repeated.
11.2Adjustment using the configuration program
Context-sensitive help information is available in the configuration program at all times. For basic han-
dling and installation instructions refer to the associated manual, number 41/68-001.
A conductive ground connection is established between the PC and the CONTRAC electronics with the
RS 232 communication cable. If the PC is grounded, this may cause a ground loop in the installation.
11.3Functions and signals at the LCP
Table 9:
Function Indication
Adjustment
Change-over to adjustment mode:
Press and hold both drive buttons for approx. 5
seconds
Both LEDs flash synchronously at approx 4Hz
after time has expired.
Moving to an end position
Use associated drive button on LCP
Both LEDs continue to flash at 4Hz while driv-
ing.
Saving the first end position
Press button 0% or 100%
The associated LED flashes at approx. 2Hz,
the other continues at 4Hz.
Saving the second end position
Press button 0% or 100%
The associated LED flashes at approx. 2Hz
synchronously to the first one.
Confirm settings
Press 0% and 100% buttons simultaneously
Both LEDs are briefly „ON“ together and then
extinguish.
Operation
Normal operation: MAN / AUT LED off
Driving with button on CSF
Priority over control system
LED off
Bootstrap mode
Electronic is in bootstrap mode during the data trans-
fer of e. g. firmware, objects or motor charcteristics;
use ECOM688 software for this procedure.
Both LED are „ON“; actuator is not available
Fault (both LEDs flash alternately at 4Hz)
Reset:
Resets fault indications
If no „Failure“ conditions exist, both LEDs
extinguish (if the actuator had been moved out
of its operating range, drive it back prior to the
reset).

15
12. Maintenance
Linear actuators of the RSD... series feature a robust design. As a result, they are highly reliable and
require only little maintenance. The maintenance intervals depend upon the effective load and are
therefore not specified here.
The built-in microprocessor evaluates the actual load factors (e.g. torques, temperatures, etc.) and de-
rives the remaining operating time until the next routine maintenance is required. Use the configuration
program for viewing this information.
12.1 Motor and Gears
All maintenance work must be carried out by qualified specialists who have been trained for this task.
As a rule, perform the following routine maintenance works:
- Check the shafts and gears
- Check the drive rod surface for damage
- Check the motor pinion gear and the respective mating gear.
- Replace the motor’s rotary shaft seal and ball bearings.
- Check the position sensor.
- Change the oil; then make a visual check and check for proper operation.
12.2 Adjusting the Brake
Note that the actuator setting may be changed accidentally by the repelling power of the valve when the
brake is released!
In automatic mode the brake is permanently released. Therefore, it is not exposed to wear and does
not require any re-adjustment.
12.3 Replacing the Position Sensor
12.3.1 Dismounting
Figure 13:
- drive actuator into 50% position (refered to rated actuator stroke)
- delete the current position settings by pressing the 2 drive buttons on the LCP for at least 5 sec
- switch-off the voltage supply
- disconnect electrically
- remove male connector
- loosen both fastening screws (1) of position sensor (fig. ) and take sensor out
- detach plug from sensor pcb
connection plug
male connector
d0150rxa

16
12.3.2 Mounting
The toothed gear pair of the position sensor is held in place by a tension spring (3), to ensure sufficient
free motion when the direction of rotation is reversed.
- fasten sensor cable plug on sensor pcb
- set the stop pin to the center position, as shown in Figure 14
- align the sensor and its gears with the actuator; set the first toothed gear in 03:00 o’clock position
(see Figure 15) onto the drive shaft gear (4)
- slightly move the sensor back and forth to pre-tension the toothed gears with the difference “z“ until
the second toothed gear snaps in
- fasten the screws (1) tightly
)
After mounting is completed readjust the actuator range as described in setup section of this manual.
Figure 14: Position sensor SP 1 Figure 15: Mounting position of SP 1
Z
1
2
1
3
(r00329x1)
(r0151rxa)
position sensor
sensor cable

17
13. Troubleshooting
This section only describes how to handle hardware errors. Refer to the configuration program’s online
help for errors related to the software.
1)
If actuator end position = valve end position, mount the sensor as described in section 12.3.2.
13.1 Electrical test values
Error Possible reason Measures to be taken
Valve cannot be moved by actu-
ator
Malfunction of actuator or valve
(e.g. cable gland fastened too
tightly)
Disconnect the actuator from the
valve.
If the actuator is working prop-
erly then, the valve is likely to be
defective. Otherwise, the actua-
tor seems to be the error source.
Actuator does not react
No communication
Set up communication using the
configuration program
Motor / brake is defective
Check the winding resistances of
the motor and brake. Check the
brake fuse.
Digital input of electronics are
not connected
Connect input
Brake does not release (no audi-
ble “click“ noise)
Check the air gap (should be
around 0.25 mm) and the electri-
cal connection of the brake.
Check the winding resistance of
the brake coil.
Actuator does not work in auto-
matic mode, although “AUT“ has
been selected in the configura-
tion program
Digital input 1 (DI 1) has not been
connected.
Connect DI 1.
LEDs on the commissioning and
service field are flashing simulta-
neously
Actuator has not been adjusted
properly
Adjust the actuator.
Fault when approaching an end
position
Actuator is working in the limit
range of the position sensor
- Move the actuator either man-
ually or with the CSF buttons
to a position beyond the end
posi-
tion
1)
(disconnect from valve if
required).
- Move actuator back. If re-
quired, reconnect to to the
valve (if applicable)
- Adapt actuator to new operat-
ing range
Table 10:
MCS 71 BA MCS 80 BA MC 90 BA MC 100 BA MC 112 BA
winding resistance
± 5% at 20° C (motor)
21 Ohm 8 Ohm 3.7 Ohm 3.7 Ohm 1,4 Ohn
winding resistance
± 5% at 20° C (brake)
2180 Ohm 1730 Ohm 1290 Ohm 1079 Ohm 1020 Ohm
Table 11:

42/68-285EN Rev. C
ABB Ltd.
Salterbeck Trading Estate
Workington, Cumbria
CA14 5DS
UK
Tel: +44 (0)1946 830 611
Fax: +44 (0)1946 832 661
ABB Inc.
125 E. County Line Road
Warminster, PA 18974
USA
Tel: +1 215 674 6000
Fax: +1 215 674 7183
ABB Automation Products GmbH
Schillerstr. 72
32425 Minden
Germany
Tel: +49 551 905-534
Fax: +49 551 905-555
ABB has Sales & Customer Support
expertise in over 100 countries worldwide..
www.abb.com/instrumentation
The Company’s policy is one of continuous product
improvement and the right is reserved to modify the
information contained herein without notice.
Printed in the Fed. Rep. of Germany (08.05)
© ABB 2005
/