NEC E461 User manual

Category
Public displays
Type
User manual

This manual is also suitable for

User’s Manual
E461
E551
English-1
www.necdisplay.com
Index
Precautions And Reminders ..............................................................English-1
Important Safety Instructions .............................................................English-2
Safety Instructions .............................................................................English-4
Important Information ........................................................................English-5
Declaration Of Conformity .................................................................English-7
Preparation ........................................................................................English-9
Preparing Your LCD Display For Wall Mounting .....................English-9
Place The Display On A Solid Surface ....................................English-9
Antenna Connection ..............................................................English-10
Battery Installation and Replacement....................................English-10
Connect To The Power Source .............................................English-11
Power On/Off Your New LCD Display ...................................English-11
Source Connection Guide .....................................................English-12
Operating Instructions .....................................................................English-13
Using The Side Panel Controls .............................................English-13
Using The Remote Control ....................................................English-14
Picture Format for Each Input Source ...................................English-15
Navigating The On-Screen Menu ....................................................English-16
Video Menu ...........................................................................English-16
Audio Menu ...........................................................................English-17
Setup Menu ...........................................................................English-17
Channel Menu .......................................................................English-20
Multimedia .............................................................................English-20
Tips ..................................................................................................English-21
Care Of The Screen ..............................................................English-21
Mobile Telephone Warning ...................................................English-21
End Of Life Directives............................................................English-21
License Notice and Trademark Acknowledgement ...............English-21
Product Specification .......................................................................English-22
Before Calling Service .....................................................................English-24
Glossary ..........................................................................................English-25
Limited Warranty .............................................................................English-26
References ......................................................................................English-27
English-1
English
Precautions And Reminders
Do not place the display
in conned spaces or in a
box when in use. Maintain
ample ventilation for the
display when in use.
Do not open the display
cabinet.
Call a NEC certied
service personnel for any
internal service needed
for your display.
Keep the display away
from direct sunlight, dust,
humidity, and smoke.
Unplug immediately if any
foreign object is put in the
display or if the display
falls.
Unplug immediately
if there is a display
malfunction such as a
loss of audio/video, the
presence of smoke, or a
bad odor coming from the
display.
Unplug the AC cord from
the AC outlet before
cleaning. Do not use
liquid cleaners or aerosol
cleaners to clean the
display.
Do not place the display
near water such as a
bathtub, washbasin,
sink, laundry tub,
swimming pool, or a damp
basement.
Do not cover or block
any vents or openings.
Inadequate ventilation
may shorten the life of
the display and cause
overheating.
Place the unit on a sturdy,
even surface.
Do not insert any foreign
objects into the display
cabinet.
Unplug the power cord
from the outlet when
the display is not in use
for long periods of time
(days).
Notice for Remote Controller
Avoid Liquids
1
2
3
4
5
6
7
8
9
0
Avoid Aerosol Cleaners
1
2
3
4
5
6
7
8
9
0
Avoid Dropping
1
2
3
4
5
6
7
8
9
0
English-2
English-3
Important Safety Instructions
Read before operating equipment
Follow all warnings and instructions marked on this display.
1. Read and keep these instructions.
2. Obey all warnings.
3. Follow all instructions.
4. Do not use equipment near water.
5. Clean with dry cloth.
6. Do not block any of the ventilation areas. Install in accordance with the
manufacturer’s instructions.
7. Do not install near heat sources, including radiators, heat registers,
stoves, or any other apparatus that creates heat.
8. Do not alter the safety purpose of the polarized or grounding type
plug. The polarized plug has two blades, one wider than the other. A
grounding type plug has two blades and a grounding prong. The wide
blade or the third prong on each plug type is provided for your safety. If
the provided plug does not t into an outlet, consult an electrician.
9. Protect the power cord from being stepped on or pinched. Pay close
attention to the connections at the wall, and the point where the cord
exits from the display.
10. Only use the attachments/accessories as indicated by the manufacturer.
11. Use only with the cart, stand, tripod, bracket, or table as instructed
by the manufacturer or sold with the device. When a cart is used, be
cautious of mishaps that cause injury.
S3125A
12. Unplug during lightning storms or when idle for long periods of time.
13. Refer all service issues to a qualied NEC technician. Service may be
necessary when the display is damaged in any way, including harm to
the power cord and plug, if liquid touches the display, if the display is
dropped, or if the display does not operate properly.
14. The display complies with the recommended safety standards for
stability. Do not excessively put force on the front or top of the cabinet.
This could cause the product to tip over and cause damage and/or
personal injury.
15. Follow instructions for wall, shelf or ceiling mounting as recommended
by the manufacturer.
16. An outdoor antenna should not be located near overhead power lines or
any electrical circuits.
17. If an outside antenna is connected to the receiver, conrm that the
English-2
English-3
English
antenna system is grounded to protect against voltage surges and built
up static charges. Section 810 of the National Electric Code, ANSI/NFPA
No. 70-1984, provides information with respect to proper grounding
for the mast and supporting structure, grounding of the lead-in wire
to an antenna discharge unit, size of grounding connectors, location
of antenna discharge unit, connection to grounding electrodes and
requirements for the grounding electrode.
NOTE: To the display system installer: This reminder is provided to call
attention to Article 820-44 of the National Electric Code that provides
guidelines for proper grounding and, in particular, specifies that the cable
ground shall be connected to the grounding system of the facility, as
reasonably close to the point of cable entry as possible
Power source
This LCD display operates on 120 volts 60 Hz, AC current. Insert the power
cord into a 120 volts 60 Hz outlet. The mains plug is used as the disconnect
device and shall remain readily operable.
To prevent electric shock from the display, do not use with an extension cord,
receptacle, or other outlet unless the blades and ground terminal can be fully
inserted to prevent blade exposure.
Never connect the LCD display to 50 Hz, direct current, or anything other than
the specified voltage.
CAUTION: Never remove the back cover of the LCD display as this can
expose you to very high voltages and other hazards. If the display does not
operate properly, unplug the LCD display and call your authorized dealer or
service center.
Adjust only those controls that are covered in the instructions, as improper
changes or modifications not expressly approved by NEC could void the
user’s warranty.
English-4
English-5
Safety Instructions
FCC STATEMENT
This equipment has been tested and found to comply with the limits for a
Class B digital device, pursuant to Part 15 of the FCC Rule. These limits are
designed to provide reasonable protection against harmful interference in
a residential installation. This equipment generates, uses and can radiate
radio frequency energy and, if not installed and used in accordance with
these instructions, may cause harmful interference to radio communications.
However, there is no guarantee that interference will not occur in a particular
installation. If this equipment does cause harmful interference to radio or
television reception, which can be determined by turning the equipment off
and on, the user is encourage to try to correct the interference by one or more
of the following measures:
1. Reorient or relocate the receiving antenna.
2. Increase the separation between the equipment and receiver.
3. Connect the equipment into an outlet on a circuit different from that to
which the receiver is connected.
4. Consult the dealer or an experienced radio/display technician for help.
This device complies with Part 15 of the FCC Rules. Operation is subject to
the following two conditions:
1. This device may not cause harmful interference.
2. This device must accept any interference received, including
interference that may cause undesired operation.
FCC CAUTION
To assure continued compliance and possible undesirable interference, ferrite
cores may be used when connecting this LCD display to video equipment;
and maintain at least 400mm spacing to other peripheral device.
CANADIAN NOTICE
This Class B digital apparatus complies with Canadian ICES-003
English-4
English-5
English
Important Information
WARNING
TO PREVENT FIRE OR SHOCK HAZARDS, DO NOT EXPOSE THIS UNIT
TO RAIN OR MOISTURE. ALSO, DO NOT USE THIS UNIT’S POLARIZED
PLUG WITH AN EXTENSION CORD RECEPTACLE OR OTHER OUTLETS
UNLESS THE PRONGS CAN BE FULLY INSERTED.
REFRAIN FROM OPENING THE CABINET AS THERE ARE HIGH
VOLTAGE COMPONENTS INSIDE.
REFER SERVICING TO QUALIFIED SERVICE PERSONNEL.
CAUTION
CAUTION: TO REDUCE THE RISK OF ELECTRIC SHOCK, MAKE SURE
POWER CORD IS UNPLUGGED FROM WALL SOCKET.
TO FULLY DISENGAGE THE POWER TO THE UNIT,
PLEASE DISCONNECT THE POWER CORD FROM THE AC
OUTLET. DO NOT REMOVE COVER (OR BACK). NO USER
SERVICEABLE PARTS INSIDE. REFER SERVICING TO
QUALIFIED SERVICE PERSONNEL.
This symbol warns user that uninsulated voltage within the
unit may have sufficient magnitude to cause electric shock.
Therefore, it is dangerous to make any kind of contact with any
part inside this unit.
This symbol alerts the user that important literature concerning
the operation and maintenance of this unit has been included.
Therefore, it should be read carefully in order to avoid any
problems.
English-6
English-7
CAUTION: Please use the power cord provided with this display in
accordance with the table below. If a power cord is not supplied with this
equipment, please contact your supplier.
Plug Type North America
Plug Shape
Region
U.S.A./Canada
Voltage AC 120 V
Apparatus shall not be exposed to dripping, splashing or any objects filled with
liquids.
Batteries installed warning
Caution - Danger of explosion if batteries are incorrectly replaced. Replace
only with the same or equivalent type. The batteries shall not be exposed to
excessive heat without risk of explosion.
English-6
English-7
English
Declaration Of Conformity
This device complies with Part 15 of FCC Rules. Operation is subject to the
following two conditions. (1) This device may not cause harmful interference,
and (2) this device must accept any interference received, including
interference that may cause undesired operation.
U.S. Responsible Party: NEC Display Solutions of America, Inc.
Address: 500 Park Boulevard, Suite 1100
Itasca, Illinois 60143
Tel. No.: (630) 467-3000
Type of Product: Display Monitor
Equipment Classification: Class B Peripheral
Model: E461
E551
We hereby declare that the equipment specied above
conforms to the technical standards as specied in the FCC Rules.
Canadian Department of Communications Compliance Statement
DOC: This Class B digital apparatus meets all requirements of the Canadian
Interference-Causing Equipment Regulations.
C-UL: Bears the C-UL Mark and is in compliance with Canadian Safety
Regulations according to CAN/CSA C22.2 No. 60065-03.
FCC Information:
1. Use the attached specied cables with the E461/E551 color monitor so as
not to interfere with radio and television reception.
(1) Please use the supplied power cord or equivalent to ensure FCC
compliance.
(2) Please use the supplied shielded video signal cable, Mini D-SUB 15
pin to Mini D-SUB 15 pin.
2. This equipment has been tested and found to abide by the limits of a Class B
digital device, pursuant to part 15 of the FCC Rules. These limits are intended
to provide reasonable security against harmful interference in a residential
deployment. This equipment generates, uses, and can radiate radio frequency
energy, and, if not installed and used in accordance with the instructions,
may cause harmful interference to radio communications. However, there is
no guarantee that interference will not occur in a certain installation. If this
equipment does cause damaging interference to radio or television reception,
which can be determined by powering the equipment on and off, the user
is encouraged to attempt correcting the interference by one or more of the
following procedures:
Reorient or relocate the receiving display.
English-8
English-9
Increase the separation between the equipment and display.
Connect the equipment into a different outlet than the receiver.
Consult your dealer or an experienced radio/display technician for
assistance.
If necessary, the user should contact the dealer or an experienced radio/
television technician for additional suggestions. The user may nd the
following booklet, prepared by the Federal Communications Commission,
helpful: “How to Identify and Resolve Radio-display Interference Problems.”
This booklet is available from the U.S. Government Printing Ofce,
Washington, D.C., 20402, Stock No. 004-000-00345-4.
Windows is a registered trademark of Microsoft Corporation.
NEC is a registered trademark of NEC Corporation.
All other brands and product names are trademarks or registered trademarks
of their respective owners.
HDMI, the HDMI logo and High-Denition Multimedia Interface are trademarks
or registered trademarks of HDMI Licensing LLC in the United States and
other countries.
English-8
English-9
English
Preparation
IMPORTANT: Do not apply pressure to the screen display area which may
compromise the integrity of the display. The manufacturer’s warranty does not
cover user abuse or improper installations.
Preparing Your LCD Display For Wall Mounting
We suggest that you keep your display at least 2.36 inches (60 mm) from the
wall to prevent cable interference. Before mounting your display on the wall,
you need to remove the base. For your safety, only mount with a UL listed
wall mount bracket that supports the weight of the display. (Please see page
22-23.) To attach a wall mount bracket to your display:
400 mm
E461 E551
200 mm
600 mm
400 mm
1. Loosen the screws on the back of the stand and remove the back cover of
the stand.
2. Pull up the stand base from the hinge to remove the stand base from your
display.
3. Secure the wall mount bracket to the back of your display using four M6
screws, as indicated in the illustration.
NOTE: Wall mounting solution is not included with the unit and is sold
separately. Contact your NEC representative for details.
Place The Display On A Solid Surface
Ensure that the LCD display
is placed in a position to allow
free flow of air. Do not cover the
ventilation openings on the back
cover. Do not place the display
near any open flames. Do not
allow the display to be placed in
an environment where it can be
exposed to heat, direct sunlight, or
rain and water. Do not expose the
equipment to any liquid.
Min
1 m
English-10
English-11
Antenna Connection
Unless your LCD display is connected
to a cable TV system or to a centralized
antenna system, a good outdoor color
TV antenna is recommended for best
television performance. However, if you
are located in an exceptionally good
signal area that is free from interference
and multiple image ghosts, an indoor
antenna may be sufficient.
When using a 75-Ohm coaxial cable system, connect the CATV coaxial cable
to the AIR/CABLE (75-Ohm) terminal. Or if you have an antenna, connect the
coaxial cable to the same AIR/CABLE terminal.
Battery Installation and Replacement
The remote control is powered by two 1.5V AAA batteries. To install or
replace batteries:
1. Open the battery cover of the remote
control by pushing and pulling it in the
direction of the arrow.
2. Insert two new “AAA” size batteries
for the remote control. When
replacing old batteries, push them
towards the springs and lift them out.
3. Match the batteries to the (+) and (-)
marks in the battery compartment.
4. Insert the bottom of the battery, the
(-) side, into the battery compartment
first, push towards the springs and
insert the top of the battery, the (+)
side, into place. Do not force the
battery into the battery compartment.
5. Close the battery cover making sure the tabs rest in the corresponding
holes and push down the cover until it clicks shut.
CAUTION: Incorrect usage of batteries can result in leaks or bursting.
NEC recommends the following battery use:
Do not mix battery brands.
Do not combine new and old batteries. This can shorten the battery life
or cause liquid leakage of the batteries.
Remove dead batteries immediately to prevent battery acid from leaking
into the battery compartment.
Do not touch exposed battery acid as it may injure skin.
Remove the batteries if you do not intend to use the remote control for a
long period of time.
English-10
English-11
English
Connect To The Power Source
The display should be installed close to an easily accessible power outlet.
Fully insert the prongs into the power outlet socket. A loose connection may
cause image degradation.
If there is power to the display, the front LED at the bottom of the display will
be either blue or red. A blue LED means the display is powered on. A red LED
means the display is in standby mode.
Power On/Off Your New LCD Display
Press the power key on the remote control or press the power button located
on the side of the display. The display will power on.
Power
Video Comp PC/HDMI TV
Power Key
1
4
3
2
5
6
VOL CH
MENU
INPUT
E.SAVE
POWER
or
English-12
English-13
Source Connection Guide
S-VIDEO
VIDEO
L
R
HDMI 3
HDMI 4
AUDIO
RGB
USB/
SERVICE
RGB
AV 2
AC POWER
E461/E551
1. HDMI – Connect the primary source for digital video such as a DVD
multimedia player or set top box through this all digital connector.
2. RGB/AUDIO – Connect the video and audio cables from a computer
here.
3. AV/S-VIDEO – Connect the primary source for composite video devices,
such as a VCR or video game. Use the white and red connectors to
connect the external audio from the same source. The signal being
carried by the S-Video cable and connector, if connected, will take
priority over the Video RCA connector (yellow connector).
4. COMPONENT (Y-PbPr with Audio L/R) – Connect the primary source
for component video devices such as a DVD Player or set top box here.
Use red for Pr, blue for Pb, green for Y, red for right audio (R) and white
for left audio (L) inputs.
5. AIR/CABLE – Connect to an antenna or digital cable (out of-the-wall, not
from Cable Box) for the digital tuner.
6. SPDIF (Optical Digital Audio Out) – When a digital audio signal is
associated with the input selected for viewing, the digital audio will be
available on this SPDIF connection to your home theater system.
7. DVI AUDIO INPUT – This jack provides Audio Input from a DVI source
when connected to the HDMI 2 Input. A DVI (source) to HDMI (Display)
connection must be made to HDMI 2.
8. AUDIO OUT – Connect an external sound system with standard audio
cable to the AUDIO OUT L and R jacks on the back of your display and
to the AUDIO IN jacks on the amplifier.
9. Earphone Output – Connect to the headphones. When the headphone
is inserted to the plug, all the speakers will be muted.
10. USB/SERVICE – This USB slot is for future software upgrades.
Once your AV device is connected, press the Source button on the remote
control to select the relevant source to view. (ex: Press Comp button to select
“Component” if you have connected a source to the Component input.)
English-12
English-13
English
Operating Instructions
1
2
3
5
6
4
7
8
VOL CH
MENU
INPUT
E.SAVE
POWER
Using The Side Panel Controls
1. VOL + Press to increase the volume.
2. VOL - Press to decrease the volume.
3. CH + Press to increase the channel number.
4. CH - Press to decrease the channel number.
5. MENU
Press to open or exit the OSD (On-Screen Display)
menu.
6. INPUT Press to select the input source.
7. E-SAVE
Press to set power consumption reduction based on
three levels (Min, Medium, Max).
8. POWER Press to turn on / off (standby) the display.
English-14
English-15
Using The Remote Control
Power
Press to turn On/Off (standby) the
display. (Note: To completely remove
power from the display, remove the
AC cord from the display.)
Video
Press repeatedly to choose AV1/AV2
source mode.
Comp
Press repeatedly to choose
Component 1/Component 2 source
mode.
PC/HDMI
Press repeatedly to choose VGA or
HDMI source mode.
TV
Press to choose ATSC/NTSC tuner
source mode.
0 ~ 9 /- number
Press to enter the tuner channel
number to select channel (Press ‘-’ to
choose the sub-channel).
PREV CH
Press to display the previous
channel.
Sleep
Press to set a time period (off /5 min
/10 min /15 min /30 min /60 min /90
min /120 min /180 min / 240 min)
after which the display should switch
itself to standby mode
Freeze
Press to freeze the displayed picture.
If the input source is HDMI, and your
DVD players supports HDMI-CEC
control, pressing this key will pause
the displayed picture.
MTS/SAP
Press to activate the NTSC tuner
sounds such as Stereo, SAP, Mono-
tone, and languages of the digital
tuner.
Power
Video
1 2 3
4 5 6
7 8 9
0
PREV CH
Comp PC/HDMI TV
Sleep
Fav Source
Mute
Menu Exit
ENTER
V-Chip
Video Adj Audio Adj
C.C.
Info
VOLCH
EPG
Freeze MTS/SAP
Fav
Press to toggle the Favorite/Normal
mode.
Source
Press repeatedly to choose the
various input sources.
EPG
This function is not supported.
English-14
English-15
English
Mute
Switch the sound On/Off.
Info
Press to show the information about
the input source, tuner channel,
display resolution and current time.
CH- / CH +
Press + or - to browse through the
tuner channels (or input sources
when in source mode).
VOL- / VOL+
Press + or - to adjust the volume.
Menu
Press to open or exit menu.
Exit
Press to exit menu or OSD.
“<”,“>”,“ ”,“ ”,“ENTER
Press to adjust the various function
items on the menu.
Press to choose the display aspect
ratio: Auto/4:3/16:9/Full/Zoom1/
Zoom2. (Ratio availability varies by
video inputs. Refer to the Picture
Format Table below for details.)
V-Chip
Press to temporarily lock the
parental control. (After setting the
restricted table of MPAA or tuner
Rating.)
Video Adj
Press to choose the picture mode:
Dynamic/Standard/Movie/Custom/
Game.
Audio Adj
Press to choose sound mode:
Standard/Movie/News/Custom.
C.C.
Press repeatedly to change the
closed caption type to CC On, CC
Off, or CC With Mute.
Input Signal
Aspect
Auto 4:3 16:9 Full Zoom1 Zoom2
AIR / CABLE Air / Cable Yes Yes Yes No Yes Yes
HDMI 1
HDMI 3
HDMI 4
HDMI
1080p, 1080i, 720p,
480p, 480i
Yes Yes Yes Yes Yes Yes
HDMI 2 HDMI / DVI
1080p, 1080i, 720p,
480p, 480i
Yes Yes Yes Yes Yes Yes
640x480, 800x600,
1024x768, 1280x720,
1280x768, 1280x1024,
1440x900, 1680x1050
Yes No No Yes No No
COMPONENT 1
COMPONENT 2
YPbPr Yes Yes Yes No Yes Yes
AV 1
AV 2
Video / S-Video No Yes Yes No Yes Yes
RGB Analog RGB Yes No No Yes No No
Picture Format for Each Input Source
English-16
English-17
Navigating The On-Screen Menu
1. Press the Menu/Exit button to
display or close the main menu.
2. Use the Navigation Ring to
navigate, select, adjust or
confirm an item on the OSD (On
Screen Display) menu.
Press the Menu/Exit button to enter/
exit the main OSD. Adjust the items
including Video, Audio, Setup,
Channels and Multimedia.
NOTE: Some features may only
be available in a particular source
mode.
Video Menu
This menu adjusts video items.
Video
Audio
Setup
Channels
Multimedia
Picture Mode Dynamic
High
45
65
0
56
53
Contrast
Brightness
Color
Tint
Sharpness
Color Temp.
Move SelectENT Return ExitEXIT
MENU
1. Picture Mode
Adjust the picture appearance
by choosing one of the preset
picture modes: Dynamic,
Standard, Movie, Custom and
Game.
2. Brightness
Control the display brightness
from 0 ~ 100.
3. Contrast
Control the display contrast from
0 ~ 100.
4. Color
Control the video chroma from 0
~ 100.
5. Tint
Control the tint range from R50
~ G50.
6. Sharpness
Control the display sharpness
from 0 ~ 100.
7. Color Temp.
Three color temperature modes
(High / Medium / Standard).
8. Gamma
Select among three gamma
correction settings (Gamma 1/
Gamma 2/Gamma 3).
9. Noise Reduction
Reduces conspicuous noise in
the picture without degrading
picture quality (Off/Low/Mid/
High).
10. MPEG NR
Reduces MPEG block noise in
the picture.
11. Backlight
Adjust the backlight strength
from 0 ~ 30.
12. Movie Mode
Auto detection for the 3:2
pulldown feature allowing for
better video playback (Off/On).
13. 120Hz Motion
Select among four settings
(High/Mid/Low/Off) of 120 Hz
smooth motion compensation.
14. Aspect Ratio
Adjust the aspect ratio by
choosing: Auto/4:3/16:9/Full/
Zoom1/Zoom2. (Ratio availability
varies by video inputs. Refer
to the Picture Format Table on
page 15 for details.)
15. Reset
Restores the default video
settings.
English-16
English-17
English
Audio Menu
The Audio menu provides an audio
adjustment for user to modify the
audio setting.
Video
Audio
Setup
Channels
Multimedia
Sound Mode Standard
PCM
English
32
0
32
Bass
Treble
Balance
Digital Output
Audio Language
Preferred Language
Move SelectENT Return ExitEXIT
MENU
English 1
1. Sound Mode
Adjust the sound mode by
choosing one of the preset sound
modes: Custom, Standard,
Movie, or News.
2. Treble
Control the treble tone from 0 ~
63. (The default of 32 is enabled)
3. Bass
Control the bass tone from 0 ~
63. (The default of 32 is enabled)
4. Balance: Audio balance
adjustment, the tuning range is
L50 ~ R50.
5. Audio Source
Select the audio source from
Mono, Stereo, or SAP. (This
function works in ATV source
only)
6. Preferred language
Select the default audio language
for programming that supports
other languages. (English/
Español/Françaisl)
7. Audio Language
Change the audio language
setting on ATSC tuner programs.
The number of the supported
audio languages depends on the
ATSC tuner programs.
8. Digital Output
Digital audio output format.
Select RAW or PCM.
9. Internal Speakers
Choose to turn on/off the
displays internal speakers. The
digital audio output signals and
earphone output signals will not
be turned off even though the
display speaker is off. The default
setting is On.
10. Perfect Volume
When enabled, this setting will
automatically adjust the volume
to be consistent across programs
and channels regardless of input
level.
11. Reset
Restores the default audio
settings.
Setup Menu
The Setup menu in TV mode is
shown below. According to various
requirements in different source
modes, certain features could be
hidden (disabled) on the menu.
Video
Audio
Setup
Channels
Multimedia
Menu Language English
Off
CC1
Time
Sleep Timer
Set Password
Parental Controls
Analog Captions
Move SelectENT Return ExitEXIT
MENU
Closed Captions Off
1. Menu Language
Select the menu display
language. (English/Español/
Français)
2. Time
Set current time. The sub-menu
includes Time Mode, Time Zone
and Daylight Savings.[Time
Mode] – Choose from Auto or
Manual.
[Time Zone] – Set current time
zone.
[Daylight Savings] – Set to On
or Off.
English-18
English-19
3. Sleep Timer
Select the auto turn off time from
5 minutes to 4 hours.
4. Parental Controls
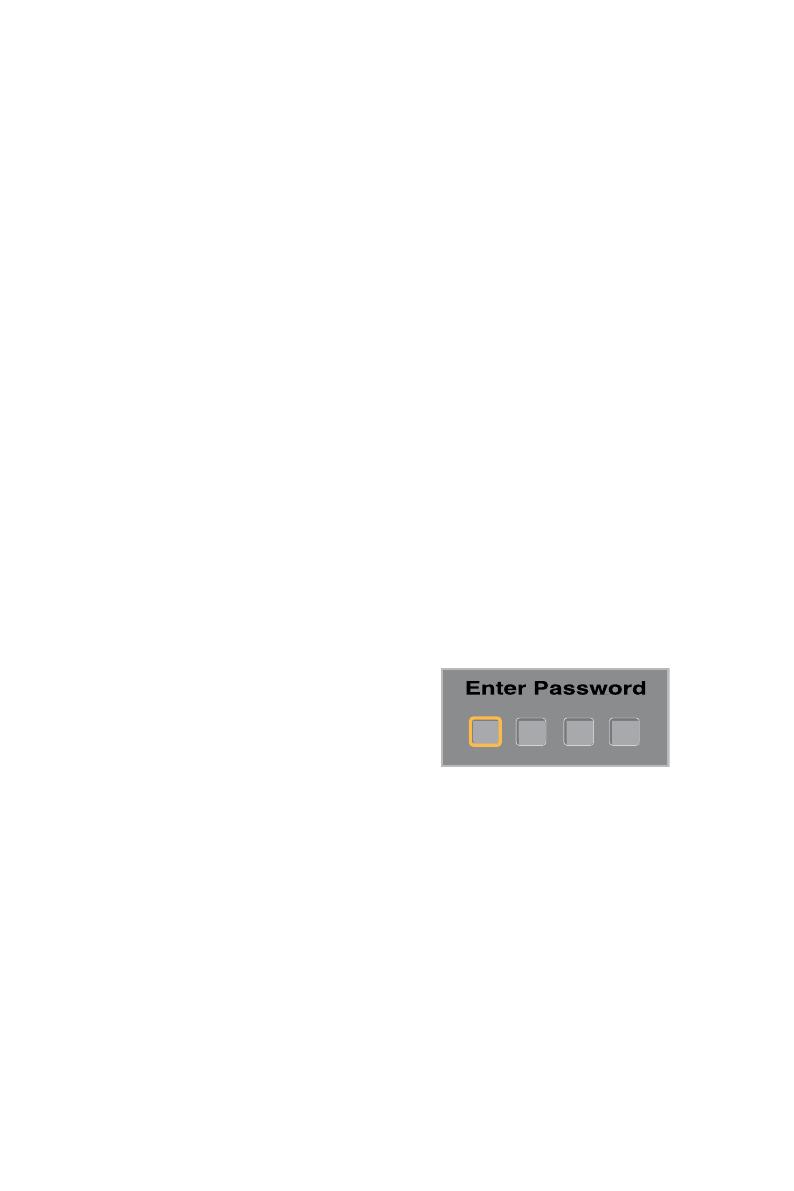
Provides the parental control
(V-chip) function setting. Before
entering the Parental Control sub-
menu, user must first key in the
password. Enabling the Parental
Locks feature allows the user to
modify the restriction table as it
relates to MPAA or TV ratings.
Once the user adjusts and exits
the sub menu the parental control
function activates. The restricted
channels or source signals
can be unlocked by pressing
the V-CHIP key on the remote
control and entering in the correct
password. Note: This feature is
only available in TV, AV1 and
AV2 source modes.
[Panel Lock] – Select On or
Off to lock or unlock the control
buttons on the side panel of the
display. When this function is
enabled, the control buttons on
your display will be locked and
the display can be controlled by
remote control only.
[Block Unrated TV] – When
Block Unrated channels is set to
on, the display will block unrated
programs.
[US] Set the parental control level
by MPAA or TV Rating.
[Canada] – Set the parental
control level via English Rating or
French Rating.
[Region 5] – Region 5 can be
utilized to block various types of
movies and television programs
based on U.S. rating guidelines
that you feel may be unsuitable
due to its content. The Region
5 option operates for Digital
Channels (ATSC) only. NOTE: In
order to set the Region 5 Ratings,
the ATSC Digital channel must
include Region 5 Ratings data.
To confirm this, press the INFO
button on the remote control.
Once the TV has received Region
5 Ratings data, the Region 5
option in the Parental Controls
menu will become available.
NOTE: In order to set the Region
5 Ratings, the ATSC Digital
channel must include Region
5 Ratings data. To see if the
channel has Region 5 Ratings,
press the INFO button on the
remote control. Once the TV
has received Region 5 Ratings
data, the Region 5 option in
the Parental Controls menu will
become available and display the
data.
5. Set Password
Change the 4-digit parental
control password. Three steps
are required for changing the
password: Enter Old Password ->
Enter New Password -> Confirm
New Password. Note: This item is
only available when the TV, AV1,
or AV2 sources are being used.
The default password is 0 0 0 0.
6. Closed Captions
Select a closed caption option.
(Off/On/With Mute)
7. Analog Captions
Select an analog caption option.
(CC 1-4 / TEXT 1-4)
8. Digital Captions
This function sets captions
for digital programs and sets
available languages.
9. Digital Caption Options
Provides numerous options for
setting the digital closed caption
style in the sub-menu.
[Style] – Set to Automatic or
1 / 1

NEC E461 User manual

Category
Public displays
Type
User manual
This manual is also suitable for

Ask a question and I''ll find the answer in the document

Finding information in a document is now easier with AI

Ask the document

in other languages