Page is loading ...

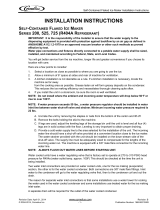
NORDIC ELITE SERIES CUBE ICE MAKER
CNM 300 lb THROUGH 1400 lb CUBERS
OWNER’S MANUAL
Release Date: April 19, 2018
Publication Number: 548000033
Revision Date: November 27, 2019
Revision: C
Visit the Cornelius web site at www.cornelius.com for all your Literature needs.

Notice
The products, technical information, and instructions contained in this manual are subject to change without notice.
These instructions are not intended to cover all details or variations of the equipment, nor to provide for every possi
-
ble contingency in the installation, operation or maintenance of this equipment. This manual assumes that the per-
son(s) working on the equipment have been trained and are skilled in working with electrical, plumbing, pneumatic,
and mechanical equipment. It is assumed that appropriate safety precautions are taken and that all local safety and
construction requirements are being met, in addition to the information contained in this manual.
This Product is warranted only as provided in Cornelius’ Commercial Warranty applicable to this Product and is sub-
ject to all of the restrictions and limitations contained in the Commercial Warranty.
Cornelius will not be responsible for any repair, replacement or other service required by or loss or damage resulting
from any of the following occurrences, including but not limited to, (1) other than normal and proper use and normal
service conditions with respect to the Product, (2) improper voltage, (3) inadequate wiring, (4) abuse, (5) accident,
(6) alteration, (7) misuse, (8) neglect, (9) unauthorized repair or the failure to utilize suitably qualified and trained per
-
sons to perform service and/or repair of the Product, (10) improper cleaning, (11) failure to follow installation, oper-
ating, cleaning or maintenance instructions, (12) use of “non-authorized” parts (i.e., parts that are not 100%
compatible with the Product) which use voids the entire warranty, (13) Product parts in contact with water or the
product dispensed which are adversely impacted by changes in liquid scale or chemical composition.
Correct Disposal of this Product
RECYCLE
This marking indicates that this product should not be disposed with other household wastes throughout the EU. To
prevent possible harm to the environment or human health from uncontrolled waste disposal, recycle it responsibly
to promote the sustainable reuse of material resources. To return your used device, please use the return and
collection systems or contact the retailer where the product was purchased. They can take this product for
environmental safe recycling.
Trademarks and Copyrights
This document contains proprietary information and it may not be reproduced in any way without permission from
Cornelius. This document contains the original instructions for the unit described.
CORNELIUS INC
101 Regency Drive
Glendale Heights, IL
Tel: + 1 800-238-3600
Printed in U.S.
Contact Information
To inquire about current revisions of any documentation or assistance with any Cornelius product, contact:
www.cornelius.com
800-238-3600

TABLE OF CONTENTS
SAFETY INSTRUCTIONS . . . . . . . . . . . . . . . . . . . . . . . . . . . . . . . . . . . . . . . . . . . . . . . . . . . . . . . . . . . 5
Safety Overview . . . . . . . . . . . . . . . . . . . . . . . . . . . . . . . . . . . . . . . . . . . . . . . . . . . . . . . . . . . . . . . . 5
Safety Alert symbol . . . . . . . . . . . . . . . . . . . . . . . . . . . . . . . . . . . . . . . . . . . . . . . . . . . . . . . . . . . . . . 5
Safety Tips . . . . . . . . . . . . . . . . . . . . . . . . . . . . . . . . . . . . . . . . . . . . . . . . . . . . . . . . . . . . . . . . . . . . 5
Qualified Service Personnel . . . . . . . . . . . . . . . . . . . . . . . . . . . . . . . . . . . . . . . . . . . . . . . . . . . . . . . 5
Safety Precautions . . . . . . . . . . . . . . . . . . . . . . . . . . . . . . . . . . . . . . . . . . . . . . . . . . . . . . . . . . . . . . 6
Freight Claims . . . . . . . . . . . . . . . . . . . . . . . . . . . . . . . . . . . . . . . . . . . . . . . . . . . . . . . . . . . . . . . . . . 7
INSTALLATION GUIDELINES . . . . . . . . . . . . . . . . . . . . . . . . . . . . . . . . . . . . . . . . . . . . . . . . . . . . . . . . 8
Ambient Operating Temperature . . . . . . . . . . . . . . . . . . . . . . . . . . . . . . . . . . . . . . . . . . . . . . . . . . . 8
Incoming Water Supply . . . . . . . . . . . . . . . . . . . . . . . . . . . . . . . . . . . . . . . . . . . . . . . . . . . . . . . . . . . 8
Water Filtration/treatment . . . . . . . . . . . . . . . . . . . . . . . . . . . . . . . . . . . . . . . . . . . . . . . . . . . . . . . . . 8
Drains . . . . . . . . . . . . . . . . . . . . . . . . . . . . . . . . . . . . . . . . . . . . . . . . . . . . . . . . . . . . . . . . . . . . . . . . 8
Clearance Requirements . . . . . . . . . . . . . . . . . . . . . . . . . . . . . . . . . . . . . . . . . . . . . . . . . . . . . . . . . 9
Stacking . . . . . . . . . . . . . . . . . . . . . . . . . . . . . . . . . . . . . . . . . . . . . . . . . . . . . . . . . . . . . . . . . . . . . . 9
Dispenser Application . . . . . . . . . . . . . . . . . . . . . . . . . . . . . . . . . . . . . . . . . . . . . . . . . . . . . . . . . . . . 9
Electrical Specifications . . . . . . . . . . . . . . . . . . . . . . . . . . . . . . . . . . . . . . . . . . . . . . . . . . . . . . . . . . 9
Remote Condenser Installation . . . . . . . . . . . . . . . . . . . . . . . . . . . . . . . . . . . . . . . . . . . . . . . . . . . . 10
Location Limits . . . . . . . . . . . . . . . . . . . . . . . . . . . . . . . . . . . . . . . . . . . . . . . . . . . . . . . . . . . . . . . . 10
Remote Condenser Location . . . . . . . . . . . . . . . . . . . . . . . . . . . . . . . . . . . . . . . . . . . . . . . . . . . . . 10
Pre-charged Line Set Routing . . . . . . . . . . . . . . . . . . . . . . . . . . . . . . . . . . . . . . . . . . . . . . . . . . . . . 10
Equivalent Run Calculation Examples . . . . . . . . . . . . . . . . . . . . . . . . . . . . . . . . . . . . . . . . . . . . . . 12
Electrical And Plumbing Requirements . . . . . . . . . . . . . . . . . . . . . . . . . . . . . . . . . . . . . . . . . . . . . . 13
Operation Of The Cnm Series Cuber . . . . . . . . . . . . . . . . . . . . . . . . . . . . . . . . . . . . . . . . . . . . . . . 17
START-UP PROCEDURE . . . . . . . . . . . . . . . . . . . . . . . . . . . . . . . . . . . . . . . . . . . . . . . . . . . . . . . . . . 18
General Maintenance Procedure . . . . . . . . . . . . . . . . . . . . . . . . . . . . . . . . . . . . . . . . . . . . . . . . . . 19
CLEANING INSTRUCTION FOR CORNELIUS CNM SERIES ICE MACHINES . . . . . . . . . . . . . . . . . 20
Cabinet Care . . . . . . . . . . . . . . . . . . . . . . . . . . . . . . . . . . . . . . . . . . . . . . . . . . . . . . . . . . . . . . . . . . 22
Chemicals For Descaling And Sanitizing . . . . . . . . . . . . . . . . . . . . . . . . . . . . . . . . . . . . . . . . . . . . 22
Cleaning Stainless Steel And Aluminum . . . . . . . . . . . . . . . . . . . . . . . . . . . . . . . . . . . . . . . . . . . . . 22
Winterizing Procedures . . . . . . . . . . . . . . . . . . . . . . . . . . . . . . . . . . . . . . . . . . . . . . . . . . . . . . . . . . 23
CNM SERIES ICE MAKER FREQUENTLY ASKED QUESTIONS . . . . . . . . . . . . . . . . . . . . . . . . . . . 24
Sequence Of Operations . . . . . . . . . . . . . . . . . . . . . . . . . . . . . . . . . . . . . . . . . . . . . . . . . . . . . . . . 26
Control Board Features . . . . . . . . . . . . . . . . . . . . . . . . . . . . . . . . . . . . . . . . . . . . . . . . . . . . . . . . . . 40
Board Led Sequence During Operation - Initial Freeze Cycle At Start-up . . . . . . . . . . . . . . . . . . . 42
Board Led Sequence During Operation - Initial Harvest Cycle At Start-up . . . . . . . . . . . . . . . . . . . 43

Board Led Sequence During Operation - Transition From Harvest To Freeze . . . . . . . . . . . . . . . 44
Board Led Sequence During Operation - Bin Full (Curtain Or Stat) . . . . . . . . . . . . . . . . . . . . . . . . 45
Board Led Sequence During Operation - Diagnostics In Freeze Cycle . . . . . . . . . . . . . . . . . . . . . 46
Board Led Sequence During Operation - Diagnostics In Harvest Cycle . . . . . . . . . . . . . . . . . . . . 47
Water Pump . . . . . . . . . . . . . . . . . . . . . . . . . . . . . . . . . . . . . . . . . . . . . . . . . . . . . . . . . . . . . . . . . . 53
Water Distribution Tube . . . . . . . . . . . . . . . . . . . . . . . . . . . . . . . . . . . . . . . . . . . . . . . . . . . . . . . . . 55
Water Inlet Valve . . . . . . . . . . . . . . . . . . . . . . . . . . . . . . . . . . . . . . . . . . . . . . . . . . . . . . . . . . . . . . 57
Purge Valve . . . . . . . . . . . . . . . . . . . . . . . . . . . . . . . . . . . . . . . . . . . . . . . . . . . . . . . . . . . . . . . . . . 58
Harvest Assist Assembly/hot Gas Valve . . . . . . . . . . . . . . . . . . . . . . . . . . . . . . . . . . . . . . . . . . . . . 59
Evaporator Assembly . . . . . . . . . . . . . . . . . . . . . . . . . . . . . . . . . . . . . . . . . . . . . . . . . . . . . . . . . . . 60
High Pressure Cut-out/fan Cycle Control . . . . . . . . . . . . . . . . . . . . . . . . . . . . . . . . . . . . . . . . . . . . 65
High Temp Safety . . . . . . . . . . . . . . . . . . . . . . . . . . . . . . . . . . . . . . . . . . . . . . . . . . . . . . . . . . . . . . 66
Fan Motor . . . . . . . . . . . . . . . . . . . . . . . . . . . . . . . . . . . . . . . . . . . . . . . . . . . . . . . . . . . . . . . . . . . . 66
REFRIGERATION SECTION . . . . . . . . . . . . . . . . . . . . . . . . . . . . . . . . . . . . . . . . . . . . . . . . . . . . . 67
TECHNICAL SPECIFICATIONS . . . . . . . . . . . . . . . . . . . . . . . . . . . . . . . . . . . . . . . . . . . . . . . . . . . 69
WIRING DIAGRAMS . . . . . . . . . . . . . . . . . . . . . . . . . . . . . . . . . . . . . . . . . . . . . . . . . . . . . . . . . . . 70

Installation Guide and Owner’s Manual
© 2019, Cornelius Inc. - 5 - Publication Number: 548000033
SAFETY INSTRUCTIONS
SAFETY OVERVIEW
• Read and follow ALL SAFETY INSTRUCTIONS in this manual and any warning/caution labels on the unit (decals,
labels or laminated cards).
• Read
and understand ALL applicable OSHA (Occupational Safety and Health Administration) safety regulations before
operating this unit.
SAFETY ALERT SYMBOL
!
This is the safety alert symbol. When you see this in the manual or on the unit, be alert to the
potential of personal injury or damage to the unit.
Types of Alerts
Indicates an immediate hazardous situation which if not avoided WILL result in serious injury, death or
equipment damage.
Indicates a potentially hazardous situation which, if not avoided, COULD result in serious injury, death,
or equipment damage.
Indicates a potentially hazardous situation which, if not avoided, MAY result in minor or moderate
injury or equipment damage.
SAFETY TIPS
• Carefully read and follow all safety messages in this manual and safety signs on the unit. - from Rod’s doc
• Kee
p safety signs in good condition and replace missing or damaged items.
• Le
arn how to operate the unit and how to use the controls.
•Do no
t let anyone operate the unit without proper training. This appliance is not intended for use by very young children
or infirm persons without supervision. Young children should be supervised to ensure that they do not play with the
appliance.
• Kee
p your unit in proper working condition and do not allow unauthorized modifications to the unit.
QUALIFIED SERVICE PERSONNEL
Only trained and certified electrical, plumbing and refrigeration technicians should service this unit.
All wiring and plumbing must conform to National and Local Codes. Failure to comply could result in
serious injury, death or equipment damage.
DANGER
!
WARNING
!
CAUTION
!
WARNING
!

Installation Guide and Owner’s Manual
Publication Number: 548000033 - 6 - © 2019, Cornelius Inc.
SAFETY PRECAUTIONS
This unit has been specifically designed to provide protection against personal injury. To ensure continued protection
observe the following:
Disconnect power to the unit before servicing, following all lock out/tag out procedures established
by the user. Verify all the power is off to the unit before any work is performed. Failure to disconnect
the power could result in serious injury, death or equipment damage.
Always be sure to keep area around the unit clean and free of clutter. Failure to keep this area clean
may result in injury or equipment damage.
Shipping And Storage
Before shipping, storing, or relocating the unit, the unit must be sanitized and all sanitizing solution
must be drained from the system. A freezing ambient environment will cause residual sanitizing
solution or water remaining inside the unit to freeze resulting in damage to internal components.
Unit Location
• This unit is not designed for use in outdoor locations.
• The appliance must be placed in a horizontal position.
• Th
e appliance is not suitable for installation in an area where a water jet would be used.
Machine Usage
• This appliance is not intended for use by persons (including children) with reduced physical, sensory
or mental capabilities, or lack of experience and knowledge, unless they have been given
supervision or instruction concerning use of the appliance by a person responsible for their safety.
• Children should be supervised to ensure that they do not play with the appliance.
WARNING
!
CAUTION
!
CAUTION
!
CAUTION
!
CAUTION
!

Installation Guide and Owner’s Manual
© 2019, Cornelius Inc. - 7 - Publication Number: 548000033
FREIGHT CLAIMS
Inspect Promptly
This merchandise has been carefully inspected and packed in accordance with the carrier’s packing specifica-
tions. Responsibility for safe delivery has been assumed by the carrier. If loss or damage occurs, you as the
consignee must file a claim with the carrier and hold the container for carrier’s inspection.
Visible Loss or Damage
Any external evidence of loss or damage must be fully described and noted on your freight bill or express
receipt and signed by the carrier’s agent. The claim should be filed on a form available from the carrier.
Concealed Loss or Damage
If loss or damage does not appear until merchandise has been unpacked, make a written request
for inspection by the carrier within 5 days of the delivery date, then file a claim on a form from the carrier.
FILE CLAIMS WITHOUT DELAY
DO NOT RETURN DAMAGED GOODS TO CORNELIUS.
HOW TO USE THIS MANUAL
Cornelius provides this manual as an aid to the Refrigeration Service Technician for installation and mainte-
nance of the CNM cube ice machines. Do not attempt to perform installation, start-up or maintenance unless you
have read and fully understand this manual.
NOTE: Cornelius ice-makers and dispensers are not approved for outdoor installation.
IMPORTANT: Air and water cooled ice machines are hermetically sealed and contain fluorinated greenhouse
gas R404A Refrigerant (GWP 3922).
For a Service Provider,
Please contact the Cornelius Service Department at 800-238-3600 or tech.se[email protected]
Keep this manual for future reference
The CNM Series Service Parts Manuals are available separately.
WARNING
!
Always disconnect electrical power and shut off water supply whenever maintenance or repairs are per-
formed on the ice machine and related equipment.
CAUTION
!
Always wear protective eye wear whenever maintenance or repairs are performed on the ice machine and
related equipment.
Cornelius Warranty
Every Cornelius ice maker is backed by a warranty that provides both parts and labor coverage. To view the war-
ranty details, register products, or check your warranty status visit the “Warranty and Water Filter Registration”
page on www.ice.cornelius.com

Installation Guide and Owner’s Manual
Publication Number: 548000033 - 8 - © 2019, Cornelius Inc.
INSTALLATION GUIDELINES
For proper operation of the ice machine, the following installation guidelines must be followed by a qualified refriger-
ation technician. Failure to do so may result in loss of production capacity, premature part failures, and may void all
warranties.
Reference the installation parameters prior to installing the machine. Cornelius assumes no responsibility for improp-
erly installed equipment. Excessive time required for service or time for units requiring removal for service of inacces-
sible equipment will be the sole responsibility of the equipment owner.
This appliance is not to be used by persons (including children) with reduced physical, sensory, or mental capabilities,
or lack or experience and knowledge, unless they have been given supervision or instruction. Children shall be super
-
vised and are not to play with the appliance.
AMBIENT OPERATING TEMPERATURE
Minimum operating temperature: 50°F (10°C)
Maximum operating temperature: 100°F (38°C) (60 Hz.), 110°F (43°C) (50 Hz.).
NOTE: Cornelius ice-makers and dispensers are not approved for outdoor installation
INCOMING WATER SUPPLY
WARNING
!
Connect to unheated potable water supply only (see Electrical and Plumbing diagrams for line sizing).
Minimum incoming water temperature: 40°F (4.5°C)
Maximum incoming water temperature:100°F (38°C)
Minimum incoming water pressure: 20 psi (1.4 bar, 0.138MPa)
Maximum incoming water pressure: 80 psi (5.5 bar, 0.552MPa)
NOTE: If water pressure exceeds 80 psi (5.5 bar), a water pressure regulator must be installed.
All water supply lines must be installed per local codes. Use 3/8 inch O.D. minimum on air cooled machines.
On water cooled machines 3/8 inch O.D. minimum tubing must be run to the condenser. The water supply for the
machine can “T” off from the condenser line using 3/8 inch O.D. minimum tubing. Make 2 coils of extra tubing so that
the machine can be pulled away from the wall if service is needed.
NOTE: This equipment must be installed with adequate backflow protection to comply with applicable federal
state and local codes.
WATER FILTRATION/TREATMENT
A water filter system should be installed with the ice machine. Refer to Cornelius water filter specification sheet.
Reverse Osmosis (RO) water can be very acidic and can attack the evaporator and other metal in the ice machine.
Because the RO process removes all minerals and metals from the water it can promote the faster growth of microbial
mold and slime. If RO water is used, it is recommended the water pH is verified to be a neutral 7.0 to minimize the cor
-
rosive effects. Incorrect cleaners, sanitizers, and RO water that does not have a neutral pH could void the machine’s
warranty.
DRAINS
All drain lines must be installed per local codes. Flexible tubing is not recommended. Route bin drain, purge
drain and water condenser drain individually to a floor drain. The use of condensate pumps for draining water is not
recommended. Cornelius assumes no responsibility for improperly installed equipment.

Installation Guide and Owner’s Manual
© 2019, Cornelius Inc. - 9 - Publication Number: 548000033
NOTE: The purge drain fitting is plastic: DO NOT apply heat to purge drain area; DO NOT over-tighten drain
connection.
All drain lines must be installed per local codes. The purge drain should be a minimum of 3/4 inch O.D. tubing. The
condenser drain on water cooled units should be 1/2 inch O.D. minimum. The drain line fittings on Cornelius bins are
3/4 FPT. The bin drain should be a minimum of 3/4 inch O.D. Cold water drains should be insulated to prevent con
-
densation from forming.
CLEARANCE REQUIREMENTS
Self-contained air-cooled ice machines should have a minimum of 6 inches (15cm) of clearance at the rear,
top and sides for proper air circulation and adequate space for serviceability.
Self-contained air-cooled ice machines exhaust air out the top and right side. There are two alternative air
exhaust options. Option A (top exhaust bias): minimum of 6 inches (15cm) of clearance at the rear and top of the
ice machine for proper function at maximum operating conditions. Option B (side exhaust bias): minimum of 6
inches (15cm) of clearance at the rear and right side of the ice machine with a minimum of 3 inches (7.5cm) of
clearance at the top for proper function at maximum operating conditions.
Appropriate space should be allowed for proper serviceability of the machine. Excess time to gain access for
serviceability is not covered under warranty.
STACKING
Cornelius does not endorse stacking ice machines.
DISPENSER APPLICATION
A thermostatic bin control kit should be installed if the CNM Cube ice machine is placed on a dispenser. A bin top
may or may not be required and should be secured to the dispenser.
ELECTRICAL SPECIFICATIONS
Refer to the serial plate at the rear of the ice machine to make sure proper voltage and circuit breaker size have
been supplied. Make sure the machine is on a dedicated circuit. European installations require that the electrical
supply fixed wiring must be provided with a disconnect means having a separation of at least 3mm in all poles.
The ice machines are provided without an electrical cord set and are designed and agency approved to be perma-
nently connected.
NOTE: Units are not approved for GFI outlets.
CAUTION
!
Electrical connection must be made or a cord installed by a qualified electrician or there is danger of an electrical fire.
Adjustments
Level the machine within 1/8 inch in all directions. Check the water in the Water Sump for proper level.
Check the ice bridge for proper thickness and adjust on Float Switch Housing Assembly as needed.
Check the Water Regulating Valve adjustment if water cooled.
Secure the machine on top of the bin or dispenser. Attach the ice machine to the bin with the mounting straps pro-
vided with the bin or dispenser. Insure that the back of the ice machine is flush with the back of the bin. Proper func-
tioning of the Bin Door requires the door, when it is opened, to be in a stable position.
If the ice machine is too far forward on the bin, the opened door may not be stable, resulting in an unexpected clos-
ing of the bin door. If the ice machine is to be mounted on a bin or dispenser other than an Cornelius, refer to the
manufacturers instructions for machine mounting. Cornelius will not be responsible for damage or injury that
results from unexpected closing of the bin door as a result of the ice machine being too far forward on the bin.

Installation Guide and Owner’s Manual
Publication Number: 548000033 - 10 - © 2019, Cornelius Inc.
REMOTE CONDENSER INSTALLATION
For proper operation of the ice machine, the following installation guidelines must be followed. Failure to do so may
result in loss of production capacity, premature part failure, and may void all warranties.
Use the following for planning the placement of the remote condenser relative to the ice machine
LOCATION LIMITS
Remote condenser location must not exceed ANY of the following:
• Maximum rise from the ice machine to the remote condenser is 35 physical feet.
• Maximum drop from the ice machine to the remote condenser is 10 physical feet.
• Physical line set maximum length is 75 ft.
• Calculated line set length maximum is 100 ft.
• Ambient operating temperatures: -20°F (-28.9°C) to 120°F (48.9°C)
Calculation Formula
Drop = dd x 6.6 (dd = drop distance (ft.))
Rise = rd x 1.7 (rd = rise distance (ft.))
Horizontal Run = hd (hd = horizontal distance (ft.))
Calculated Line Length = Drop + Rise + Horizontal Run
NOTE: Configurations that do NOT meet these requirements must receive written authorization from the
manufacturer. This includes multi-pass or rack system remote condensers.
NOTE: Do NOT route a line set that rises, then falls, then rises or a line set that falls, then rises, then falls.
REMOTE CONDENSER LOCATION
Pre-charged line sets are available in 25, 40 or 75 foot length to connect the ice machine to the remote condenser.
Select the best available location, protecting the remote condenser from extremes of dirt, dust and sun. Meet all
applicable building codes. The services of a licensed electrician may be required.
Roof Attachment
Install and attach the remote condenser to the roof of the building using the methods and practices of construction
that conform to the local building codes, including having a roofing contractor secure the remote condenser to the
roof.
Have an electrician connect the remote condenser fan motor wires to the ice machine using the junction box at the
back of the machine.
PRE-CHARGED LINE SET ROUTING
CAUTION
!
Do not connect the pre -charged tubing until all routing and forming of the tubing has been completed. See the
coupling instructions for connecting information.
NOTE: The openings in the building or ceiling or wall, listed in the next step, are the minimum sizes
recommended for passing the refrigerant lines through.
Have a roofing contractor cut a minimum hole for the refrigerant lines of 2.50 inch. Check local codes, a separate
hole may be required for the electrical power to the condenser.

Installation Guide and Owner’s Manual
© 2019, Cornelius Inc. - 11 - Publication Number: 548000033
CAUTION
!
Each set of pre-charged tubing refrigerant lines consists of a 3/8 diameter liquid line and 1/2 inch diameter
discharge line. Both ends of each line have quick connect couplings, one end of the line set has a Schrader valve
connection.
CAUTION
!
DO NOT KINK OR CRIMP REFRIGERANT TUBING WHEN INSTALLING IT.
NOTE: REMOTE LINES MUST NOT RISE AND DROP IN THE SAME RUN.
Route the refrigerant lines through the roof opening. Follow st
raight line routing whenever possible. Any excess tubing
MUST remain inside the building. Spiral the excess length of pre- charged tubing inside the building. Use a horizontal
spiral to avoid any traps in the lines. Have the roofing contractor seal the holes in the roof per local codes.
CAUTION
!
The couplings on the sets of pre-charged lines are self sealing when installed properly. Carefully follow the
instructions in the Remote Condenser manual.
The following remote ice makers incorporate the Mixing Valve in the Condenser. This configuration allows up to a
100 foot calculated remote line set run. Reference the diagram on the next page to calculate the maximum 100 ft.
line set run. Maximum actual line set run is limited to 100 ft. Add 1/4 oz. of refrigerant for each actual foot from 75
to 100 ft. actual line set run.
CNM Machine Model Number Remote Condenser Model Number
CNM0520/530 RCN1001
CNM0525/535 RCN1061
CNM0636 RCN1061
CNM1126 RCN1061
CNM0630R/0830R/1030R RCN1061
CNM0835/0836/0837 RCN1061
CNM1135/1136/1137 RCN1061
NOTE: Verify the CNM machine is compatible with the remote condenser. For more information contact your
Cornelius distributor.

Installation Guide and Owner’s Manual
Publication Number: 548000033 - 12 - © 2019, Cornelius Inc.
EQUIVALENT RUN CALCULATION EXAMPLES
Formula for maximum equivalent run:
(RISE x 1.7) + (DROP x 6.6) + HORIZONTAL RUN = EQUIVALENT RUN
NOTE: NOT TO EXCEED 100 CALCULATED FEET
Figure 1.
Figure 2.

Installation Guide and Owner’s Manual
© 2019, Cornelius Inc. - 13 - Publication Number: 548000033
ELECTRICAL AND PLUMBING REQUIREMENTS
22” CNM SERIES Common Connections
(CNM**22 A*0/5/6)
Air Cooled
NOTE: Air-cooled units require 6”(152mm)
for air intake and exhaust.
A. Ice maker potable water in, 3/8”
FP
T.
B. Ice maker water out, 3/4” FPT.
C. Hole for electrical connections, 7/8”.
D. Electrical junction box, 7/8”.
Figure 3.
(CNM**22* W/R*0/5/6)
Water/Remote Cooled
A. Ice maker potable water in, 3/8”
FPT.
B. Ice maker water out, 3/4” FPT.
C. Hole for electrical connections, 7/8”.
D. Electrical junction box, 7/8” (remote).
E. Condenser water in, 3/8” FPT (water
o
nly). Discharge line, 1/2” male quick
connect coupling for pre -charged line
set (remote only).
F. Condenser water out, 1/2” FPT (water
on
ly).
G. Liquid Line, 3/8” male quick connect
cou
pling for pre -charged line set
(remote only)
Figure 4.

Installation Guide and Owner’s Manual
Publication Number: 548000033 - 14 - © 2019, Cornelius Inc.
30” CNM SERIES Common Connections
(CNM**30 A*0/5/6)
Air Cooled
NOTE: Air-cooled units require 6”(152mm)
for air intake and exhaust.
A. Ice maker potable water in, 3/8”
FPT.
B. Ice maker water out, 3/4” FPT.
C. Hole for electrical connections, 7/8”.
D. Electrical junction box, 7/8”.
Figure 5.
CNM**30* W/R*0/5/6
Water/Remote Cooled
A. Ice maker potable water in, 3/8”
FPT.
B. Ice maker water out, 3/4” FPT.
C. Hole for electrical connections, 7/8”.
D. Electrical junction box, 7/8”
(r
emote).
E. Condenser water in, 3/8” FPT
(wat
er only). Discharge line, 1/2”
male quick connect coupling for pre -
charged line set (remote only).
F. Condenser water out, 1/2” FPT
(wat
er only).
G. Liquid Line, 3/8” male quick connect
coup
ling for pre -charged line set
(remote only).
Figure 6.

Installation Guide and Owner’s Manual
© 2019, Cornelius Inc. - 15 - Publication Number: 548000033
48” CNM SERIES Common Connections
(CNM**48A*6)
Air Cooled
NOTE: Air-cooled units require 6”(152mm) for air intake and exhaust.
A. Ice maker potable water in, 3/8” FPT.
B. Ice maker water out, 3/4” FPT.
C. Hole for electrical connections, 7/8”.
D. Electrical junction box, 7/8”.
Figure 7.

Installation Guide and Owner’s Manual
Publication Number: 548000033 - 16 - © 2019, Cornelius Inc.
CNM**48* W/R*6
Water/Remote Cooled
A. Ice maker potable water in, 3/8” FPT.
B. Ice maker water out, 3/4” FPT.
C. Hole for electrical connections, 7/8”.
D. Electrical junction box, 7/8” (remote).
E. Condenser water in, 3/8” FPT (water only). Discharge line, 1/2” male quick connect coupling for pre -
cha
rged line set (remote only).
F. Condenser water out, 1/2” FPT (water only).
G. Liquid Line, 3/8” male quick connect coupling for pre -charged line set (remote only).
Figure 8.

Installation Guide and Owner’s Manual
© 2019, Cornelius Inc. - 17 - Publication Number: 548000033
OPERATION OF THE CNM SERIES CUBER
Freeze Cycle
A quick press and release of the ON/OFF button will start operation of the unit. The Water Inlet Valve is energized.
Once the HI Water Float is in the open position the Water Inlet is de-energized. The Hot Gas Valve will open for 5 sec-
onds. The Compressor will be energized and 5 seconds later the Hot Gas Valve
will close, starting the Pre-chill of the
Evaporator. The Fan Motor (if applicable) will start once the Fan Control closes. After the Pre-chill ends, the Water
Pump will be energized. Water is now flowing across the Evaporator.
When the water temperature reaches a predetermined factory set
point (near freezing), the unit will perform a 20 sec-
ond shut down of the Water Pump to assist in Anti-Slush of the water in the Sump. At the conclusion of Anti-Slush, the
unit will con
tinue in freeze mode until the Low Water Float is satisfied (closes), indicating the formation of a full slab of
Ice on the Evaporator and will start the harvest Cycle.
Harvest Cycle
The Fan Motor shuts down as the Hot Gas Valve, Purge Valve and Water Inlet Valve are energized. The Water Inlet
Valve will stay energized for additional time after the Purge Valve closes, partially filling the Water Sump.
The unit continues in this mode until the Harvest Assist Assembly
helps push the ice slab from the plate and the con-
tacts in the Curtain Switch open as the slab drops into the bin. If the Curtain Switch remains open after the factory
preset
time in the Harvest Cycle, the unit will shut down on a full bin. If the Curtain opens and closes with the harvest
of the ice, the unit will restart the next freeze cycle.
Proper bridge thickness, when measured at the middle of the slab,
on the CNM units is approximately 3/16” thick for
units less than 400 lbs. and 1/8” for 400 lbs. and above.
CNM CONTROL BOARD
The Board controls the operation of the unit. A series of LED lights show Switch positions and Component operation
to assist the technician in understanding and troubleshooting issues that may arise. See Sequence of Operation pg.
12 for operational information.
Figure 9.

Installation Guide and Owner’s Manual
Publication Number: 548000033 - 18 - © 2019, Cornelius Inc.
START-UP PROCEDURE
NOTE: Before starting the machine, make sure the machine is level within 1/8 inch in all directions, the bin or
dispenser leg height can be adjusted by rotating the leg foot.
After verifying proper voltage, water supply, drains
a
nd breathable air space around the unit, press and
quickly release the ON/OFF button behind the unit
front panel. The indicator light will change from a
solid red to solid blue in color.
Follow the sequence of operation described under
“
Operation of CNM Series Cuber” in this manual.
Check operation of each component through the
cycle as explained in this section.
Access to water level Adjustment
Figure 10.
Bridge Thickness Adjustment
Once the unit has gone through a harvest cycle,
verify the bridge thickness (3/16” thick for units
less than 400 lbs. and 1/8” for 400 lbs. and
above) across the middle of the ice slab on the
second batch produced. The ice thickness can
be changed on the Float Housing by turning the
adjustment clockwise to decrease the bridge
thickness and counter-clockwise to increase the
bridge thickness. You will hear a “click” with
each adjustment. It is recommended adjust-
ments be made one or two “clicks” at a
time.
Lowers Float, increases
bridge thickness
Raises Float; decreases
bridge thickness
Figure 11.
Model Batch Weight
Half Cube Full Cube Grande Cube
CNM0330 2.9-3.15 3.25-3.5
-
CNM0530/630 4.9-5.15 5.5-5.8
-
CNM0830/1030 6.9-7.4 7.9-8.3 8.4-8.8
CNM 1448 13.8-14.8 15.8-14.8 -

Installation Guide and Owner’s Manual
© 2019, Cornelius Inc. - 19 - Publication Number: 548000033
WARNING
!
Electrical shock and/or injury from moving parts inside this machine can cause serious injury. Disconnect
electrical supply to machine prior to performing any adjustments or repairs.
Failure to perform the required maintenance at the frequency specified will void warranty coverage in the
event of a related failure.
GENERAL MAINTENANCE PROCEDURE
To insure economical, trouble free operation of your machine; it is recommended that the following maintenance be
performed every 6 months.
1.Clean the ice-making section per the instructions below. Cleaning should be performed a minimum of every 6
months. Local water conditions may require that cleaning be performed more often.
2.Check ice bridge thickness. See Figure 11.for proper thickness and adjustment procedure.
3.Check water level in Sump. See Figure 11. for proper water level and adjustment procedure.
4.Clean the condenser (air-cooled machines) to ensure unobstructed air flow.
5.Check for leaks of any kind: water, refrigerant, oil, etc.
6.Check the bin control switch (if applicable) for proper adjustment.
7.Check the Water Regulating Valve (water cooled machine) for proper adjustment by measuring the discharge pres-
sure which should be adjusted to maintain 250 psi (17.01 bar/ 1.723 MPa). Adjust the water regulating valve as
required. Water exiting the condenser should be between
100°F (38°C) and 110°F (43°C).
8.Check all electrical connections.
9.Oil the fan motor if the motor has an oil fitting. (Self contained air-cooled models only)
10.Check the water filter (if applicable) and replace if dirty or restricted.
11.Inspect the evaporator water distribution tube to insure even distribution of water across the face of the evaporator.
12.Clean Remote Condenser if applicable.

Installation Guide and Owner’s Manual
Publication Number: 548000033 - 20 - © 2019, Cornelius Inc.
CLEANING INSTRUCTION FOR CORNELIUS CNM
SERIES ICE MACHINES
NOTE: Proper cleaning of an ice machine requires two parts: descaling and sanitizing.
Descaling should
be scheduled at a minimum of twice per year but no more than once per month.
Descaling dissolves the mineral deposits on the evaporator and other surfaces. It removes scale, calcium, lime scale
and other mineral buildup. Cornelius requires a “nickel-safe” cleaner such as Nu-Calgon Nickel-Safe Ice Machine
Cleaner or equivalent diluted per manufacturer’s instructions.
Sanitizing should
be performed after each descaling but no more than once per month.
Sanitizing disinfects the machine and removes microbial growth including mold and slime. Cornelius requires a sani-
tizer such as Nu-Calgon IMS-III or equivalen
t diluted per manufacturer’s instructions.
Please refer to
www.cornelius.com for approved chemical formulations and proper pH balance.
CAUTION
!
Do not mix cleaner (descaler) and sanitizer together.
NOTE: Electrical power will be ON when performing the following cleaning instructions.
1. Remove all ice from storage means to prevent any contamination of ice in storage.
2. Remove the front panel of the ice machine by loosening
the two front panel screws with a Phillips head screw-
driver. Lift panel to remove.
3. Press and hold the POWER button for 3 seconds to initiate a ha
rvest cycle (blue light will begin to flash for Manual
Harvest mode). This ensures there is no ice on the plate and the water is emptied from the sump.
POWER
BUTTON
CLEAN
BUTTON
Figure 12.
4. Once the ice machine has completed its harvest cycle, the POWER light will go to solid red (OFF mode).
5. Remove the upper evaporator cover and leave the lower curtain.
Top
Cover
Evaporator
Cover
(Slide up and
Lift Off)
Figure 13.
/