12
2.
1.
other powerline devices to factory default. The default network name/key is
“HomePlugAV”. The Reset button is located on the bottom of the TPL-310AP.
With a pin or paperclip, press and hold the reset button for 1 second and release it. The
PWR and PL LEDs will turn off and turn back on. (Note: The PL LED will flash in amber.)
To verify connectivity, the PL LED will become solid when the powerline adapters establish
connectivity. The TPL-310AP and your other powerline devices must have the same
network name/key in order to connect to each other.
Note: If you have problems resetting the device, unplug the powerline access point(s) from
the power outlet, wait 15 seconds and plug the access point(s) back into the outlet, then
repeat the reset procedure.
3.
1. Make sure you are not connecting the device into a surge protector or power strip.
Make sure that your Router is connected to the Internet and one of the Router's LAN port is
connected to a TPL-310AP or other powerline device. Check both the powerline device and the
router's network port LED for positive connection status.
Make sure the TCP/IP setting for your computer's network adapter is set to Obtain an IP address
automatically (see the steps below).
I have verified that my Powerline device is connected to my workstation, but I cannot detect
other Powerline devices. What should I do?
Verify that you are using Cat. 5, Cat 5e or Cat. 6 Ethernet network cables from each TPL-310AP
adapter.
2. Verify that the power outlet of the TPL-310AP is plugged into is on the same electrical power
distribution and/or circuit breaker box.
3. If you are still not able to establish connectivity after performing the above steps, please reset
the TPL-310AP
a:
b:
I can detect my Powerline devices on my Powerline network, but I cannot connect to the
Internet. What should I do?
Assuming that the Powerline network is connected to a router:
2.
3.
Windows 7
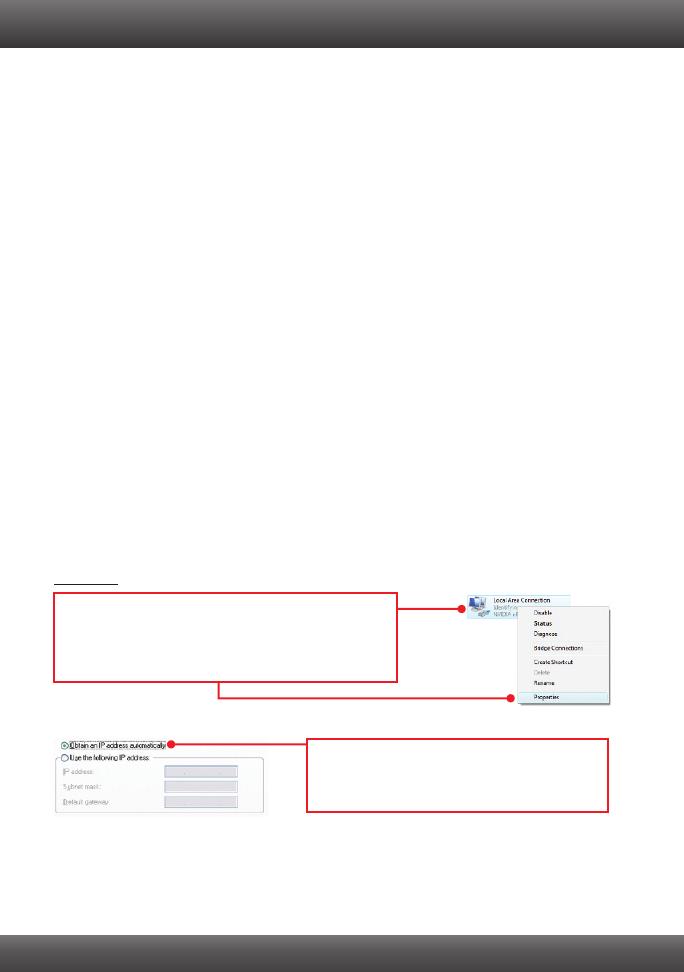
1. Go into the Control Panel, click Network and Internet,
click Network and Sharing Center, click Change
Adapter Settings and then right-click the Local Area
Connection icon and then click Properties.
2. Click Internet Protocol Version 4(TCP/IPv4)
and then click Properties. Then click on Obtain
an IP address automatically.


