Page is loading ...

649 Strike
Center chassis
assembly (8828)
Cover
(8828, 8863)
Center chassis
assembly (8863)
649 Strike (for non-Fire Rated
application) – attach with
(2) strike screws and two
lock washers
Rim cylinder
Center chassis
assembly
(8866)
Cover
(8866)
Mark vertical and horizontal
reference lines on the door
Horizontal
reference line
(C of chassis and
rail assembly)
L
Horizontal
reference line
(C of mounting
holes)
L
Vertical
reference line
(C of chassis)
L
Finished floor
Identify type of installation to
determine location of vertical C
L
Single Door (Non-Fire Rated)
Door
Vertical reference line
(C of chassis)
L
For 649 strike Dim. “A” = 2-1/4"
For 613 strike Dim. “A” = 1-3/4"
For 642 strike Dim. “A” = 1-1/2"
Double Door with 980 Mullion
Door
Door
Vertical reference
line (C of chassis)
L
Single Door (12- Fire Rated Exit Device)
Double Door with 12-980 Mullion
Vertical reference
line (C of chassis)
L
Vertical reference
line (C of chassis)
L
Apply Rail Assembly
Prepare Door
Tape template on inside of door
along reference lines.
Spot and drill holes.
Vertical reference line
(C of chassis)
L
Horizontal reference line
(37-5/8" from finished floor
for 41" height center of
push rail)
1. Attach chassis to
door with (4) #10
mounting screws.
2. Through-bolt outside
trim and cylinder
to chassis, if used.
Mount SARGENT cylinder
with (2) screws thru chassis
Chassis
mounting
screw
Cylinder
mounting
screw
STS
trim
Countersunk
washer
A6703G 3/12
CAUTION!
Before Starting:
– Install mullion if used;
– Door should be fitted and hung;
– Check box label for size of exit device.
Available Stock Lengths:
Length “E”: 32" door, no cut off required.
Can be cut to fit doors down to 24" wide.
Length “F”: 36" door, no cut off required.
Can be cut to fit doors down to 33" wide.
Length “J”: 42" door, no cut off required.
Can be cut to fit doors down to 37" wide.
Length “G”: 48" door, no cut off required.
Can be cut to fit doors down to 43" wide.
For Assistance, contact SARGENT at 800-727-5477 or www.sargentlock.com
IMPORTANT:
Surface of the door where exit device
is applied must be flush.
Clear away any raised projections
to allow exit device to rest on
flat surface of the door.
US Patent No. 268003
Canadian Patent No. RD1981
End
cap
Mounting
plate
“Lock Down Key”
To operate:
Depress pushrail; insert
hex key and turn clockwise.
ATTENTION:
Not furnished with
12- (Fire Rated) exit devices
Rail assembly
• Check box label for rail size and refer to chart
for door sizes. If cutting is not required,
proceed to step “B”.
• If cutting is required, continue
with step “A”.
Determine cut off dimension “X” by
subtracting 1-3/4" from dimension “Y”.
Mark cut off point on mounting rail.
For doors with stile
rail must overlap stile
by 1/2" min.
Vertical reference line
(C of chassis)
L
1-3/4" Min.
Mortise
cylinder
Collar
Cut off on mark
and deburr
Depress arm into rail opening and slide
rail onto chassis.
Level rail and fasten mounting plate.
Level
Mounting plate
Arm
Attach rail assembly to the
chassis with two #8 truss
head machine screws
Place mounting plate tight
against rail and attach it
to the door with three
#10 round head screws
Attach cover to chassis with
four (4) cover screws
Attach end cap to
mounting plate with
two cover screws
649 Strike (for Fire Rated
application) – attach with (2)
outer screws and adjust for
proper position. Drill and tap
thru strike two holes in frame
and fasten strike in place with
(2) inner screws.
Door
Door
Door
649 Strike
649 Strike
649 Strike
Apply Hardware
Apply Covers and Strike
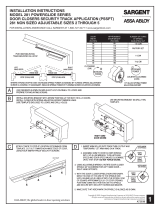
INSTRUCTIONS FOR INSTALLING SARGENT
®
8800 AND 12-8800
SERIES RIM EXIT DEVICES FOR 28, 63 AND 66 FUNCTIONS
Copyright
©
2008, Sargent Manufacturing Company, an ASSA ABLOY Group company. All rights reserved. Reproduction
in whole or in part without the express written permission of Sargent Manufacturing Company is prohibited.

Mark vertical and horizontal
reference lines on the door
Identify type of installation to
determine location or vertical C
L
Horizontal
reference line
(C of chassis and
rail assembly)
L
Horizontal
reference line
(C of mounting
holes)
L
Vertical
reference line
(C of chassis)
L
Prepare Door
Tape template on inside of door
along reference lines.
Spot and drill holes.
Vertical
reference line
(C of chassis)
L
Horizontal reference line
(37-5/8" from finished floor
for 41" height center of
push rail.)
Vertical reference
line (C of chassis)
L
Vertical reference
line (C of chassis)
L
Single Door (Non-Fire Rated)
Double Door with 980 Mullion
Single Door (12- Fire Rated Exit Device)
Double Door with 12-980 Mullion
For 649 strike Dim. “A” = 2-1/4"
For 613 strike Dim. “A” = 1-3/4"
For 642 strike Dim. “A” = 1-1/2"
Door
Door
Vertical reference
line (C of chassis)
L
Door
Door
Door
649 Strike
649 Strike
649 Strike
Apply Hardware
1. Attach chassis to
door with (4) #10
mounting screws.
2. Through-bolt outside
trim and cylinder
to chassis, if used.
Mount SARGENT cylinder
with (2) screws thru chassis
Chassis
mounting
screw
Cylinder
mounting
screw
Apply Covers and Strike
Attach cover to chassis with
four (4) cover screws
Attach end cap to
mounting plate with
two cover screws
649 Strike (for Fire Rated
application) – attach with (2)
outer screws and adjust for
proper position. Drill and tap
thru strike two holes in frame
and fasten strike in place with
(2) inner screws
Apply Rail Assembly
Determine cut off dimension “X” by
subtracting 1-3/4" from dimension “Y”.
Mark cut off point on mounting rail.
For doors with stile
rail must overlap stile
by 1/2" min.
Vertical reference line
(C of chassis)
L
1-3/4" Min.
Cut off on mark
and deburr
Depress arm into rail opening and slide
rail onto chassis.
Level rail and fasten mounting plate.
Arm
Level
Mounting plate
Attach rail assembly to the
chassis with two #8 truss
head machine screws
Place mounting plate tight
against rail and attach it
to the door with three #10
round head screws
• Check box label for rail size and refer
to chart for door sizes. If cutting is not
required, proceed to step “B”.
• If cutting is required, continue
with step “A”.
CAUTION!
Before Starting:
– Install mullion if used;
– Door should be fitted and hung;
– Check box label for size of exit device.
Available Stock Lengths:
Length “E”: 32" door, no cut off required.
Can be cut to fit doors down to 24" wide.
Length “F”: 36" door, no cut off required.
Can be cut to fit doors down to 33" wide.
Length “J”: 42" door, no cut off required.
Can be cut to fit doors down to 37" wide.
Length “G”: 48" door, no cut off required.
Can be cut to fit doors down to 43" wide.
For Assistance, contact SARGENT at 800-727-5477 or www.sargentlock.com
IMPORTANT:
Surface of the door where exit device
is applied must be flush.
Clear away any raised projections
to allow exit device to rest on
flat surface of the door.
US Patent No. 268003
Canadian Patent No. RD1981
Rim cylinder
649 Strike
shown
Center chassis
assembly
Cover
Collar
Mortise
cylinder
Rail assembly
“Lock Down Key”
To operate: Depress pushrail;
insert hex key and turn clockwise.
Mounting
bracket
End
cap
Finished Floor
Vertical reference line
(C of chassis)
L
A6703G 3/12
649 Strike (for non-Fire Rated
application) – attach with
(2) strike screws and two
lock washers
INSTRUCTIONS FOR INSTALLING SARGENT
®
8816 AND 12-8816 SERIES RIM EXIT DEVICES
Copyright
©
2008, Sargent Manufacturing Company, an ASSA ABLOY Group company. All rights reserved. Reproduction
in whole or in part without the express written permission of Sargent Manufacturing Company is prohibited.
/