Page is loading ...

1
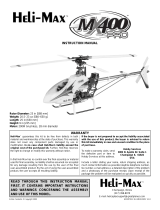
Instruction Manual
Engineered for ultimate performance. Light weight, durable, powerful design featuring
CNC machined anodized aluminum heat sink chassis plate, fiber reinforced composite
structures, solid axle head design. CP features bell/hiller mixing.
CP FP
MOTOR SIZE: 370 370
MAIN ROTOR DIAMETER: 520mm 533mm
LENGTH: 485mm 485mm
WEIGHT: 300-350g 300-350g
Century Helicopter Products
Designed and Developed in USA
Copyright April 2004. All rights reserved.
SPECIFICATIONS
Hummingbird FP
Hummingbird CP

2
Items needed to fly the Hummingbird
1x Radio (4 channels FP, 6 channels CP)
1x Receiver (4 channels FP, 6 channels CP)
2x Micro servos (FP)
3x Micro servos (CP)
1x Century micro gyro
1x Hummingboard mixer/speed control
1x Battery (8.4V or 9.6V)
1x Wall charger (NiMH type)
(CP= Collective Pitch) (FP=Fixed Pitch)
IntroductionIntroduction
IntroductionIntroduction
Introduction
Thank YThank Y
Thank YThank Y
Thank You Fou F
ou Fou F
ou For Choosing The Hummingbirdor Choosing The Hummingbird
or Choosing The Hummingbirdor Choosing The Hummingbird
or Choosing The Hummingbird
ELite Series Helicopter FELite Series Helicopter F
ELite Series Helicopter FELite Series Helicopter F
ELite Series Helicopter From Century!rom Century!
rom Century!rom Century!
rom Century!
Introduction
Congratulations on the purchase of Century Helicopter Product’s new
Hummingbird Elite series helicopter. The Hummingbird Elite is not only ideal
for beginners new to the hobby, but also for the intermediate to expert pilot
looking for the ultimate in micro electric helicopter performance. A simple 4
channel “airplane” radio is all that is necessary to successfully fly the FP
(Fixed Pitch) version. The CP (Collective Pitch) version requires a 6+
channel computer radio that supports 120 degree eCCPM operation. Please
check with your favorite retailer or manufacturer to verify compatibility of your
radio system of choice.
Century Helicopter Products
1740-C Junction Ave.
San Jose, CA 95112
Tel: (408) 451-1155
Fax: (408) 451-1156
Web:www.centuryheli.com
Warning
This radio controlled model is not a toy! It is a precision machine requiring proper assembly and setup to avoid
accidents. It is the responsibility of the owner to operate this product in a safe manner as it can inflict serious injury.
The helicopter is made pre-assembled and will require inspection for construction before your first flight.
As the manufacturer, we assume no liability for the use of this product.
Table of Contents
Table of Contents & Introduction ............................................................2
Required Items and Building Guide for Assembly.................................2
Getting started ..........................................................................................3
Installation and diagnostics for electronics ...........................................4-6
Hummingbird CP Pitch Setup..................................................................7
Radio Installation Battery Mounting and Motor break in.......................8
Blade Tracking, Questions and answers Section ..................................9
Your first Flight .........................................................................................10
Replacement Parts (diagram) ..................................................................11
Replacement Parts and Options..............................................................12
The introduction
Sections
Collective and fixed pitch Collective pitch only Fixed pitch only
RR
RR
Rules Of R/Cules Of R/C
ules Of R/Cules Of R/C
ules Of R/C
-Always turn your transmitter
on before powering the
model.
-Always turn off the model by
disconnecting the helicopter
battery prior to turning off the
transmitter.
-Always start your helicopter
with the throttle in the lowest
position.
-Always perform a pre-flight
inspection for safe operation.
These rules will help prevent
unsafe operation.
RR
RR
Required Itemsequired Items
equired Itemsequired Items
equired Items

3
4
Section 1Section 1
Section 1Section 1
Section 1 YY
YY
Your New Hummingbird Elite Helicopterour New Hummingbird Elite Helicopter
our New Hummingbird Elite Helicopterour New Hummingbird Elite Helicopter
our New Hummingbird Elite Helicopter
GetGet
GetGet
Getting Stting St
ting Stting St
ting Startedarted
artedarted
arted
CHECKING OVER THE MODEL
Before beginning, check the kit contents as shown. This is a good time to check the
“items needed to fly the Hummingbird” section on page 2 and make sure everything
necessary is on hand for assembly.
INITIAL MECHANICAL ADJUSTMENTS
The Hummingbird Elite series flybar and main blades
must be set properly after removing from the package.
1. Slide the flybar until it is centered in the rotor head
having equal length on each side.
2. Tighten the two set screws in the flybar control arms to
secure the flybar. Flybar paddles must be parallel to each
other and the ground when the swashplate is level. Make
sure the bolt head in each paddle faces upwards.
3. Adjust the blade tension on the main rotor grips to be
equal using the supplied allen key. The tightness should
be snug but should also allow the blades to move. Setting
the blades too tight may contribute to vibration.
4. Remove the canopy and set aside. You will not need
the canopy until the end of the setup process.
Before operating the Hummingbird the battery must
be charged. The “Bird Seed” is the recommended
battery for the Hummingbird Elite.
The charger supplied will plug in to any standard
electrical wall outlet in your home. The charge time is
approximately 90 minutes. Frequently check the
battery temperature. The battery should be warm but
not HOT when fully charged.
CNE050
8.4V “Bird Seed”
CNE050A
9.6V “Bird Seed”
(optional)
CNE051
“Bird Seed”
Charger
(110V USA)
CNE051A
“Bird Seed”
Charger
(220V Europe)
CHARGING THE BATTERY
USING ADHESIVES TO SECURE THE MODEL
Check over the landing gear area of the helicopter.
Secure any loose connections using the adhesive of
your choice. Using CA (cyanocrylite) glue is very
effective but difficult to debond for maintainance.
Household white glue, although not as strong, works
well and is easier to dissasemble later.
The canopy mounting posts should be glued to their
mounting brackets to ensure a snug canopy fit.
flybar
paddle
12
ExEx
ExEx
Extrtr
trtr
trasas
asas
as
Both the CP and FP
models are packaged with
an extra tail rotor, antenna
tube, tie wraps, small allen
key, sticky tape and a pitch
setup tool.
Do not leave charging battery unattended. Do not
overcharge. The battery is NiMH and comes partially
charged. Do not completely drain a NiMH battery.
Glue
Only glue paddles
when position is final
Slide
flybar
3

4
1 2 3 4 5 6
Channels
6 5 4 3 2 1
Channels
Section 2Section 2
Section 2Section 2
Section 2 Connection And Diagnostics FConnection And Diagnostics F
Connection And Diagnostics FConnection And Diagnostics F
Connection And Diagnostics For Theor The
or Theor The
or The
Electronic ComponentsElectronic Components
Electronic ComponentsElectronic Components
Electronic Components
TESTING AND PREPARATION OF RADIO EQUIPMENT
PLEASE DON’T SKIP THIS SECTION
Before modifying or installing any radio gear,
please take a few minutes to test everything
as shown. Time spent becoming familiar with
the equipment and testing all the components
can prevent difficulty.
1. Install the crystals into the transmitter and
receiver. Be certain that the channel
frequency matches.
2. Note that all electronics plug into the receiver with the wires as pictured (orange wire faces
receiver label). Follow the diagram for each electronic connection. Once the electronics
system is connected and the transmitter is turned on, follow this step-by-step process to
check your equipment.
ELECTRONIC CONNECTION OVERVIEW
6 5 4 3 2 1
Channels
Throttle Connection
Servo Connections
Ch#1
Aileron Ch#2
Elevator Ch#6
Pitch (CP)
Rudder & Gyro Connections
Motor Connections
1. Turn on the transmitter - Does
the green LED turn on?
2. Plug the “Bird Seed” battery
into your mixer board and wait for
the flashing LEDs on the mixer
board and the gyro to stop
flashing.
IMPORTANT:
All connections shown in
this manual work for
Futaba, Hitec & Century
radio systems. If you
have any other radio
system please consult
your radio instructions
for channel numbering.
(some equipment may
differ in appearance.)
!
IMPORTANT:
If you have the FP and
Century Lightning 4
channel radio please
refer to the wiring
diagram provided with
the radio system.
!
STEP-BY-STEP COMPONENT TEST
3. Some servo arms require widening the hole in the arm in order for them to accept the
Hummingbird’s pushrods using a #55 drill bit [1.34mm or 0.052”].
The gyro helps
the helicopter
maintain rudder
heading. Without
the gyro the
helicopter might
spin out of
control.
The mixer speed controller controls the amount of power
transfered to the main and tail motors in proportion.
Century Micro
Receiver
CN2032
Aileron Servo (ch.1)
CN2023
(move left & right)
Elevator Servo (ch.2)
CN2023
(move front & back)
Bird Seed Battery
7 Cell 8.4V
CNE050
Bird Seed Battery
8 Cell 9.6V
CNE050A (optional)
Micro Gyro
CN2022E
Mixer and speed control Board
CNE052
Main Motor
(ch.3) CNE056
(go up & down)
Tail Motor
(ch.4) CNE019
(turn left & right)
Connect the tail motor and main motor
connectors to the board, note that the
two red wires are beside each other when
connected to the board as marked by
positive and negative indicators.
Collective
Pitch Servo
(ch.6 CP only)
CN2023
(blade pitch)
Gyro: signal faces
signal connection
Note:
Signal (s)
Positive (+)
Negative (-)
MODIFYING THE SERVOS FOR INSTALLATION
1. A long half arm may have to be created by
cutting a full or cross arm.
2. After testing the radio equipment the servos
will be in their center position. Remove the servo
retaining screw and servo wheel. Replace the
wheel with one of the long half arms. See section
3 for the final positions for your version.
This diagram represents the
overall connections for wiring
the Hummingbird Elite
correctly. This diagram
includes the separate
connections pictured above.
There are 2 wires coming from the upper
left corner of the board. The top wire is
marked rudder on the front of the board.
This wire goes into the gyro. Bottom wire
goes to the receiver for the throttle.
1
2
2
1
3
123456
Channels
3. Move the right hand stick on
the transmitter left to right -
does the aileron servo move?
4. Move the right hand stick
forward and back - does the
elevator servo move?
Back of Hummingboard
Front of
Hummingboard

5
Ball LinksBall Links
Ball LinksBall Links
Ball Links
Ball link closed end
Ball link open end with lip
The correct side of the ball
link to mount has a larger
opening than the other side
and also has a lip in the
plastic around the opening.
Servo Arm/Horn/Wheel
Servo Arm Retaining Screw
Servo Output Shaft
Servo Mounting Flange
Servo Case
Servo Lead w/
Connector
Section 2aSection 2a
Section 2aSection 2a
Section 2a ModificaModifica
ModificaModifica
Modification And Diagnostics Of Thetion And Diagnostics Of The
tion And Diagnostics Of Thetion And Diagnostics Of The
tion And Diagnostics Of The
Electronic Components (continued)Electronic Components (continued)
Electronic Components (continued)Electronic Components (continued)
Electronic Components (continued)
MODIFYING THE SERVOS FOR INSTALLATION
4 & 5. Trim both servo mounting flanges from each servo.
6. Cut the protruding portions from the bottom of the servo
case as pictured. This will allow the best fit in the model.
Note that the cut is made on the far end from the servo lead.
7. After modifying the servo it should appear as pictured.
8. Before entering section 3 you will need to remove the
pushrods from the swashplate of the helicopter.
ready to
mount servo
MOUNTING YOUR SERVOS (FP)
1. Insert the pushrod into the hole on
the servo arm farthest from the output
(10-12mm from center).
2. Place servo tape on the mounting
surface before mounting the servo.
3. Note that the elevator servo is
mounted slightly forward (3mm or so).
This will ensure that the arm can move
freely.
4. Once the mounting position of the servo is
determined carefully mount the servo to the mast
tower. If the servo has a label on the same side
that will mount with double sided tape, peel off
the label and clean the surface using rubbing
alcohol.
5. After mounting the servo place the plastic ball
link on the corresponding control ball on the
swashplate. Only use the large opening on the
ball link.
6. There are only 2 servos needed on the FP.
When mounted they should appear as pictured.
90O
angle
Swashplate
Servo horn
Adjustable
pushrod and
ball link
Section 3Section 3
Section 3Section 3
Section 3 Servo and pushrod setup andServo and pushrod setup and
Servo and pushrod setup andServo and pushrod setup and
Servo and pushrod setup and
instinst
instinst
installall
allall
allaa
aa
ation for the FPtion for the FP
tion for the FPtion for the FP
tion for the FP
4
56
4 5 6
The SerThe Ser
The SerThe Ser
The Servovo
vovo
vo
7
5
7. Turn the radio on with all sticks and
trims centered except for throttle. Make
sure the throttle is in the lowest position.
Use servo horns that have a hole 10-
12mm out from the servo pivot center and
place it as pictured (parallel to swashplate
and frame). Verify also that flybar paddles,
swashplate & servo horns are parallel to
each other and also 90 degrees to the
main shaft. You can adjust the lengths of
the pushrods by twisting the ball links
clockwise to shorten the length and
counterclockwise to increse the length.
7
8Carefully remove
ball link from
swashplate ball.
Too much force
may break the
plastic balls.
1 2 3

6
123
Section 3aSection 3a
Section 3aSection 3a
Section 3a Servo InstServo Inst
Servo InstServo Inst
Servo Installall
allall
allaa
aa
ation and pushrodtion and pushrod
tion and pushrodtion and pushrod
tion and pushrod
setup for the CPsetup for the CP
setup for the CPsetup for the CP
setup for the CP
MOUNTING YOUR SERVOS (CP) USE SECTION 4 FOR EXACT MEASUREMENTS
1. Insert the pushrod into the hole on
the servo arm farthest from the output
(10-12mm from center).
2. Place servo tape on the mounting
surface before mounting the servo.
3. Note that the elevator servo is
mounted slightly forward (3mm or so).
This will ensure that the arm can move
freely.
4. If the servo has a label on the same side
that will mount with servo tape, peel off the
label and clean the surface using rubbing
alcohol. Once the mounting position of the
servo is determined carefully mount the servo
to the mast tower.
5. After mounting the servo. Place the plastic
ball link on the corresponding control ball on
the swashplate. Only use the large end of the
tapered opening on the ball link.
6. There are 3 servos needed on the CP.
When mounted they should appear as
pictured.
7. Turn the radio on with all sticks and trims centered. Verify also that
paddles, swashplate & servo horns are parallel to each other and also
90 degrees to the main shaft when all sticks are centered.
Adjust the lengths of the pushrods by twisting the ball links clockwise to
shorten. Twist counter-clockwise to increase the rod length.
8.) The Hummingbird Elite Collective Pitch helicopter uses the eCCPM
control system. This system will require a computer helicopter radio that
supports 120 degree eCCPM. Refer to Page 7 for detailed instructions
on how to use eCCPM.
IMPORTANT:
Refer to Page 7 for
detailed instructions on
how to use the eCCPM
control system.
!
90O
angle
Swashplate
Servo horn
Adjustable
pushrod and
ball link
Aileron
servo
Elevator
servo
Collective
Pitch Servo
8
7
Ball LinksBall Links
Ball LinksBall Links
Ball Links
Ball link closed end
Ball link open end with lip
The correct side of the ball
link to mount has a larger
opening than the other side
and also has a lip in the
plastic around the opening.
Front
Main shaft
Top View
56
4

7
Section 4Section 4
Section 4Section 4
Section 4 eCCPM ReCCPM R
eCCPM ReCCPM R
eCCPM Radio Setup foradio Setup for
adio Setup foradio Setup for
adio Setup for
Hummingbird CP onlHummingbird CP onl
Hummingbird CP onlHummingbird CP onl
Hummingbird CP onlyy
yy
y
Radio Setup Procedure
1. It is best to choose a new model memory (if available) and use the Reset feature to remove any previous settings or mixes.
Remember this usually also returns the radio configuration to single servo.
2. Locate and activate the swashplate mixing for 1200 ccpm (most manufacturers set single servo by default).
3. Return both the aileron and elevator trims and subtrims to neutral along with any hover pitch knobs to neutral.
CP setup:
4. Power on the transmitter and the helicopter without the main or tail motors connected. Center collective stick to 50% and find the
correct servo arm that is closest to 900 degrees (slightly up or down is ok).
5. Watch as the collective stick is moved that all three servo arms move in the same direction. Any servo that is moving in the wrong
direction should be corrected using the servo reverse function for that channel. Continue until all three servos work together to move the
swashplate in the same direction.
6. Watch as the collective stick is raised that the swashplate moves upwards. If it moves downwards, go to the ccpm swashplate menu
and change the default setting to be opposite, for example, if Pitch is set to +60 then change to -60 and retest.
7. While looking from the back of the helicopter, check that when the elevator stick is moved forward that the swashplate tips forward
and when the aileron stick is moved left the swashplate tips left. If the swashplate moves in the wrong direction, change the direction
from the same ccpm swashplate menu. Change from the default value of +60 to -60 and retest.
8. Now that the servos are moving in the correct directions, the servo horn must be trimmed using the internal subtrim feature to position
the arm be 900 degrees to its pushrod (and to the length of the servo), use the subtrim to achieve this angle, be as precise as possible.
9. Carefully remove the three pushrods from the swashplate and verify the length is 25mm from the “z” bend to the center of the ball link.
Remove each servo horn one at a time and drill the last hole (photo) using a #55 drill bit [1.34mm or 0.052”] that located the pushrod at
11-12mm from the center of the servo arm pivot point.
10. Now that the basic radio setup procedure is completed, return to your pitch curve function and restore points 1 & 3 to their default
valves, usually 25% and 75%. Move the collective stick from low to high and watch the swashplate, if the swashplate bends at the low or
high position, reduce the pitch value in the ccpm menu, for example if the value is -60 try -55 and repeat the test. Continue until the
swashplate moves to the limits but does not bend.
11. Move the cyclic (aileron and elevator) sticks to the full horizontal and diagonal positions and see if the swashplate is binding against
the main shaft. If it does, return to the ccpm menu and reduce the value for the servo that is binding. While holding the cyclic stick in the
corner, slowly rotate the rotor head and again watch the swashplate for binding.
Expert Tips:
To make the setup go easier on transmitters with 5 or more programmable points on the pitch curve, assuming that the 5 points
correspond to low stick, point 1, point 2, point 3 and high stick. Set points 1,2,3 to 50% which will create a flat pitch curve in the center
that will allow you to consistently find 50% pitch near mid stick. After servo direction and centering is completed, return points 1 & 3
back to their default values.
For highly aerobatic flying, when the rotor head speed is at 1500rpm or above, bond the flybar paddles in place using cyanoacrylate
glue to the flybar.
Elevator
Aileron
Pitch
CP
Front

8
Battery
brackets
Rubber
band
INSTALLING ELECTRONICS TO YOUR HUMMINGBIRD ELITE
The electronics used to operate the Hummingbird Elite helicopter install with servo tape.
This will securely mount the electronic components to the frame of the helicopter for proper
operation. Be sure that the diagram on page 4 reflects the wiring connections that you
make to the mounted model. (note: the below photos are an example layout)
Servo tape
1. Mount the mixer board. 2. Mount the gyro (mount the gyro with
the word “Century” oriented as pictured). 3. Mount the receiver.
4. Plug in channel 1 for aileron servo. 5. Plug in channel 2 for elevator servo. 6. Plug in channel 3 for throttle (mixer board).
7. Plug mixer rudder lead into gyro
(signal wires must face each other). 8. Plug gyro into channel 4 for rudder. 9. For CP Hummingbird plug 3rd servo
(collective pitch) into channel 6.
MOUNTING THE BATTERY
Section 5Section 5
Section 5Section 5
Section 5 RR
RR
Radio instadio inst
adio instadio inst
adio installall
allall
allaa
aa
ation andtion and
tion andtion and
tion and
baba
baba
batt
tt
ttery mountingtery mounting
tery mountingtery mounting
tery mounting
BREAKING IN THE 370 MOTOR
Items required:
1x cup of water
2x D-cell batteries
1x series 3-volt D cell battery
holder (example: Radio Shack
part number
270-386A)
1x (Optional) female connector
First remove the main motor by
locating and removing the two mounting screws under
the main chassis. Immerse the motor in a cup of water.
Connect the motor to the 3 volt battery holder Red wire
to red wire black wire to black wire. (Tip – a female
connector can be attached to the battery box for quick
connection to the motor). Install batteries and Run
motor for four minutes to a maximum of five minutes.
Remove motor from water immersion and dry. Place
one drop of light oil (CN2024T Tri-Flow oil) on each
brass bushing for lubrication. Reinstall motor checking
carefully for smooth gear mesh.
(This procedure is only required to be performed once
and only on a new motor).
Warning: Breaking in the motor is not “required”
Manufacturer is not responsible for problems related
with motor break-in.
Helpful HintHelpful Hint
Helpful HintHelpful Hint
Helpful Hint
ROUTING THE ANTENNA
To provide the best possible reception for the model, the Hummingbird Elite comes with a plastic tube for
routing the antenna. Put a small hole in one end and pull the antenna all the way through leaving about 2
to 3 inches of slack. Wrap the antenna around the tube. After the antenna is almost completely wrapped
around the plastic tube place a hole at the other end of the tube to secure the end of the antenna. The
Hummingbird Elite series helicopters have brackets in the landing gear for mounting this plastic tube.
12
45
79
The Hummingbird uses a NiMH battery. Both 8.4V and 9.6V Bird Seed batteries will work and fit in
the provided battery brackets using a rubber band.
1. The battery slides back and forth on it’s supports so you can adjust the center of gravity on the
helicopter.
2. To test your results hold the helicopter by the flybar as pictured. Move the batery to have the
helicopter sit level or very slightly nose heavy.
3
6
8
1
2
Place a hole
here using a
thumb tack.
Place a hole
here using a
thumb tack.

9
Section 6Section 6
Section 6Section 6
Section 6 BlBl
BlBl
Blade trade tr
ade trade tr
ade tracking / Q & Aacking / Q & A
acking / Q & Aacking / Q & A
acking / Q & A
ADJUSTING THE BLADE TRACKING
During regular operation the Hummingboard will remain solid green but as the battery starts to run out and the voltage drops the
helicopter will simply descend. At this time it is best to land immediately.
Q:Everything is on and connected. Why won’t the rotors turn?
A: -The throttle trim may be set too high try moving the trim to the lowest point.
-Your gyro may be installed incorrectly make sure the the order of wires is as shown on page 4.
-Your throttle channel may be reversed.
Q:Why does the helicopter spin like a top?
A: -It’s possible that the rudder channel on your radio is reversed or your gyro is installed upside down. Please see page 8 for best
mounting location.
-Check the connections to the receiver to make sure connections are correct. If the problem persists take a look at the direction the
tail motor turns.
-The curved portion of the tail rotor should move forward being the “leading edge”. If this is not the case please check the polarity of
the motor’s connection to the mixer board.
Q: Why is there vibration?
A: -The main blades may be out of track. Refer to the blade tracking information above.
-The main shaft may be bent. This can be difficult to notice when the blades are not moving. A bent main shaft can be caused in a
crash or a hard blade strike.
-Vibration can also result from any loosely connected components such as the battery tray or the landing gear. Make sure to secure
them and be sure to check the frame and flybar every time you crash or have a hard landing as they may need to be repositioned.
Q: Why won’t the helicopter come off of the ground?
A: -Be sure that the gear mesh on the main motor moves smoothly and that the battery is fully charged. Do not fully discharge a NiMH
type battery as it will lose it’s capacity memory.
-If you don’t think it’s the battery it’s possible that slightly damaged blades are reducing the possible lift. If there is a part of the blade
broken off especially near the tip the helicopter may not lift properly.
-Check to make sure nothing is rubbing against the main gear possibly slowing its RPM.
Q: Why is it so difficult to move the helicopter backwards?
A: -The elevator servo may be installed too far to the rear. The servo may have to move forward in its mount so the servo arm will clear
the rear of the frame.
Q: Why does the helicopter operate on its own without my command inputs?
A: -You may be getting hit with interference. RF interference can occur for many reasons. Ordinary household electronics, televisions,
cell phones, microwaves, electric tools and other R/C models can add to the field of interference affecting your model. Try turning off
unnessesary electronics or find an area where there are less electrical disturbances.
Q: Why does the helicopter still move too far forward or backward even after adjusting the servo arm positions and trims?
A: -The helicopter may not have an even center of gravity. You can slide the battery in it’s mounting tray to adjust it’s center of gravity.
-You can also combine your battery weight centering with trims and servo arm positions to get any desired combination.
TROUBLESHOOTING QUESTIONS AND ANSWERS
Tracking Adjustment
1. Tracking refers to trimming the actual pitch of the main rotor blades to be equal. On the first flight, bring the rotor head up to speed
without leaving the ground and look at the side or profile of the rotor disk.
2. Only one rotor blade should be visible, if there are two distinctive blades then the tracking linkage must be changed. Observe which
blade color is lower and carefully remove the ball link on that blade grip and shorten the link by one complete turn.
A
B
Both blades should track in the same line A=B.
2
1

10
Hovering
when all is set, ready and checked, it’s time for the initial flight.
1. Stand behind the model about 10' away.
2. Always watch the nose of the helicopter, move the rudder left and the nose will move left.
3. Start by increasing the throttle slowly until the helicopter rises 2-6 inches off the ground then set it back down.
4. Repeat this process until you become comfortable with the holding the model in the same spot for a few seconds then land it.
After some time at this you can increase the height slightly up to 1 foot (be very carefull not to fly too high) as you are practising taking
off and landing. This is the most basic but required skill for the beginner to learn.
Beyond Hovering
It cannot be stressed enough that mastering the hovering skill is crucial to becoming a good helicopter pilot. As you progress in your
learning, always practise hovering until you are completely comfortable in holding the helicopter in any direction at any altitude.
Perfecting hovering enables you to learn all the types and styles of helicopter flying, forward flight, loops and rolls, 3D (aerobatic flying)
and anything you want to do with your helicopter as it can be set up for beginner through to expert. Lastly, have fun!!
1. After turning the radio on, move each servo separately, looking for unusual or excessive movement.
2. Inspect the main and tail rotor blades for damage. Never fly damaged blades.
3. Inspect the main and tail rotor linkage for play or binding.
4. Turn the main gear in both directions to feel if a problem is developing.
5. Check the electronics connections making sure everything is correct.
Section 6Section 6
Section 6Section 6
Section 6 The first flightThe first flight
The first flightThe first flight
The first flight
BASIC HOVERING
PRE-FLIGHT CHECKLIST
TRIM AND THROTTLE ADJUSTMENTS
(1) Collective & Throttle: Slowly raise the throttle stick, the
helicopter should lift off at half stick. If it tends not to lift off
increase the hover pitch on the radio or increase the throttle
trim. If the helicopter lifts off before mid stick decrease these
settings. (collective present in CP model only.)
(2) Rudder: When the helicopter is ready to take off, make a
correction trim first then use the rudder stick to control the Left
& Right. Note, now is a good time to make a final adjustment
on the gyro.
(3) Elevator: If at hover the helicopter tends to move forward,
move the trim down, if it moves backward move the trim
upwards Use the elevator stick to control the Forward &
Backward.
(4) Roll (Aileron): If at hover the helicopter tends to move left,
move the trim right, if the helicopter moves to the right move
the trim left. Move the Aileron stick to control the slide of the
helicopter to the Right & Left.
All trim adjustments are to allow you to lift the helicopter
straight up and can be made one click or detent at a time
on the radio.
Control Movement - All trimming of the Hummingbird should be done one click or detent of the subtrims at a time until it will rise
without moving left, right, forward or backward at a location without wind. Some tail rotation is normal at lift off until it is hovering. Start
by lifting the Hummingbird 3-6 inches at a time to practice lift off and landing.

11
Section 7Section 7
Section 7Section 7
Section 7 Construction DiagrConstruction Diagr
Construction DiagrConstruction Diagr
Construction Diagramam
amam
am

12
Section 8Section 8
Section 8Section 8
Section 8 ReplRepl
ReplRepl
Replacement Pacement P
acement Pacement P
acement Partsarts
artsarts
arts
CNE204CNE204
CNE204CNE204
CNE204
Main Blades FP
CNE207CNE207
CNE207CNE207
CNE207
Flybar Paddles
CNE206CNE206
CNE206CNE206
CNE206
Flybar
CNE205CNE205
CNE205CNE205
CNE205
Head Block
CNE203CNE203
CNE203CNE203
CNE203
Blade Grips CP
CNE202CNE202
CNE202CNE202
CNE202
Blade Grips FP
CNE208CNE208
CNE208CNE208
CNE208
Seesaw Parts
(covers parts for CP & FP)
CNE209CNE209
CNE209CNE209
CNE209
Head Link Set
(covers parts for CP & FP)
CNE210CNE210
CNE210CNE210
CNE210 CNE211CNE211
CNE211CNE211
CNE211
Swashplate FP
CNE212CNE212
CNE212CNE212
CNE212
Swashplate CP
CNE213CNE213
CNE213CNE213
CNE213
Main Shaft Bearings
CNE214CNE214
CNE214CNE214
CNE214
Mast Tower FP CNE215CNE215
CNE215CNE215
CNE215
Mast Tower CP CNE216CNE216
CNE216CNE216
CNE216
Antirotation Bracket CNE217CNE217
CNE217CNE217
CNE217
Chassis Plate
CNE218CNE218
CNE218CNE218
CNE218
Main Gear
CNE219CNE219
CNE219CNE219
CNE219
Main Shaft & Collar CNE220CNE220
CNE220CNE220
CNE220
Landing Gear Set CNE221CNE221
CNE221CNE221
CNE221
Tail Boom & Gearbox CNE222CNE222
CNE222CNE222
CNE222
Fins & Boom Supports CNE223CNE223
CNE223CNE223
CNE223
Tail Gear & Shaft
CNE224CNE224
CNE224CNE224
CNE224
Tail Rotor Blade CNE225CNE225
CNE225CNE225
CNE225
Canopy CNE226CNE226
CNE226CNE226
CNE226
Battery Tray CNE021CNE021
CNE021CNE021
CNE021
Tail Shaft Bearings
CNE201CNE201
CNE201CNE201
CNE201
Head Axle & Dampeners
CNE227CNE227
CNE227CNE227
CNE227
Semi-Sym Wood
Blades CP
CNE056ACNE056A
CNE056ACNE056A
CNE056A
Main Motor With Gear CNE019CNE019
CNE019CNE019
CNE019
Tail Motor With Gear
CNE023CNE023
CNE023CNE023
CNE023
Servo Tape Tie Wraps &
Rubber Band
OPTIONAL ITEMS AND ACCESSORIES
Hyper Charger *Li-Ion charger required
Li-Ion Batteries
*Charges 7 cell 8.4V ‘Bird Seed’ in 30
minutes. *Not for use with lithium type.
CN2033CN2033
CN2033CN2033
CN2033
CNE057CNE057
CNE057CNE057
CNE057
700mAh 11.1V
CNE057ACNE057A
CNE057ACNE057A
CNE057A
700mAh 7.4V
CNE058CNE058
CNE058CNE058
CNE058
1400mAh 11.1V
Machined Main Rotor
Hub With Head Button
Main Motor
Heat Sink Tail Motor
Heat Sink
CNE061CNE061
CNE061CNE061
CNE061 CNE060CNE060
CNE060CNE060
CNE060
Auto Rotation
Hub & Gear
Lightning Brushless
Main Motor
CNE228CNE228
CNE228CNE228
CNE228
Fully Symetrical Wood
Main Blades
Castle Creations
Brushless Speed Control
CN2022ECN2022E
CN2022ECN2022E
CN2022E
CNE052CNE052
CNE052CNE052
CNE052
CNE051CNE051
CNE051CNE051
CNE051
Micro Gyro
Mixer Control Board
Charger 110V (USA)
CNE051ACNE051A
CNE051ACNE051A
CNE051A
Charger 220V(Europe)
CNE209ACNE209A
CNE209ACNE209A
CNE209A
Swashplate Links CP Mixing Levers & Links
CNE050CNE050
CNE050CNE050
CNE050
8.4V Bird Seed Battery
Bird Seed 9.6V
Battery
CNE050ACNE050A
CNE050ACNE050A
CNE050A
PHX-10PHX-10
PHX-10PHX-10
PHX-10
CNE250CNE250
CNE250CNE250
CNE250
CNE251CNE251
CNE251CNE251
CNE251
CNE252CNE252
CNE252CNE252
CNE252
/