Page is loading ...

Adding VHF reception to Antennas Direct UHF antennas
The C2 VHF reflector kit (C2-V-REF, $19.99 + S&H), as packaged and sold, is an easy bolt-on upgrade
intended for the ClearStream 2 UHF antenna. We’ve found that, with a bit of ingenuity and some basic
mechanical skills, the kit can be adapted for use with most of our UHF ClearStream loop and DB bowtie
antennas to offer much improved VHF reception on these otherwise UHF antenna designs. Some of the
following modifications may involve the use of power tools. Please take appropriate safety precautions
to avoid possible injury.
Generic upgrade
The kit may be made into a simple VHF antenna suitable for combining with any
UHF antenna by using
the following tips
1) Disassemble the kit so as to remove the black wire reflector, and then reassemble.
2) The kit may then be mast-mounted so the dipole element has a clear view of the VHF signals.
3) If necessary replace the attached UHF coaxial cable with a longer piece so as to be able to
combine the existing UHF antenna to the UHF/VHF combiner.
ClearStream 4
The C2v reflector panel may be installed in place of one of the two reflectors. While this mounting
location doesn’t offer an optimal location for the VHF element due to its proximity to the C4 combiner
and cross-bars, it works moderately well for less complicated reception areas. For optimal performance,
mount the VHF element to the mast above or below the C4 as described in the generic instructions
above.
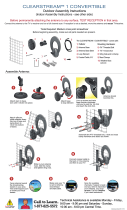
ClearStream 1 and ClearStream1 Convertible
Replace the standard C1/C reflector with the replacement kit. Use the long screw originally provided
with the C1/C to make the mechanical connection. The modified antenna will work slightly better on
UHF than with the original reflector screen. The drawback is that the modified antenna must now be
attached to a mast or mount as it will no longer be able to simply stand on a horizontal surface.
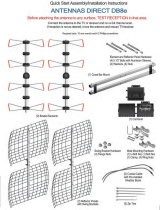
DB8
Use generic instructions above or DB4/DB4e instructions below. Best results will be achieved by
situating the dipole above or below the DB8 rather than behind the reflector screens or adjacent to the
combiner bar assembly.

DB2e, DB2
Use generic guidelines above for ease of conversion. Otherwise: 1) A hole will need to be drilled
through the reflector support to mount the combiner or 2) Use cable ties to secure the combiner to the
reflector.
DB4e, DB4
On the C2-V-REF, remove the plastic cable ties, and then remove the signal combiner and plastic dipole
holder from the reflector (two screws and nuts). Save the screws and re-use them as directed below.
Remove the upper screw that attaches the mast clamp bracket to the rear reflector assembly of the
DB4e. Reinstall one of the longer screws (removed above) through the back of the mast clamp, through
the reflector’s main support, and then place the dipole holder onto the screw. Use one of the nuts to
secure the assembly together. Attach the combiner to one of the two holes in the reflector support
near the middle of the bottom section using the other long screw and secure with a nut. Route the
coaxial cables and secure with UV-resistant cable ties (purchase locally) as shown in photo.
/


