PLEASE KEEP THIS INSTRUCTION MANUAL FOR FUTURE REFERENCE FOR PRODUCT
OPERATION AND MAINTENANCE.
Product Features:
Frameless backlit Mirror
Extra thick frosted LED light
Can be hung vertical or horiztonal
Touch switch on & o
Anti-fog pad
LED Backlit Mirror
Sizes: 48” W x 36”H (horizontal or vertical)
60” W x 35”H (horizontal or vertical)
70” W x 38”H (horizontal or vertical)
Model:
Catella M09AT, Catela-Plus M10AT, Royal M12AT,
Edison M13AT, Swan M14AT, Egret M16AT
For easy installation of your Dyconn Mirror please do the following:
Thoroughly read all instructions before installing the enclosed product.
Read and take note of all safety, care, and maintenance information.
www.dyconnfaucet.com
E491008


Warning: Please read!!
electrician.
2. During installation please make sure the circuit breaker or the
with a live line on.
3. It is recommended to have at least two people available to install
the mirror. Remember to wear proper protective gear during instal-
lation. All mirror glass is non-tempered glass and can result in sharp
shards if the glass is shattered.
wall. Using the proper anchor and screws for securing the unit to the
wall is crucial. Screwing to the stud is recommended.
Feel free to contact us at 855-239-2666 or info@dyconnfaucet.com

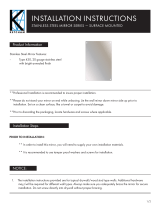
Product Description & Information
Product Features:
• Frameless backlit Mirror
• Extra thick frosted LED light
• Can be hung vertical or horizontal
• Touch switch on & o
• Touch switch dim function
• Anti-fog pad
Package Content:
• LED backlit Mirror
• Screws
• Studs
Lock catch
(Horizontal
hanging only)
Horizontal Mount
Vertical
Mount
Horizontal Mount
Lock catch
(Horizontal
hanging only)
Anti-fog
pad
Touch
switch
Mirror
E491008

Tools you will need:
Phillips Screwdriver
Electronic Driller
Warning: Al
installation and maintenance.
Do not switch on the electrical supply at the mains until the end of
the installation.
Vertical Mount
Back Frame
HandlesLock catch
(Horizontal
hanging only)
Horizontal Mount
Horizontal Mount
1
E491008

Installation Steps
First, decide whether you want to hang your mirror vertically or
horizontally. It is advisable to have one more person help you
install the mirror.
Horizontal Mounting
1.Have one person hold the side of the mirror while another person holds the back
frame. Pull the bottom of the glass out from the back frame and lift up to separate
these two parts.
2. Use an I-Beam level to mount the back frame onto the wall. (use an anchor when
installing on drywall, concrete, or tile surfaces)
connect the neutral (White), hot (black), and ground (copper wire or Green) wire
between the mirror and the junction box.
4. When hanging mirror horizontally, place the mirror’s side on to the mounting
bracket in the metal frame. Then push the bottom of the mirror onto the lock catch
to lock it in.
5. Test the mirror. (Make sure to connect all wire between the inner housing and
touch sensor switch)
Connect three wires:
neutral (White), hot (black),
and ground (copper wire/ Green)
2
E491008

Vertical Mounting
1.Have one person hold the side of the mirror while another person holds the back
frame. Pull the bottom of the glass out from the back frame and lift up to separate
these two parts.
2. Remove the two horizontal mounts on the back of the frame. Line up the holes
on the bracket with the holes placed for the vertical mount and screw the bracket
in. Remove the two catch locks located at the bottom of the metal frame by
removing its screw.
3. Using an I-Beam level, mount the back frame onto the wall. (Use an anchor when
installing on drywall, concrete, or tile surfaces.)
connect the neutral (White), hot (black), and ground (copper wire or Green) wire
between the mirror and the junction box.
5. Mount the mirror vertically by placing the mirror’s side on to the mounting
brackets. Two L hooks on the glass should latch on to the mounts. There is no catch
lock needed for vertical mounting.
6. Test the mirror.
Vertical Mount
HandlesLock catch
(Only when
hung horizontally)
Horizontal Mount
3
E491008

LED Mirror Power Source FAQ
110VAC
Anti-fog
pad
OutputInput
Power Source:
Constant 110AC
power
Output
Dimmer Switch
12V LED Light
110VAC -12VDC
LED
driver
Internal Power Flow Diagram
110VAC
Anti-fog
pad
OutputInput
Power Source:
Ceiling/Vanity
Light controlled by
a non-dimmable
switch on the
wall.
Output
Dimmer Switch
12V LED Light
110VAC -12VDC
LED
driver
110VAC
Anti-fog
pad
OutputInput
Power Source:
Ceiling/Vanity
Light controlled
by a non-
dimmable
swithc On/
the wall.
Output
Bypass built-in
touch dimmer switch
12V LED Light
110VAC -12VDC
LED
driver
110VAC
Anti-fog
pad
OutputInput
Power Source:
Ceiling/Vanity
Light controlled
by a dimmable
swithc On/
the wall.
Output
Dimmer Switch
12V LED Light
110VAC -12VDC
LED
driver
Scenario 1
(Direct Wired)
This is the most common way to
connect the mirror. The LED light
& anti fog pad are both
controlled by the built-in touch
switch on the mirror.
*The LED light is dimmable.
Scenario 2
(Wall Switch)
By doing so, the mirror is now
bridged to the wall switch. In order
to turn on the mirror,the wall
switch needs to be on. The touch
switch can be used to turn on the
LED mirror and anti-fog pad. The
mirror shuts down once the wall
Scenario 3
(Wall Switch – No Dimmer)
By doing so, the mirror’s light and
anti-fog pad are now controlled by
the wall switch. This is without the
need to use the built-in touch
switch. The touch switch is disabled.
The LED and anti fog pad are now
controlled only by the wall switch.
Scenario 4
(Wall Dimmer Switch –
Not Accepted)
This is a scenario that is not
acceptable. There is no work
around for our mirror.
Do not try this way as it will
damage the LED driver.
7
E491008

Introducing Tri-Color Mirrors and Additional Features
In the near future, Dyconn Faucet will be upgrading our mirror products to
include tri-color options and additional features. Full feature list is listed below:
• Tri-color temperature options: 3000K, 4000K and 6400K
• Dimming Capability (except 72 Inch models)
• Onboard memory – If connected to a switch, the mirror will turn on with the settings last used
• Built-in touch Sensor
• Built-in anti-fog (except 12 x 16 size)
Some tri-color options are already available online via resellers and distributors. To easily recognize
which items will include the newest colors and features, you need only to pay attention to the end
character of the model number. If the model number ends with “T” (example: M16AT2432T), then the
products will be tri-color and include the newest features.
Please note the following :
• Bypassing touch sensor: When connecting tri-color models and bypassing the touch sensor to a
non-dimmable wall switch, the mirror will only enable 4000K and will no longer be able to select
between all available color temperatures.
• Tri-color maximum brightness: The mirror can turn to its full brightness output at 4000K and half
of maximum brightness when set at 3000K or 6400K.
4
Model
Description
# of LED Lumens
Watts
strip output
M09AT1216W 12 “x16” 2 Frosted Strips 2 1456 13.44
M09AT2432W 24 “x 32” 2 Frosted Strips 2 2964 27.36
M09AT3036W 30 “x 36” 2 Frosted Strips 2 3328 30.72
M09AT4836W 48 “x 36” 2 Frosted Strips 2 3328 30.72
M09AT6035W 60 “x 35” 2 Frosted Strips 2 3224 29.76
M09AT7238W 72 “x 38” 2 Frosted Strips 2 3536 32.64
M10AT4836W 48 “x 36” 3 Frosted Strips 1 6448 59.52
M10AT6035W 60 “x 35” 3 Frosted Strips 1 6838 63.12
M10AT7238W 72 “x 38” 3 Frosted Strips 1 7956 73.44
All CAT22W (Round) Round 22” LED Frosted Edge 1 1638 15.12
All CAT34W (Round) Round 34” LED Frosted Edge 1 2600 24
All CAT42W (Round) Rou
nd 42” LED Frosted Edge 1 3250 30
All VAT1824W (Oval) 18 “x 24” LED Frosted Edge - Oval 1 1456 13.44
All VAT2535W (Oval) 25 “x 34” LED Frosted Edge - Oval 1 1456 13.44
All VAT3042W (Oval) 30 “x 42” LED Frosted Edge - Oval 1 2184 20.16
All VAT3543W (Oval) 35 “x 43” LED Frosted Edge - Oval 1 2860 26.4
M12/M13/M14-AT1216W 12 “x 16” Frosted LED w/ Silver Edge 1 1040 10.2
M12/M13/M14/M16-AT2432W 24 “x 32” Frosted LED w/ Silver Edge 1 2,200 23.04
M12/M13/M14/M16-AT3036W 30 “x 36” Frosted LED w/ Silver Edge 1 2,604 27.84
M12/M13/M14/M16-AT4836W 48 “x 36” Frosted LED w/ Silver Edge 2 7072 72.96
M12/M13/M14/M16-AT6035W 60 “x 35” Frosted LED w/ Silver Edge 2 8,212 83.52
M12/M13/M14/M16-AT7238W 72 “x 38” Frosted LED w/ Silver Edge 2 9,768 97.92
M13AT1216WC 12
“x 16” Crystal Tri-color LED w/ Silver Edge 1 1,824 21.47
M13AT2432WC 24 “x 32” Crystal Tri-color LED w/ Silver Edge 1 3,856 45.36
M13AT3036WC 30 “x 36” Crystal Tri-color LED w/ Silver Edge 1 4,556 53.6
M13AT4836WC 24 “x 32” Crystal Tri-color LED w/ Silver Edge 1 6,188 72.81
M13AT6035WC 30 “x 36” Crystal Tri-color LED w/ Silver Edge 1 7,185 84.55
M15AT2432W 30 “x 36” Aluminum Frame, Blk Trim, Gold Foil - 3000K 1 3016 27.84
M15AT3036W 30 “x 36” Aluminum Frame, Blk Trim, Gold Foil - 3000K 1 3016 27.84
M15AT2864W 24 “x 68” Aluminum Frame, Blk Trim, Gold Foil - 3000K 1 4368 40.32
All #of LED strip, lumens output, and watts is the same with Bluetooth or TV option.
E491008
Model Chart

Dyconn Faucet LED Mirror 48-inch and above
Frequently Asked Questions & Troubleshooting Guide
5
E491008
1. Can I connect to a dimmer on the wall to dim the mirror (ELV or non ELV dimmer) Answer: Unfortunately, no, the mirror cannot be
connected to an ELV dimmer or traditional non-ELV dimmer switch. All Dyconn Faucet mirrors contain low voltage LEDs and the power
supply will not work properly if the source AC is altered through a wall AC dimmer.
2. Can I connect to a non-dimmer wall switch? Answer: Yes. Our mirrors can connect to a non-dimmable wall switch and use the
control the LED mirror’s light and defogger pad. Please note that bypassing the touch sensor will also result in the loss of dimming
functionality. To do so, please refer to page 7 on the manual for connecting without touch sensor switch.
3. Why does the 72-inch mirror not have a dimming function? Answer: In order to provide the maximum lighting output, all our large
exceeds the capacity of the touch sensor to allow dimming functionality.
4. Why do the large mirrors (48-inch and above) not include the hanging mounting bracket like all other smaller mirrors? Wouldn’t that
be simpler for installer to hang the mirror? Answer: We recommend securing the large mirrors using two wall studs. The mirror is
designed to have the front mirror glass removeable from the main bracket housing and allow the installer be able to secure the metal
housing to the wall studs. Once the metal housing bracket is secured, hang the mirror back onto the housing and connect all wire
connections between the glass and the main housing with the help of two or three people
.
5. How far does the wiring extend from the back of the mirror? Answer: The wiring extends about 24-inches to connect to the j-box
(j-box not included).
6. Where should the installer prepare the J-box for wiring? Answer: All mirror wire connections are located “dead center” of the back
housing, regardless of the size of the mirror.
7. Can the LED Mirror be used as the only light source in the bathroom? According to its lumen output, it seems enough for lighting up
a room? Answer: We do not recommend our mirrors to be the sole light source of any room. The lumens of our LED mirrors might seem
FAQ for Tri-color (model # ending with T or WC)
8. How far does the wiring extend from the back of the mirror? Answer: Yes. The electrician can bypass the touch sensor, having the DC
power from the internal power supply feed directly to the LED strips and let the non-dimmable wall switch to control the mirror. The
down side is that you will have to choose between 3000K or 6400K at half its brightness or 4000K at its full brightness (some wire
soldering might be required).
9. If I connect the mirror to a non-dimmable wall switch can I set the desired light temperature and brightness level? Answer: Yes, the
tri-color models have a memory function allo
wing the last light temperature and brightness setting to be the recalled when you turn on
the wall switch. To do so just turn on the light switch on the wall to initial the power to the mirror, press the touch sensor to select the
light temperature, then press and hold the touch sensor switch to dim to the level you like. Once you have reached your desired light
time you use the mirror, turn on the wall switch and touch one time on the touch sensor and the mirror will turn on with the brightness
and temperature settings you set last time.
Troubleshooting:
1. Right out of the box, we connected the AC power to the back of the mirror to see if the mirror functions properly (before hanging the
mirror), but there is no light and touch sensor doesn’t light up. Why is that? Answer: For the large mirrors (48-inch and up), there are
wires that need to be connected in order for the mirror to function. The mirror glass is designed to be separated from its metal housing
during installation. Installers would be required to disconnect any wiring inside when remo
ving the mirror glass. We ship the mirrors
without connecting these wires inside the unit to make installation more convenient.
2. Why does the touch sensor seem to be unresponsive? Answer
(once per second). Do not tap/touch the mirror sensor switch at a speed faster than twice per second. This will cause the sensor CPU to
malfunction. A circuit breaker reset will be required to reset the touch sensor.
3. Why is my mirror making humming/buzzing noise? Answer: Hearing a low buzzing/humming noise is normal as the touch sensor
defective. 1) The relay for the anti-fog pad 2) the touch sensor or 3) Power supply. Please contact Dyconn Faucet customer service at
855-239-2666 or info@dyconnfaucet.com.
4.
Answer
power supply (AC to DC). Please contact Dyconn Faucet customer service at 855-239-2666 or info@dyconnfaucet.com.

6
E491008
2.
3.
1.
2.
3.
12
LED
+
-
Numbers will correspond to
following tags attached to the wires
Use the following steps to wire mirror to an electrical wall switch
and bypass the touch sensor:
1. Disconnect all connections from the touch sensor (#1-3).
2. Connect the LED Power Supply directly to the 12V DC LED
Connector (#1 and #2 circled in red).
Wall Switch Bypass Instructions

Manufacturer Limited Warranty
All Dyconn Faucet products are manufactured and tested with the highest quality standards and rigorous quality control process. This
warranty is limited to the non-commercial use of Dyconn Faucet products purchased and installed in the United States and Canada.
Dyconn Faucet Brand Limited Warranty on Faucets and Kitchen/Bath Accessories
Dyconn Faucet warrants its faucet products to be free from manufacturing defects in material and workmanship during the normal
non-commercial use for a period of (3) three years for all non-electrical component items and (1) one year for all electronic component
related items (such as, but are not limited to, products like the sensor faucet and bidet toilet) from the initial purchase date by the original
arrants its part and accessory products to be free from manufacturing
defects in material and workmanship during the normal non-commercial use for a period of one (1) year from the initial purchase date by
rranty is non-transferable between homes or owners and only applicable
for residential use. Any commercial or industrial use of Dyconn Faucet products automatically void the warranty. Any warranty claim must
include the original sales receipt as proof of purchase from an Authorized Dealer or Distributor of Dyconn Faucet products.
(Authorized Dealers can be found on the Dyconn Faucet website).
Dyconn Faucet recommends installation of all Dyconn Faucet products by licensed professionals. Dyconn Faucet will not be held
responsible for any damages or product failure due to improper installation, misuse or the failure to adequately utilize a licensed
professional. Proper care and maintenance for all products is s
ure
proper function and a lasting product. Instructions are provided in your manual on the proper care and maintenance of Dyconn
Faucet products.
This warranty will not cover any damages that might be caused b for such
limitations, therefore, this may not apply to all owners).
Any and all warranty claims must include the original sales receipt as proof of purchase from an Authorized Dealer or Distributor of
Dyconn Faucet products. Please contact Dyconn Faucet Support or
Any
product reported to Dyconn Faucet as defective will be repaired or replaced (with a product of equal value) at the company's discretion.
If Dyconn Faucet is not able to replace or repair the product, Dyconn Faucet may elect to refund the original purchase price to the original
purchaser in exchange for the product's return. Dyconn Faucet has full rights to inspect any Dyconn Faucet product reported as defective
prior to repair or replacement. Any repair and replacement costs EXCLUDE shipping, labor for removal or re-installation, and any
consequential or special damages associated with the return, replacement, and installation of your product. To ease the duration and
ss the
product's condition and determine the necessary replacement parts. Replacement parts and warranty claims may be obtained by
contacting us using one of the following methods:
Phone: 1-855-239-2666 (in the U.S. and Canada)
Email: [email protected]
Write to us:
Dyconn Faucet Warranty
382 N. Lemon Avenue #122
Walnut, CA 91789
Dyconn Faucet reserves the right to modify the warranty at any
upersede
warranty conditions that are applicable at the time of the original sale of products in question.
Dyconn Faucet makes no implication that products comply with any or
all local building or plumbing codes. It is the consumer’s responsibility to determine any code compliances when installing and using
Dyconn Faucet products.
Limitations of Warranty:
The warranty shall not apply and be void for incorrect operatin
improper
installation, carelessness, abuse, misuse, misapplication, improper maintenance and alteration of product; damages caused by chemicals,
asualty. Avoid abrasive cleaners, materials, steel wools and harsh chemicals
ation of
chaser of the product. Dyconn Faucet neither installs nor supervises the
installation nor hires contractors for this purpose; consequently, Dyconn Faucet cannot be held responsible for any default breakage, or
damages caused thereby or resulting thereof, either directly or indirectly.
This warranty does not apply to products that have not been installed or operated in accordance with instructions supplied by Dyconn
Faucet and all applicable rules, regulations, and legislation pertaining to such installations.
This warranty does not apply to commercial or industrial applications of Dyconn Faucet products.
Dyconn Faucet is not responsible or liable for personal injuries or deaths to any person for any direct, special, incidental, or consequential
expenses, labor or material charges, or any other cost resulting from the
use of the product or equipment or pertaining to the application of the present warranty, or resulting from the removal or replacement of
any product or element or part covered by this warranty.
In any case, Dyconn Faucet is not liable for any amount over and above the purchase price paid for the product by the original
Cleaning and Care
abrasives and cleaning pads. To clean, use a light, non-abrasive cleaning solution or cleaning polish.
E491008
8
/