Page is loading ...

Manual
Version-E22-07-05

Manual
Speedy
- 2 -
Important Information
General
Before using your ALGE-TIMING device read the complete manual carefully. It is part of the device and
contains important information about installation, safety and its intended use. This manual cannot cov-
er all conceivable applications. For further information or in case of problems that are mentioned not at
all or not sufficiently detailed, please contact your ALGE-TIMING representative. You can find contact
details on our homepage www.alge-timing.com
Safety
Apart from the information of this manual all general safety and accident prevention regulations of the
legislator must be taken into account.
The device must only be used by trained persons. The setting-up and installation must only be exe-
cuted according to the manufacturer’s data.
Intended Use
The device must only be used for its intended applications. Technical modifications and any misuse
are prohibited because of the risks involved! ALGE-TIMING is not liable for damages that are caused by
improper use or incorrect operation.
Power supply
The stated voltage on the type plate must correspond to voltage of the power source. Check all con-
nections and plugs before usage. Damaged connection wires must be replaced immediately by an
authorized electrician. The device must only be connected to an electric supply that has been installed
by an electrician according to IEC 60364-1. Never touch the mains plug with wet hands! Never touch
live parts!
Cleaning
Please clean the outside of the device only with a smooth cloth. Detergents can cause damage. Never
submerge in water, never open or clean with wet cloth. The cleaning must not be carried out by hose
or high-pressure (risk of short circuits or other damage).
Liability Limitations
All technical information, data and information for installation and operation correspond to the latest
status at time of printing and are made in all conscience considering our past experience and
knowledge. Information, pictures and description do not entitle to base any claims. The manufacturer
is not liable for damage due to failure to observe the manual, improper use, incorrect repairs, technical
modifications, use of unauthorized spare parts. Translations are made in all conscience. We assume
no liability for translation mistakes, even if the translation is carried out by us or on our behalf.
Disposal
If a label is placed on the device showing a crossed out dustbin on wheels (see drawing),
the European directive 2002/96/EG applies for this device.
Please get informed about the applicable regulations for separate collection of electrical
and electronical waste in your country and do not dispose of the old devices as house-
hold waste. Correct disposal of old equipment protects the environment and humans
against negative consequences!
Copyright by ALGE-TIMING GmbH
All rights reserved. Any duplication, either in full or in part, requires the prior written consent of the
copyright holder.

Manual
Speedy
- 3 -
TABLE OF CONTENTS
1 General ......................................................................................................................... 4
1.1 Components of the System ..................................................................................... 5
1.2 Setup of the System ................................................................................................ 5
2 Adjustments of the Display Board D-SFxxx-3-E0 ..................................................... 6
2.1 Default Values ........................................................................................................ 6
2.2 Parameters ............................................................................................................. 6
Brightness of Display Board ................................................................................................... 6
Unit of Displayed Speed ......................................................................................................... 7
Display Time ........................................................................................................................... 7
Photocell Distance (1 – 999 m) and .............................................................................. 8
2.2.4.1 Photocell Distance (1 – 99 m) ...................................................................................................... 8
2.2.4.2 Photocell Distance (100 – 900 m) ................................................................................................ 8
Speed Limit and ............................................................................................................ 8
2.2.5.1 Speed Limit – Low........................................................................................................................ 8
2.2.5.2 Speed Limit - High ....................................................................................................................... 8
Measurement Counter ..................................................................................................................... 7
2.2.6.1 Total Measurement-Counter ........................................................................................................ 7
2.2.6.2 Daily Measurement -Counter ....................................................................................................... 7
2.3 Malfunctions ............................................................................................................ 8
Start Photocell Error ..................................................................................................... 8
Finish Photocell Error ................................................................................................... 8
3 Technical Data ............................................................................................................. 9
3.1 Power Supply .......................................................................................................... 9
Mains ............................................................................................................................................... 9
External Battery ............................................................................................................................... 9
3.2 Impulse Channels ................................................................................................. 10
3.3 Interfaces .............................................................................................................. 10
RS232 Interface ............................................................................................................................. 10
RS485 Interface ............................................................................................................................. 10
3.4 Hints ..................................................................................................................... 10

Manual
Speedy
- 4 -
1 General
The Speedy is a device to measure the speed of an object that passes two photocells. The
distance of the photocells is adjustable. The speed is measured by measuring the time be-
tween both photocells and then calculating the speed from distance and time.
It is possible to adjust the unit of the speed choosing km/h, m/s or mph.
The speed measurement works only in one direction. The photocell that is connected to the
green cable end of the cable 172-30 is the first photocell (start of speed measurement) and
the red cable end goes to the second photocell (end of speed measurement).
The cable that connects the photocells must be plugged in at one of the DIN-plugs on the left
side of the display board D-SFXXX-3-E0.
The RS232 and RS485 interfaces are not active for this type of display board.
All banana plugs are out of function for this display!

Manual
Speedy
- 5 -
1.1 Components of the System
• display board with different sizes:
o display D-SF150-3-E0 (figure height 150 mm)
o display D-SF250-3-E0 (figure height 250 mm)
o display D-SF450-3-E0 (figure height 450 mm)
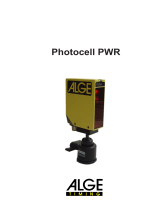
• two photocells PR1a-R
• cable 171-30 (split cable from display board to both photocells, 30 m long)
1.2 Setup of the System

Manual
Speedy
- 6 -
2 Adjustments of the Display Board D-SFxxx-3-E0
2.1 Default Values
When ALGE-TIMING supplies a display board it has the following settings:
Brightness: Default = 09 (full brightness)
Unit: Default = C (km/h with decimals)
Display Time: Default = 0 (it shows the speed until the next measurement)
Distance in meters: Default = 01 (1 m between photocells)
Distance in 100 meters: Default = 0 (only value of SP is relevant)
Speed Limit – Low: Default = 01 (minimum measured speed is 1 km/h)
Speed Limit – High: Default = 00 (maximum measured speed is endless)
In case the parameters are changed or you are not sure about the function of the display
board, you have the possibility to adjust the default settings by pressing the black push but-
ton on the right side for about 15 seconds until the display shows the version number (e.g.
1.2).
2.2 Parameters
It is possible to set parameters in the display board for the optimal usage. In order to select
the parameters you proceed as follows:
• Select the parameters:
o Press the black push button on the right upper corner of the display board for
about four seconds until it shows blinking <br> (Brightness).
o Release the push button.
o To move to the next parameter press the push button again shortly
• Change the parameters:
o Move to the parameter that you want to change as described above
o Wait for four seconds until the display switches from the parameter to the val-
ue of the parameter (value is now blinking)
o Press the push button to adjust the value that you need
o Some parameters have a value that has two digits. In this case you can only
change one digit (value) after the other.
Brightness of Display Board
With this parameter the brightness effects and settings can be adjusted. The first digit is for
the appearance, the second one for the brightness.
• Setting the First Digit
The first digit defines the type of change between time and temperature. The fade-in
changes over with brightness effects from time to temperature.
• Fade-in Off
Fading is deactivated.
• Fade-in On
Fading is activated. (Brightness is immediately switched on and off when changing.)

Manual
Speedy
- 7 -
• Setting the Second Digit
This setting defines the brightness mode of the display.
• Manual setting
The second digit of the brightness setting can be manually adjusted from 0 to 9.
Value 0 is minimum brightness and value 9 is maximum brightness. This setting can
also be carried out via the menu of your TdC8001 or Timy.
• Daytime depending Brightness
Brightness is set automatically, depending on the daytime.
• Light Sensor depending Brightness
With this setting, the brightness depends on the light sensor. If no light sensor is
connected, the brightness is always at maximum.
Measurement Counter
2.2.2.1 Total Measurement-Counter
Shows the total number of measurements of the Speedy.
If you press the button when the counter reading is blinking the counter is reset to zero.
To read the counter just blocks the photocell. After 10 seconds the total counter read-
ing is shown and subsequently the daily counter reading.
2.2.2.2 Daily Measurement -Counter
Shows the daily number of measurements of the Speedy.
If you press the button when the counter reading is blinking the counter is reset to zero.
To read the counter just blocks the photocell. After 10 seconds the total counter read-
ing is shown and subsequently the daily counter reading.
Unit of Displayed Speed
This parameter serves for setting the desired measurement unit.
• Km/h (default)
Shows the measured speed in kilometers per hour with decimals if possible
• Km/h
Shows the measured speed in full kilometers per hour only
• M/s
Shows the measured speed in meters per second
• Mph
Shows the measured speed in miles per hour
• ss.th
Shows the measured time in seconds and hundredths; maximum measuring period
is 99.00 seconds
Display Time
With this value you can set the time in seconds during which the speed is shown on the
display board (e.g. default value 15 means the measured speed is shown for 15 sec-
onds on the display board). If you receive a further speed before the display time is
over, the previous speed is overwritten by the current speed and the display time starts
anew.
Value 0 is displayed until the next measurement overwrites it.

Manual
Speedy
- 8 -
Photocell Distance (1 – 999 m) and
The correct and accurate measuring distance between the photocells is important to
obtain an accurate result of the speed. The shorter the measuring distance is, the more
accurate the adjustment must be.
The system allows you to input a measuring distance between 1 and 999 m. The dis-
tance value is split in two parameters (<SP> for the last two digits (0 to 99 m) and <Sh>
for the first digit (100 to 900 m)). Longer distance means more accurate measurement.
2.2.5.1 Photocell Distance (1 – 99 m)
Input with <SP> the distance between 0 and 99 m. Check always also the parameter
<Sh> to avoid wrong adjustments; e.g. if you want a measuring distance of 1 m, the pa-
rameter <SP> must be 01 and the parameter <Sh> must be 0.
2.2.5.2 Photocell Distance (100 – 900 m)
Input with <Sh> the distance for hundreds meters. For distances below 100 m this val-
ue must be on zero.
Speed Limit and
Often the speed is only of interest within a certain range, e.g. between 30 and 60 km/h.
Other speeds are wrong measurements (e.g. objects that pass the photocell that you
do not want to measure). Therefore, it is possible to adjust a lowest and highest speed
limit. The value you input is always in such a unit that you selected as measuring unit
(e.g. if you display km/h the input is in km/h).
2.2.6.1 Speed Limit – Low
Input the minimum speed that you want to measure.
This value is important in order to have an automatic reset of the speed measurement if
an object only crosses the first photocell, but never reaches the second photocell.
2.2.6.2 Speed Limit - High
Input the maximum speed that you want to measure. Please note that the digit you in-
put is always to be multiplied with the factor 10 (e.g. if you input 1, it means you meas-
ure up to 10).
2.3 Malfunctions
Start Photocell Error
If the start photocell is triggered for more than 10 seconds, the display shows the error
message. It shows alternating and .
Finish Photocell Error
If the finish photocell is triggered for more than 10 seconds, the display shows the error
message. It shows alternating and .

Manual
Speedy
- 9 -
3 Technical Data
Internal button to set the display mode
Amphenol socket:
1 +10 - 12 VAC (external supply)
2 ground
3 no function
E no function
No function for these banana sockets
No function for these banana sockets
90 - 240V, 50-60Hz
1.0A Fuse
3.1 Power Supply
Mains
90 - 240V, 50-60Hz
1.0A Fuse
External Battery
+10 - 12 VAC

Manual
Speedy
- 10 -
3.2 Impulse Channels
1 ...... c0 ......... start channel
2 ...... c1 ......... stop channel
3 ...... GND ..... common ground
4 ...... +Ua ..... power supply out 8-22 VDC
5 ...... +5V ..... stabilized voltage out (+5 VDC)
6 ...... c2 ......... intermediate time channel
3.3 Interfaces
RS232 Interface
No function
RS485 Interface
No function
3.4 Hints
The decimal point is displayed based on the measured speed.
Velocity <10 is displayed with two 2 decimal places
Speed <100 is displayed with one decimal place
Velocity >99.9 is displayed without decimals
This behavior cannot be changed.

Manual
Speedy
- 11 -

Manual
Speedy
- 12 -
Subject to changes
Copyright by
ALGE-TIMING GmbH
Rotkreuzstrasse 39
6890 Lustenau / Austria
www.alge-timing.com
/

