SMART Technologies UX80 (ix2 systems) User guide

Category
Whiteboards
Type
User guide

This manual is also suitable for

SMARTBoard® 800ix2
interactive whiteboard systems
CONFIGURATION AND USERS GUIDE
FOR MODELS SB800ix2 AND SB800ix2-SMP
smarttech.com/kb/170340
FCC warning
This equipment has been tested and found to comply with the limits for a Class A digital device, pursuant to Part 15 of the FCC Rules. These limits are designed to provide
reasonable protection against harmful interference when the equipment is operated in a commercial environment. This equipment generates, uses and can radiate radio
frequency energy and, if not installed and used in accordance with the manufacturer’s instructions, may cause harmful interference to radio communications. Operation of
this equipment in a residential area is likely to cause harmful interference in which case the user will be required to correct the interference at his own expense.
Trademark notice
SMARTBoard, SMARTNotebook, SMARTMeetingPro, SMARTGoWire, DViT, smarttech, the SMART logo and all SMART taglines are trademarks or registered
trademarks of SMARTTechnologiesULC in the U.S. and/or other countries. Microsoft, Windows and InternetExplorer are either registered trademarks or trademarks of
Microsoft Corporation in the U.S. and/or other countries. Blu-ray is a trademark of the Blu-ray Disc Association. All other third-party product and company names may be
trademarks of their respective owners.
Copyright notice
© 2015SMARTTechnologiesULC. All rights reserved. No part of this publication may be reproduced, transmitted, transcribed, stored in a retrieval system or translated
into any language in any form by any means without the prior written consent of SMARTTechnologiesULC. Information in this manual is subject to change without notice
and does not represent a commitment on the part of SMART.
This product and/or use thereof covered by one or more of the following U.S. patents.
www.smarttech.com/patents
08/2015
i smarttech.com/kb/170340
Important information
Before you install and use your SMARTBoard interactive whiteboard system, read and understand
the safety warnings and precautions in this user’s guide and the included important information
document. These safety warnings and precautions describe the safe and correct operation of your
interactive whiteboard system and its accessories, helping you to prevent injuries and equipment
damage. Ensure that your interactive whiteboard system is always being used correctly.
In this document, interactive whiteboard system” refers to the following:
l SMARTBoard 800 series interactive whiteboard
l SMARTUX80 projector
l Accessories and optional equipment
The projector included with your system is designed to work only with certain SMARTBoard
interactive whiteboard models. Contact your authorized SMART reseller (smarttech.com/where) for
more information.
Safety warnings, cautions and important
information
Installation
WARNING
l Failure to follow the installation instructions shipped with your SMART product could result in
personal injury and damage to the product.
l To reduce the risk of fire or electric shock, do not expose the SMART product to rain or
moisture.
l Two people are required to mount your SMART product because it may be too heavy for one
person to safely maneuver.
When you lift your interactive whiteboard, you and your assistant should stand on either side
of the screen, supporting its weight at the bottom while balancing the top with your other
hands.
IMPORTANT INFORMATION
ii smarttech.com/kb/170340
l When mounting the projector boom on a framed or hollow wall, attach the mounting bracket to
a stud to safely support the projector’s weight. If you use only drywall anchors, the drywall can
fail, resulting in possible personal injury, and damage to the product which may not be covered
by your warranty.
l Do not leave cables on the floor where they can be a tripping hazard. If you must run a cable
over the floor, lay it in a flat, straight line and secure it to the floor with tape or a cable
management strip of a contrasting color. Handle cables carefully and avoid excessive
bending.
CAUTION
l Do not operate this unit immediately after moving it from a cold location to a warm location.
When the unit is exposed to such a change in temperature, moisture can condense on the lens
and crucial internal parts. Allow the system to stabilize to room temperature before operation
to prevent possible damage to the unit.
l Do not place the unit in hot locations, such as near heating equipment. Doing so could cause a
malfunction and shorten the life of the projector.
l Avoid setting up and using the SMART product in an area with excessive levels of dust,
humidity and smoke.
l Do not place your SMART product in direct sunlight or near any appliance that generates a
strong magnetic field.
l If you need to lean the interactive whiteboard against a wall before you mount it, make sure it
remains in an upright position, resting on the pen tray brackets, which can sustain the weight
of the interactive whiteboard.
Do not rest the interactive whiteboard on its side or on the top of the frame.
l You must connect the USB cable that came with your SMARTBoard interactive whiteboard to
a computer that has a USB compliant interface and that bears the USB logo. In addition, the
USB source computer must be compliant with CSA/UL/EN 60950 and bear the CE mark and
CSA and/or UL Mark(s) for CSA/UL 60950. This is for operating safety and to avoid damage to
the SMARTBoard interactive whiteboard.
IMPORTANT
IMPORTANT INFORMATION
iii smarttech.com/kb/170340
l The
SMARTBoard 885ix2 and 885ix2-SMP interactive whiteboard system textless
installation guide
is also available online (smarttech.com/kb/170341).
l The SMARTBoard 880i6 and 885i6 interactive whiteboard system textless installation guide
is also available online (smarttech.com/kb/170499).
l Make sure an electrical socket is near your SMART product and remains easily accessible
during use.
l Using your SMART product near a TV or radio could cause interference to the images or
sound. If this happens, move the TV or radio away from the projector.
Operation
WARNING
l If you are using an external audio system, use only the power supply included with that
product. Using the wrong power supply might create a safety hazard or damage the
equipment. If in doubt, refer to the specification sheet for your product to verify the power
supply type.
l Do not climb (or allow children to climb) on a wall- or stand-mounted SMARTBoard interactive
whiteboard.
Do not climb on, hang from or suspend objects from the projector boom.
Climbing on the interactive whiteboard or projector boom could result in personal
injury or product damage.
l To prevent injury or product and property damage, use only the mounting hardware
supplied with your SMARTBoard 800 series interactive whiteboard when you install your
product on drywall. The mounting hardware provided with other interactive whiteboards may
not be strong enough to support the weight of SMARTBoard 800 series interactive
whiteboards.
CAUTION
l Do not block the projector’s ventilation slots and openings.
l If dust or small items prevent pen tray buttons from being pressed or cause constant button
contact, remove the obstructions carefully.
IMPORTANT
l If you have peripheral devices that do not use a 3.5 mm phone jack audio in/out, a DB15 VGA
video input connector or an HDMI® video connector, or that do not use a 4-pin power mini-DIN
IMPORTANT INFORMATION
iv smarttech.com/kb/170340
output connector to provide power to other SMARTproducts, you may need to purchase third-
party adapters.
l Keep your remote control in a safe place because there is no other way to access menu
options.
l Do not disconnect cables from the ECP to connect peripheral devices because you could
disconnect controls for your interactive whiteboard.
l Disconnect the product from its power source when it’s not used for a long period.
Other precautions
If you own a SMARTproduct other than a SMARTBoard interactive whiteboard system, refer to the
installation manual for your product for relevant warnings and maintenance instructions.
Environmental requirements
Before you install your SMARTBoard interactive whiteboard system, review the following
environmental requirements.
Environmental
requirement
Parameter
Operating temperature
l
4F to 95°F (5°C to 35°C) from 0' to 6000' (0 m to 1800 m)
l
4F to 86°F (5°C to 30°C) from 6000' to 9800' (1800 m to 3000 m)
Storage temperature
l
-F to 122°F (-20°C to 5C)
Humidity
l
5% to 95% storage relative humidity, non-condensing
5% to 85% operating relative humidity, non-condensing
Water and fluid
resistance
l
Intended for indoor use only. Doesn’t meet any salt-spray or water
ingress requirements.
l
Don’t pour or spray liquids directly onto your interactive whiteboard,
the projector or any of its sub-components.
Dust
l
Intended for use in office and classroom environments. Not for
industrial use where heavy dust and pollutants can cause
malfunctions or impaired operation. Periodic cleaning is required in
areas with heavier dust. See
Cleaning the projector
on page21 for
information on cleaning the SMARTUX80 projector.
IMPORTANT INFORMATION
v smarttech.com/kb/170340
Environmental
requirement
Parameter
Electrostatic discharge
(ESD)
l
EN61000-4-2 severity level 4 for direct and indirect ESD
l
No malfunction or damage up to 8kV (both polarities) with a 330ohm,
150 pF probe (air discharge)
l
Unmated connectors meet no malfunction or damage up to 4kV (both
polarities) for direct (contact) discharge
Cables
l
All SMARTBoard interactive whiteboard system cables should be
shielded to prevent potential accidents and degraded video and audio
quality.
Conducted and radiated
emissions
l
EN55022/CISPR 22, Class A
vii smarttech.com/kb/170340
Contents
Important information i
Safety warnings, cautions and important information i
Environmental requirements iv
Chapter 1: About your interactive whiteboard system 1
SMARTBoard 800ix2 interactive whiteboard system features 2
Included accessories 5
Chapter 2: Installing your interactive whiteboard system 7
Choosing a location 7
Choosing a height 8
Routing the cables 9
Installing SMART software 9
Setting up the projector image 9
Integrating your system with peripheral devices 12
Chapter 3: Using your interactive whiteboard system 13
Using your projector 13
Using your interactive whiteboard 15
Using the Extended Control Panel (ECP) 15
Using the SMARTGoWire cable 17
Chapter 4: Maintaining your interactive whiteboard system 19
Maintaining your interactive whiteboard 19
Cleaning the projector 21
Focusing and adjusting the projector image 21
Removing and replacing the projector lamp module 21
Resetting the lamp hours 23
Replacing the remote control battery 24
Chapter 5: Troubleshooting your interactive whiteboard system 25
Before you start 26
Determining your interactive whiteboard systems status 29
Resolving interactive whiteboard issues 30
Resolving projector issues 32
Resolving audio issues 37
Resolving network communication issues 38
Resolving ECP issues 39
Accessing the service menu 39
CONTENTS
viii smarttech.com/kb/170340
Transporting your interactive whiteboard system 40
Appendix A: Remotely managing your system through a network interface 41
Web page management 41
Simple Network Management Protocol (SNMP) 49
Crestro RoomView® 49
Appendix B: Remotely managing your system through an RS-232 serial interface 51
Connecting your room control system to the SMARTUX80 projector 52
Projector programming commands 53
Appendix C: Adjusting projector settings 67
Appendix D: Integrating other devices 75
Video format 75
Connecting peripheral sources and outputs 78
Appendix E: Remote control code definitions 81
Appendix F: Hardware environmental compliance 83
Waste Electrical and Electronic Equipment and Battery regulations (WEEE and
BatteryDirectives) 83
Batteries 83
Mercury 83
More information 83
Index 85
Chapter 1
1 smarttech.com/kb/170340
Chapter 1: About your interactive whiteboard
system
SMARTBoard 800ix2 interactive whiteboard system features 2
SMARTBoard 800 series interactive whiteboard 2
SMARTUX80 projector 3
Extended Control Panel (ECP) 4
Included accessories 5
Remote control 5
Pens 5
Eraser 5
SMARTBoard-SMP interactive whiteboard system accessories 5
SMARTGoWire auto-launch cable 5
CAT 5 USB extender 6
Hardware mounting kit 6
Your SMARTBoard interactive whiteboard system combines the following components:
l SMARTBoard 800 series interactive whiteboard
l SMARTUX80 projector
l Accessories and optional equipment
This chapter describes the features of your interactive whiteboard and provides information about
product parts and accessories.
CHAPTER 1
ABOUT YOUR INTERACTIVE WHITEBOARD SYSTEM
2 smarttech.com/kb/170340
SMARTBoard 800ix2 interactive whiteboard
system features
Your SMARTBoard 800ix2 interactive whiteboard
system uses the WXGA (16:10) ultra-short-throw,
high-offset SMARTUX80 projector. It delivers high-
definition, high performance interactivity that is virtually
shadow--free and glare--free.
The modular and expandable hardware and software
architecture of your interactive whiteboard system
enables you to do everything you can do at your
computer—open and close applications, meet with
others, create new documents or edit existing ones, visit
websites, play and manipulate video clips and more—just
by touching the interactive surface. Two users can also
draw on the interactive surface at the same time, and
you can use an array of gestures within applications.
The projector also supports video and audio connections from a variety of devices, including DVD
and Blu-ray™ players, document cameras, and other high-definition sources, and can project media
from these sources onto the interactive screen.
When you use SMART software with your SMARTBoard 800ix2 interactive whiteboard system, you
can write over any application in digital ink using a pen tray pen or your finger, and then save these
notes for future reference and distribution.
SMARTBoard 800 series interactive whiteboard
Your SMARTBoard 800 series interactive whiteboard, featuring SMART’s proprietary DViT®
(DigitalVisionTouch) technology, is the most intuitive touch-sensitive front projection interactive
whiteboard in the world.
The SMARTBoard 800 series interactive whiteboard performs best with the SMARTUX80 projector
because of its exceptional color performance, aspect ratio, input response and short-throw image
distance.
CHAPTER 1
ABOUT YOUR INTERACTIVE WHITEBOARD SYSTEM
3 smarttech.com/kb/170340
Other features of your interactive whiteboard include:
l A modular pen tray that automatically detects
when you pick up a pen tray pen or the eraser
l Pen tray buttons that activate the pens colors
and the on-screen keyboard, right-click,
Orientation and Help functions
l A durable hard-coated surface that is optimized
for projection and easily cleaned
l A security cable lock feature that enables you to
lock your interactive whiteboard to help safeguard it from theft
For more information about your SMARTBoard interactive whiteboard, see the
SMARTBoard 800
series interactive whiteboard user’s guide
(smarttech.com/kb/144817).
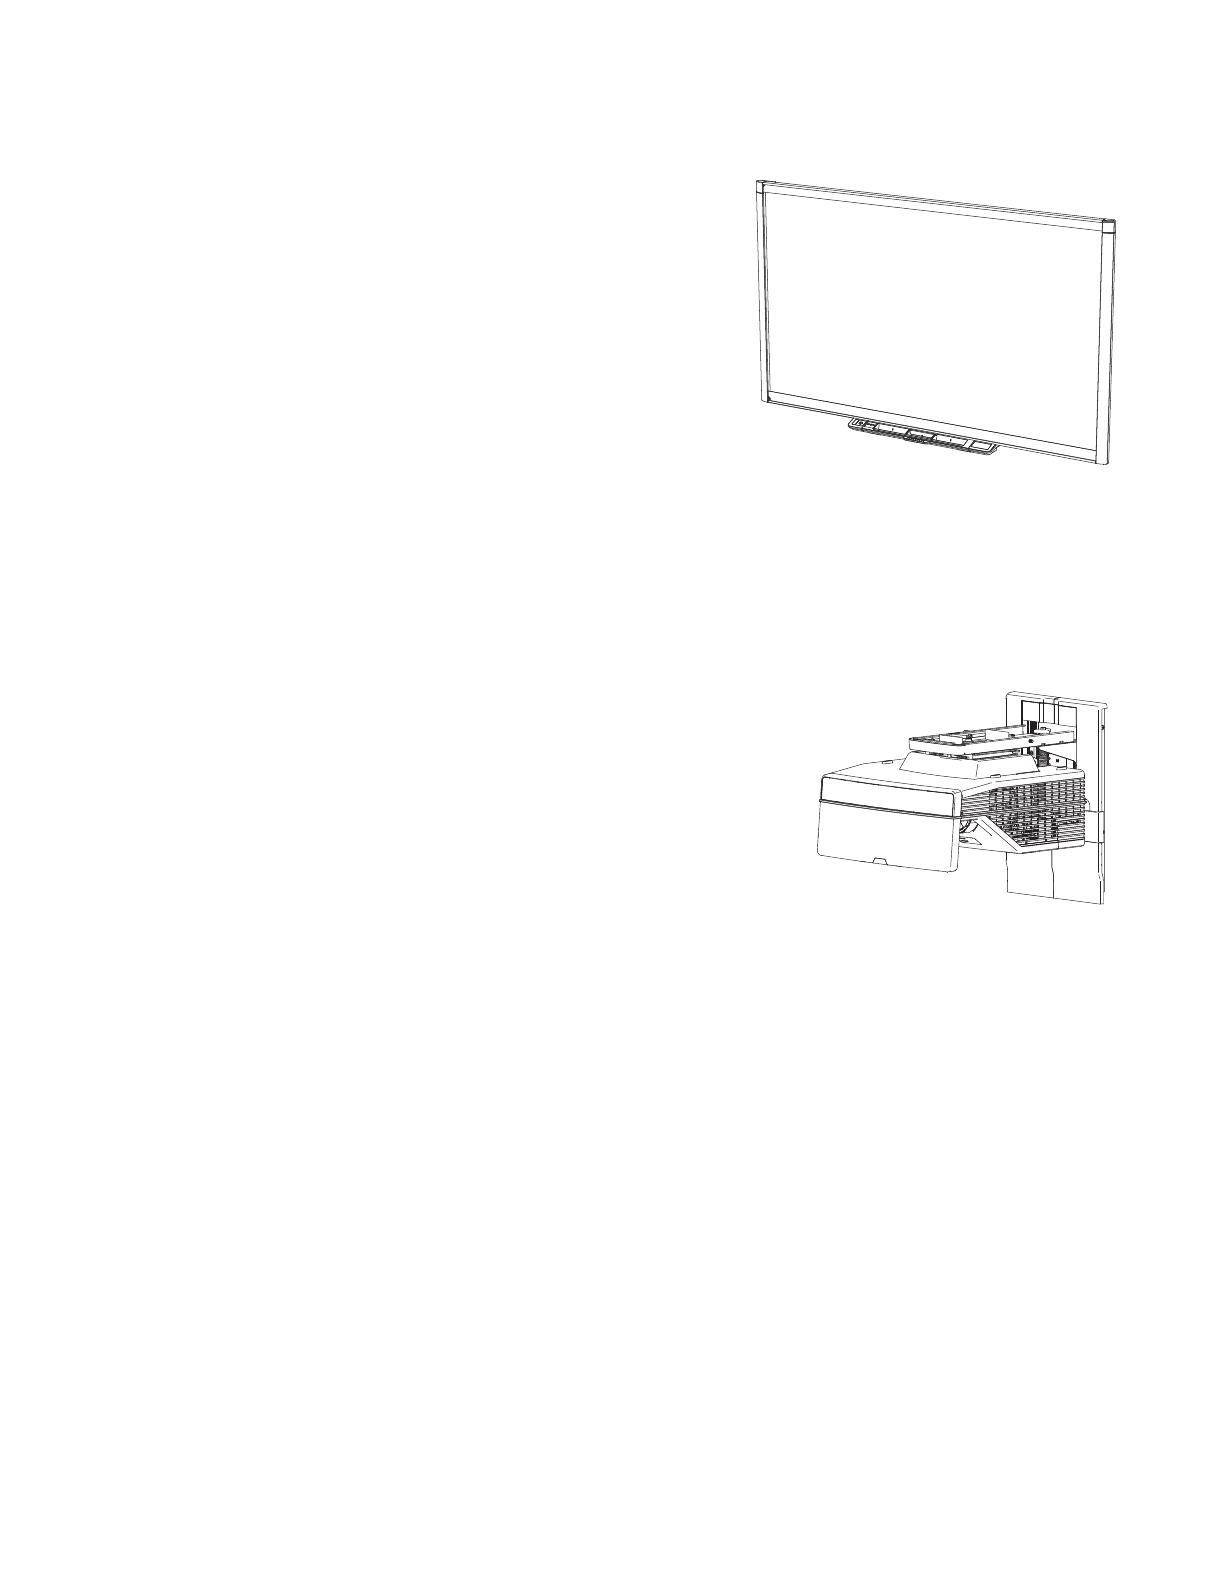
SMARTUX80 projector
The SMARTUX80 projector system includes an
ultra-short-throw projector for use with SMARTBoard
interactive whiteboards and a sturdy support system ideal for
corporate and classroom environments.
The features of the projector system include the following:
l A wall-mounted, high-offset SMARTUX80 projector
engine that uses single chip DLP® technology by
TexasInstruments™, providing BrilliantColor performance, High Contrast, and Gamma 2.1
correction with Bright Classroom, Dark Classroom, sRGB, User and SMART Presentation
modes
l 16:10 aspect ratio
l 3600 ANSI lumens (typical)
l PAL, PAL-N, PAL-M, NTSC, NTSC 4.43, SDTV (480i/p and 576i/p), HDTV (1080p) video
system compatibility
l Native 1280 × 800 resolution
l AppleMacintosh, iMac and VESA® RGB video format standard compatibility
l Remote management via network through an RJ45 cable
OR
Remote management via a serial RS-232 interface
CHAPTER 1
ABOUT YOUR INTERACTIVE WHITEBOARD SYSTEM
4 smarttech.com/kb/170340
l Connectivity for a second SMARTUX80 projector in a dual interactive whiteboard system
l Self-protection timer for a hot re-strike of the projector lamp
l Protected cable routing through the projector housing and a cable cover that prevent tampering
and clutter
l Secure mounting and installation system that includes a projector padlock loop
l An internal speaker
l Templates and instructions for positioning the system safely
Your SMARTUX80 projector connection panel has the following connections:
l 3.5 mm phone jack audio input connector
l 3.5 mm phone jack audio output connector
l DB15F (DE-15F) RGB VGA video input connector
l DB9F (DE-9F) RS-232 connector
l HDMI 1In input connector
l HDMI 2 In input connector
l Power
l USBB connector for service access
l RJ45 (8P8C modular) connector for local area network connections
l RJ45 (8P8C modular) connector for dual interactive whiteboard systems
l 7-pin mini-DIN connector
l 4-pin power-DIN 5V/2A output connector
Extended Control Panel (ECP)
Your projector system ECP attaches to the interactive whiteboard
pen tray. The ECP features controls for power, source selection and
volume adjustment, as well as a USB A receptacle for USB drives.
CHAPTER 1
ABOUT YOUR INTERACTIVE WHITEBOARD SYSTEM
5 smarttech.com/kb/170340
Included accessories
The following accessories are included with your interactive whiteboard system.
Remote control
The remote control enables you to control the system and set up your projector. Use the
remote control to access menu options, system information and input selection options.
Pens
There are two pens included with your interactive whiteboard.
Pick up a pen and press one of the four color buttons on the pen
tray (black, red, green or blue) to select the color of digital ink you
write on the interactive whiteboard.
IMPORTANT
Do not substitute the pens with other items, such as dry-erase markers, if Touch Recognition is
enabled. (Touch Recognition enables you to pick up a pen tray pen, and then write, select or erase
without replacing the pen.)
Eraser
The eraser resembles a rectangular chalkboard eraser. You can use a
substitute object, as long as it has a similar shape, reflects infrared light
and doesn’t scratch or mark the interactive whiteboard surface.
SMARTBoard-SMP interactive whiteboard system accessories
The following accessories are included with SMARTBoard-SMP interactive whiteboard systems.
SMARTGoWire auto-launch cable
The SMARTGoWireauto-launch cable is a USB to USB
connection that enables you to use SMARTMeetingPro
PE software on computers where the software is not
installed.
CHAPTER 1
ABOUT YOUR INTERACTIVE WHITEBOARD SYSTEM
6 smarttech.com/kb/170340
IMPORTANT
Ensure that Autoplay is enabled on your computer before you connect the cable. See the
SMARTSupport website (smarttech.com/support) for additional information.
If you are using a laptop that doesn’t have SMARTMeetingPro PE software installed, you can
connect the laptop to the interactive whiteboard using your SMARTGoWire cable. The
SMARTBoard icon appears in the notification area on your laptop once you connect the cable.
CAT 5 USB extender
The CAT 5 USB extender (Part No.
SBX800-CAT5-XT) enables you to connect
your interactive whiteboard to a computer up
to 50' (15 m) away using a Cat5, Cat5e or
Cat6 cable (not included).
You can add a variety of accessories to your interactive whiteboard to best meet your specific needs.
Purchase these items from your authorized SMART reseller (smarttech.com/where).
For more information on accessories, go to smarttech.com/accessories.
Hardware mounting kit
You can order a hardware mounting kit from your authorized SMART reseller (smarttech.com/where).
It contains an assortment of screws and wall anchors for several different wall types (see
smarttech.com/kb/160505).
Chapter 2
7 smarttech.com/kb/170340
Chapter 2: Installing your interactive
whiteboard system
Choosing a location 7
Choosing a height 8
Routing the cables 9
Installing SMART software 9
Setting up the projector image 9
Focusing the image 10
Aligning the image 10
Projector connection diagram 11
Integrating your system with peripheral devices 12
Consult the SMARTBoard interactive whiteboard system installation document included with your
product for instructions on how to install and secure your system.
IMPORTANT
This chapter provides additional considerations and details for installing your interactive whiteboard
system.
Choosing a location
Choose a location for your interactive whiteboard system that’s far from bright light sources, such as
windows and strong overhead lighting. IR lighting can cause issues with the performance of the
cameras and can lead to unintentional or missed touches.
Select a wall with a flat, regular surface and sufficient clearance to accommodate your interactive
whiteboard system. Install the projector and your interactive whiteboard on the same flat surface. For
best presentation alignment, mount your interactive whiteboard system in a location that’s central to
your audiences viewing direction.
For mobile or adjustable installation options, contact your authorized SMART reseller.
CHAPTER 2
INSTALLING YOUR INTERACTIVE WHITEBOARD SYSTEM
8 smarttech.com/kb/170340
WARNING
Refer to your interactive whiteboard system’s specifications (available at smarttech.com/support)
for its weight. Check your local building codes to ensure that your wall can support this weight, and
use appropriate mounting hardware for your wall type.
CAUTION
If you’re replacing a SMARTBoard 500 or 600 series interactive whiteboard with the SMARTBoard
800 series interactive whiteboard on drywall, you must remove the wall-mount bracket and
mounting hardware, and then install all the mounting hardware and brackets supplied with your
SMARTBoard 800 series interactive whiteboard instead.
To help ensure that your interactive whiteboard is mounted correctly, make sure the colors of the
wall-mount hanger on the back of the interactive whiteboard and the wall-mount bracket are the same.
Choosing a height
SMART includes a mounting template with each interactive whiteboard system. If you lose this
template, contact your authorized SMART reseller. Using this template ensures that you can do the
following:
l Mount the projector at a safe height for head space clearance, while maintaining enough space
for airflow and installation access above the unit.
l Position the projector at the correct height above your interactive whiteboard to align the
projected image with the touch screen.
Dimensions on the template recommend a distance from the floor suitable for adults of average
height. You should consider the general height of your user community when you choose a location
for your interactive whiteboard.
CHAPTER 2
INSTALLING YOUR INTERACTIVE WHITEBOARD SYSTEM
9 smarttech.com/kb/170340
Routing the cables
When connecting cables from the SMARTUX80 projector to your interactive whiteboard, make sure
that all cables pass between the two interactive whiteboard wall-mounting brackets and that the
cables don’t rest on the wall-mounting brackets.
Installing SMART software
You must install SMARTsoftware, such as SMARTMeetingPro® software or SMARTNotebook®
collaborative learning software on the computer connected to your interactive whiteboard system to
access all of its features.
Download SMARTsoftware from smarttech.com/software. These web pages list the minimum
hardware requirements for each software version. If SMART software is already installed on your
computer, take this opportunity to upgrade your software to ensure compatibility.
Setting up the projector image
You must focus the projected image, and then align the projected image.
CHAPTER 2
INSTALLING YOUR INTERACTIVE WHITEBOARD SYSTEM
10 smarttech.com/kb/170340
Focusing the image
Use the focus lever on the bottom of the SMARTUX80 projector to focus the projected image.
To focus and adjust the image
Turn the focus lever clockwise or counterclockwise until the image is in focus.
Aligning the image
Refer to these notes when aligning the projected image as described in the included
SMARTBoard
880ix2 and 885ix2-SMP interactive whiteboard system textless installation guide
(smarttech.com/kb/170341).
CAUTION
Never touch the lens or the mirror with your hands or a brush. This can disturb the focus or quality of
image that your projector displays.
The projector’s image alignment screen appears when you start your projector the first time, or you
can access it from the startup screen menu any time.
  • Page 1 1
  • Page 2 2
  • Page 3 3
  • Page 4 4
  • Page 5 5
  • Page 6 6
  • Page 7 7
  • Page 8 8
  • Page 9 9
  • Page 10 10
  • Page 11 11
  • Page 12 12
  • Page 13 13
  • Page 14 14
  • Page 15 15
  • Page 16 16
  • Page 17 17
  • Page 18 18
  • Page 19 19
  • Page 20 20
  • Page 21 21
  • Page 22 22
  • Page 23 23
  • Page 24 24
  • Page 25 25
  • Page 26 26
  • Page 27 27
  • Page 28 28
  • Page 29 29
  • Page 30 30
  • Page 31 31
  • Page 32 32
  • Page 33 33
  • Page 34 34
  • Page 35 35
  • Page 36 36
  • Page 37 37
  • Page 38 38
  • Page 39 39
  • Page 40 40
  • Page 41 41
  • Page 42 42
  • Page 43 43
  • Page 44 44
  • Page 45 45
  • Page 46 46
  • Page 47 47
  • Page 48 48
  • Page 49 49
  • Page 50 50
  • Page 51 51
  • Page 52 52
  • Page 53 53
  • Page 54 54
  • Page 55 55
  • Page 56 56
  • Page 57 57
  • Page 58 58
  • Page 59 59
  • Page 60 60
  • Page 61 61
  • Page 62 62
  • Page 63 63
  • Page 64 64
  • Page 65 65
  • Page 66 66
  • Page 67 67
  • Page 68 68
  • Page 69 69
  • Page 70 70
  • Page 71 71
  • Page 72 72
  • Page 73 73
  • Page 74 74
  • Page 75 75
  • Page 76 76
  • Page 77 77
  • Page 78 78
  • Page 79 79
  • Page 80 80
  • Page 81 81
  • Page 82 82
  • Page 83 83
  • Page 84 84
  • Page 85 85
  • Page 86 86
  • Page 87 87
  • Page 88 88
  • Page 89 89
  • Page 90 90
  • Page 91 91
  • Page 92 92
  • Page 93 93
  • Page 94 94
  • Page 95 95
  • Page 96 96
  • Page 97 97
  • Page 98 98
  • Page 99 99
  • Page 100 100

SMART Technologies UX80 (ix2 systems) User guide

Category
Whiteboards
Type
User guide
This manual is also suitable for

Ask a question and I''ll find the answer in the document

Finding information in a document is now easier with AI