Page is loading ...


smarttech.com/kb/144817
Learn more
This guide and other resources for SMARTBoard 800 series interactive
whiteboards are available in the Support section of the SMARTwebsite
(smarttech.com/support). Scan this QRcode to view these resources on your
mobile device.
FCC warning
This equipment has been tested and found to comply with the limits for a Class A digital device, pursuant to Part 15 of the FCC Rules. These limits are designed to
provide reasonable protection against harmful interference when the equipment is operated in a commercial environment. This equipment generates, uses and
can radiate radio frequency energy and, if not installed and used in accordance with the manufacturer’s instructions, may cause harmful interference to radio
communications. Operation of this equipment in a residential area is likely to cause harmful interference in which case the user will be required to correct the
interference at his own expense.
Trademark notice
SMARTBoard, DViT, SMARTNotebook, SMARTMeetingPro, SMARTInk, smarttech, the SMART logo and all SMART taglines are trademarks or registered
trademarks of SMARTTechnologiesULC in the U.S. and/or other countries. Microsoft, Excel, PowerPoint, Windows and WindowsVista are either registered
trademarks or trademarks of Microsoft Corporation in the U.S. and/or other countries. Mac, OSX and Finder are registered trademarks of Apple, Inc., registered
in the U.S. and other countries. All other third-party product and company names may be trademarks of their respective owners.
Copyright notice
© 2011—2019. All rights reserved. No part of this publication may be reproduced, transmitted, transcribed, stored in a retrieval system or translated into any
language in any form by any means without the prior written consent of SMARTTechnologiesULC. Information in this manual is subject to change without notice and
does not represent a commitment on the part of SMART.
Portions of the software that ships with this product are copyrighted by Intel Corporation.
This product and/or use thereof covered by one or more of the following U.S. patents: smarttech.com/patents. Other patents pending.
October 24, 2019

i smarttech.com/kb/144817
Important information
Before you install and use the SMARTBoard® 800 series interactive whiteboard, read and
understand the safety warnings and precautions in this guide. These safety warnings and
precautions describe the safe and correct operation of the interactive whiteboard and its
accessories, helping you to prevent injuries and equipment damage. Ensure that the interactive
whiteboard system is always being used correctly.
NOTE
In this document, the term “interactive whiteboard” refers to the interactive whiteboard and its
accessories and options.
Safety warnings and cautions
WARNING
l Ensure that any cables extending across the floor to the SMART product are properly
fastened together and marked to avoid a trip hazard.
l To reduce the risk of fire or electric shock, do not expose the SMART product to rain or
moisture.
l Refer to the safety warnings and precautions published by the projector manufacturer. Do
not stare (or allow children to stare) directly into the projector’s beam of light.
l Do not touch (or allow children to touch) the projector. It can become extremely hot during
normal operation.
l Do not stand (or allow children to stand) on a chair to touch the surface of the SMART
product. Instead, safely fix the product at the appropriate height on a wall or use a SMART
height-adjustable floor stand.
l Do not climb (or allow children to climb) on a wall- or stand-supported
SMARTBoard interactive whiteboard.

IMPORTANT INFORMATION
ii smarttech.com/kb/144817
l Safely mounting the interactive whiteboard requires two people because it is too heavy for
one person to safely maneuver. When you and your assistant lift the interactive whiteboard,
support its weight at the bottom, avoiding the corner cameras, and balance the top with
your other hands.
l The weight of the interactive whiteboard is approximately 52 lb. (23.7 kg) for the
SMARTBoard 880 interactive whiteboard and 61 lb. (27.5 kg) for the SMARTBoard 885
interactive whiteboard. Check your local building codes to ensure that the wall can support
this weight, and use appropriate mounting hardware for the type of wall.
l To prevent injury or product and property damage, use only the mounting hardware
supplied with the SMARTBoard 800 series interactive whiteboard when you install the
product on drywall. The mounting hardware provided with other interactive whiteboards
may not be strong enough to support the weight of a SMARTBoard 800 series interactive
whiteboard.
l Use two wall-mounting brackets to install SMARTBoard interactive whiteboards with a
diagonal width of 87" (221 cm).
l For operating safety and to prevent damage to the interactive whiteboard, connect its USB
connector, or SMART connection extenders, only to a computer that has a USB compliant
interface and that bears the USB logo. In addition, the USB source computer must be
compliant with CSA/UL/EN 60950 and bear the CE mark and CSA and/or UL mark(s) for
CSA/UL 60950.
l To prevent injury or product damage as a result of tipping, mount the interactive whiteboard
only on a floor stand that is certified for use with SMARTBoard 800 series interactive
whiteboards, such as the SMART FS670 Mobile Floor Stand or SMART HAWM FS-UX Mobile
Height-Adjustable Floor Stand. Do not modify the interactive whiteboard or the floor stand
to make them compatible.
l Move a floor stand-supported SMARTBoard interactive whiteboard with care. Sudden
stops, excessive force and uneven surfaces may cause the product to overturn.
CAUTION
l If you’re replacing a SMARTBoard 500 or 600 series interactive whiteboard with the
heavier SMARTBoard 800 series interactive whiteboard on drywall, you must remove the
wall-mount bracket and mounting hardware, and then install all the mounting hardware and
brackets supplied with the SMARTBoard 800 series interactive whiteboard instead.

IMPORTANT INFORMATION
iii smarttech.com/kb/144817
l If you need to lean your interactive whiteboard against a wall, make sure that it remains in an
upright position, resting on its pen tray brackets, which are designed to sustain the
interactive whiteboard’s weight. Do not rest the interactive whiteboard on its side, on the
top of its frame or on the corners of the frame where the cameras are located.
l Do not add any extra weight or pressure to a wall-mounted interactive whiteboard or its pen
tray. SMART designed the brackets to support only the weight of the interactive whiteboard
and its accessories during normal use.
l There are no user-serviceable parts inside the pen tray.
l When transporting the SMARTBoard interactive whiteboard, repack it with the original
packaging. This packaging was designed to provide the best possible protection against
shock and vibration.
l Do not use compressed air to clean the cameras.
l Do not allow cleaner to flow onto the infrared (IR) reflective material at the edges of the
interactive whiteboard frame, or into the pen tray slots.
l Do not set up and use the interactive whiteboard in an area with excessive levels of dust,
humidity or smoke.
l If the SMARTBoard interactive whiteboard requires replacement parts, make sure that the
service technician uses replacement parts specified by SMARTTechnologies.
Other precautions
If you own a SMART product other than a SMARTBoard 800 series interactive whiteboard, refer to
the installation manual for that product for relevant warnings and maintenance instructions.


v smarttech.com/kb/144817
Contents
Important information i
Safety warnings and cautions i
Other precautions iii
Chapter 1: About the SMARTBoard 800 series interactive whiteboard 1
Identifying the components of the SMARTBoard 800 series interactive whiteboard 2
Highlights 3
Understanding how the SMARTBoard interactive whiteboard works 4
Included parts and accessories 5
Optional accessories 6
Chapter 2: Installing and securing the SMARTBoard interactive whiteboard 7
Environmental requirements 7
Installing the SMARTBoard interactive whiteboard 8
Chapter 3: Connecting a computer 13
Connecting the interactive whiteboard to the computer 13
Installing SMARTProductDrivers 14
Configuring the computer settings 15
Calibrating and orienting the interactive whiteboard 16
Connecting a guest laptop 16
Chapter 4: Calibrating and orienting the interactive whiteboard 17
Calibrating the interactive whiteboard 17
Orienting the interactive whiteboard 18
Chapter 5: Using and maintaining the interactive whiteboard 21
Getting started 22
Using the pen tray 27
Using SMARTInk 29
Writing, selecting and erasing using object awareness 29
Using gestures 30
Tips for trouble-free performance 37
Chapter 6: Troubleshooting the interactive whiteboard 41
Updating SMART software 41
Adjusting the projected image 42
Resetting the interactive whiteboard 42
Using the Connection Wizard 43

CONTENTS
vi smarttech.com/kb/144817
Starting the troubleshooting process 44
Troubleshooting using the Ready light 48
Troubleshooting using SMARTBoard diagnostics 55
Finding more information 58
Contacting SMARTSupport 58
Transporting the interactive whiteboard 59
Removing the pen tray 59
Appendix A: Hardware environmental compliance 61
Waste Electrical and Electronic Equipment and Battery regulations (WEEE and
BatteryDirectives) 61
More information 61

Chapter 1
1 smarttech.com/kb/144817
Chapter 1: About the SMARTBoard 800 series
interactive whiteboard
Identifying the components of the SMARTBoard 800 series interactive whiteboard 2
Highlights 3
Software 3
Dual sketch capabilities 3
SMARTInk 3
Touch and gestures 3
Pen tray 3
Durable surface and dry erase 3
Wall-mount bracket 3
Cables 4
Security cable lock 4
Understanding how the SMARTBoard interactive whiteboard works 4
Other components 4
Included parts and accessories 5
Pens 5
Eraser 5
Wall-mounting kit 5
USB cable 6
Extended Control Panel (ECP) 6
Appliance Control Panel (ACP) 6
Power supply 6
Optional accessories 6
The SMARTBoard 800 series interactive whiteboard is the most advanced and intuitive touch
sensitive, front projection interactive whiteboard in the world, featuring SMART’s proprietary DViT®
(DigitalVisionTouch) technology. Its modular and expandable hardware and software architecture
enables you to do everything you can do at your computer—open and close applications, meet
with others, create or edit documents, visit websites, play and manipulate video clips and more—
just by touching the interactive surface.
When you use SMARTsoftware, you can also write over any application in digital ink using a pen
tray pen or your finger, and then save these notes for future reference and distribution.

CHAPTER 1
ABOUT THE SMARTBOARD 800 SERIES INTERACTIVE WHITEBOARD
2 smarttech.com/kb/144817
Identifying the components of the SMARTBoard
800 series interactive whiteboard
Use the following illustration to familiarize yourself with the parts of the interactive whiteboard.
NOTES
l Your interactive whiteboard’s pen tray might look different than the one illustrated above.
The is because the left and right sides of the pen tray are modular.
l The modular options for the left side of the pen tray include the basic power module
(illustrated above), the Extended Control Panel (ECP), and the Appliance Control Panel
(ACP).
l The module options for the right side of the pen tray include the blank cover (illustrated
above), a CAT 5 USB extender module, and a wireless connection module.

CHAPTER 1
ABOUT THE SMARTBOARD 800 SERIES INTERACTIVE WHITEBOARD
3 smarttech.com/kb/144817
Highlights
Software
To use all the interactive whiteboard‘s features, ensure that you have the latest version of SMART
software and SMARTProductDrivers installed on your computer. You can download the latest
software from smarttech.com/downloads.
Dual sketch capabilities
Two people can each pick up a pen and draw on the interactive surface at the same time,
providing a higher degree of interactivity.
SMARTInk
The SMARTInk™ feature smoothes out the appearance of the digital ink, which improves the
legibility of your handwriting as you write over applications, websites and videos. The ink
becomes an object that you can move and manipulate.
Touch and gestures
You can perform mouse functions with your finger, and write and erase digital ink with a pen tray
pen or the eraser. The object awareness feature enables you to pick up a pen, and then write,
select or erase without replacing the pen.
Pen tray
The SMARTBoard 800 series interactive whiteboard features a modular pen tray with an intuitive
new design. As well as two pens and an eraser, pen tray buttons activate the pen’s color, the on-
screen keyboard, right-click, Orientation and Help functions.
Optional Extended Control Panel (ECP), Appliance Control Panel (ACP), CAT 5 USB extender, and
wireless connection modules are also available.
Durable surface and dry erase
The hard-coated surface is scratch resistant, optimized for projection, compatible with dry-erase
markers and easily cleaned.
Wall-mount bracket
Wall mount brackets enable you to install the SMARTBoard interactive whiteboard simply and
securely.

CHAPTER 1
ABOUT THE SMARTBOARD 800 SERIES INTERACTIVE WHITEBOARD
4 smarttech.com/kb/144817
Cables
Connect the SMARTBoard interactive whiteboard to your computer with the included, standard
USB cable, and to a wall outlet with the included power supply and cords.
Security cable lock
Lock the interactive whiteboard with a security cable (not included) to help safeguard it from theft.
Understanding how the SMARTBoard interactive
whiteboard works
The interactive whiteboard functions as an input device for a computer, just like a mouse, enabling
you to work in any application on the computer from the interactive whiteboard.
When you touch the interactive whiteboard’s surface, the four cameras located in the interactive
whiteboard’s corners detect the contact’s horizontal and vertical (or x,y) coordinates. The computer
interprets these coordinates and moves the pointer to the corresponding location on the
interactive whiteboard’s surface.
Other components
Using the interactive whiteboard requires two
additional components: a computer and a digital
projector.
These components work together as follows:
l The computer runs an application and sends the
image to the projector.
l The projector casts the image onto the interactive
whiteboard.
l The interactive whiteboard acts both as your
computer’s monitor and its input devices, that is, its
mouse and keyboard, enabling you to control any application by touching the interactive
surface.

CHAPTER 1
ABOUT THE SMARTBOARD 800 SERIES INTERACTIVE WHITEBOARD
5 smarttech.com/kb/144817
When you install SMARTProductDrivers on the computer, the touch of your finger on the
interactive surface becomes a mouse click, enabling you to control the computer from the
interactive whiteboard. When you use a pen from the pen tray, the system detects which tool
you’re using. SMARTProductDrivers then interacts with the computer’s mouse driver to change
the pointer to a colored pen, enabling you to write in digital ink on the desktop or any open
application. When you use the eraser, you can erase the digital ink. You can even use your finger
on the interactive whiteboard’s surface without returning the pen tray tools—automatic object
awareness determines the tool you’re using on the interactive surface. You can also save your
notes to a .notebook file, or directly into any Ink Aware application.
Included parts and accessories
The SMARTBoard 800 series interactive whiteboard includes the following accessories.
Pens
There are two pens included with the interactive whiteboard. Pick up a
pen and press one of the four color buttons on the pen tray (black, red,
green or blue) to change the color of digital ink you write with on the
interactive whiteboard.
TIP
To learn how to distinguish SMARTBoard 800 series interactive whiteboard pens from other
SMART product pens, see SMART product pens comparison (smarttech.com/kb/171230).
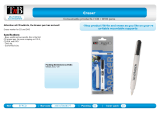
Eraser
The eraser is rectangular like a traditional chalkboard eraser.
Wall-mounting kit
The 32" (81.3 cm) wall-mount bracket comes with five screws and toggle bolts, enabling you to
wall-mount the interactive whiteboard simply and securely. SMARTBoard 885 interactive
whiteboards come with two wall-mounting kits.

CHAPTER 1
ABOUT THE SMARTBOARD 800 SERIES INTERACTIVE WHITEBOARD
6 smarttech.com/kb/144817
USB cable
A 16' 5" (5 m) USB cable enables you to connect your SMARTBoard 800
series interactive whiteboard to a USB receptacle on your computer.
Extended Control Panel (ECP)
If your interactive whiteboard is bundled with a SMART or Epson for
SMART projector as part of a projector system, the Extended Control
Panel (ECP) attaches to the left side of the interactive whiteboard pen
tray. The ECP features controls for power, source selection and volume
adjustment, as well as a USB A receptacle for USB drives.
Appliance Control Panel (ACP)
If your interactive whiteboard is bundled with a SMART projector and
appliance as part of a projector system, the Application Control Panel
(ACP) attaches to the left side of the interactive whiteboard pen tray.
The ACP features a power button and LCD control screen.
Power supply
The SMARTBoard 800 series interactive whiteboard receives power from a wall outlet through the
included country-specific power supply and cables.
NOTE
If your interactive whiteboard is bundled with a SMART projector as part of a projector system,
power for the interactive whiteboard is provided by the SMART projector through a separate
power supply.
Optional accessories
You can add a variety of optional accessories to the SMARTBoard 800 series interactive
whiteboard to best meet your specific needs, including a CAT 5 USB extender module or a
wireless connection module.
You can purchase these items when you order an interactive whiteboard, or later from your
authorized SMARTreseller (smarttech.com/us/Where). For more information about accessories, go
to smarttech.com/accessories.

Chapter 2
7 smarttech.com/kb/144817
Chapter 2: Installing and securing the
SMARTBoard interactive
whiteboard
Environmental requirements 7
Installing the SMARTBoard interactive whiteboard 8
Installation tips 9
Replacing an existing interactive whiteboard on drywall 9
Securing the pen tray to the interactive whiteboard 10
Securing the pen tray to the brackets 11
Environmental requirements
Before installing the interactive whiteboard, review the following environmental requirements.
Environmental
requirement
Parameter
Operating
temperature
41°F to 95°F (5°C to 35°C)
Storage temperature -40°F to 120°F (-40°C to 50°C)
Humidity 5% to 80% relative humidity, non-condensing
Water and fluid
resistance
l
Intended for indoor use only. Doesn’t meet any salt-spray or water
ingress requirements.
l
Don’t pour or spray liquids directly onto the interactive whiteboard
or any of its sub-components. These liquids might get into areas
where they could damage sensitive electronic components. Refer
to Keeping the writing surface clean on page39 for detailed
instructions on cleaning the interactive whiteboard.

CHAPTER 2
INSTALLING AND SECURING THE SMARTBOARD INTERACTIVE WHITEBOARD
8 smarttech.com/kb/144817
Environmental
requirement
Parameter
Dust
l
Moderate dust. Intended for use in office and classroom
environments. Not for industrial use where heavy dust and
pollutants can cause malfunctions or impaired operation.
l
Designed for pollution degree 1 (P1) as per EN61558-1, which is
defined as “No pollution or only dry non-conductive pollution.”
Conducted and
radiated emissions
EN55022/CISPR 22, Class A
Installing the SMARTBoard interactive
whiteboard
Follow the procedure outlined in the installation document included in the interactive whiteboard’s
box to install the interactive whiteboard. If you purchased a floor stand, wall-mount or an interactive
whiteboard system that includes a projector or other components, refer to the installation
documents included with these components. The optimal mounting height is 77" (196 cm) from the
floor to the center of the installation brackets. However, consider the general height of your user
community when you choose a location for wall-mounting the interactive whiteboard. If you mount
the interactive whiteboard too low, it might force tall people to bend over uncomfortably. If it’s too
high, other people might need to reach up too far. Also remember to leave enough room on either
side of the interactive whiteboard so that you can stand beside it.
WARNING
l Safely mounting the interactive whiteboard requires two people. It is too heavy for one
person to safely maneuver. When you and your assistant lift the interactive whiteboard,
support its weight at the bottom, avoiding the corner cameras, and balance the top with
your other hands.
l The weight of the interactive whiteboard is approximately 52 lb. (23.7 kg) for the 880 model
and 61 lb. (27.5 kg) for the 885 model. Check your local building codes to ensure that the
wall can support this weight, and use appropriate mounting hardware for the wall type.
CAUTION
l If you need to lean the interactive whiteboard against a wall before you mount it, make sure
it remains in an upright position, resting on the pen tray brackets, which can sustain the
weight of the interactive whiteboard.

CHAPTER 2
INSTALLING AND SECURING THE SMARTBOARD INTERACTIVE WHITEBOARD
9 smarttech.com/kb/144817
l Do not rest the interactive whiteboard on its side or on the top of the frame, or on the
corners where the cameras are located.
Installation tips
l Ensure the bottom of the pen tray is unobstructed at all times, because you will need to
access it if the interactive whiteboard requires service.
l Install the interactive whiteboard on a flat, plumb wall.
l If you’re installing the interactive whiteboard on drywall, use all the toggle bolts supplied.
Because one of the mounting bracket holes aligns with a wall stud, use appropriate hardware
in that hole instead of a toggle bolt.
l Ensure that the power supply cable is connected to the correct receptacle in the pen tray, as
shown below.
Replacing an existing interactive whiteboard on drywall
If you’re replacing a SMARTBoard 500 or 600 series interactive whiteboard with the heavier
SMARTBoard 800 series on drywall, you must remove the wall-mount bracket and mounting
hardware, and then install all the mounting hardware and brackets supplied with the SMARTBoard
800 series interactive whiteboard instead.
CAUTION
To help ensure that the interactive whiteboard is mounted correctly, make sure the color of the
wall-mount hanger on the back of the interactive whiteboard and the color of the wall-mount
bracket are the same.

CHAPTER 2
INSTALLING AND SECURING THE SMARTBOARD INTERACTIVE WHITEBOARD
10 smarttech.com/kb/144817
Securing the pen tray to the interactive whiteboard
Because the pen tray is detachable, you might want to safeguard it—and the interactive
whiteboard—by anchoring it with a security cable (not included). Underneath the pen tray, you’ll
find a lock slot that accommodates a security cable, such as a Kensington® lock.
IMPORTANT
Securing the pen tray can provide theft deterrence for the interactive whiteboard because the
screws that secure the interactive whiteboard to the wall are located directly behind the pen tray
and cannot be removed without first detaching the pen tray. In effect, when you secure the pen
tray, you also secure the interactive whiteboard if the security cable is tight.
To secure the pen tray to the interactive whiteboard
1. Loop the security cable behind the pen tray brackets before you secure them to the wall.
2. Thread the lock end of the cable through the loop end of the cable.
3. Verify that the cable is tight enough that you can’t remove the pen tray while the lock is in
place, and then install the pen tray.
4. Insert the prong end of the security cable into the lock slot, and then complete the pen tray
installation by locking it.

CHAPTER 2
INSTALLING AND SECURING THE SMARTBOARD INTERACTIVE WHITEBOARD
11 smarttech.com/kb/144817
Securing the pen tray to the brackets
Because you can remove the pen tray without tools, you might want to securely attach it to its
brackets.
To secure the pen tray to the brackets
Insert two No. 8/M4 screws (not included) into the holes indicated by a lock symbol on the
bottom of the pen tray.

/