Page is loading ...

ALPHATECH TECHNOLOGIES s.r.o.
Jeremenkova 88, Praha 4, Czech Republic
www.alphatechtechnologies.cz
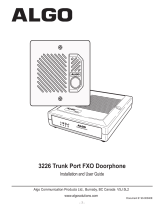
IP-VarioBell
SIP DoorPhone
IP-VarioBell
IPVB-00, IPVB-01, IPVB-02
IPVB-00C, IPVB-01C, IPVB-02C
VBD5-mod, VBD10-mod, VBDKey
Installation and operating
instructions

Installation and operating instructions

IP VarioBell – User instructions
3

Welcome
Congratulations to purchasing a modern SIP based VoIP audio-video
door entry phone system, the IP VarioBell. This door entry phone system can
widely satisfy your needs for communication with visitors of your office, home,
school, building, etc.
VoIP means “Voice over Internet Protocol” – this door entry system can be
connected to an IP network and allows 2 ways of calling. Either in P2P mode
(peer to peer) – it means calling directly to an IP adress of other VoIP device or
it registers to a SIP server (as a SIP client) and then calls a phone number.
To each call button you can assign 5 phone numbers with possibility of
progressive or simoultaneous dialling.
The IP VarioBell is a modular system, surface mounted on the wall or flush
mounted into the wall. It can be used outdoors or indoors. It starts with zero, 1
or two call buttons, in audio version without a camera or in a video version with
a colour camera. The system can be expanded up to 87 call buttons and it can
also have a dialling/door access code keypad. The keypad can uses both
modes (dialling mode and door access code lock mode) at the same time.
The IP VarioBell can be powered via a 12V power supply which can power
also an electrical lock at your door entrance. It might be also powered via PoE
(Power over Ethernet). It is a hands free phone. One of the basic features is
the possibility to open 2 doors via connected electrical locks as well as a user
friendly configuration via WEB based interface.
Manual version V3.5 5-9-2016
Valid for firmware – V3.4.xx
Alphatech Technologies s.r.o.
Jeremenkova 88
140 00 Praha 4
www.alphatechtechnologies.cz
info@alphatechtechnologies.cz
The producer progressively improves features of the unit (firmware). The door entry
systém „IP VarioBell“ allows to upgrade the firmware with the newest version via PC.
The latest firmware version can be downloaded from www.alphatechtechnologies.cz
.
The neccessary guidelines can be found at page 81. We recommend to use the latest
firmware version which brings you new features as well as eventual correction of
errors of previous versions. At www.alphatechtechnologies.cz you can also find
latest versions of user documentation.

IP VarioBell - installation and operating instructions
5
Contents
1 BASIC DESCRIPTION ....................................................................................... 7
1.1 FEATURES ...................................................................................................... 7
1.2 USED TERMINOLOGY ...................................................................................... 8
1.3 SET OF MODULES ......................................................................................... 10
1.3.1 Call button modules ................................................................................ 11
1.3.2 Mechanical parts .................................................................................... 12
1.4 CONNECTION OF THE IP-VARIOBELL ........................................................... 15
1.4.1 IP-VarioBell basic board ....................................................................... 15
1.4.2 Power supply - terminal (10) .................................................................. 19
1.4.3 Exit button, door sensor – terminal (7) .................................................. 19
1.4.4 Button extension bus ............................................................................... 19
1.5 CONNECTION OF EXPANSION MODULES VBD10(5)-MOD ............................. 20
1.5.1 Cable K0 / K1 ......................................................................................... 20
1.5.2 Example of connection of VBD10-mod modules ..................................... 21
1.5.3 Example of connection of VBD5-mod modules ....................................... 22
1.5.4 Call buttons numbering........................................................................... 23
1.6 CONNECTION OF VBDKEY KEYBOARD ........................................................ 26
1.7 SIGNALLING ON THE FRONT PANEL OF THE BASE MODULE ........................... 27
2 INSTALLATION ............................................................................................... 28
2.1 ASSEMBLY ................................................................................................... 28
2.2 CONNECTION OF SWITCHES .......................................................................... 31
2.2.1 PoE supply .............................................................................................. 33
2.2.2 COde relay SWitch (COSW) ................................................................... 34
2.2.3 Use of door sensors – exit button ............................................................ 34
2.2.4 Micro SD card ........................................................................................ 35
3 SERVICE OF THE IP VARIOBELL .............................................................. 36
3.1 SIGNALLING OVERVIEW ............................................................................... 36
3.2 VISITOR AT THE DOOR .................................................................................. 36
3.2.1 Pressing the call button – outgoing call ................................................. 36
3.2.2 Pressing the call button – code lock ....................................................... 37
3.2.3 Call ......................................................................................................... 38
3.3 VISITOR INSIDE BUILDING ............................................................................ 38
3.3.1 Outgoing call .......................................................................................... 38
3.3.2 Incoming call .......................................................................................... 38
3.4 VIDEO .......................................................................................................... 39
4 PARAMETRES PROGRAMMING ................................................................ 40
4.1 WEB INTERFACE ACCESS ............................................................................. 40
4.1.1 What you should know ............................................................................ 40
4.1.2 Login ....................................................................................................... 41

IP VarioBell - installation and operating instructions
6
4.2 CURRENT STATUS ........................................................................................ 42
4.2.1 Language settings ................................................................................... 43
4.3 IP NETWORK SETTING .................................................................................. 43
4.3.1 IP Network setting .................................................................................. 43
4.3.2 SIP setting ............................................................................................... 46
4.3.3 WEB server ............................................................................................. 50
4.4 BASIC SETTING ............................................................................................. 52
4.4.1 Phone book ............................................................................................. 52
4.4.2 Relays ...................................................................................................... 55
4.4.3 Door sensors ........................................................................................... 59
4.4.4 Setting SNMP .......................................................................................... 60
4.4.5 Time profiles ........................................................................................... 61
4.4.6 Date and time setting .............................................................................. 62
4.4.7 E-mail ..................................................................................................... 64
4.5 EXTENDED SETTING ..................................................................................... 66
4.5.1 DoorPhone .............................................................................................. 66
4.5.2 Audio setting ........................................................................................... 69
4.5.3 Audio codecs ........................................................................................... 70
4.5.4 Video setting ........................................................................................... 71
4.5.5 Video watching (PopUp programm) ....................................................... 72
4.5.6 Video codecs ........................................................................................... 73
4.5.7 Streaming ................................................................................................ 74
4.6 SERVICE ....................................................................................................... 76
4.6.1 Restart ..................................................................................................... 76
4.6.2 Configuration .......................................................................................... 77
4.6.3 Language and style ................................................................................. 78
4.6.4 Style and language preparation .............................................................. 79
4.6.5 Firmware upgrade .................................................................................. 81
4.6.6 Logfile ..................................................................................................... 82
4.6.7 License .................................................................................................... 84
4.6.8 Sound files ............................................................................................... 85
5 TECHNICAL PARAMETRES......................................................................... 86
5.1 ELECTRICAL PARAMETRES ........................................................................... 86
5.2 MECHANICAL DIMENSIONS .......................................................................... 86
5.3 VIDEO PARAMETRES .................................................................................... 87
5.3.1 Requests .................................................................................................. 88

IP VarioBell - installation and operating instructions
7
1 Basic description
1.1 Features
▪ audio is full duplex with ECHO cancellation
▪ phone book for up to 999 subscribers with 5 phone numbers for each (max.
87 call buttons + keyboard)
▪ every subscriber can have more phone numbers with progressive or
simultaneous calling
▪ Email sending when unreachable including attachment with pictures
▪ 10 time plans with weekly program
▪ 4 relays. 2 included on the board with possibility to connect 2 independent
locks for door opening and 2 virtual (webrelays, i.e. for remote control of an
external IP relay or relays synchronization)
▪ Relays system via synchronization allows combination of any mode
(progressive opening, 2 pulses, etc.)
▪ 10 shared adjustable codes for every relay + every subscriber has own code
for every relay
▪ all versions can use door sensors or exit buttons
▪ SNMP usage possibility
▪ real time clocks from NTP or SIP server
▪ extendable possibilities of buttons functionality, light intensity settings, call
duration restriction, etc.
▪ audio signalling settings, saving own tones or messages
▪ multilanguage support
▪ multilevel loading and configuration refresh
▪ reliable firmware upgrade
▪ loging system with possibility of data saving to MicroSD card (under development)
▪ pictures as well as video saving possibility to MicroSD card (under development)
▪ WEB inerface management
▪ power supply 12V or PoE (Class 0 - 12,95W)
▪ Ethernet – 10/100Mb with standard 10BaseT and 100BaseTx
▪ The unit starts within 10 seconds
▪ Linux operating system
▪ USB connection of integrated webcamera. Video transmission to
webbrowser - JPEG, video transmission to VoIP phones - stream H.263,
H.264
▪ SIP connection P2P or PBX (SIP server) system, switchable in the web
interface
▪ SIP 2.0 protocol , define with RFC3261

IP VarioBell - installation and operating instructions
8
1.2 Used terminology
• Incoming call - Connection between the doorphone and a phone made by
selecting an option on the phone. The doorphone connects the call after set
number of rings. The doorphone can be programmed from the phone following
a connection by inputting a password.
• Outgoing call - Connection between the doorphone and a phone made by
choosing an option on the doorphone (i.e. Pressing a button).
• External code - Combination of 10 buttons or keyboard keys (after pressing
the key symbol) for a relay activation. [External = enter code outside the
building]
• Internal code - Combination of 10 buttons on phone for a relay activation (by
DTMF). [Internal = enter code inside the building].
• Code lock - Function for relay connections by inputting a combination of up to
10 buttons or keyboard keys (after pressing the key symbol)
• Ethernet is technology which is used to build up local networks (LAN)
• LAN - Local Area Network (local network) mark PC network which cover small
geographical area (for example homes, office, etc…).
• 10Base-T As transmission medium use twisted twoline cable with rate
10 Mbit/s. It used 2pairs of structured cabling from four.
• 100Base-TX Version with transmission rate 100 Mbit/s, which is named Fast
Ethernet. It used 2 pairs UTP or STP cable category 5.
• Twisted 2line or also twisted pair is cable type which is used in PC networks.
Twisted 2line is created by cables pair which are regularly twisted in the length
and after pairs are twisted together.
• UTP, Unshielded Twisted Pair
• STP, Shielded Twisted Pair
• WEB - World Wide Web (WWW, shortly web), is mark for application of http
internet protocol
• HTTP (Hypertext Transfer Protocol) is internet protocol design for exchange of
hypertex documents in format HTML
• USB (Universal Serial Bus) . Modern way of accessories connection to PC
• Video codec (compound of word begins „coder and decoder“) . Compression
H.263 is derived from MPEG-4, H.264 is coder for format MPEG-4 AVC.
MPEG-4 is kind of video compression – decreasement of pictures sequence
data flow
• JPEG is standard method of loss making compression used for savings PC
pictures
• Voice over Internet Protocol (shortly VoIP) is technology allows transmission
of digitized voice in body of family protocols UDP/TCP/IP pockets via PC
network . It is used for calling via internet, intranet or any other data
connection.
• TCP/IP contents set of protocols for communication in PC network and it is
main protocol of worldwide network Internet.
• IP address is number which definitely identify network interface in PC network
which used IP protocol.

IP VarioBell - installation and operating instructions
9
• DHCP (Dynamic Host Configuration Protocol) is application protocol from
family TCP/IP. It is used for automatic assign of IP adresses to individual
computers in PC network. Due this simplify its management
• Internet is worldwide system of mutually connected PC networks
• Intranet is PC network similiar to internet but it is „private“. It is designed jsut
for small group of subscribers (for example workers in some company)
• PoE (Power over Ethernet) is powering via data network cable.
• NTP (Network Time Protocol) is protocol for synchronization of internal PC
clocks
• NAT (Network address translation) is a method of remapping one IP address
space into another by modifying network address information in Internet
Protocol (IP) datagram packet headers while they are in transit across a
traffic routing device
• STUN (Session Traversal Utilities for NAT) is a standardized set of methods
and a network protocol to allow an end host to discover its public IP address if
it is located behind a NAT.
• SIP User Agent - every SIP user agent (phone, software, device) identifies
itself with a string. The syntax of this string is not defined, but a common
practise is „device name + version“

IP VarioBell - installation and operating instructions
10
1.3 Set of modules
The IP-VarioBell doorphone is a modular system using the latest
technology, offers timeless design, easy installation and use.
The IP-VarioBell has two relay switches and it can be powered via PoE.
The basic models differ by number of call buttons. There can be zero, one or
two call button on the basic module. Then you can either use an audio version
without a camera or a video version with a colour camera. The whole systém
can be expanded up to 87 call buttons. You can also add a keypad. It can be
used as a dialling keypad and at the same time as door access code keypad.
The basic module IPVB-xx can have two call buttons (IPVB-02), one call
button (IPVB-01) or zero call buttons (IPVB-00). The models with a colour
camera are marked with letter C at the end (e.g. IPVB-02C).
The expansion modules VBDx-mod (the same ones as for the analogue
and GSM version of VarioBell doorphone) are available in two types only:
- VBD5-mod is a module with 5 call buttons
- VBD10-mod is a module with 10 call buttons
A speciality of expansion modules is that numbering of call buttons does
not depend on cable connection of the modules. The numbering is set
with a DIP switch on each module (see more details later in the text).
The last expansion module is the keypad VBDKey – connection of the
keypad does not depend on its place of connection (see more details
later in the text).

IP VarioBell - installation and operating instructions
11
1.3.1 Call button modules
Basic module Basic module Basic module
IPVB-02 IPVB-01 IPVB-00
Basic module Basic module Basic module
IPVB-02C IPVB-01C IPVB-00C
Button module Button module Keypad module
VBD5-mod VBD10-mod VBDKey

IP VarioBell - installation and operating instructions
12
1.3.2 Mechanical parts
Below you can find images of mechanical parts for 1, 2 and 3 modules. In
one column there are max. 3 modules.
Flush mounting installation boxes into the wall:
Flush Monting Box -1 Flush Monting Box -2 Flush Monting Box -3

IP VarioBell - installation and operating instructions
13
Mounting Frame – for mounting into the wall and on the wall
for 1 module for 2 modules for 3 modules

IP VarioBell - installation and operating instructions
14
Rain hood – for flush mounting into the wall
Rain hood -1 Rain hood -2 Rain hood - 3
Surface Mounting Box with rain hood – for installation on the wall (frames
are supplied separetely)
SMB -1 SMB -2 SMB -3

IP VarioBell - installation and operating instructions
15
1.4 Connection of the IP-VarioBell
The IP-VarioBell consists of the basic board, processor board and it
always has two buttons on the board. Number of used call buttons is defined
with the used front panel plate. You can connect up to 85 call buttons to the
basic board and also a keypad. The basic board also includes two inputs (door
sensors or exit buttons) and two relay switches.
1.4.1 IP-VarioBell basic board
The basic board is the same for all models of the IP-VarioBell. It only
differs with included or excluded colour camera module. In the basic
configuration there is always a PoE module included (according to IEEE802.3af
norm), also there is a connector for connecting expansion modules, LED
illumination of a name card, reader of MicroSD cards and two relay switches.
All operational and connected parts are marked with a digit inside a red
circle.
1. CPU board (proccessor module)
2. LED green – powering of the doorphone works fine
3. LED for checking of network activity, green = 100M LAN connected, yellow
= data transmission on the LAN
4. Slot for a MicroSD card – insert the card before powering the doorphone.
Never take out the card during doorphone´s operation!
5. DIP switch
1 – always is ON position (used for factory service only)
2 – OFF. In case it is in ON position when you
power the unit, the doorphone goes to a default
IP address 192.168.1.250 and also to its default style (a rescue
mode). The user name is admin and the access password is
1234. To display a video stream, the user name is video and the
password is 1234 (if it is required). The operation position of the
DIP switch 2 is OFF.
6. Connection of the UTP cable (Ethernet, LAN, network)
7. Two inputs (the middle connector is common for both inputs) for door
sensors or exit buttons (programmable, need to be ordered in production in
advance before delivery)
8. Connection of cable K0 for expansion module(s) – a flat cable, on one side
there is an orange connector, on the other side there is a black connector
9. Terminal connector of the switching contact of the first relay (NC =
normally closed, NO=normally open and COM=common, the middle
connector)
10. Terminal connector of the switching contact of the second relay
NO=normally open and COM= common, the middle connector)

IP VarioBell - installation and operating instructions
16
11. Input for powering of the IP-VarioBell 12V AC / DC (max. power
consumption approx. 300mA). A direct current (DC) power supply is
recommended
12. Output 12V DC, max. 300mA, for example for powering of a low
consumption electrical lock if PoE power supply is used for the IP-VarioBell

IP VarioBell - installation and operating instructions
17

IP VarioBell - installation and operating instructions
18
13. Yellow LED shines when the doorphone rings or establishes and finishes
the connection (establishing a connection).
14. Blue LED shines when the connection has been established and you can
talk (Active Call).
15. Green LED shines when one of the relays has been activated (Door open).
16. Sensor of an ambient light for illumination control of the camera and name
cards
17. White LED for illumination of the surrounding area in front of the camera
(used at models with a camera only)

IP VarioBell - installation and operating instructions
19
18. Camera objective (only models with a camera). Diagonal view angle is
120°, max. resolution 640x480.
19. Speaker
20. Microphone
21. White LED for illumination of name card
22. Call button 1 and 2 – available on each board. Depending on the selected
front frame module you can use zero, 1 or two call buttons.
1.4.2 Power supply - terminal (10)
The 12V power supply can be direct (DC) or alternating (AC), the
polarity does not matter. You can consume max. 300mA from the 12V power
supply. You can also use the power supply for powering the electric lock. In
this case it is suggested to use a 12V/1A power supply.
You can also use a 24V DC power supply. The use is mainly at the
installation site, where such kind of a power supply already exists and it is
already used for the attendance/access control system or the sliding gate or
similar type of use. In this case you must not use AC, but you are allowed to
use a DC power supply only. The polarity does not matter.
1.4.3 Exit button, door sensor – terminal (7)
The exit button serves for direct control of the switches. Each switch
can be set to one or two pulses. The button (terminal (8)) is connected to a 12V
loop current circuit (terminal 6). This makes it possible to connect the exit
button with a cable up to 500m long.
1.4.4 Button extension bus
This bus allows you to
connect extension call buttons up
to 87, including the keyboard. In
addition to the serial data
transmission, the bus also powers
the ilumination of name cards and
name/house number modules.
The call buttons module is
supplied in two versions:
VBD10-mod can use 10
call buttons – 5 of the left side and
5 on the right side
VBD5-mod can use 5 call
buttons – only 5 on the right side
The keyboard VBDKey can be connected to the bus at any place.

IP VarioBell - installation and operating instructions
20
1.5 Connection of expansion modules VBD10(5)-mod
The VBD10-mod call button expansion modules come with ten call
buttons and the VBD5-mod call button expansion modules come with with five
call buttons. However, the way of numbering is crucial. The physical connection
can be random, you can interconnect the modules as you wish on regardless of
the numbering!
The numbering of call button modules will be explained later on. The
numbering is setup on each call button module using the DIP switch (E6).
The VBDx-mod electronics board only connects to the original A-
VarioBell key module by means of the terminal block (E5) and the
interconnecting three-wire cable (E4). The connector (E7) is not used with IP-
VarioBell.
The connection is made using K1 flat cable (two black connectors at
both ends) and the K0 cable only serves as a connection between the base
module and the first button module or keypad (on the one side orange and on
the other side the black connector).
(E1) is a connection to the
basic module (K0 cable) or
connection to the previous button
module (cable K1), (E2) is the
connection of the following button
module (K1 cable), (E3) is the
connection between the call button
modules (cable K1)
1.5.1 Cable K0 / K1
Cable K0 – on one side
orange connector, black connector
on the other end - serves only to
connect the first expansion module
to the base module
Cable K1 – on both sides
black connector - serves for
interconnection between
expansion modules
Fig. 1 Interconnection between
VBD10-mod and VBD5-mod
/