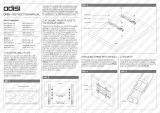
Figure 6-4 Grounding the EXU 131
Figure 6-5 Cable tray and cable ducts in an LSU (A =
front) 132
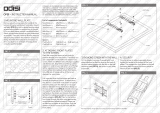
Figure 6-6 Arc Guard System™ in an optional roof extension
box (REB) 133
Figure 6-7 Location of Arc Guard sensors in a TEU 134
Figure 6-8 Cable tray and cable ducts in an LSU (A =
front) 134
Figure 6-9 Cable entry with type 1 sealing modules 135
Figure 6-10 Cable entry frame with type 1 sealing modules 136
Figure 6-11 Cable entry with type 2 sealing modules 137
Figure 6-12 Cable gland 137
Figure 6-13 Cable entry with EMC plates 138
Figure 6-14 TEU 1000 mm cabinet (A = back) with top (1)
and bottom (2) cable entries 139
Figure 6-15 Short busbar removal in ARU 140
Figure 6-16 EXU with top cable entry (A) and EXU with
bottom cable entry (B) 141
Figure 6-17 EXU cabinet 141
Figure 6-18 Preparing power cables for sealing modules 143
Figure 6-19 Prepare power cables for cable glands 144
Figure 6-20 Preparing cables for EMC plates: (A) cables with
an outer screen or shield, (B) cables without an
outer screen or shield or (C) cables in an
EXU cabinet 145
Figure 6-21 Cable connections in an EXU cabinet 146
Figure 6-22 Minimum distance between bolted joints of different
phases in an EXU 147
Figure 6-23 Bolted busbar connection - marine drives 147
Figure 6-24 Bolted busbar connection - non-marine drive 148
Figure 6-25 Cable entry with sealing modules 150