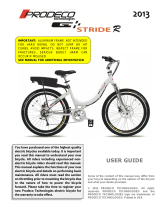
Evelo Aurora User guide

Category
Bicycles
Type
User guide

Evelo Aurora: Experience the future of cycling with our state-of-the-art electric bike. With its powerful motor and long-lasting battery, conquer hills, explore new paths, and enjoy a smooth, effortless ride. Stay in control with the intuitive handlebar display, choose your pedaling assistance level, and monitor your speed, distance, and battery life. Safety first: hydraulic brakes and a sturdy frame ensure a secure and comfortable ride.

Evelo Aurora: Experience the future of cycling with our state-of-the-art electric bike. With its powerful motor and long-lasting battery, conquer hills, explore new paths, and enjoy a smooth, effortless ride. Stay in control with the intuitive handlebar display, choose your pedaling assistance level, and monitor your speed, distance, and battery life. Safety first: hydraulic brakes and a sturdy frame ensure a secure and comfortable ride.

EVELO Aurora Limited
Quick Start Guide
Welcome to your EVELO Aurora Limited!
You’ve made a great decision to purchase the best electric bike on the market, and
we encourage you to read through the included display panel manual and user
guide. We know you’re eager to get started, so we want to point out a few quick tips.
Assembling your Aurora Limited yourself?
Please stop here and check out the following link for assembly instructions:
www.evelo.com/aurora-assembly
EVELO Aurora Limited Quick Start Guide 2
A quick note on assembly: your Aurora Limited has hydraulic brakes, and includes
a spacer in the front brake caliper to keep the brake pistons retracted. This must be
removed prior to installing the front wheel. The caliper is located at the bottom
of the front fork on the le side of the bike from riding position. Simply pull the
plastic tab out to remove it. This spacer may be Yellow, Red, or Black. Aer remov-
ing the spacer, avoid pulling the front (le) brake lever until the wheel is installed.
Is your Aurora fully assembled? Great! Let’s go over a few key items:
Step 1: You’ll need power! The battery charge port is at the bottom right of the battery, with a rubber
cover. There is a USB charge port on the battery as well, which can be used for charging low
voltage devices. Pull the cover back and charge the battery with the included charger. We
recommend fully charging your bike before your first ride:
Note: The battery can be charged on or off the bike. To remove the
battery, insert and turn the key, then swing the battery away from the
key at the top. To install, insert the battery at the bottom and swing
back into position while pushing down towards the frame. The
battery will automatically lock back into place.
Step 2: Pre Ride Check: Before your initial ride, please check the following items:
Wheels should spin freely. There may be some slight rubbing of the brakes, which typically
subsides once the brakes are used a few times.
Belt tension: check the belt for appropriate tension. With a firm press in the middle of
the belt, there should be approximately 3/8” of play, +/- ¼ of an inch. If your belt needs
adjusted, please contact EVELO for instructions to adjust belt tension.
Squeeze both brake levers to ensure that the brakes can be fully secured before the
levers hit the handlebars. Because the hydraulic fluid path is longer to the rear brake, the
rear lever may have a bit more travel, which is typical.
Ensure that the thru axle securing the front wheel is tight. The front thru axle is secured
with an allen wrench.
Check your tire pressure. Because of the wider tires, it will likely be lower than you are
accustomed. While the maximum pressure is relatively high, best performance is found
between 18 to 24 PSI for riders 140 lbs to 280 lbs. For every 20 lbs over 140 lbs, increase by
approximately 1 PSI.
EVELO Aurora Limited Quick Start Guide 3
Step 3: Familiarize yourself with the controls.
Brakes: Your Aurora Limited includes front and rear brake levers, equipped with cutoff
switches which turn off power to the motor when the brakes are pressed. Its
recommended to squeeze both brakes with equal power at the same time for
stopping.
Shier: This gearing system is ready to ride with the handlebar controller right out of the
box. If you are not comfortable connecting the bike to your phone, you can disre-
gard the steps below.
We recommend pairing the system to your phone using the Enviolo App to ensure
your soware is consistently up to date, and get the most out of your EVELO
Electric Bicycle. Before starting, make sure your phone is connected to the inter-
net and your bicycle is powered on. To pair, download the Enviolo App located in
Google Play on Android devices or the App Store on iPhones. You can find apps by
typing in “Enviolo Automatiq” into the search field.
Once installed, you can open the app and you will see the Connect screen.
At this time, you want to press and hold the “sync” button located on
the Shi interface for 5 seconds. This is the Black round part near the
rear wheel of the bike.
This button may be partially blocked by the bike itself, so use a small
hex key, a small flat head screwdriver, or other poking apparatus to
depress the button if you are unable to reach it with your finger. Press
and hold the button for 5 seconds, there will be an audible click and
it will turn Blue aer 5 seconds. You will then be greeted with the
welcome screen on your phone.
EVELO Aurora Limited Quick Start Guide 4
If the App recommends a firmware update, please update the firmware of your
Enviolo Automatiq Shier.
Once your Enviolo Automatiq system is
connected with the Enviolo App, you can
control everything in the system directly
from your phone.
If you prefer to use the handlebar mounted
controller, you will want to re-sync the
system - as the system can either be
connected to your phone, or to the handle-
bar mounted controller, but not both at the
same time.
To sync to the handlebar mounted control-
ler, power the bicycle on and press the
button on the shier interface. Press and
hold the button for 5 seconds, it will turn
blue.
Then, Press and hold the center button of
the handlebar shier for 3 seconds. The
handlebar unit will blink red and green.
Once the unit blinks green only, the pairing
is complete.v
EVELO Aurora Limited Quick Start Guide 5
Please consult the included manual for more details, reach out to EVELO customer
support, or navigate to the following instruction webpage if you have any issues or
concerns: https://support.enviolo.com/hc/en-us/articles/360014553219
Throttle: The throttle is on the le hand side, and operational as soon as you power on the
bike. Handle with care! The throttle can be useful for starting, particularly on a hill,
but it is best to familiarize yourself with the bike prior to using throttle control.
Pedal Assist: There are 5 levels of assist. You can access these with the two buttons on the le
side of the three button panel. The “+” increases the level, and “-” will lower it. We
strongly recommend starting in level 1 or 2 until you’re used to the handling of your
Aurora Limited. The buttons can be pressed while ridin
Step 4: Adjust your seat: You can raise or lower the seat by opening the quick release lever and adjust-
ing the post up or down. There should be a slight bend in your leg at full extension, though
some riders prefer to have the seat a bit lower until they are comfortable with the bike. If you are
unable to get your seat low enough, you may need to cut your seat post. This can be done with a
sharp hacksaw blade. Please contact us for details.
Step 5: Power up your bike: On the le side of your handlebars is a 4 button switch. The “o” on the lower
right hand side of the button panel is used to toggle power on and off. Hold it for 2-3 seconds, until
your display panel lights up.
Step 6: Get on and ride! We recommend doing your first ride on flat terrain in an uncrowded area.
Some tips for riding your Aurora Limited:
EVELO Aurora Limited Quick Start Guide 6
Start slow! If this is your first time on an electric bike we recommend using a low level of assist until
you are comfortable with the ride and handling.
Start in Pedal Assist 1 or 2. You can use a bit of throttle to get going if you need a boost. A
little goes a long way.
The level of pedal assist can be adjusted while riding. Higher levels of throttle will provide
more power and less range.
Please consult our solutions database for access to the full manuals for your display panel and other bicycle
components
https://support.evelo.com/support/home
Questions? Get In Touch:
877-991-7272
contact@evelo.com
EVELO Aurora Limited Quick Start Guide 7
Notes:
EVELO Aurora Limited Quick Start Guide 8
Questions? Get In Touch:
EVELO.COM
First Edition
877-991-7272
contact@evelo.com
  • Page 1 1
  • Page 2 2
  • Page 3 3
  • Page 4 4
  • Page 5 5
  • Page 6 6
  • Page 7 7
  • Page 8 8

Evelo Aurora User guide

Category
Bicycles
Type
User guide

Evelo Aurora: Experience the future of cycling with our state-of-the-art electric bike. With its powerful motor and long-lasting battery, conquer hills, explore new paths, and enjoy a smooth, effortless ride. Stay in control with the intuitive handlebar display, choose your pedaling assistance level, and monitor your speed, distance, and battery life. Safety first: hydraulic brakes and a sturdy frame ensure a secure and comfortable ride.

Ask a question and I''ll find the answer in the document

Finding information in a document is now easier with AI