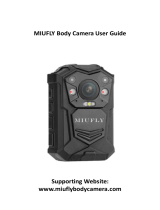
DIGITALas F1EL21 User manual

Type
User manual
Body Worn Camera
User Manual
1
Thanks for your purchasing. This camera is specially designed for
video recording and photo taking. Please read the user manual
before using it.
Important information: before you start to use this
device, please connect it to computer through auxiliary USB cable,
then press Fn button for six times to get access to camera
storage. Copy BodyCam PC software to your computer for
camera setting purpose in the future. BodyCam PC software will
be deleted if you format the camera storage. Please contact vendor
if it is lost.
2
Body Camera Exterior Overview
3
Item
Description
1.LCD Screen
Showing the battery, storage, GPS,WIFI,
Mute, Infrared, Video recording status;
Press power button to turn LCD on/off
2.Charging dock
connector
Connect charging dock for charging or
connecting PC.
3.Camera Lens
Full HD camera
4.Status Indicator
LED
Green: standby mode(power on but not
recording)
Solid Red: pre-record mode
Flashing Red: video recording
Flash once(red): taking photo
5.Charging
Indicator LED
Blue: charging status
White: charge done (fully charged)
6.Infrared Lights
Providing infrared light compensation to
help camera record good quality video in
low light conditions.
7.Light Sensor
Detect changes of light and turn on/off IR
for low light recording automatically.
8.Record Button
a) Press to start video recording
b) Hold 3 seconds to stop video recording
c) While camera is powered off, hold 3
seconds, camera will turn on and start
recording.
4
9.Snapshot
Button
a) Press to take a photo in standby mode.
b) Press to take a single snapshot image
while in video recording mode.
c) Hold 3 seconds to enable covert mode,
both voice, LED & LCD indication will be
disabled, camera will only vibrate: Start
recording, vibrate once, stop recording,
vibrate twice.
10.USB Port &
Reset button
For charging or connection to PC
PS: connects to external camera (optional).
Reset button is inside small hole near USB
port and it is used to reset the device when
it works abnormally.
11.Fn Button
a) Press to turn on/off infrared lights when
infrared lights are in manual mode.
b) When camera is in standby mode, hold 3
seconds to turn on/off WIFI.
c)Double click (press 2 times in 1 second)
Fn button to enable/disable video mute.
When video mute is turned on, recorded
video will have no audio, only video.
12.Power Button
Hold 3 seconds to turn on; Hold 3 seconds
to turn off.
5
How to Operate
Power on/off and Standby mode
Hold the power button 3 seconds to turn the camera on, camera
will be in standby mode. Hold 3 seconds again to turn the camera
off.
Video Recording
When camera is in standby mode, press REC button to start video
recording, recording initiates with audio prompt (Recording start),
Status Indicator LED (Red recording indicator flashing) and camera
vibrate once.
Hold 3 seconds to stop recording, camera vibrate twice and status
indicator LED turns to solid green.
Note: When camera is powered off, hold Record button 3 seconds
to power camera on and start video recording.
Snapshot
Either when camera is in standby mode or recording video, press
snapshot button to take a photo, status indicator LED will flash
once(red).
Hold snapshot button 3 seconds to enable covert mode, both LED,
LCD & voice indication will be disabled. Camera recording status will
be indicated by vibration: start recording vibrate once, stop
recording vibrate twice.
6
WIFI
When camera is in standby mode, hold Fn button 3 seconds to turn
on/off WIFI.
Note: When WiFi is on, external camera connection is disabled.
GPS
Set GPS on/off via Camera Manager.exe (from BodyCam PC
software).
IR infrared night vision
Press Fn button once to turn on IR, press again to turn IR off.
Covert Mode (Stealth mode)
Hold photo button 3 seconds to enable/disable covert mode.
When covert mode is on, camera LED, LCD & audio alerts will all be
disabled. Camera will vibrate only: vibrate once-start video
recording; vibrate twice-stop video recording.
Video Mute
Press Fn button twice in one second (double click) to enable Video
Mute function, when Mute is on, the recorded video wont have
audio. When mute is enabled, camera will beep once, when mute is
disabled, camera will beep twice.
7
LCD Screen
After camera is powered on, LCD will turn on, and LCD will turn off
automatically after 1 minute. Press power button to turn on/off
LCD.
When camera goes to covert mode, LCD will go off, once covert
mode is disabled, LCD will turn on again.
LCD screen overview:
Standby mode
(power on but not recording)
Recording mode
(video recording)
Pre-Recording mode
(Pre- recording is set on)
8
IR icon : When camera IR Infrared light has been turned on, IR
icon will show up .
Mute icon : When camera mute function has been turned on,
Mute icon will show up.
GPS icon : When GPS was set off, the GPS icon shows up.
When GPS has been set on, GPS icon will show up, flashing. After
GPS signal being received, GPS icon will go solid.
WIFI icon : When WIFI is off, WIFI icon is .
When WIFI has been turned on, WIFI icon will turn blue .
Storage icon : When storage is full, it will show 4 blocks, then one
block less once storage has been used.
Battery icon : When battery is full, it will show 4 blocks, then one
block less once battery has been used.
Resolution icon : When resolution has been set, Resolution
icon will show accordingly, for example, 1440P, 1080P, 720P.
Video recording icon : When video recording starts, the red
dot will start flashing. When camera is in standby mode, the red dot
will be solid red.
9
Recording time : The time format HH:MM:SS, indicates
the video recorded time.
LED indication
Charging indication LED:
Blue: charging status
White: camera is fully charged
Status Indicator LED:
Solid Green: camera is in standby mode
Solid Red: camera is in standby mode, while pre-record is set on
Flashing Red: camera is recording video
Flash red once: camera is taking photo
Charging
Use the USB cable supplied in the box to charge the camera via the
USB port on the side, or the USB port on the charging dock where
camera is docked.
Note: upon receiving your body camera, it is recommended to get
device fully charged before usage; Recharge the camera before long
period of not being used.
Reset
RESET BUTTON is inside the USB port
Press RESET BUTTON when camera freezes up or works abnormally.
Note:
When camera battery level goes to 5%, camera will prompt voice
alarm: LOW BATTERY, LOW BATTERY …
When camera memory level descend to 200MB, camera will prompt
voice alarm: CARD FULL, CARD FULL …
10
WiFi
Search Eyescam Pro in App Store or Google Play and download it to your
phone or tablet.
11
Hold Fn button for 3 seconds to turn on WiFi. You will see blue WiFi icon on
top row of screen.
Go to phone/tablet WiFi setting. Find out your body cameras WiFi SSID
(amba_boss-****) and select, then input WiFi password (1234567890 as
default) and connect.
12
Open Eyescam Pro and tap connecting device to enter camera interface.
Tap resolution window to change video resolution.
Tap setting icon to enter simple setting menu.
13
Tap RED button to start/stop video recording. Tap PHOTO button to make a
snapshot.
14
15
Tap Recorder File to view the video and photo files.
16
1. Camera setting through CAM MANAGER
Camera setting can be changed through Camera Manager (from
BodyCam PC software). Before using this camera, please connect it to
computer through auxiliary USB cable, then press Fn button for six time
to get access camera storage on PC. You can find BodyCam PC Software in
root folder. Please copy it to your PC for further use.
1, Open Camera Manager and enter password, connect and login. (Default
password is 000000)
17
2, Click Get to show up camera original settings. Choose target setting and
click Set, then setting is changed.
3, Click Enter U Disk (upper right corner) to make camera to be recognized
by PC as a folder. You can check all files from the camera folder.
18
IMPORTANT INFORMATION
The clips and attachment studs rotate 360 degrees -
The crocodile clip, epaulette clip, chest harness and shoulder harness
attachment studs ALL turn 360 degrees. Slot the clip into the back of the
camera then turn the clip vertically. Or you can slot the clips into the back of
the body camera first, then attach the body camera to the chest or shoulder
harness, then turn the body camera vertically.
Reset device-
To reset the device, use a small needle to jab the reset button. The reset
button is located next to the USB port.
Delete files -
You can only delete the recorded files from a computer. This is to stop people
from getting rid of the evidence straight from the device itself. To delete the
files from your computer, right click, and then delete them.
Product warranty -
We offer a 12-month warranty on the body camera. This warranty covers
faults that were caused by the manufacturer. If the fault was caused by the
customer, then the warranty will be void.
USB cable -
Please only use the USB cable provided in the product box. Using other USB
cables might cause damage to the body camera.
Attention -
Charge camera fully after camera is left without working for long time.
Keep camera bottom away from water to avoid short circuit or oxidation.
Don’t disassemble camera without authorized instruction.
When WiFi is on or low battery, external camera connection is disabled.
  • Page 1 1
  • Page 2 2
  • Page 3 3
  • Page 4 4
  • Page 5 5
  • Page 6 6
  • Page 7 7
  • Page 8 8
  • Page 9 9
  • Page 10 10
  • Page 11 11
  • Page 12 12
  • Page 13 13
  • Page 14 14
  • Page 15 15
  • Page 16 16
  • Page 17 17
  • Page 18 18
  • Page 19 19

DIGITALas F1EL21 User manual

Type
User manual

Ask a question and I''ll find the answer in the document

Finding information in a document is now easier with AI