Workbench toolbar
While all operations can be done
from the menus, many commonly
used functions can be performed
from the main Digi ESP
™
toolbar
.
The contents of this toolbar change
based on the active perspective and items may be enabled or disabled based on the
state of either the active view or editor
.
Output and Console
V
iews:
Pr
oblems tab
Look here for compile errors
. Double-click on the
errors to navigate to the location in your source code.
Reference: C/C++ Perspective
Additional Information
Refer to the items below for additional information and assistance
on developing NET+OS applications
• The product support web page: www.digiembedded.com/support
•
T
he product support web forums:
www.digiembedded.com/forums
Reference: Debug Perspective
C/C++ Projects view
Displays your projects and files.
Digi ESP
™
includes multiple tutorials to help you along. Find more
of the information by clicking the Help > Welcome menu.
Welcome toolbar
A mini version of the welcome screen. Use this toolbar to navigate just as you
would use the welcome screen to find Getting Started tutorials
,
samples
,
and
other helpful information.
Debug per
spective
Debugging views
. Digi ESP
™
automatically switches to the Debug
perspective when you start to debug
your application.
C/C++ per
spective
Development views
. Create, develop,
edit and build using the C/C++
perspective
.
Features of Digi ESP
™
Other debug views
V
iew local and global v
ariables, breakpoints, monitor and change Digi NET+ARM
chip registers or inspect regions of memory.
Debug view
Displays threads
,
thread status
, and thread stack frames.
New
Build Debug
Digi ESP
™
maintains multiple layouts of views, menus, and toolbars to help you complete
different tasks
. These layouts are called perspectives. All perspectives are completely
customizable and Digi ESP
™
remembers the changes you make, so the next time you use the
perspective, it stays just the way you like it.
COM Port
Call Stack
V
ariable
,
Breakpoint
V
iew
Source View
TIP: While debugging at a breakpoint:
hover over a variable to reveal its value.
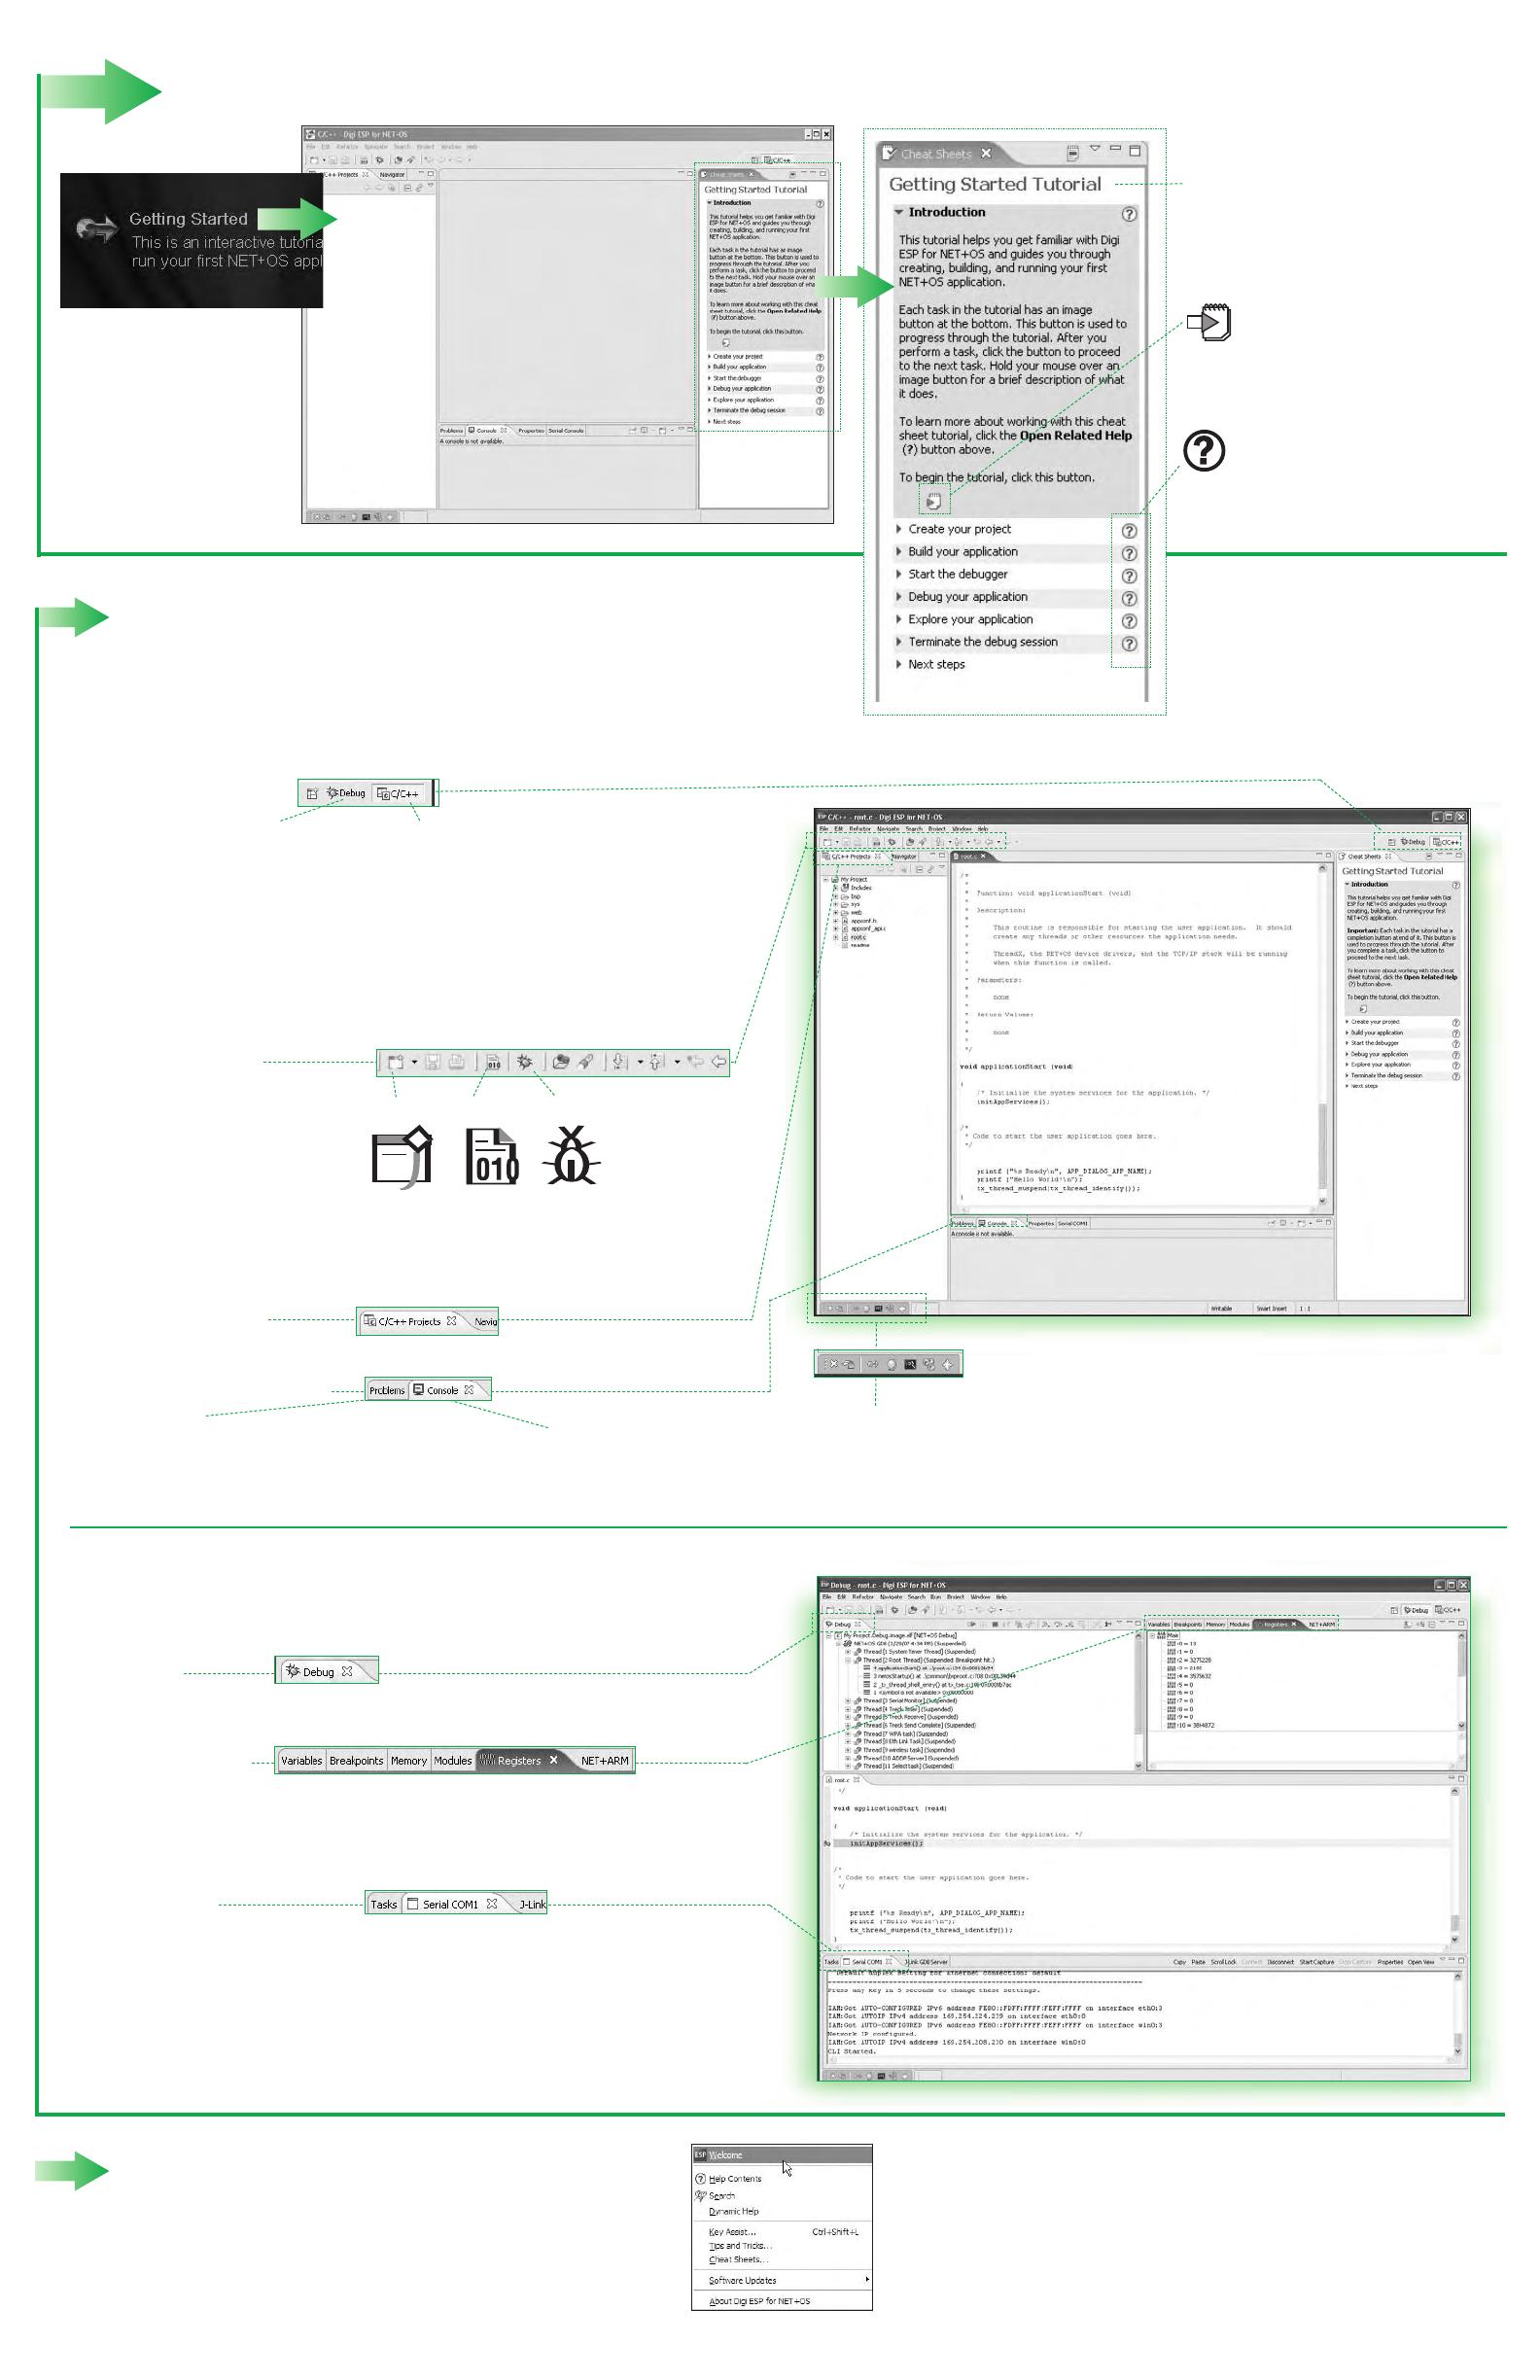
5 Get started with your 1st application
Getting Started Tutorial Digi
ESP
™
guides you through these
simple steps helping you to build
your first application in minutes
.
Next Step button
Click here when you have
completed a step to move onto
the next step in the tutorial.
Help button
Click here to open detailed
help relating to this step in the
tutorial.
Serial COM tab
This view is the serial data received on your serial console. This is the default
console for standard I/O for your application.
Console tab
This view displays the
complete compiler output.

