Page is loading ...

BEFORE YOU BEGIN
Check the thickness of the door. The product will work with a door thickness of 1-3/8" - 1-3/4" only.
Note
If your door is pre-bored, go to Step 1 for deadbolt installation. If your door is not pre-bored, go to
Step 2 and 3 for preparing the door for strike.
The deadbolt for this handleset has an adjustable backset. The deadbolts are preset to a 2-3/8" backset.
Only adjust the deadbolts if your door is prebored to a 2-3/4" backset.
PART IDENTIFICATION
1. Adjustable deadbolt
2. Combo screws
3. Flat head wood screws
4. Strike
5. Key
6. Key cylinder
7. Cylinder collar
8. Turnpiece mounting plate
9. 2" Pan head machine screws
10. Turnpiece trim
11. 1/2" Oval head machine screws
2
EXPLODED VIEW
3
(2) DEADBOLT MOUNTING SCREW
#10-32 x 2"
(2) COMBO SCREW
#8 x 3/4"
(2) 1-1/4" WOOD SCREW
#10 x 1-1/4"
INSTALLATION FASTENERS
(2) 1/2" OVAL HEAD ACHINE SCREWS
#8 X 1/2"
4
5
6
7
8
9
10
11
1
TOOLS REQUIRED: ADDITIONAL TOOLS IF DOOR IS NOT PRE-BORED:
• Phillips screwdriver
or power screwdriver
• Center punch
• 1/8" drill bit
• 3/8" drill bit
• 7/8" spade bit
• Wood chisel
• 2-1/8" hole saw
• 1" spade bit
• Drill
ENTRY DOOR SINGLE CYLINDER DEADBOLT
INSTALLATION INSTRUCTIONS
TM
Rockwell

1HANDLE INSTALLATION
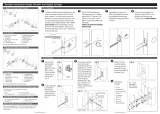
A. Install the deadbolt into the door panel. Insert the deadbolt into the top
bore ensuring the "+" slot is underneath and ridge on top. Using a 1/8" drill
bit drill two pilot holes and secure the deadbolt with two flat head wood
screws. Ensure the bolt is extended for installation.
Note: To extend the head of the deadbolt, insert a screwdriver into the
"+" slot and rotate.
B. Install the key cylinder. Keeping the tailpiece vertical, insert the key
cylinder through cylinder collar and into the "+" slot of the deadbolt. Secure
the exterior cylinder by driving two 2" pan head machine screws through the
mounting plate, deadbolt and into the exterior cylinder.
DO NOT OVER TIGHTEN SCREWS AND DO NOT INSERT KEY
INTO KEY CYLINDER DURING THIS STEP.
C. Install the turnpiece trim. Position the turnpiece trim over
the mounting plate, inserting the key cylinder tailpiece into
the turnpiece. Secure in place by driving two 1/2" oval head
machine screws through the two chamfered holes.
2PREPARING DOOR FOR DEADBOLT
Note: The following instructions are for doors that have not been
pre-bored ONLY.
A. Fold the template on the line and place on the door at the desired height (approximately 40"
from the floor). Use a center punch to mark the hole locations on the face and edge of the door panel.
Caution: RE-CHECK bore hole locations BEFORE drilling.
B. Drill the face bores and edge bores as indicated on the template.
C. Insert the latch into the edge of the door. Trace an outline of the faceplate onto
the door's edge and mark the screw hole centers.
D. At the screw hole marks, drill two 1/8" diameter pilot holes for the screws.
E. Chisel out the area marked in Step C to a depth of 5/32" or until the faceplate is
flush with the door's edge.
3PREPARING DOOR FOR STRIKE INSTALLATION
A. Using the strike portion of the marking template locate and use a center punch to mark the strike mounting screws and
centering points for the door thickness.
B. Align the strike and trace the outline onto the door frame using the mounting screw marks for location.
C. At the screw marks,
drill two 1/8" diameter pilot
holes for the screws.
D. At the centering point
mark, bore a 7/8"
diameter by 3/4" deep hole.
E. Chisel the areas
mark in Step B until
the strike is flush with
the door frame.
F. Place the strike
and secure with the two
screws provided.
1B
1B
1C
PROPER TURN PIECE
MOUNTING PLATE
ORIENTATION
PROPER TURN PIECE
ORIENTATION
RIDGE
SLOT
1A
'
wEJBNFUFS
QJMPUIPMFT
wEJBNFUFSCZ
wEFFQCPSF
$
%
&
"
i
%003
.PVOUJOH
TDSFX
.PVOUJOH
TDSFX
$FOUFSJOHQPJOU
-PDBUFTUSJLFPO
UIFTBNFDFOUFS
BTMBUDI
i
%003
#
w
#"$,4&5
w
#"$,4&5
i
5)*$,
%003
i
5)*$,
%003
"QQSPY
w
GSPNnPPS
"
&
$
wEJBNFUFS
QJMPUIPMFT
%
/


