Page is loading ...

Instructions for Installation & Use 1
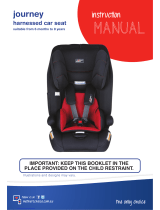
IMPORTANT:
KEEP THIS BOOKLET IN THE PLACE PROVIDED ON THE CHILD RESTRAINT
Instructions for Installation & Use
Series No. 7300/E/2013
Series No. 7300/E/2013/i
Series No. 7300/F/2013
Series No. 7300/F/2013/i
If you have purchased an
ISOFIX compatible version
then ISOFIX compatible straps
are tted the seat.
Scan for video
instructions
REARWARD
FACING
Birth to 2-3
years (approx)
FORWARD
FACING
12 months to 4
years (approx)
CONVERTIBLE CAR SEAT
WITH OPTIONAL ISOFIX COMPATIBILITY
Suitable for Birth to 4 years (approx)

Instructions for Installation & Use
2
SEATBELT QUICK SETUP REARWARD FACING
SEE PAGE 28 - 35 FOR FURTHER INFORMATION
1
2
3
4
5
6

Instructions for Installation & Use 3
SEATBELT QUICK SETUP REARWARD FACING
SEE PAGE 28 - 35 FOR FURTHER INFORMATION
7
10
OR
9
88

Instructions for Installation & Use
4
SEATBELT QUICK SETUP FORWARD FACING
SEE PAGE 58 - 62 FOR FURTHER INFORMATION
3
4
56
1
2

Instructions for Installation & Use 5
SEATBELT QUICK SETUP FORWARD FACING
SEE PAGE 58 - 62 FOR FURTHER INFORMATION
7
8
11
10
OR
99

Instructions for Installation & Use
6
ISOFLEX QUICK SETUP REARWARD FACING
SEE PAGE 36 - 41 FOR FURTHER INFORMATION
2
3
45
6
7
1

Instructions for Installation & Use 7
ISOFLEX QUICK SETUP REARWARD FACING
SEE PAGE 36 - 41 FOR FURTHER INFORMATION
8
10
11
12
OR
99

Instructions for Installation & Use
8
2
ISOFLEX QUICK SETUP FORWARD FACING
SEE PAGE 63 - 66 FOR FURTHER INFORMATION
3
4
5
6
7
1

Instructions for Installation & Use 9
ISOFLEX QUICK SETUP FORWARD FACING
SEE PAGE 63 - 66 FOR FURTHER INFORMATION
8
9
11
OR
10 10

Instructions for Installation & Use
10
INTRODUCTION
To be used only in a rearward-facing position until the infants's shoulders either reach the lower shoulder
height marker (approximately 12 months of age) or reach the middle height marker (approximately 2 to
3 years of age). Then to be used in a forward-facing position until the child's shoulders reach the upper
shoulder height marker (approximately 4 years of age).
Continue to use this child restraint until the child reaches this limit.
Do not use forward facing until child's shoulders are above the lower shoulder height marker.
Infants are at risk of serious injury if they face forward too early.
Children are at risk of serious injury if they move to booster seats too early.
Children who have outgrown this restraint are safest in a larger child restraint with an in-built harness or a
booster seat until their shoulders reach the upper shoulder height marker of the restraint.
للاستخدام فقط في الوضعية المواجهة للخلف، حتى يصل كتفا الطفل إما إلى الإشارة السلفية لارتفاع الكتف
(حوالي 12 شهرا من العمر) أو إلى الإشارة المتوسطة لارتفاع الكتف (حوالي 2-3 سنوات من العمر). ثم الاستخدام في
الوضعية المواجهة للأمام حتى يصل كتفا الطفل إلى الإشارة العلوية لارتفاع الكتف (حوالي 4 سنوات من العمر).
استمر في استخدام حاجز الأطفال هذا لحين وصول الطفل إلى هذا الحدّ
لا تستخدم الوضعية المواجهة إلى الأمام إلا عندما يكون كتفي الطفل أعلى من علامة ارتفاع الأكتاف السفلية.
يكون الرضّع في مخاطرة للتعرض إلى الإصابات الخطيرة إذا تم توجيههم إلى الأمام بصورة مبكرة أكثر من اللازم.
يكون الأطفال في مخاطرة للتعرض إلى الإصابات الخطيرة إذا ما انتقلوا إلى مقاعد الأمان المرتفعة بصورة مبكرة أكثر
من اللازم.
يكون الأطفال الذين كبُر حجمهم عن هذا الحاجز أكثر أمانًا في حاجز أطفال ذو مقاس أكبر ومزود بأحزمة مدمجة أو مقعد أمان
مرتفع حتى تصل أكتافهم إلى علامة ارتفاع الأكتاف العلوية للحاجز.
只用于后向式安装,直到婴儿的肩膀达到靠下的肩高标记(大约12个月的宝宝)或者中
部的肩高标记(大约2-3岁的儿童)。然后用于前向式安装,直到儿童的肩膀达到靠上的
肩高标记(大约4岁的儿童)。
在儿童达到该座椅上限以前必须不断使用这一安全座椅。
在儿童肩高未超过靠下的肩高标记之前不得采用前向式坐姿。
婴儿过早乘坐前向式座椅则可能受到严重的伤害。
儿童过早使用垫高椅则可能受到严重的伤害。
个子比该安全座椅大的儿童最安全的做法是乘坐设有内置安全带的更大汽车座椅或垫高
椅,直到他们的肩膀达到该座椅靠上的肩高标记。

Instructions for Installation & Use 11
INTRODUCTION
Sólo debe utilizarse orientado hacia atrás hasta que los hombros del niño alcancen el
marcador de altura inferior (aproximadamente a los 12 meses de edad) o alcancen el
marcador de altura medio (aproximadamente de 2 a 3 años de edad). Posteriormente
debe utilizarse orientado hacia adelante hasta que los hombros del niño alcancen el
marcador de altura superior (aproximadamente a los 4 años de edad).
Utilice este sistema de seguridad infantil hasta que el niño alcance ese límite.
No utilice la silla orientada hacia adelante hasta que los hombros no sobrepasen el
marcador de altura inferior.
El niño corre el riesgo de sufrir lesiones graves si se utiliza la silla orientada hacia
adelante antes de tiempo.
El niño corre el riesgo de sufrir lesiones graves si se lo traslada antes de tiempo a un
asiento elevador.
El niño que ya no quepa en este sistema de seguridad estará más seguro en un asiento
para niños más grande con un arnés incorporado o un asiento elevador hasta que sus
hombros alcancen el marcador de altura superior del sistema de seguridad.
Magagamit lamang sa isang nakaharap sa likod na posisyon hanggang sa maabot ng
balikat ng sanggol ang alinman sa ibabang marka ng taas ng balikat (humigit-kumulang
12 na buwang edad) o maabot ang panggitnang marka ng taas (humigit-kumulang
2-3 taong edad). Pagkatapos ay magagamit sa nakaharap sa unahan na posisyon
hanggang sa maabot ng mga balikat ng bata ang itaas na marka ng taas sa balikat
(humigit-kumulang 4 na taong edad).
Ipagpatuloy ang paggamit ng pampigil ng bata na ito hanggang sa maabot ng bata ang
limitasyong ito.
Huwag gamitin sa isang nakaharap sa unahan na posisyon hanggang sa malampasan
ng mga balikat ng bata ang ibabang marka ng taas ng balikat
Ang mga sanggol ay nasa seryosong peligro ng pagkapinsala kung sila ay haharap ng
masyadong maaga.
Ang mga bata ay nasa seryosong peligro ng pagkapinsala kung sila ay masyadong
maagang ililipat sa mga upuang booster.
Ang mga batang napagkalakhan na ang pampigil na ito ay pinakaligtas sa isang mas
malaking pampigil sa bata na may kasamang guwarnisyon o isang upuang booster
hanggang sa maabot ng kanilang mga balikat ang itaas na marka ng taas ng balikat ng
pampigil.

Instructions for Installation & Use
12
INTRODUCTION
Να χρησιμοποιείται μόνο σε θέση στραμμένο προς τα πίσω μέχρι οι ώμοι του βρέφους
είτε να φτάνουν στον κάτω δείκτη ύψους ώμου (περίπου 12 μηνών) είτε να φτάνουν
στον μεσαίο δείκτη ύψους (περίπου 2 με 3 ετών). Κατόπιν να χρησιμοποιούνται σε θέση
που να κοιτάζει προς τα εμπρός μέχρι οι ώμοι του παιδιού να φτάνουν στον επάνω
δείκτη ύψους ώμου (περίπου 4 ετών).
Συνεχίστε να χρησιμοποιείτε αυτό το σύστημα συγκράτησης βρεφών μέχρι το παιδί να
φτάσει σε αυτό το όριο.
Μην το χρησιμοποιείτε στραμμένο προς τα εμπρός μέχρι οι ώμοι του παιδιού να είναι
πάνω από τον χαμηλότερο δείκτη ύψους ώμων.
Τα νήπια κινδυνεύουν με σοβαρό τραυματισμό αν κοιτάζουν προς τα εμπρός πολύ
νωρίς.
Τα παιδιά διατρέχουν κίνδυνο σοβαρού τραυματισμού, εάν μετακινηθούν σε βοηθητικά
Da utilizzare solo in posizione rivolta all'indietro fino a quando le spalle del bambino
raggiungono il marcatore di altezza inferiore della spalla (circa 12 mesi di età) o il
marcatore di altezza centrale (circa 2 o 3 anni). Dopo di che, può essere usato nel senso
di marcia fino a quando le spalle del bambino raggiungono il marcatore di altezza della
spalla superiore (circa 4 anni di età).
Continuare a utilizzare questo sistema di ritenuta del bambino fino a quando raggiunge
questo limite.
Non utilizzare nel senso di marcio fino a quando le spalle del bambino superano il
marcatore di altezza inferiore.
I neonati sono a rischio di lesioni gravi se messi in posizione frontale troppo presto.
I bambini sono a rischio di lesioni gravi se si muovono dal seggiolino troppo presto.
I bambini che hanno superato la marcatura sono più sicuri in un sistema di ritenuta per
bambini più grande con imbracatura interna o in un seggiolino fino a quando le spalle
raggiungono il marcatore di altezza superiore della spalla del sistema di ritenuta.

Instructions for Installation & Use 13
INTRODUCTION
僅可後向安裝使用,直至嬰兒肩膀達到靠下的肩高標記(大約12個月大),或是達到中
間肩高標記(大約2至3歲大)。然後您才能讓其乘坐前向安裝使用的座椅,直至其肩膀
達到高位肩膀高度標記(大約4歲大)。
孩子應一直采用後向式坐姿,直至其達到後向式坐姿的上限。
孩子肩膀未超過靠下的肩高標記前,切勿采用前向式坐姿。
孩子若過早乘坐前向式汽車座椅,可能會對其造成嚴重的傷害。
急於讓孩子過早地乘坐墊高椅,可能會對其造成嚴重的傷害。
孩子因長大超出此汽車座椅的上限,最安全的做法便是采用更大且有內建式安全帶的汽
車座椅,或是乘坐墊高椅,直至其肩膀達到汽車座椅靠上的肩高標記。
केवल पीछे की तरफ मुँह किये हुये स्थिति में तब तक प्रयोग करें जबतक या तो शिशु का कन्धा कन्धे के निचले भाग के चिन्ह तक न
पहुँच जाए (लगभग 12 महीने की आयु पर) या फिर मध्य भाग के चिन्ह तक न पहुँच जाए (लगभग 2 से 3 वर्ष की आयु पर)। इसके
बाद शिशु का मुँह सामने की दिशा में हो जबतक शिशु का कन्धा कन्धे के ऊपरी भाग के चिन्ह तक न पहुँच जाए (लगभग 4 साल की आयु
पर)।
शिशु के इस सीमा तक पहुँचने तक इस शिशु प्रतिबन्ध का प्रयोग जारी रखें।
शिशु के मुँह सामने की दिशा की ओर तब तक न करें जबतक कि शिशु का कन्धा कन्धे के निचले भाग के चिन्ह को पार न करे।
शिशुओं को समय से पहले सामने की ओर बैठाए जाने पर उन्हें गम्भीर चोट का खतरा होता है।
बूस्टर सीट को समय से पहले प्रयोग किए जाने पर शिशुओं को गम्भीर चोट का खतरा होता है।
`जो शिशु इस प्रतिबन्ध के लिए अनुकूल आयु से बढ़े हो चुके हों, वे एक बडे आकार के प्रतिबन्ध में सबसे अधिक सुरक्षित होते है
जिसकी इन-बिल्ट हार्नस या बूस्टर सीट हो और तब तक जब तक उनके कन्धे प्रतिबन्ध के कन्धे के ऊपरी भाग के चिन्ह तक न पहुँच
जाए।
Chỉ được sử dụng ở vị trí hướng mặt về phía sau cho đến khi vai của bé cao tới vạch
ghi ở dưới cùng (khoảng 12 tháng tuổi) hay tới vạch ghi độ cao ở giữa (khoảng 2 tuổi tới
3 tuổi). Sau đó được sử dụng hướng mặt về phía trước đến khi vai của em cao tới vạch
ghi ở trên cùng (khoảng 4 tuổi).
Hãy tiếp tục sử dụng ghế em bé này đến khi em cao tới giới hạn này.
Không sử dụng hướng mặt về phía trước cho đến khi vai của em bé trên vạch ghi độ
cao của vai ở dưới cùng.
Bé sơ sinh có nguy cơ bị chấn thương nghiêm trọng nếu hướng mặt về phía trước quá
sớm.
Trẻ em có nguy cơ bị chấn thương nghiêm trọng đổi sang ghế em bé (booster) quá
sớm.
Các em nào lớn hơn ghế em bé được an toàn nhất là trong ghế em bé (restraint) lớn
hơn với đai nịt gắn sẵn hoặc ghế trẻ em rộng hơn cho đến khi vai của em cao tới vạch
ghi độ cao của vai ở trên cùng của ghế em bé.

Instructions for Installation & Use
14
INTRODUCTION
These instructions cover various configurations of this model. To determine if the feature is available on
your child restraint refer to packaging. ISOFIX compatible connection is not available on all models.
No child restraint can guarantee absolute protection from injury in every crash. However, to ensure
that your child gets all the protection designed into the restraint PLEASE READ AND FOLLOW THESE
INSTRUCTIONS EXACTLY and use only Britax Safe-n-Sound recommended parts and accessories.
A child should not use this restraint in the forward facing mode until their neck muscles are able to support
their head. However Britax recommends that you keep your child in a rearward facing restraint for as long
as possible or until the appropriate shoulder height marker is reached.
Carefully read all the instructions for installation in this book. If in doubt about the method of installation,
consult Britax Childcare or agent, or a child restraint fitter or, in New Zealand, to consult the agent for the
vehicle.
To be used with a lap-sash or lap only seatbelt or ISOFIX low anchorages (if fitted) in the back of most cars
with forward facing seats.
Regional Road Rules may prohibit the use of this restraint in the front seat of the car until the child is 4
years of age. Check your Regional Rules for exemptions.
Note: These instructions show the adjustable headrest with side wings, these instructions are also
applicable to restraints with adjustable headrests without side wings.
Always store the instruction book in the pocket provided and tuck pocket under trim cover.
WHAT ARE ISOFIX LOW ANCHORAGES IN A VEHICLE?
If you purchased a model which is ISOFIX Compatible there will be straps fitted to each side of the lower
part of the seat and stored at the upper side of the seat. Refer to page 24.
ISOFIX low anchorages are fixed, standardised anchoring points for securely installing an ISOFIX
compatible child restraint in a vehicle with ISOFIX low anchorages. They are an alternative method of
installing the child restraint without using car's seatbelt.
It has now become an international standard for vehicles. This anchoring technology minimises installation
mistakes by optimising the protective effect of the connection between vehicle and ISOFIX compatible child
restraint.

Instructions for Installation & Use 15
INDEX
INTRODUCTION
WARNINGS
SHOULDER HEIGHT MARKERS
A GROWING CHILD
SHOULDER HEIGHT MARKERS
SHOULDER HEIGHT MARKERS
THE NEXT STEP
INSTALLATION METHOD
SPECIAL FEATURES:
REARWARD FACING
SUITABLE FOR USE
HOW TO INSTALL
HOW TO INSTALL USING
SEATBELT
HOW TO INSTALL USING
ISOFLEX CONNECTORS
HOW TO USE
HOW TO REMOVE
SPECIAL FEATURES: FORWARD-
FACING
SUITABLE FOR USE
HOW TO SETUP
HOW TO INSTALL USING
SEATBELT
HOW TO INSTALL USING ISOFLEX
CONNECTORS
HOW TO USE
HOW TO REMOVE
HOW TO INSTALL IN AN AIRCRAFT
CARE & MAINTENANCE
ACCESSORIES
INSTALLATION OF CAR UPPER
ANCHORAGE POINT
TRAVELLING TIPS
IN CASE OF ACCIDENT
23
18
20
21
22
26
27
16
14
28
36
42
50
53
56
60
63
67
72
74
77
86
89
93
94
57
PAGE

Instructions for Installation & Use
16
• Fit the restraint firmly to the car seat.
• Fit the harness firmly to the child.
• A loose restraint or harness is dangerous.
• Supervision of children is needed because they may be able to undo the buckles and adjusters.
• Use the restraint exactly as shown in the instructions.
• DO NOT LEAVE CHILDREN UNATTENDED IN THE CAR.
• Do not alter or modify this restraint.
• Repairs must only be done by the manufacturer or agent.
• Do not allow the restraint to come into contact with polishes, oils, bleach and other chemicals.
• Destroy the restraint if it has been in a severe crash, even if no damage is visible. See page 94.
• DO NOT USE THIS RESTRAINT WITHOUT THE COVER.
• Always secure the loose end of the top tether strap. Do not use the child restraint where this strap may
fall into a split in the seat back or off the side of the seat.
• ALWAYS ATTACH HOOK AND REMOVE SLACK.
• To ensure infant’s back is evenly supported, do not put more than one nappy on the baby and make
sure the nappy is not thickly folded at the back.
• DO NOT USE A REAR-FACING CHILD RESTRAINT WHERE AN AIRBAG IS FITTED IN FRONT OF
THE SEATING POSITION.
• Do not harness an infant wrapped in a blanket or swaddled. Any blanket or wrap must only be placed
over the harness and infant.

Instructions for Installation & Use 17
IMPORTANT :
NON ISOFIX COMPATIBLE: FOR INSTALLATION WITH SEATBELT ONLY
TO BE USED WITH LAP-SASH OR LAP ONLY SEATBELTS IN THE BACK OF MOST CARS WITH
FORWARD FACING SEATS.
• Without ISOFIX compatible connectors; This child restraint is not approved for use with any connectors
that connect to the car's ISOFIX low anchorages.
ISOFIX COMPATIBLE: FOR INSTALLATION WITH ISOFLEX CONNECTORS
• TO BE USED WITH A LAP-SASH OR LAP-ONLY SEATBELT OR ISOFIX LOW ANCHORAGES IN
THE BACK OF MOST CARS WITH FORWARD FACING SEATS.
• Do not attach the lower attachment connectors of two separate child restraints to the same
ISOFIX low anchorages in your car.
• Always attach the top tether strap to the child restraint upper anchorage in your car before each
journey.
• Child restraint lower attachment connectors and the ISOFIX low anchorages in your car are designed to
withstand only those loads imposed by a correctly fitted child restraint.
GENERAL
• Regularly check the restraint components, straps and other fitments for correct function and condition. If
faulty, cease using and seek repair by Britax.
• IF AN AIRBAG IS FITTED IN THE SEATING POSITION WHERE THE CHILD RESTRAINT IS TO BE
FITTED, FOLLOW THE VEHICLE MANUFACTURERS WARNINGS AND INSTRUCTIONS.
• Protect all webbing from abrasion and cutting by sharp corners and edges.
• The restraint should not be purchased or sold as a second hand item. It is recommended not to use
child restraints older than 10 years as the protection in an accident may be reduced.
• THIS RESTRAINT IS NOT SUITABLE FOR USE WHERE THE TOP TETHER STRAP MAY FALL INTO
A SPLIT IN THE SEAT BACK OR OFF THE SIDE OF THE SEAT.
• Seatbelt extenders are not recommended to be used if the seatbelt is not long enough to secure the
child restraint. If seatbelts are too short then seek advice from a child restraint fitter and consider their
recommendations before using a seatbelt extender. If you use a seatbelt extender then ensure that the
seatbelt buckle does not enter the rearward or forward facing belt paths.
• THIS RESTRAINT MUST BE ATTACHED TO A CHILD RESTRAINT UPPER ANCHORAGE POINT
IN THE CAR. REFER TO CAR OWNER'S HANDBOOK FOR LOCATION OF UPPER ANCHORAGE
POINTS. REFER TO A CHILD RESTRAINT FITTING STATION IF NO UPPER ANCHORAGE POINTS
ARE IN THE MOTOR CAR. Refer to pages 89 to 92.

Instructions for Installation & Use
18
SHOULDER HEIGHT MARKERS
A GROWING CHILD
This restraint must remain rear facing until the child reaches the lower shoulder height marker (approx. 12
months old).
Once the child reaches the lower shoulder height marker the restraint can either;
• Remain rear facing until the middle shoulder height marker is reached, or
• Change the mode to forward facing until the upper shoulder height marker is reached (approx. 2 to 3
years).
USE IN FORWARD FACING MODE
BETWEEN THESE MARKERS
USE IN REAR FACING MODE UP TO
EITHER OF THESE MARKERS
Britax recommends that you keep your
child in a rearward facing restraint for as
long as possible until the middle shoulder
height marker is reached.
Forward FacingForward FacingRearward Facing

Instructions for Installation & Use 19
SHOULDER HEIGHT MARKERS
A GROWING CHILD
Forward Facing
Rearward Facing
Newborn (Rearward-Facing)
Shoulder Height
Marker A
Shoulder Height
Marker B
Older baby (Rearward-Facing)
Child Use (Forward-Facing)
Move to the next form of child restraint when
the child's shoulders reach the upper shoulder
height marker.
Turn to forward-facing when the child's shoulders
are between the lower marker A and middle
marker B shoulder height markers.
Shoulder
Height
Marker A
Shoulder
Height
Marker C

Instructions for Installation & Use
20
SHOULDER HEIGHT MARKERS
Marker A: LOWER SHOULDER HEIGHT MARKER
Marker B: MIDDLE SHOULDER HEIGHT MARKER
Marker C: UPPER SHOULDER HEIGHT MARKER
When the child's shoulders
reach the lower marker, the child
restraint may be turned to face
towards the front of the vehicle
or move the child to another
forward facing seat with in built
harness. At least 12 months
of age. Britax recommends to
maintain rearward facing for
as long as possible until the
shoulders reach marker B.
The child restraint is unsuitable for the occupant when the shoulders are above the upper height marker
label. The child needs to be moved into the next form of child restraint.
When the child's shoulders
reach this upper marker, the
child is now too big for the
child restraint. It is now time
to move to the next child
restraint. Approximately 4
years of age.
When the child's shoulders
reach this marker, the seat must
be moved into forward facing
mode. Approximately 2 to 3
years of age.
IMPORTANT: Follow this advice.
/