OJ Electronics MCS4 User manual
- Category
- Thermostats
- Type
- User manual

© 2013 OJ Electronics A/S
1
Application
Contents
Introduction ...................................................2
First time settings .........................................2
CS4
TM
CENTRAL CONTROLLER
General operation ......................................... 2
Back ...........................................................2
Exit .............................................................2
Operation mode ............................................ 2
Holiday mode ............................................2
Comfort mode ...........................................3
Frost mode .................................................3
Manual mode .............................................3
Auto mode .................................................. 3
Controller setup menus ...............................3
4-event settings ............................................ 3
Schedule ....................................................3
User settings .................................................3
Time and date ...........................................3
Child lock ..................................................3
Display settings .........................................3
Energy monitor ..........................................4
Engineer settings ..........................................4
Oset temperature .....................................4
Adaptive function .......................................4
Application .................................................4
Temperature scale ......................................4
Frost temperature .......................................4
Backlight ....................................................4
Sensor selection .........................................4
Language....................................................5
Factory reset ...............................................5
Information .................................................5
System settings ............................................5
Add unit ...................................................... 5
Remove unit ...............................................5
Switch unit ..................................................5
Alarm relay ..................................................5
Readout .........................................................5
Energy monitor ...........................................5
Room status ...............................................5
Back ...........................................................5
Exit .............................................................5
Control signal .............................................5
Factory settings, Master ............................. 6
CS4
TM
THERMOSTAT
General operation ......................................... 6
Wireless signal strength ..............................6
OCS4-10 / OSD4-1999 / OSA4-10
67116C 11/13 (LOA)
Comfort System4
TM
English
Adaptive function
Information
4-event settings
User settings Engineer settings System settings
Holiday
Readout Exit
Comfort System4
TM
Menu
Offset temp. Energy monitor
Room status
Back
Comfort
Frost
Manual
Add unit
Remove unitChild lock
Switch unit
Back
List
Menu
Mode
16:31
List Menu Mode
Tue
00: Hall
21.0°C
USER MANUAL
Time and date
Display settings
Energy monitor
Backlight
Exit
Back
ExitExit Sensor
Language
Factory reset
Temp scale
Back
Exit BackAlarm relay
Manual temperature setting ........................6
Settings .........................................................6
Max. temperature ....................................... 6
Min. temperature ........................................ 6
Max. limit temperature ...............................6
Min. limit temperature ................................6
Measured floor temperature .......................6
Measured room temperature......................6
Application .................................................6
Oset ..........................................................7
Backlight ....................................................7
Address readout .........................................7
Repeater function .......................................7
Software version ........................................7
Child lock (local) ...........................................7
Factory reset ................................................. 7
CS4
TM
PANEL HEATER CONTROLLER
General operation ......................................... 7
LED readouts ................................................7
Factory setting ...........................................7
COMFORT System4
TM
, GENERAL
Error messages ............................................7
System factory settings ...............................8
Preset schedule ..........................................8
GREEN COMFORT
Máximo conforto com reduzido consumo de energia

2
© 2013 OJ Electronics A/S
Comfort System4
TM
English
Introduction
Comfort System4™ is a complete control system for multi-room,
electric heating systems consisting of up to 16 rooms. The system
consists of a Central Controller with Thermostats, Panel Heater
Controller and an Ethernet Gateway. The wireless Central Controller
and Thermostat with room and/or floor sensor ensures maximum
comfort and minimum energy costs.
The Central Controller is a central unit for controlling and monitoring
up to 16 rooms. Animated menu navigation ensures easy setup,
monitoring of energy consumption and selection of comfort mode or
holiday mode.
The Central Controller has 5 built-in schedules. For each day of the
week, individual temperatures can be set for 4 dierent periods, cal-
led events, all of which can be adjusted to suit your needs. Lowering
the temperature when the home is unoccupied reduces energy costs
without reducing comfort.
Furthermore, the Central Controller features an adaptive function
that automatically adjusts heating period start times to ensure that
the required temperature is reached at the required time. After 3
days the adaptive function has learned when the heating must be
switched on.
Gateway is a new possibility for viewing and controlling Master func-
tions from a distance. With a PC, tablet or smartphone, you can gain
access to Master functions via Gateway and the Internet.
Among other things, this gives you the opportunity to: - turn on
the heating in your summer cottage before you arrive; - turn down
the temperature at home if you decide to prolong your holiday; or
simply - make small alterations to the settings if you change your
daily routine.
FIRST TIME SETTINGS
Central Controller
The first time you switch the power interrupter to ON “I”, language,
time and date must be set. The menu will automatically guide you
through the process.
• Choose your language with the up and down buttons and confirm
with OK.
• Set the actual hour and press the OK button. Then set the mi-
nutes. Press OK.
• Set the actual date: year, month and day. Confirm the settings
with the OK button.
• Choose the room or zone to which the controller is to be allotted.
• You are now given the opportunity of connecting the wireless
thermostats. Confirm with OK.
Connecting Thermostats
Before connecting the thermostats it is a good idea to note the
zone/room for the various thermostats so as to facilitate setup, see
table at back of the manual.
• Switch on the power of the first thermostat/pa-
nel heater controller. For the next 120 seconds,
the unit will transmit a unique signal to the con-
troller. The thermostat will display its assigned
address and the signal strength. The controller
will display the same address.
• Switch on the power of the next thermostat/
Panel heater controller to be connected. Repeat
the procedure for all other thermostats/ Panel
heater controller.
• The units connected can now be grouped into
an area name or zone number on the controller. Up to 5 area
names can be chosen.
Press OK for the chosen address and use the navigation but-
tons to select a suitable group.
Press Exit to complete the setup and the controller will show
the initial display.
• Comfort System4 is now ready for use and will control your
heating system in accordance with the pre-programmed 4-event
schedule, see Factory settings.
• Remember to note your settings for each thermostat/relay
point in the table on the back page.
NOTE: Control type is factory set to Room/limit. Control type
can be changed in Engineer settings/Application (page 4).
CS4
TM
CENTRAL CONTROLLER
Navigation buttons
Power interrupter
General operation
The interrupter button allows you to turn the controller on “I” and o
“0” by sliding the button up and down. When the Central Controller
is switched o “0”, the relay disengages. All settings, including time
and date, will be remembered.
The Central Controller is intuitively operated using the navigation
buttons.
The function of each button is indicated above the button on the
display.
Back
Back
Various menus and submenus contain a Back
option.
Use Back to return to the previous step.
Exit
Exit
Returns to the initial display.
Select room
The initial display allows you to select the room for which you want
the actual set temperature and event mode to be displayed.
Use the left and right arrow buttons to select the desired room.
Operation mode
The Central Controller features 5 dierent types of temperature con-
trol. Press Select, then Mode:
OK
Holiday
Holiday mode
Select Holiday if you want to lower the tem-
perature in all rooms for a specific period to
save energy, e.g. if the house is uninhabited
for a period of time.
• Press OK for Holiday, select the stop time
and date, press OK. Select the holiday temperature and confirm
with OK.
The comfort system is now in Holiday mode and a suitcase is
displayed. When the specified date and time is reached, the Central

© 2013 OJ Electronics A/S
3
Controller will automatically revert to Auto mode.
Comfort mode
Select Comfort to set a temporary comfort temperature
(so-called party mode) for a single room or all rooms.
• Press Comfort, confirm with OK and select the room. The com-
fort temperature becomes the highest temperature for the 4-event
plan for the day concerned. Then enter the required duration of
comfort mode: 1-8 hours.
When the period has elapsed, the Central Controller will automati-
cally revert to Auto mode.
Frost mode
OK
Frost
Select Frost to maintain a minimum tempera-
ture for frost protection. The comfort system
maintains a minimum temperature of 10°C
(factory setting).
• Press Frost, confirm with OK and the frost
symbol will be displayed.
Manual mode
OK
Manual
Select Manual to override the program-
med 4-event schedule in a zone by setting a
required temperature manually.
• Press Manual, confirm with OK and
choose the required temperature.
Auto mode
Select Auto if you want the temperature to be controlled auto-
matically via the 4-event schedule for all rooms. The clock will be
displayed.
Please note: Auto mode can only be selected when the controller is
in one of the other modes.
Controller setup menus
The menu allows you to select the following options:
4-event settings
Allows temperature to be controlled automatically in accordance to
a program of your choice. For each of the 5 zones, you can select
temperature settings for 4 dierent events during the day:
Morning
Daytime
Evening
Night
OK
4-event settings
Each zone is pre-programmed with a 4-event
schedule for easy and economic heating
control, see Preset schedule under Factory
settings. The schedule can be easily chan-
ged in the following way:
1. Press Select and then Menu to activate the 4-event settings
display. Confirm with OK.
2. Select the zone for which you wish to make changes. Press OK. If
you want to change the schedule for the zone concerned, select
Schedule in the menu and confirm with OK. The factory default is
5:2, see following section: Schedule.
3. Use the Up or Down button to choose the days for which you
want to change the settings: Mon-Fri or Sat-Sun for 5:2; Mon-
Comfort System4
TM
English
Sat or Sun for 6:1; or Mon-Sun for 7:0. Press OK.
4. Now select the time and temperature for the chosen event in the
program. Press OK and set the start time for the event concerned.
Confirm with OK. Set the temperatures for this event, first room
temperature then floor temperature, and confirm with OK.
5. After setting the required events, select Back in the menu to make
changes in other zones or Exit to return to the initial display.
Temp
OK
40.0°C
5.0°C 25°C
Time
OK
08:00
Max
06:00
Min
07:00
Schedule
For every zone, the 4-event settings follow a specific schedule.
Here, you can choose the type of weekly 4-event schedule required.
5:2 : Monday to Friday with 4 events and Saturday to Sunday with 2
events. This is the factory default.
Typically used if you work from Monday to Friday.
6:1 : Monday to Saturday with 4 events and Sunday with 2 events.
Typically used if you work from Monday to Saturday.
7:0 : Monday to Sunday with 4 individual events. Allows you to
choose individual programs for each of the seven days of
week.
Select the required 4-event schedule and confirm with OK.
OK
User settings
User settings
In the user settings menu you can change the
following items:
• Time and date
• Child lock
• Display settings
• Energy monitor
OK
Time and date
Time and date
Press OK and set the actual time in hours
and minutes.
The date will then be displayed. Set the date
and confirm with OK.
Child lock
OK
Child lock
Allows you to lock the comfort system set-
tings, including all thermostats, e.g. in public
or other places where you do not want the
settings changed. There are four alternative
child lock settings:
Central : Locks only the controller.
Normal : Locks all units, including the controller. Individual thermo-
stats can be unlocked locally.
Full : Locks all units, including the controller. Individual thermo-
stats can only be unlocked from the controller.
O : Disables the child lock settings.
Confirm your choice with OK. The lock symbol will be shown on the
display.
The child lock can only be unlocked on the comfort system control-
ler by simultaneously pressing both the left and right buttons for 8
seconds.
OK
Display settings
Display settings
Allows you to select what is shown on the
initial display.
Temp -
-Set temp: Shows the current temperature
setting

4
© 2013 OJ Electronics A/S
-Room: Shows the actual room temperature
-Floor: Shows the actual floor temperature
Scr. saver: Switches o the display after 60 seconds if no button
is pressed. Any subsequent press of a button reactiva-
tes the display. The controller remains active and runs
the selected program.
Idle screen: When Exit is pressed or there has been no activity for
30 seconds, the Central Controller reverts to the initial
display. There are 3 dierent display modes:
Single: Single mode is the standard initial display
(the factory setting).
Auto: Standard initial display with automatic switch-
ing between the current status of all connected room
thermostats.
Simple : Simple mode for easy mode shifting. The
controller will show the initial display in one of the three
modes: Holiday, Comfort or Frost. To enter the menu,
select Back and press OK.
Press the OK button to select or deselect the display options. Then
select Exit in the menu to return to the initial display and view your
chosen settings.
OK
Energy monitor
Energy monitor
To view the true cost of the energy consu-
med, select the actual currency and cost per
unit.
Currency: Press OK and choose the required currency.
Confirm with OK.
Cost/unit: Press OK and set the actual cost of electricity.
The cost must be entered per kWh. Press OK.
Leave the menu by pressing Exit.
To display actual energy consumption and to specify the load for
each thermostat, see Readout.
OK
Engineer settings
Engineer settings
The Engineer settings menu contains the
following options:
• Oset temperature
• Adaptive function
• Application
• Temperature scale
• Backlight
• Sensor selection
• Language
• Factory reset
• Information
OK
Offset temp.
Offset temperature
If the actual temperature (measured using
a thermometer) does not correspond to the
thermostat value shown on the controller, the
thermostat can be adjusted by osetting the
temperature.
Press OK and enter the measured temperature value. Confirm with
OK.
OK
Adaptive function
Adaptive function
Ensures that the required temperature has
already been reached when you get up in the
morning or come home from work. After just
a few days, the adaptive function will have
automatically calculated when the heating
must be turned on. The adaptive function applies for all units con-
nected to the system. Press OK and set the function.
Press OK and set the function to On. Confirm with OK.
OK
Application
Application
Set the type of control to be used by the
Central Controller.
There are 4 options:
Floor: The Central Controller controls
floor temperature only. A floor sensor must be con-
nected.
Room: The Central Controller controls room temperature
only.
Room/limit: The Central Controller controls room temperature with
min. and max. limits for floor temperature. A floor sen-
sor must be connected.
Regulator: The Central Controller functions as a simple regulator
and no sensors are used. The setting is a percen-
tage. Temperature regulation can be achieved via the
option in the User settings menu:
Regulator.
NOTE: Setback temperature unavailable.
Press OK and select the required application. Confirm with OK.
OK
Temp scale
Temperature scale
Allows you to set the temperature range with-
in which the Central Controller can be set. It is
then only possible to set a temperature within
this range in auto, comfort and manual mode.
Press OK to highlight Min temperature. Use the Up or Down button
to select the minimum permissible temperature. Press OK and then
select the maximum permissible temperature. Confirm the settings
with OK.
OK
Frosttemp.
Frost temperature
The required temperature in frost protection
mode. Both room and floor temperature can
be set.
Press OK and set the required room tempe-
rature using the Up or Down button. Press
OK and set the required floor temperature. Confirm the settings by
pressing OK.
OK
Backlight
Backlight
There are three settings for the display back-
lighting:
• Auto: Backlighting is activated whenever a
key is pressed and goes out automatically
30 seconds after the last key is pressed.
• On heat: Backlighting comes on when heating is called for by the
thermostat.
• Const on: Backlighting is constantly on.
Select the required backlighting setting and confirm with OK.
OK
Sensor
Sensor selection
Floor sensors of types other than that sup-
plied by OJ Electronics (12 kΩ/ 25°C) can
be selected in this menu. The controller is
preprogrammed for 4 other types:
Sensor 2 kΩ
Sensor 10 kΩ
Sensor 15 kΩ
Sensor 33 kΩ
Select the installed sensor with the arrow buttons, then confirm
with OK. The resistance characteristics of the sensor at 15 °C,
20 °C, 25 °C and 30 °C are now displayed.
Comfort System4
TM
English

© 2013 OJ Electronics A/S
5
Comfort System4
TM
English
If the installed sensor does not have the same characteristic as
that shown in the display, change the values for the 4 listed tempe-
ratures using the arrow buttons.
Confirm with OK to switch to the next resistance characteristic.
Select Information with the arrow buttons, then confirm with OK.
The display now shows the resistance characteristic of the selected
sensor. Then confirm with OK. The new sensor values are now
stored in the controller.
Note: If an incorrect sensor is selected, there is a risk that the ther-
mostat will not be able to maintain the required temperatures, and
damage to the floor construction or covering may therefore occur.
OK
Language
Language
Allows the language used on the display to be
changed.
Press OK and select the required language.
Confirm with OK.
OK
Factory reset
Factory reset
Allows factory settings to be restored. Your
personal settings will be lost, see System
factory settings.
Press OK and choose Reset in the menu.
Confirm with OK.
OK
Information
Information
Displays the thermostat software version.
OK
System settings
System settings
The System settings menu contains the fol-
lowing options:
• Add unit
• Remove unit
• Switch unit
• Alarm relay
OK
Add unit
Add unit
To add a new thermostat or relay point to the
comfort system, select Add unit and press
OK. The controller now enters "listening
mode".
For details on connecting the Thermostat/Panel Heater Controller,
see Connecting thermostats under First time settings.
OK
Remove unit
Remove unit
To remove a Thermostat or Panel Heater Con-
troller from the Comfort System, press OK.
Select the unit you want to remove and press
OK. Confirm with OK.
OK
Switch unit
Switch unit
If a unit has been set up in the wrong group or
zone, you can change the group/zone.
Press OK, select the thermostat/Panel Heater
Controller concerned and press OK. Now
select the required zone.
Confirm with OK.
OK
Alarm relay
Alarm relay
The central controller can be used as an alarm
relay for external signals from the output ter-
minals. The alarm relay can be set as follows:
Sensor Err.: The alarm relay is activated
by sensor faults on one or more of the connected
thermostats.
Overheat: The alarm relay is activated by sensor faults or
overheating of units.
Communication: The alarm relay is activated by sensor faults, over-
heating of units or wireless communication faults.
O : The alarm relay function is switched o, and the
output terminals are used to control an underfloor
heating cable.
OK
Readout
Readout
The Central Controller features readouts of
energy consumption and status for each con-
nected room.
• Energy monitor
• Room status
OK
Energy monitor
Energy monitor
Displays energy consumption for the past 2,
30 or 365 days.
Press OK and select the room you want to
view. Press OK for the chosen period. The
value in percent (%) shows the relative amount of time the heating
has been on. The following figure is the cost for the selected period.
To ensure correct calculation, check the settings for Load.
Load: Press OK and enter the connected heating power.
The value must be in watt (W). Press OK.
Leave the menu by pressing Exit.
OK
Room status
Room status
Displays the actual status for each room/zone.
Press OK for the chosen room thermostat.
Signal strength is displayed in the top right-
hand corner, with up to 4 bars at full strength.
Room: The actual room temperature in degrees.
Floor: The actual floor temperature in degrees
(if floor or limit control is selected).
Application: The application for the actual thermostat.
Operating hours: The number of hours the Central Controller has
been switched on.
ID button:
Press ID button to identify the selected Thermostat/Panel Heater
Controller. The selected unit will be identified by its ID number in the
upper left of the display in one of the following ways:
Thermostat: Display flashes the ID number.
Panel Heater: LED flashes as many times as the ID number.
The process lasts approx. 10 seconds before the unit returns to
normal mode.
Back
Back
Various menus and submenus contain a Back
option.
Use Back to return to the previous step.
Exit
Exit
Returns to the initial display.
Control signal
OCS4 is equipped with a control signal input, the terminal for

6
© 2013 OJ Electronics A/S
Comfort System4
TM
English
which is marked S. By means of an external signal, the thermostat
can be controlled in three dierent modes:
• Setback: In setback mode, the thermostat controls the tempe-
rature according to the lowest programmed setting in the 4-event
schedule for floor and room temperature respectively.
• Frost protection: In frost protection mode, the thermostat con-
trols room temperature according to the value set under: Engineer
settings/Frost temperature.
• O: Switches the thermostat to O.
Factory settings, Master
Child lock - Room
Display settings Temperature (Temp)
Energy monitor - Currency
- Price/unit
Norwegian kroner (NOK)
1.23
Adaptive function On
Application Room/floor (Room/limit)
Temperature scale - Min.
- Max
0.0
40.0
Frost - Room
- Floor
10.0
10.0
Backlight Auto
Sensor Factory
CS4
TM
THERMOSTAT
Left button Middle button Right button
Decrease temperature Programming Increase temperature
Power interrupter
General operation
The interrupter button allows you to turn the thermostat on “I” and
o “0” by sliding the button up and down. When the thermostat is
switched o “0”, the relay disengages. All settings will, however, be
remembered.
The thermostat is intuitively operated using the navigation buttons.
Basic functions such as manual temperature setting and thermostat
setup can easily be performed. Other functions such as 4-event
settings, energy readouts, etc. can be performed from the Central
Controller.
Wireless signal strength
The thermostat has a built-in signal strength monitor, which
transmits the actual signal strength to the controller. The
aerial symbol consists of 4 bars at full signal strength, 3 bars
at medium, 2 bars at low and 1 bar at very low signal strength.
If the thermostat is installed far from the controller or there are signal
absorbing materials in the building, it may be necessary to connect
a repeater, see Settings - Repeater function.
If no aerial symbol is shown on the display, wireless connection to
the Central Controller has been lost. Go to System settings / Add
unit on the Central Controller to reconnect the thermostat.
Manual temperature setting
The thermostat has a temperature setting range of 0-40 °C. This
function allows you to override the 4-event program for the actual
event. The manual setting will apply until the next programmed
event.
Set the required temperature using the left and right buttons. The
temperature setting will flash on the display. 5 seconds later, the
temperature setting is shown constantly on the display together with
a hand symbol.
To cancel manual operation, press the middle button once and
the thermostat will revert to the automatic 4-event program on the
system controller.
Settings
To set parameter values, press and hold the middle button for 3
seconds. SCA Hi 40 will be shown on the display. Firstly, SCA
will be displayed for 1 second, followed by Hi and finally 40. The re-
quired value can then be set using the arrow buttons. To access the
next parameter, press the programming button again. If no buttons
are pressed for 30 seconds, the program returns to the initial display.
Parameter Shown on display Factory setting
Max. temperature
SCA Hi 40
40°C
(0-40°C)
Min. temperature
SCA Lo 0
0°C
(0-40°C)
Max. limit temperature FLOOR
Li Hi 28
28°C
(0-40°C + OFF)
Min. limit temperature FLOOR
Li Lo 15
15°C
(0-40°C + OFF)
Measured floor temperature
FLo 24.5
Measured room temperature
ro 21.5
Application
APp F (Floor sensor) *1
A (Room sensor)
AF (Room sensor with
floor limit) *1
C : Regulator
F : Floor
Oset
OFF 0
0
(+/- 8°C)
Backlight
LHt OFF
OFF
Address readout
Adr 05
Repeater function
rEp OFF
OFF
Software version
SU 1.0
*1 : Requires that a floor sensor is installed
If Regulator (C) is selected under Application, the floor and room sensors are discon-
nected and the heating is controlled on a scale of 0-10, corresponding to 0-100%
activated.
Max. temperature
The highest temperature to which the thermostat can be adjusted.
Min. temperature
The lowest temperature to which the thermostat can be adjusted.
Max. limit temperature
If a limit/floor sensor is connected to the thermostat, the highest
floor temperature allowed for wooden or other floor types can be
set here.
Min. limit temperature
If a limit/floor sensor is connected to the thermostat, the lowest
floor temperature allowed for tiled or other floor types can be set
here.
Measured floor temperature
Readout of actual floor temperature (if a floor sensor is connected).
Measured room temperature
Readout of actual room temperature.
Application
Application setup for the thermostat. Allows the type of control to
be set. There are 4 options:

© 2013 OJ Electronics A/S
7
Floor (F) : The thermostat controls floor temperature only.
A floor sensor must be connected.
Room (A) : The thermostat controls room temperature only.
Room/limit (AF) : The thermostat controls room temperature with
min. and max. limits for floor temperature. A
floor sensor must be connected.
Regulator (C) : The thermostat functions as a simple regulator
and no sensors are used. The setting is a per-
centage.
Offset
If the actual temperature (measured using a thermometer) does
not correspond to the thermostat value, the thermostat can be
adjusted by osetting the temperature.
Backlight
The display is lit by backlighting whenever a button is pressed. Af-
ter 30 seconds the light goes out unless a button is again pressed.
This menu option allows constant low lighting to be chosen by
selecting LHt On.
Address readout
Displays the thermostat address.
Repeater function
If a thermostat or panel heater controller has insucient or no
signal, a second thermostat with strong signal can be configu-
red to repeat the signal. Set the repeater function on the second
thermostat to ON and connect the thermostat, see FIRST TIME
SETTINGS.
Software version
Displays the thermostat software version.
Child lock (local)
Allows the settings for this thermostat to be locked, e.g. in public
or other places where you do not want the settings changed. Press
and hold the left and right buttons simultaneously for 8 seconds.
The local lock symbol will then appear on the display.
The child lock can be unlocked by simultaneously pressing the left
and right buttons for 8 seconds.
Factory reset
Allows factory settings to be restored. Your personal settings will
be lost for this thermostat, including the connection to the comfort
system controller.
Press and hold the middle button for 10 seconds. The display will
switch o and then come on again. The factory settings will then be
restored and the thermostat will automatically try to connect to the
Central Controller.
Green LED
Red LED
Power
interrupter
CS4
TM
PANEL HEATER CONTROLLER
Comfort System4
TM
English
General operation
The interrupter button allows you to turn the Panel Heater Control-
ler on “I” and o “0” by sliding the button up and down. When the
Panel Heater Controller is switched o “0”, the relay disengages.
The wireless settings will be remembered.
The two LEDs on the front indicate actual status.
The relay point can be used for three dierent control types:
Setback: The relay point lowers the temperature accor-
ding to the selected 4-event schedule.
Frost protection: The relay point enters frost protection mode
if frost protection is chosen as the operating
mode on the Master.
Thermostat with ex ternal sensor: The relay point controls the
temperature according to the selected 4-event
schedule.
The type is determined by the way in which the relay point is wired
and configuration occurs automatically.
LED readouts
The Panel Heater Controller has a green and a red LED to indicate
actual status.
Green ON: Power ON, relay point OK.
Green flashes
quickly: Connection sequence in progress
Green flashes
slowly: No connection to controller
Red ON: Relay ON, night setback or frost protecting in ope-
ration.
Red flashes
quickly: Error code, depends on no. of flashes in series.
1 flash, E0 + E1: Internal sensor defective or short-circuited.
2 flashes, E2: External sensor defective or short-circuited.
5 flashes, E5: Internal overheating. Inspect the installation.
6 flashes, E6: Communication error. No connection to controller.
Factory setting
Allows factory settings to be restored and
cancels the connection to the master for
central control. Remove the cover by inserting
a small screwdriver into the hole on one side of
the thermostat. Press the centre pressure pad
beneath the LEDs with the screwdriver. Both
LEDs will flash twice. The relay point has now
been reset.
COMFORT System4
TM
, GENERAL
Error messages
If a fault or error occurs, the Central Controller/Thermostat will dis-
play an error code as follows:
E0: Internal failure. The thermostat is defective. Replace unit.
E1: Internal sensor defective or short-circuited.
E2: External sensor defective or short-circuited.
E5: Internal overheating. Inspect the installation.
E6: Communication error. No connection to Central Controller.

OJ ELECTRONICS A/S
Stenager 13B · DK-6400 Sønderborg
Tel.: +45 73 12 13 14 · Fax +45 73 12 13 13
[email protected] · www.ojelectronics.com
8
ID no. Zone Room
00
01
02
03
04
05
06
07
08
09
10
11
12
13
14
15
16
Comfort System4
TM
English
System factory settings
Preset schedule
Days 1-5
Event Time
With
floor-sensor
With
room-sensor
Morning 05:00-08:00 25 °C 21 °C
Daytime 08:00-16:00 20 °C 15 °C
Evening 16:00-22:00 25 °C 21 °C
Night 22:00-05:00 20 °C 15 °C
Days 6-7
Event Time
With
floor-sensor
With
room-sensor
Daytime 08:00-23:00 25 °C 21 °C
Night 23:00-08:00 20 °C 15 °C
The OJ trademark is a registered trademark belonging to OJ Electronics A/S · © 2013 OJ Electronics A/S

© 2013 OJ Electronics A/S
9
Application
Contenido
Introducción ..................................................... 10
Ajustes iniciales ............................................... 10
CS4
TM
CONTROLADOR CENTRAL
Funcionamiento general ................................. 10
Volver (Back) ................................................. 10
Salir (Exit) ...................................................... 10
Modalidad de funcionamiento ........................ 10
Modo de vacación (Holiday mode) ............... 10
Modo de confort (Comfort mode) ............... 11
Modo anticongelación (Frost mode) ............ 11
Modo manual ................................................ 11
Modo automático (Auto mode) .................... 11
Menús de configuración del controlador ...... 11
Ajustes de 4 eventos (4-event settings) ........ 11
Programa (Schedule) ..................................... 11
Ajustes del usuario (User settings) ................ 11
Hora y fecha (Time and date) ....................... 11
Bloqueo para niños (Child lock) ................... 11
Ajustes de pantalla (Display settings) .......... 12
Monitor de energía (Energy monitor) ............ 12
Ajustes ingeniería (Engineer settings) ........... 12
Compensación de temperatura (Oset temp.) 12
Función adaptativa (Adaptive function) ........ 12
Aplicación (Application) ................................ 12
Escala de temperatura (Temperature scale) .. 12
Temperatura anticongelante
(Frost temperature) ........................................ 13
Retroiluminación (Backlight) ......................... 13
Selección de sensor (Sensor selection) ........ 13
Idioma (Language) ........................................ 13
Reajuste de fábrica (Factory reset) ............... 13
Información (Information) .............................. 13
Ajustes de sistema (System settings)............ 13
Agregar unidad (Add unit) ............................. 13
Retirar unidad (Remove unit) ......................... 13
Cambiar unidad (Switch unit) ........................ 13
Relé de alarma (Alarm relay) ......................... 13
Lectura (Readout) ............................................ 13
Monitor de energía (Energy monitor) ............. 14
Estado de habitación (Room status) ............. 14
Volver (Back) ................................................. 14
Salir (Exit) ...................................................... 14
Señal de control ............................................ 14
CS4
TM
TERMOSTATO
Funcionamiento general ................................. 14
Potencia de señal inalámbrica ....................... 14
OCS4-10 / OSD4-1999 / OSA4-10
Comfort System4
TM
Español
Adaptive function
Information
4-event settings
User settings Engineer settings
System settings
Holiday
Readout
Exit
Comfort System4
TM
Menú
Offset temp. Energy monitor
Room status
Back
Comfort
Frost
Manual
Add unit
Remove unitChild lock
Switch unit
Back
List
Menu
Mode
16:31
List Menu Mode
Tue
00: Hall
21.0°C
USER MANUAL
Time and date
Display settings
Energy monitor
Backlight
Exit
Back
ExitExit
Sensor
Language
Factory reset
Temp scale
Back
Exit BackAlarm relay
Ajuste de temperatura manual ....................... 14
Ajustes .............................................................. 15
Temperatura máx. ......................................... 15
Temperatura mín. .......................................... 15
Temperatura límite máx. ................................ 15
Temperatura límite mín. ................................. 15
Temperatura de suelo medida ...................... 15
Temperatura de habitación medida .............. 15
Aplicación ..................................................... 15
Compensación .............................................. 15
Retroiluminación ........................................... 15
Lectura de dirección ..................................... 15
Función de repetición ................................... 15
Versión de software ...................................... 15
Bloqueo para niños (local) .............................. 15
Reajuste de fábrica ......................................... 15
CS4
TM
CONTROLADOR DE PANEL CALEFACTOR
Funcionamiento general ................................. 16
Lecturas LED ................................................... 16
Reajuste de fábrica ....................................... 16
COMFORT System4
TM
, GENERAL
Mensajes de error ........................................... 16
Ajustes de fábrica del sistema ....................... 16
Programa predeterminado ............................ 16
GREEN COMFORT
Máximo confort con un bajo consumo de energía

10
© 2013 OJ Electronics A/S
Comfort System4
TM
Espanol
Introducción
El Comfort System4™ es un sistema completo de control para
sistemas de calefacción eléctrica multiambientes que se componen
de hasta 16 habitaciones. El sistema consiste en un Controlador
Central con Termostatos, un Controlador de Panel Calefactor y un
Portal de Ethernet. El Controlador Central inalámbrico y el Termosta-
to con sensor de habitación y/o suelo aseguran un confort máximo
y unos costes energéticos mínimos.
El Controlador Central es una unidad central para controlar y super-
visar hasta 16 habitaciones. La navegación por menús animados
asegura una fácil instalación, supervisión del consumo energético y
selección del modo de confort o de vacación.
El Controlador Central tiene 5 programas integrados. Para cada día
de la semana pueden fijarse temperaturas individuales para 4 perio-
dos distintos, o eventos, y todas pueden adaptarse para cubrir sus
necesidades. Bajando la temperatura ajustada cuando la vivienda
no esté habitada reducirá sus costes de energía sin sacrificar ni un
ápice de confort.
Además, el Controlador Central incluye una función adaptativa que
ajusta automáticamente las horas de inicio de los períodos de cale-
facción con el fin de asegurar que se logre la temperatura requerida
a la hora deseada. Después de 3 días, la función adaptativa habrá
aprendido a qué hora deberá activarse la calefacción.
El Portal es una nueva posibilidad de visualizar y controlar las
funciones principales a distancia. Con una computadora personal,
tablet o teléfono inteligente, puede obtener acceso a funciones prin-
cipales a través del portal y la Internet. Entre otras cosas, esto le da
la oportunidad de: - encender la calefacción de su casa de veraneo
antes de llegar a ella; - bajar la temperatura en casa si usted decide
prolongar sus vacaciones; o simplemente… realizar pequeñas modi-
ficaciones a los ajustes si usted cambia su rutina diaria.
AJUSTES INICIALES
Controlador Central
La primera vez que usted activa el interruptor a la posición de En-
cendido “I”, será necesario establecer el idioma, la hora y la fecha.
El menú le guiará automáticamente a través del proceso.
• Seleccione su idioma con los botones de flecha arriba y abajo y
confirme su elección con OK.
• Ajuste la hora real y pulse el botón OK. Después ajuste los minu-
tos. Pulse OK.
• Ajuste la fecha real: año, mes y día. Confirme los ajustes con el
botón OK.
Cómo conectar los termostatos
Antes de conectar los termostatos conviene apuntarse la zona/
habitación para los diversos termostatos para así facilitar la
configuración, véase la tabla en el reverso del
manual.
• Conecte y encienda el primer termostato/
controlador de panel calefactor. Durante los
siguientes 120 segundos la unidad transmitirá
una señal única al controlador. El termostato
mostrará su dirección asignada y la potencia
de la señal. El controlador mostrará la misma
dirección.
• Conecte y encienda el próximo termostato/Con-
trolador de panel calefactor que deba conec-
tarse. Repita el procedimiento para el resto de
termostatos/Controladores de panel calefactor.
• Las unidades conectadas ya pueden agruparse en un nombre
de área o número de zona en el controlador. Pueden elegirse
hasta 5 nombres de área.
Presione OK para la dirección elegida y use los botones de
navegación para seleccionar un grupo adecuado.
Presione Exit (Salir) para completar la configuración y el contro-
lador mostrará la pantalla inicial.
• El Comfort System4 ya está listo para el uso y controlará su sis-
tema de calefacción de acuerdo con el programa de 4 eventos
preseleccionado, véase Ajustes de fábrica.
• Recuerde anotar sus ajustes para cada termostato/punto
del relé en la tabla de la página final.
¡Aviso! El tipo de control está fijado de fábrica en Habitación/
límite. El tipo de control puede cambiarse en Ajustes Ingenie-
ría/Aplicación (página 4)
CS4
TM
CONTROLADOR CENTRAL
Botones de navegación
Interruptor
principal
Funcionamiento general
El interruptor le permite encender “I” y apagar “0” el controlador
deslizando el interruptor hacia arriba y hacia abajo. Cuando el Con-
trolador Central está apagado “0”, el relé se desactiva. Todos los
ajustes, incluso la hora y la fecha, quedarán en memoria.
El Controlador Central se opera intuitivamente por medio de los
botones de navegación.
La función de cada botón se indica arriba del botón en la pantalla.
Volver (Back)
Back
Varios menús y submenús tienen una opción
Back (Volver).
Use Back (Volver) para regresar al paso previo.
Salir (Exit)
Exit
Vuelve a la pantalla inicial.
Seleccionar habitación (Select room)
La pantalla inicial le permite elegir la habitación para la que desea la
temperatura fijada actual y el modo de evento que se va a mostrar.
Use los botones de flecha izquierdo y derecho para seleccionar la
habitación deseada.
Modalidad de funcionamiento
El Controlador Central ofrece 5 tipos diversos de control de tempera-
tura. Presione Select (Selecccionar), después Modo:
OK
Holiday
Modo de vacación
Seleccione Vacación si desea bajar la tem-
peratura en todas las habitaciones durante
un periodo específico para ahorrar energía,
p. ej., si la casa está deshabitada durante un
periodo de tiempo.
• Presione OK para Vacación, seleccione la fecha y hora de parada,
presione OK. Seleccione la temperatura de vacaciones y confirme
con OK.

© 2013 OJ Electronics A/S
11
Comfort System4
TM
Espanol
El sistema de confort está ahora en el Modo de vacación y se mues-
tra una maleta. Cuando se alcanzan la fecha y hora especificadas, el
Controlador Central volverá automáticamente al Modo automático
(Auto mode) .
Modo de confort (Comfort mode)
Seleccione Confort para establecer una temperatura tem-
poral de confort (conocida como Modo de fiesta) para una
sola habitación o para todas las habitaciones.
• Presione Comfort, confirme con OK y seleccione la habitación.
La temperatura de confort se convierte en la máxima temperatura
en el plan de 4 eventos para el día en cuestión. Después introduz-
ca la duración deseada del modo confort: 1-8 horas.
Cuando haya pasado el periodo, el Controlador Central volverá
automáticamente al Modo automático.
Modo anticongelación (Frost mode)
OK
Frost
Seleccione Frost (Anticongelación) para
mantener una temperatura mínima para pro-
tección anticongelante. El sistema de confort
mantiene una temperatura mínima de 10°C
(ajuste de fábrica).
• Presione Frost (Anticongelación), confirme con OK y se mostrará
el símbolo de anticongelación.
Modo manual
OK
Manual
Seleccione Manual para anular el progra-
ma de 4 eventos programado en una zona
ajustando manualmente una temperatura
deseada.
• Pulse Manual, confirme con OK y selec-
cione la temperatura deseada.
Modo automático
Seleccione Auto si desea controlar la temperatura automática-
mente mediante el programa de 4 eventos para todas las habitacio-
nes. Se mostrará el reloj.
Tome nota: Solamente se puede seleccionar el modo automático
cuando el controlador está en uno de los otros modos.
Menús de configuración del controlador
El menú le permite seleccionar las opciones siguientes:
Ajustes de 4 eventos (4-event settings)
Permite controlar automáticamente la temperatura según un pro-
grama de su elección. Para cada una de las 5 zonas puede usted
seleccionar ajustes de temperatura para 4 eventos distintos durante
el día:
Día
En el trab.
A casa
Noche
OK
4-event settings
El termostato viene configurado previamente
con un programa de 4 eventos para el control
fácil y económico de la calefacción, véase
Preset schedule (Programa predeterminado)
bajo Factory settings (Ajustes de fábrica).
El programa se puede cambiar fácilmente de
la manera siguiente:
1. Presione Select (Seleccionar) y después Menu para activar la
pantalla de ajuste de 4 eventos. Confirme con OK.
2. Seleccione la zona para la que desea hacer cambios. Pulse
OK. Si desea cambiar el programa para la zona de que se trate,
seleccione Schedule (Programa) en el menú y confirme con OK.
El valor predeterminado de fábrica es 5:2, véase la siguiente
sección: Programa.
3. Use el botón Arriba o Abajo para elegir los días para los que quie-
re cambiar los ajustes: Lun-Vier o Sáb-Dom para 5:2; Lun-Sáb o
Dom para 6:1; o Lun-Dom para 7:0 Pulse OK.
4. Ahora seleccione la hora y la temperatura para el evento elegido
del programa. Pulse OK y establezca la hora de inicio para el
evento en cuestión. Confirme con OK. Fije las temperaturas para
este evento, primero la de habitación y después la de suelo, y
confirme con OK.
5. Después de ajustar los eventos deseados seleccione Back(Volver)
en el menú para hacer cambios en otras zonas o Exit (Salir) para
volver a la pantalla inicial.
Temp
OK
40,0°C
5,0°C 25°C
Time
OK
08:00
Max.
06:00
Min.
07:00
Programa (Schedule)
Para cada zona, los ajustes de 4 eventos siguen un programa es-
pecífico. En él puede usted elegir el tipo de programa semanal de 4
eventos deseado.
5:2 : Lunes a viernes con 4 eventos y sábado a domingo con 2
eventos. Este es el valor predeterminado de fábrica.
Típicamente se utiliza si usted trabaja de lunes a viernes.
6:1 : Lunes a sábado con 4 eventos y domingo con 2 eventos.
Típicamente se utiliza si usted trabaja de lunes a sábado.
7:0 : Lunes a domingo con 4 eventos individuales. Le permite selec-
cionar programas individuales para cada uno de los 7 días de
la semana.
Seleccione el programa de 4 eventos deseado y confirme con OK.
OK
User settings
Ajustes del usuario
(User settings)
En el menú de ajustes del usuario usted pue-
de cambiar los parámetros siguientes:
• Hora y fecha (Time and date)
• Bloqueo para niños (Child lock)
• Ajustes de pantalla (Display settings)
• Monitor de energía (Energy monitor)
OK
Time and date
Hora y fecha (Time and date)
Pulse OK y ajuste la hora real en horas y
minutos.
Después aparecerá la fecha. Ajuste la fecha y
confirme con OK.
Bloqueo para niños (Child lock)
OK
Child lock
Le permite bloquear los ajustes del sistema
de confort, inclusive todos los termostatos,
por ejemplo, en espacios públicos u otros lu-
gares donde usted no desea que se cambien
los ajustes. Hay cuatro ajustes alternativos de bloqueo para niños:
Central : Bloquea solamente el controlador.

12
© 2013 OJ Electronics A/S
Comfort System4
TM
Espanol
Normal : Bloquea todas las unidades, inclusive el controlador.
Los termostatos individuales pueden desbloquearse
localmente.
Pleno : Bloquea todas las unidades, inclusive el controlador.
Los termostatos individuales solamente pueden desblo-
quearse desde el controlador.
Apagado : Desactiva los ajustes del bloqueo para niños.
Confirme su elección con OK. El símbolo de bloqueo se mostrará en
la pantalla.
El bloqueo para niños solamente puede desbloquearse en el contro-
lador del sistema de confort pulsando simultáneamente los botones
izquierdo y derecho durante 8 segundos.
OK
Display settings
Ajustes de pantalla
(Display settings)
Le permite seleccionar lo que se muestra en
la pantalla inicial.
Temp -
-Temp. establ: Muestra el ajuste de
temperatura actual
-Room (Habitación): Muestra la temperatura actual de la habita-
ción
-Floor (suelo): Muestra la temperatura actual del suelo
Protec. pant: Apaga la pantalla después de 60 segundos
si no se oprime botón alguno. Cualquier
pulsación subsiguiente de un botón reactiva
la pantalla. El termostato permanece activo y
ejecuta el programa seleccionado.
Pantalla inactiva: Cuando se ha pulsado Exit (Salir) o no ha
habido actividad durante 30 segundos, el
Controlador Central vuelve a la pantalla
inicial. Hay 3 modos distintos de pantalla:
Único: El modo único es la pantalla inicial
estándar
(la configuración de fábrica).
Auto: Pantalla inicial estándar con cambio
automático entre el estado actual de todos
los termostatos de habitación conectados.
Simple : Modo simple para cambio fácil de
modo. El controlador mostrará la pantalla
inicial en uno de los tres modos: Vacación
(Holiday), Confort (Comfort) o Anticon-
gelamiento (Frost). Para entrar el menú,
seleccione Back (Volver) y pulse OK.
Pulse el botón OK para seleccionar o cancelar las opciones de
pantalla. Después seleccione Salir en el menú para regresar a la
pantalla inicial y ver sus ajustes seleccionados.
OK
Energy monitor
Monitor de energía
(Energy monitor)
Para ver el coste real de la energía consumi-
da, seleccione la divisa y coste actuales por
unidad.
Divisa: Pulse OK y seleccione la divisa deseada.
Confirme con OK.
Coste/unidad: Pulse OK y ajuste el coste real de la electricidad.
Es preciso introducir el coste por kWh. Pulse OK.
Salga del menú presionando Salir (Exit).
Para mostrar el consumo energético actual y especificar la carga
para cada termostato, véase Readout (Lectura).
OK
Engineer settings
Ajustes ingeniería (Engineer settings)
El menú de ajustes Ingeniería contiene las
opciones siguientes:
• Compensación de temperatura
• Función adaptativa (Adaptive function)
• Aplicación (Application)
• Escala de temperatura
• Retroiluminación (Backlight)
• Selección de sensor
• Idioma (Language)
• Reajuste de fábrica (Factory reset)
• Información
OK
Offset temp.
Compensación de temperatura
Si la temperatura actual (medida con un termó-
metro) no coincide con el valor del termostato
mostrado en el controlador, es posible ajustar
el termostato compensando la temperatura.
Pulse OK e introduzca el valor de temperatura medido. Confirme
con OK.
OK
Adaptive function
Función adaptativa
(Adaptive function)
Asegura que ya se haya alcanzado la tempe-
ratura deseada cuando usted se levante en la
mañana o cuando regrese a casa del trabajo.
Después de unos pocos días, la función
adaptativa habrá calculado automáticamente la hora en que se debe
encender la calefacción. La función adaptativa se aplica a todas las
unidades conectadas al sistema. Pulse OK y establezca la función.
Pulse OK y establezca la función en On. Confirme con OK.
OK
Application
Aplicación (Application)
Establezca el tipo de control que debe usar
el Controlador Central.
Existen 4 opciones:
Floor (Suelo): El Controlador Central única-
mente controla la temperatura del suelo. Es necesario
conectar un sensor de suelo.
Room
(Habitación): El Controlador Central únicamente controla la tempe-
ratura de la habitación.
Habitación/
límite: El termostato controla la temperatura de la habitación
con los límites mín. y máx. para la temperatura del
suelo. Es necesario conectar un sensor de suelo.
Regulator
(Regulador): El termostato funciona como un simple regulador y
no se usan sensores. El ajuste se realiza en porcen-
taje. La regulación de temperatura puede obtenerse a
través de la opción en el menú de Ajustes de usuario:
Regulador.
¡Aviso! Temperatura de reducción inaccesible
Pulse OK y seleccione la aplicación deseada. Confirme con OK.
OK
Temp. scale
Escala de temperatura (Temp. scale)
Le permite establecer la gama de temperatu-
ras dentro de las cuales se puede ajustar el
Controlador Central. Entonces es posible es-
tablecer una temperatura únicamente dentro
de estos límites en los modos automático, confort y manual.
Pulse OK para resaltar la temperatura Mín. Use el botón de flecha
Arriba o Abajo para seleccionar la temperatura mínima permisible.

© 2013 OJ Electronics A/S
13
Comfort System4
TM
Espanol
Pulse OK y seleccione la temperatura máxima permisible. Confirme
los ajustes con OK.
OK
Frost temp.
Temperatura anticongelante (Frost temperature)
La temperatura requerida en modo de protec-
ción anticongelante. Pueden establecerse las
temperaturas de habitación y de suelo.
Pulse OK y establezca la temperatura de
habitación usando el botón Arriba o Abajo.
Pulse OK y establezca la temperatura de suelo deseada. Confirme
los ajustes pulsando OK.
OK
Backlight
Retroiluminación (Backlight)
Hay tres ajustes para la iluminación de fondo
de la pantalla:
• Auto: La iluminación de fondo se activa
siempre que se pulse una tecla y se apaga
automáticamente 30 segundos después de pulsar la última tecla.
• On heat (Calefacción encendida): La iluminación de fondo se
enciende cuando el termostato activa el calefactor.
• Const on (Constantemente encendida): La retroiluminación está
constantemente encendida.
Seleccione el ajuste de iluminación de fondo deseado y confírmelo
con OK.
OK
Sensor
Selección de sensor (Sensor
selection)
En este menú pueden seleccionarse
sensores de suelo de tipos distintos de los
suministrados por OJ Electronics (12 kΩ/
25 °C). El controlador viene preprogramado
para otros 4 tipos:
Sensor 2 kΩ
Sensor 10 kΩ
Sensor 15 kΩ
Sensor 33 kΩ
Con las teclas de flecha seleccione el sensor instalado, después
confírmelo con OK. Ahora aparecen en pantalla las características
de resistencia del sensor a 15 °C, 20 °C, 25°C y 30 °C.
Si el sensor instalado no tiene las mismas características que las
que aparecen en pantalla, con las teclas de flecha cambie los valo-
res para las cuatro temperaturas indicadas.
Confirme con OK para cambiarse a la próxima característica de
resistencia.
Seleccione Information con los botones de flecha, después con-
firme conOK.
Ahora la pantalla muestra la característica de resistencia del sensor
seleccionado. Después confírmelo con OK. Los nuevos valores del
sensor están ahora almacenados en el controlador.
Nota: Si se selecciona el sensor erróneo existe el riesgo de que el ter-
mostato no pueda mantener las temperaturas deseadas y que, como
consecuencia, se dañe la construcción o el revestimiento del suelo.
OK
Language
Idioma (Language)
Permite cambiar el idioma que se utiliza en la
pantalla.
Pulse OK y seleccione el idioma deseado.
Confirme con OK.
OK
Factory reset
Reajuste de fábrica (Factory reset)
Permite restaurar los ajustes de fábrica. Se
perderán sus ajustes personales, vea System
Factory settings (Ajustes de fábrica del
sistema).
Pulse OK y seleccione Restablecer en el menú. Confirme con OK.
OK
Information
Información (Information)
Muestra la versión de software del termostato.
OK
System settings
Ajustes de sistema
(System settings)
El menú de Ajustes del sistema contiene las
opciones siguientes:
• Agregar unidad (Add unit)
• Retirar unidad (Remove unit)
• Cambiar unidad (Switch unit)
• Relé de alarma (Alarm relay)
OK
Add unit
Agregar unidad (Add unit)
Para agregar un nuevo termostato o punto del
relé al sistema de control, seleccione Agregar
unidad y pulse OK. Ahora el controlador
entrará en el “modo de escucha”.
Para obtener detalles para conectar el Termostato/Controlador de
Panel Calefactor, vea Cómo conectar los termostatos bajo Ajus-
tes iniciales.
OK
Remove unit
Retirar unidad (Remove unit)
Para retirar un Termostato o Controlador de
Panel Calefactor del Sistema de Confort, pulse
OK. Seleccione la unidad que desea retirar y
pulse OK. Confirme con OK.
OK
Switch unit
Cambiar unidad (Switch unit)
Si se ha establecido una unidad en el grupo
o zona equivocados, puede usted cambiar el
grupo/zona.
Pulse OK, seleccione el termostato/Contro-
lador de Panel Calefactor de que se trate y
pulse OK. Ahora seleccione la zona deseada.
Confirme con OK.
OK
Alarm relay
Relé de alarma (Alarm relay)
El controlador central puede usarse como un
relé de alarma para señales externas de las
terminales de salida. Puede establecerse el
relé de alarma del modo siguiente:
Sensor Err (Error
de sensor).: El relé de alarma se activa por fallos del sensor en
uno o más de los termostatos conectados.
Calentamiento
excesivo: El relé de alarma se activa por fallos de sensor o
sobrecalentamiento de las unidades.
Comunicación: El relé de alarma se activa por fallos de sensor,
sobrecalentamiento de las unidades o fallos de
comunicación inalámbrica.
Apagado : La función del relé de alarma se apaga, y las ter-
minales de salida se usan para controlar un cable
subterráneo de calefacción.
OK
Readout
Lectura (Readout)
El Controlador Central ofrece lecturas del
consumo de energía y del estado de cada
habitación conectada.
• Monitor de energía (Energy monitor)
• Estado de habitación

14
© 2013 OJ Electronics A/S
Comfort System4
TM
Espanol
OK
Energy monitor
Monitor de energía (Energy monitor)
Muestra el consumo de energía de los pasa-
dos 2, 30 o 365 días.
Pulse OK y seleccione la habitación que
desea ver. Pulse OK para el período selec-
cionado. El valor en porcentajes (%) muestra el tiempo relativo que
la calefacción ha estado encendida. La cifra siguiente es el coste
para el período seleccionado. Para asegurar un cálculo correcto,
compruebe los ajustes para Carga.
Carga:
Pulse OK e introduzca la potencia de calefacción conectada.
El valor debe estar en vatios (W). Pulse OK.
Salga del menú presionando Salir (Exit).
OK
Room status
Estado de habitación (Room status)
Muestra el estado actual para cada habita-
ción/zona. Pulse OK para el termostato de
habitación elegido.
Se muestra la potencia de señal en la esquina
superior derecha llegando a 4 barras a plena potencia.
Room
(habitación): La temperatura actual de la habitación en grados.
Floor (Suelo): La temperatura actual del suelo en grados
(si se ha seleccionado control de suelo o de
límite).
Aplicación
(Application) La aplicación para el termostato actual.
Horas de funcio-
namiento: El número de horas que ha estado encendido el
Controlador Central.
Botón ID:
Pulse el botón ID para identificar el Termostato/Controlador de Panel
Calefactor seleccionado. La unidad seleccionada será identificada
por su número ID en la parte superior izquierda de la pantalla en uno
de los siguientes modos:
Termostato: La pantalla destella el número ID.
Panel Calefactor: LED destella un número de veces equivalente al
número ID.
El proceso dura aprox. 10 segundos hasta que la unidad vuelve al
modo normal.
Volver (Back)
Back
Varios menús y submenús tienen una opción
Back (Volver).
Use Back (Volver) para regresar al paso previo.
Salir (Exit)
Exit
Vuelve a la pantalla inicial.
Señal de control
El OCS4 va equipado con una entrada de señal de control, cuya
terminal va marcada con una S. Por medio de una señal externa,
puede controlarse el termostato de tres modos distintos:
• Reducción: En el modo de reducción, el termostato controla la
temperatura de acuerdo con el ajuste mínimo programado en el
programa de 4 eventos para la temperatura de suelo y habitación
respectivamente.
• Protección anticongelante (Frost protection): En el modo de
protección anticongelante el termostato controla la temperatura
de la habitación de acuerdo con el valor establecido bajo: Ajustes
Ingeniería/Temperatura anticongelante.
• O: Cambia el termostato a Apagado.
Ajustes de fábrica, Master
Bloqueo para niños - Habitación
Ajustes de pantalla Temperatura (Temp)
Monitor de energía - Divisa
- Precio/unidad
Coronas noruegas (NOK)
1.23
Función adaptativa Encendido
Aplicación Habitación/suelo
(Habitación/límite)
Escala de tempe-
ratura
- Mín.
- Máx.
0.0
40.0
Anticongelamiento - Room (Habitación
- Floor (Suelo)
10.0
10.0
Retroiluminación) Auto
Sensor Fabricante
CS4
TM
TERMOSTATO
Botón izquierdo Botón central Botón derecho
Bajar la temperatura Programando Subir la temperatura
Interruptor
principal
Funcionamiento general
El interruptor le permite encender “I” y apagar “0” el termostato
deslizando el interruptor hacia arriba y hacia abajo. Al apagar el
termostato “0”, el relé se desconecta. No obstante, se guardarán
todos los ajustes.
El termostato se opera intuitivamente por medio de los botones de
navegación.
Las funciones básicas como el ajuste de temperatura manual y la
configuración del termostato pueden realizarse con facilidad. Otras
funciones como los ajustes de 4 eventos, lecturas de energía, etc.,
pueden realizarse desde el Controlador Central.
Potencia de señal inalámbrica
El termostato tiene un monitor de potencia de señal integra-
do que transmite la potencia de señal actual al controlador.
El símbolo aéreo consiste en 4 barras con potencia de señal
plena, 3 barras con media, 2 barras con baja y 1 barra con potencia
de señal muy baja.
Si el termostato se instala lejos del controlador o hay materiales
absorbentes de señales en el edificio, podrá ser necesario conectar
un repetidor, véase la función Ajustes – Repetidor.
Si la pantalla no muestra ningún símbolo aéreo, se ha perdido la
conexión inalámbrica con el Controlador Central. Vaya a System
settings (Ajustes del sistema) / Add unit (Agregar unidad) en el
Controlador Central para reconectar el termostato.
Ajuste de temperatura manual
El termostato tiene una gama de ajuste de temperatura de 0-40 °C.
Esta función le permite a usted anular el programa de 4 eventos
para el evento de que se trate. El ajuste manual se aplicará hasta el
próximo evento programado.
Establezca la temperatura deseada usando los botones izquierdo y
derecho. El ajuste de temperatura destellará en la pantalla. 5 segun-

© 2013 OJ Electronics A/S
15
Comfort System4
TM
Espanol
dos más tarde, el ajuste de temperatura se muestra constantemente
en la pantalla junto con el símbolo de una mano.
Para cancelar el funcionamiento manual, pulse el botón central una
vez y el termostato volverá al programa de 4 eventos automático en
el controlador del sistema.
Ajustes
Para ajustar los valores de parámetro, pulse sin soltar el botón
central durante 3 segundos. En la pantalla aparecerá el mensaje
SCA Hi 40. Primero aparecerá SCA durante 1 segundo,
después aparecerá Hi, y finalmente 40. Entonces se podrá ajustar
el valor requerido con los botones de flecha. Para obtener acceso
al parámetro siguiente, vuelva a pulsar el botón de programación. Si
no se pulsa botón alguno durante 30 segundos, el programa vuelve
a la pantalla inicial.
Parámetro Aparece en pantalla Reajuste de
fábrica
Temperatura máx.
SCA Hi 40
40 °C
(0 / +40 °C)
Temperatura mín.
SCA Lo 0
0 °C
(0 / +40 °C)
Límite máx. de tempera-
tura SUELO
Li Hi 28
28 °C
(0-40 °C
+ APAGADO)
Límite mín. de temperatura
SUELO
Li Lo 15
15 °C
(0-40 °C
+ APAGADO)
Temperatura de suelo
medida
FLo 24.5
Temperatura de habitación
medida
ro 21.5
Aplicación
APp F (Sensor de suelo) *1
A (Sensor de habitación)
AF (Sensor de habita-
ción/límite) *1
C : Regulador
F : Suelo
Compensación
OFF (APAGADO) 0
0
(+/- 8 °C)
Retroiluminación
LHt OFF (APAGADO)
OFF (APAGADO)
Lectura de dirección
Adr 05
Función de repetición
rEp OFF (APAGADO)
OFF (APAGADO)
Versión de software
SU 1.0
*1 : Requiere que se instale un sensor de suelo
Si se selecciona el Regulador (C) bajo Aplicación, se desconectan los sensores de sue-
lo y de habitación y la calefacción se controla en una escala de 0-10, que corresponde
al 0- 100 % activado.
Temperatura máx.
La temperatura más alta a la cual se puede ajustar el termostato.
Temperatura mín.
La temperatura más baja a la cual se puede ajustar el termostato.
Temperatura límite máx.
Si se ha conectado al termostato un sensor de límite/de suelo,
es posible ajustar aquí la temperatura de suelo máxima permitida
para suelos de madera o de otro tipo.
Temperatura límite mín.
Si se ha conectado un sensor de límite/de suelo al termostato, es
posible ajustar aquí la temperatura más baja del suelo para suelos
de baldosa o de otro tipo.
Temperatura de suelo medida
Indicación de la temperatura real del suelo (si está conectado un
sensor de suelo).
Temperatura de habitación
Indicación de la temperatura de habitación real actual.
Aplicación
Configuración de la aplicación para el termostato. Permite definir el
tipo de control. Existen 4 opciones:
Suelo (F): El termostato controla únicamente la tem-
peratura del suelo.
Es necesario conectar un sensor de suelo.
Habitación (A): El termostato controla únicamente la tem-
peratura de la habitación.
Habitación/límite (AF): El termostato controla la temperatura de la
habitación con los límites mín. y máx. de la
temperatura del suelo. Es necesario conec-
tar un sensor de suelo.
Regulador (C): El termostato funciona como un simple re-
gulador y no se usan los sensores. El ajuste
se realiza en porcentajes.
Compensación
Si la temperatura real actual (medida con un termómetro) no coin-
cide con el valor del termostato, es posible ajustar el termostato
compensando la temperatura.
Retroiluminación (Backlight)
La pantalla se ilumina por retroiluminación cuando se pulsa un
botón. A los 30 segundos la luz se apaga a menos que se pulse
de nuevo un botón. Esta opción del menú permite que se elija una
iluminación baja constante seleccionando LHt On (Luz encendida).
Lectura de dirección (Address readout)
Muestra la dirección del termostato.
Función de repetición
Si un termostato o controlador de panel calefactor tiene una señal
insuficiente o nula, puede configurarse un segundo termostato de
señal fuerte para repetir la señal. Ponga la función de repetición
del segundo termostato en Encendido y conecte el termostato,
vea AJUSTES INICIALES
Versión de software
Muestra la versión de software del termostato.
Bloqueo para niños (local)
Permite que se bloqueen los ajustes para este termostato, p.ej., en
lugares públicos o de otro tipo donde usted no desea que se cam-
bien los ajustes. Pulse y mantenga pulsados los botones izquierdo
y derecho simultáneamente durante 8 segundos. El símbolo de
bloqueo local aparecerá en la pantalla.
El bloqueo para niños puede desbloquearse pulsando simultánea-
mente los botones izquierdo y derecho durante 8 segundos.
Reajuste de fábrica (Factory reset)
Permite restaurar los ajustes de fábrica. Sus ajustes personales para
este termostato se perderán, inclusive la conexión al controlador del
sistema de confort.
Pulse y mantenga pulsado el botón central durante 10 segundos. La
pantalla se apagará y volverá a encenderse. Entonces se restaurarán
los ajustes de fábrica y el termostato intentará automáticamente
conectar con el Controlador Central.

16
© 2013 OJ Electronics A/S
Comfort System4
TM
Espanol
LED verde
LED rojo
Potencia
interruptor
CS4
TM
CONTROLADOR DE PANEL CALEFACTOR
Funcionamiento general
El interruptor le permite encender “I” y apagar “0” el termostato
deslizando el interruptor hacia arriba y hacia abajo. Al apagar el
Controlador de Panel Calefactor “0”, el relé se desconecta. Los
ajustes inalámbricos se guardarán.
Los dos LEDs en la parte frontal indican el estado actual.
El punto del relé puede usarse para tres tipos distintos de control:
Reducción: El punto del relé baja la temperatura de acuerdo
con el programa de 4 eventos seleccionado.
Protección
anticongelante: El punto del relé entra en el modo de protección
anticongelante si se ha elegido la protección
anticongelante como modo de funcionamiento en
el Master.
Termostato con
sensor externo: El punto del relé controla la emperatura de acuer-
do con el programa de 4 eventos seleccionado.
El tipo se determina por el modo en que el punto del relé está ca-
bleado y la configuración tiene lugar automáticamente.
Lecturas LED
El Controlador de Panel Calefactor tiene un LED verde y uno rojo
para indicar el estado actual.
Verde Encendido: Corriente Encendida, punto del relé OK.
Verde destella
rápidamente: Secuencia de conexión en proceso
Verde destella
despacio: No hay conexión con el controlador
Rojo Encendido: Relé encendido, reducción nocturna o protec-
ción anticongelante en funcionamiento
Rojo destella
rápidamente: Código de error, depende del núm. de destellos
en serie
1 destello, E0 + E1: El sensor interno está defectuoso o en cortocir-
cuito.
2 destellos, E2: El sensor externo está defectuoso o en cortocir-
cuito.
5 destellos, E5: Sobrecalentamiento interno. Inspeccione la
instalación.
6 destellos, E6: Error de comunicación. No hay conexión con el
controlador.
Reajuste de fábrica (Factory reset)
Permite que se restauren los ajustes de fábrica
y cancela la conexión con el master para el con-
trol central. Retire la tapa insertando un pequeño
destornillador en el orificio a un lado del termostato.
Presione la almohadilla de presión central bajo los
LEDs con el destornillador. Ambos LEDs destellarán
dos veces. El punto del relé ha sido restablecido.
COMFORT System4
TM
, GENERAL
Mensajes de error
Si ocurre un fallo o un error, el Controlador Central/Termostato mos-
trará un código de error de la manera siguiente:
E0: Error interno. El termostato está defectuoso. Reemplace la
unidad.
E1: El sensor interno está defectuoso o en cortocircuito.
E2: El sensor externo está defectuoso o en cortocircuito.
E5: Sobrecalentamiento interno. Inspeccione la instalación.
E6: Error de comunicación. No hay conexión con el Controlador
Central.
Ajustes de fábrica del sistema
Programa predeterminado
Días 1-5
Evento Hora
Con
sensor de suelo
Con
sensor de
habitación
Día 05:00-08:00 25 °C 21 °C
Enb el trab. 08:00-16:00 20 °C 15 °C
En casa 16:00-22:00 25 °C 21 °C
Noche 22:00-05:00 20 °C 15 °C
Días 6-7
Evento Hora
Con
sensor de suelo
Con
sensor de
habitación
Día 08:00-23:00 25 °C 21 °C
Noche 23:00-08:00 20 °C 15 °C

OJ ELECTRONICS A/S
Stenager 13B · DK-6400 Sønderborg
Tel.: +45 73 12 13 14 · Fax +45 73 12 13 13
[email protected] · www.ojelectronics.com
17
Comfort System4
TM
Espanol
Núm. ID Zona
Habitación
00
01
02
03
04
05
06
07
08
09
10
11
12
13
14
15
16
La marca es una marca comercial registrada de OJ Electronics A/S · © 2013 OJ Electronics A/S

18
© 2013 OJ Electronics A/S

© 2013 OJ Electronics A/S
19

OJ ELECTRONICS A/S
Stenager 13B · DK-6400 Sønderborg
Tel.: +45 73 12 13 14 · Fax +45 73 12 13 13
[email protected] · www.ojelectronics.com
20
The OJ trademark is a registered trademark belonging to OJ Electronics A/S · © 2013 OJ Electronics A/S
-
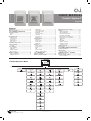 1
1
-
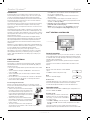 2
2
-
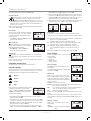 3
3
-
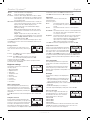 4
4
-
 5
5
-
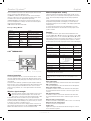 6
6
-
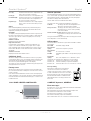 7
7
-
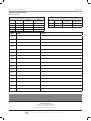 8
8
-
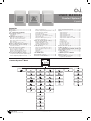 9
9
-
 10
10
-
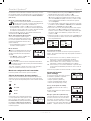 11
11
-
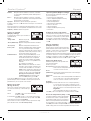 12
12
-
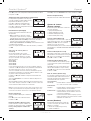 13
13
-
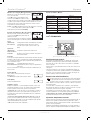 14
14
-
 15
15
-
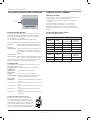 16
16
-
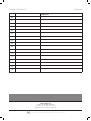 17
17
-
 18
18
-
 19
19
-
 20
20


OJ Electronics MCS4 User manual
- Category
- Thermostats
- Type
- User manual
Ask a question and I''ll find the answer in the document
Finding information in a document is now easier with AI
in other languages
Related papers
-
OJ Electronics OSA4 User manual
-
-
-
-
-
-
-
OJ Electronics OCD5 User manual
-
-
Other documents
-
Hitachi Room Unit Operating instructions
-
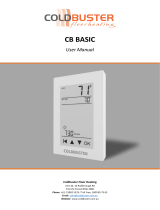 COLDBUSTER CB BASIC User manual
-
koban KCT21-WIFI Owner's manual
-
klima SF300 User manual
-
COLDBUSTER CB User manual
-
Danfoss Zone Regulator Installation guide
-
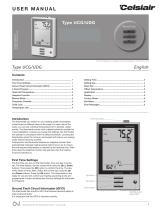 Celsiair UDG User manual
-
Roma Heating CT1000 User manual
-
Warmup WA-XSTAT-V Operating instructions
-

