Page is loading ...

METRA. The World’s best kits.®
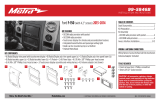
Installation instructions for 99-3010S-LC
®
CAUTION!
All accessories, switches, climate controls panels, and
especially air bag indicator lights must be connected before cycling
the ignition. Also, do not remove the factory radio with the key in the
on position, or while the vehicle is running.
• A) Radio trim panel • B) Radio housing • C) ISO brackets • D) ISO trim plate • E) ISO DDIN brackets
• F) ISO DDIN trim plate • G) Pocket • H) Axxess interface and harness (not shown)
KIT COMPONENTS
WIRING & ANTENNA CONNECTIONS (sold separately)
Wiring Harness:
• Axxess interface included
Antenna Adapter:
• 40-EU55
• Panel removal tool • Phillips screwdriver
• 7mm socket wrench • T-20 Torx Wrench • Cutting tool
TOOLS REQUIRED
• DIN radio provision with pocket
• ISO DIN radio provision with pocket
• ISO DDIN radio provision
•Painted silver to match factory finish
KIT FEATURES
Chevrolet Camaro 2010-2015
99-3010S-LC
A B C D E
F G

99-3010S-LC
®
2
Dash Disassembly ........................................... 2-3
Kit Preparation .....................................................3
Kit Assembly
– DIN radio provision with pocket ..........................4
– ISO DIN radio provision with pocket ....................4
– ISO DDIN radio provision .....................................5
Axxess Interface Installation
– Connection to be made .......................................6
– Installing the Axxess interface ............................. 6
– Initializing the Axxess interface ...........................6
– Vehicle customization with optional AX-LCD ........7
– Changing display backlight color .........................7
Table of Contents
For vehicles without UMQ gauge panel, unsnap
and remove shifter trim panel and skip to step 8
.
1.
Unclip and remove the (2) side trim panels running
the length of the center console. (Figure A)
2. Remove (1) Phillips screw from each side of
the front of the center console. (Figure B)
3. Remove (2) Phillips screws per side from the
cover on the back of the center console then
unclip and remove the cover. (Figure C)
4. Remove (2) Phillips screws exposed under the
cover on the back of console. (Figure D)
5. Remove gauge cluster/trim panel around
shifter. (Figure E)
Continue onto next page
Dash Disassembly
0
30
70 9
12
19
180
200
320
300
30
100
(Figure B)
0
30
70 9
12
19
180
200
320
300
30
100
(Figure C)
0
30
70 9
12
19
180
200
320
300
30
100
(Figure D)(Figure A)

99-3010S-LC
®
3
1. Cut and remove the sub dash
radio support to make room for the
interface and harnesses. (Figure A)
2. Remove panel clips from factory
radio and attach to the top of the
kit housing. (Figure B)
Continue to kit assembly
Kit Preparation
(Figure I)
(Figure A)
(Figure B)
6.
For automatic models, remove one
T-20 Torx screw from the front of the
shifter, and then remove the knob
and shifter surround panel. (Figure F)
7. Remove (4) Phillips screws now
exposed, and then lift up on the
rear of the center console. Slide
toward the back of the vehicle
then unclip and remove the entire
center console. (Figure G)
8. Remove (2) 7mm screws securing
the climate control/radio trim panel
and remove. (Figure H)
9.
Remove (4) 7mm screws securing
the radio chassis, and then remove.
(Figure I)
Continue to kit preparation
0
30
70 9
12
19
180
200
320
300
30
100
(Figure H)
(Figure G)
(Figure F)
(Figure E)
Dash Disassembly

99-3010S-LC
®
4
DIN radio provision with pocket
1. Remove the metal DIN sleeve from
the aftermarket radio.
2. Slide the sleeve into the radio
housing and secure by bending the
metal locking tabs down. (Figure A)
3. Snap the pocket into the bottom
opening of the radio housing.
(Figure B)
4. Slide the radio back into the sleeve
until it clicks in. (Figure B)
5. Continue to Axxess Interface
Installation, and once completed,
reassemble the dash in reverse
order of disassembly using the
99-3010S-LC radio trim panel
instead of the factory panel.
Kit Assembly
(Figure A)
(Figure B)
ISO DIN radio provision with pocket
1. Remove the metal DIN sleeve and
trim ring from the aftermarket radio.
2. Mount the ISO brackets to the
radio with the screws supplied
with the radio. (Figure A)
3. Snap the pocket into the bottom
opening of the radio housing.
(Figure B)
4. Slide the radio into the radio
opening until the side clips engage.
(Figure B)
5. Snap the ISO trim plate into the
radio housing. (Figure C)
6. Continue to Axxess Interface
Installation, and once completed,
reassemble the dash in reverse
order of disassembly using the
99-3010S-LC radio trim panel
instead of the factory panel.
(Figure B)
(Figure A)
(Figure C)

99-3010S-LC
®
5
ISO DDIN radio provision
1. Cut and remove the center support.
(Figure A)
2. Snap the ISO DDIN brackets to the
inside edge of the radio housing.
(Figure B)
3. Slide the radio into the bracket/
radio housing assembly and secure
it using the screws supplied with
the radio. (Figure C)
4. Snap the ISO DDIN trim plate into
the radio housing. (Figure C)
5. Continue to Axxess Interface
Installation, and once completed,
reassemble the dash in reverse
order of disassembly using the
99-3010S-LC radio trim panel
instead of the factory panel.
Kit Assembly
(Figure B)
(Figure C)
(Figure A)
Axxess interface
Installation
• Wire cutter • Crimping tool • Tape • Solder gun
• Connectors (butt-connectors, bell caps, etc.)
TOOLS REQUIRED
• 3010S-LC interface • 3010S-LC harness
INTERFACE COMPONENTS
FEATURES
• Provides accessory power (12-volt 10-amp)
• Retains R.A.P. (retained accessory power)
• Provides NAV outputs (parking brake, reverse, and speed sense)
• Used in non-amplified models
• Used in models without OnStar
• Retains all warning chimes
• High level speaker input
• Retains balance and fade
• Micro “B” USB updatable

®
6
Connections to be made
From the 3010S-LC harness to the aftermarket radio:
• Connect the Black wire to the ground wire.
• Connect the Yellow wire to the battery wire.
• Connect the Red wire to the accessory wire.
• Connect the Pink wire to the Pink wire located in the HVAC harness
(ignore the writing on this wire, this is NOT a “mute” wire).
• Connect the Blue/White wire to the power antenna wire.
• If the aftermarket radio has an illumination wire, connect the Orange/White wire to it.
• Connect the White wire to the left front positive speaker output.
• Connect the White/Black wire to the left front negative speaker output.
• Connect the Gray wire to the right front positive speaker output.
• Connect the Gray/Black wire to the right front negative speaker output.
• Connect the Green wire to the left rear positive speaker output.
• Connect the Green/Black wire to the left rear negative speaker output.
• Connect the Purple wire to the right rear positive speaker output.
• Connect the Purple/Black wire to the right rear negative speaker output.
The following (3) wires are only for multimedia/navigation radios that require these wires.
• Connect the Blue/Pink wire to the VSS/speed sense wire.
• Connect the Green/Purple wire to the reverse wire.
• Connect the Light Green wire to the parking brake wire.
Installing the Axxess interface
With the key in the off position:
• Connect the 3010S-LC harness into the interface, and then to the wiring harness
in the vehicle.
Initializing the Axxess interface
Attention: If the Axxess interface loses power for any reason,
the following steps will need to be performed again.
• Turn the key (or push-to-start button) to the ignition position and wait until the
radio comes on.
Note: If the radio does not come on within 60 seconds, turn the key to the off
position, disconnect the interface, check all connections, reconnect the interface,
and then try again.
• Turn the key to the off position, and then start the vehicle.
• Cycle the A/C fan speed all the way to high, and then back to low.
•
Test all functions of the installation for proper operation, before reassembling the dash
.
Axxess interface installation 99-3010S-LC

®
7
The AX-LCD allows the retention of the vehicles personalization
menu that is lost after removing the OE radio.
From the DIN harness with leads on the AX-LCD harness:
• Connect the Black wire to ground.
• Connect the Red wire to accessory power.
•
Connect the Pink wire to the Pink wire of the 3010S-LC harness.
Note: This wire will have to be soldered onto the 3010S-LC.
• Tape off and disregard the Blue/Pink wire, it will not be used in
this application.
• Press and hold the “Return/ESC” button on the LCD screen for 5
seconds until “Select Interface” comes up.
• Select “Connection Type”, and then press “Enter”
• Scroll up or down to “Gateway”, and then press “Enter”
•
Once done, press the “Return/ESC” button two times to get back
to the main menu
.
Axxess interface installation 99-3010S-LC
Red
Color level up
Color level down
Green Blue
Press and hold to enter
“Configure backlight color” mode
(Figure A)
1. Press the front defrost button for 5 seconds,
this will engage the “Configure Backlight
Color” mode. (Figure A)
Note: Backlight will blink while in this mode.
2. Create your backlight color (Figure A):
• Press and hold the “Face” button to
increase Red.
• Press the “Foot” button to decrease Red.
• Press and hold the “Face/Foot” button to
increase Green.
• Press and hold the “Def/Foot” button to
decrease Green.
• Press and hold the “Fan Up” button to
increase Blue.
• Press and hold the “Fan Down” button to
decrease Blue.
3. After you have your desired color stop
pressing the button(s) and the blinking will
stop leaving your desired color. (Figure A)
Changing display backlight color
Vehicle customization with the
optional AX-LCD (sold separately)
Learn more about installation parts we have.
/