Page is loading ...

E X T E R N A L E N C L O S U R E
w w w . v a n t e c u s a . c o m
U S E R M A N U A L

Package Contents:
NexStar 2 External 3.5” HDD Enclosure:
(NST-355U2, NST-355UF):
• Driver CD
• User Manual
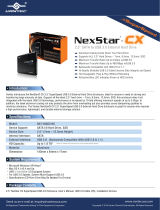
• NexStar 2 External 3.5“ HDD Enclosure
• Power Adaptor
• Power Cable
• USB Cable
• FireWire Cable (NST-355UF Only)
• Screws
• Vibration Dampeners
NexStar 2 External 5.25” IDE Enclosure:
(NST-525U2, NST-525UF):
• Driver CD
• User Manual
• NexStar 2 External 5.25“ IDE Enclosure
• Power Cable
• USB Cable
• FireWire Cable (NST-525UF Only)
• Screws
• Mounting Brackets
TRADEMARKS
MS-DOS, Microsoft, Windows 95/98/NT/2000/ME/XP are trademarks of Microsoft Corporation.
Apple, Macintosh and Mac are trademarks of Apple Computer
*All other third-party brands and names are the property of their respective owners.

Table of Contents
1
Table of Contents:
1. Introduction ...................................................................................................................................... pg. 2
2. Specifications/Features
2.1. NexStar 2 External 3.5” HDD Enclosure .......................................................................... pg. 3
2.2. NexStar 2 External 5.25” IDE Enclosure ........................................................................... pg. 3
3. System Requirements .................................................................................................................... pg. 4
4. Parts Layout
4.1. NexStar 2 External 3.5” HDD Enclosure .......................................................................... pg. 5
4.2. NexStar 2 External 5.25” IDE Enclosure ........................................................................... pg. 5
5. Installation
5.1. NexStar 2 External 3.5” HDD Enclosure
5.1.1. Hardware Installation ................................................................................................. pg. 6
5.1.2. Driver Installation ......................................................................................................... pg. 8
5.2. NexStar 2 External 5.25” IDE Enclosure
5.2.1. Hardware Installation ................................................................................................. pg. 11
5.2.2. Driver Installation ......................................................................................................... pg. 14
6. Disconnecting the NexStar 2
6.1. NexStar 2 External 3.5” HDD Enclosure .......................................................................... pg. 16
6.2. NexStar 2 External 5.25” IDE Enclosure ........................................................................... pg. 17
7. Creating A New Partition .............................................................................................................. pg. 18
8. Troubleshooting/FAQ
8.1. NexStar 2 External 3.5” HDD Enclosure .......................................................................... pg. 20
8.2. NexStar 2 External 5.25” IDE Enclosure ........................................................................... pg. 22
9. Warranty ............................................................................................................................................. pg. 23
10. Contact ............................................................................................................................................. pg. 23

Introduction
2
1. Introduction:
With its NexStar 2 series of enclosures, Vantec literally puts technology in your hands.
Whether you’re looking for the ideal portable storage device or simply a convenient way
to share hardware (hard drives, DVD burners, etc), the NexStar 2 series of enclosures is
the perfect solution.
Sleek and stylish, the NexStar 2 External 3.5” Hard Drive Enclosure is a great way to
upgrade any internal 3.5” hard drive into an external storage solution. Installing a new
hard drive can be a hassle, especially if you are trying to add storage to a notebook
computer. With the NexStar 2, you can upgrade your storage in minutes. The NexStar 2
takes advantage of USB 2.0 or FireWire (NST-355UF only) to offer speeds up to 480Mbps.
Because the NexStar 2 is plug & play, you can easily transfer data between Windows
XP/2000 systems without worrying about drivers or rebooting.
With the Vantec NexStar 2 External 5.25” Enclosure, you can easily add any 5.25” IDE
Device to your existing system. This unit also connects to your computer through USB
2.0 or FireWire (NST-525UF only) offering speeds up to 480Mbps and eliminating the
need to open your system. The NexStar 2 is perfect for anyone looking to add any 5.25”
device, such as a CD/DVD burner, to a notebook or desktop computer. Because you
don’t have to open your computer, you don’t have to worry about voiding your existing
warranty or dealing with messy wires. The integrated fan also keeps your device cool
and operating at optimum conditions. The NexStar 2 External 5.25” Enclosure is the
smart way to upgrade your computer.

Specifications/Features
3
2. Specifications/Features:
2.1. NexStar 2 External 3.5” HDD Enclosure:
Specifications:
• Interface: IDE to USB 2.0/FireWire (NST-355UF only)
• Dimension: 210 X 135 X 40 mm
Features:
• Dampens Hard Drive vibration
• Transfer Rates Up to 12Mbps With USB 1.1
• Transfer Rates Up to 480Mbps With USB 2.0
• Transfer Rates Up to 400Mbps With FireWire (NST-355UF only)
• Easily add storage to any system with USB or Firewire (NST-355UF only)
• Hot-swappable: Plug and play without rebooting!
• Attractive blue LED indicates power/HDD activity
2.2. NexStar 2 External 5.25” IDE Enclosure:
Specifications:
• Interface: IDE to USB 2.0/FireWire (NST-525UF only)
• Dimension: 251.5 x 173 x 47 mm
Features:
• Integrated 40x40mm Cooling Fan
• Transfer Rates Up to 12Mbps With USB 1.1
• Transfer Rates Up to 480Mbps With USB 2.0
• Transfer Rates Up to 400Mbps With FireWire (NST-525UF only)
• Easily Add A 5.25” Device to Any System With USB or FireWire
(NST-525UF only)
• Hot-Swappable: Plug & Play Without Rebooting!
• Easy Installation: No Need To Open Computer!

System Requirements
4
3. System Requirements:
• Intel Pentium II 350MHz-compatible or Apple G3 processor and greater
• Microsoft Windows 98SE/ME/2000/XP or Mac OS 8.6 and greater
• USB-equipped system
• For USB 2.0 speeds, the system must support USB 2.0 specifications
• For FireWire, the system must support FireWire (IEEE 1394) specifications
• CD Rom drive (if drivers are needed)

Parts Layout
5
4. Parts Layout:
4.1. NexStar 2 External 3.5” HDD Enclosure:
4.2. NexStar 2 External 5.25” IDE Enclosure:
IDE Cable
Power Cable
Audio Cable
Left Vibration Dampener
Right Vibration Dampener
Right Mounting Bracket
Left Mounting Bracket
Power Cable
IDE Cable

Installation: NexStar 2 External 3.5” HDD Enclosure
6
5. Installation:
5.1. NexStar 2 External 3.5” HDD Enclosure:
5.1.1. Hardware Installation:
Preparing the hard drive:
1) Set the hard drive jumpers to MASTER or SINGLE DRIVE ONLY. Please refer to
the documentation included with your hard drive for information on how to
accomplish this.
2) Place the vibration dampener on the hard drive as pictured below and screw
it in place. (note: The lip of the vibration dampener is on the bottom of the
hard drive.)
3) Repeat with the second vibration dampener so that the hard drive appears
as below.
Vibration Dampener

Installation: NexStar 2 External 3.5” HDD Enclosure
7
Note: When removing the hard drive from the NexStar 2, be careful not to yank on the IDE
cable or the power cable. To remove the IDE cable, grasp the cable between your thumb
and index finger and gently pull at the sides until the cable comes loose. To remove the
power cable, grasp the sides of the plug and pull.
Installing the hard drive in the NexStar 2:
1) Remove the top cover of the NexStar 2 (the side with the logo and text).
2) Connect the IDE cable and power cable to the hard drive as pictured below.
3) Place the hard drive inside the NexStar 2 so that the vibration dampeners
line up with the sides as pictured below.
4) Place the top cover of the NexStar 2 back
on as pictured on the right.
5) Screw the cover in place (optional)
6) Install the clamp/stand over the screw
holes with the rubber feet on the bottom
(as pictured on the right).

Installation: NexStar 2 External 3.5” HDD Enclosure
8
Connecting the NexStar 2 to your computer:
1) Connect the appropriate interface cable between the NexStar 2 and your
computer
a. USB: Connect the type B connector to the NexStar 2 and the type A
connector to an available USB 1.1/2.0 port on your system.
b. FireWire (NST-355UF only): Connect one end of the FireWire cable to the
NexStar 2 and the opposite end to an available FireWire port.
2) Connect the power cable to the NexStar 2 and plug the cable into an
available outlet.
3) Turn on the NexStar 2 via the power switch.
4) Your operating system should detect the NexStar 2 and automatically install
the necessary drivers (if you have Windows 98SE/MacOS 8.6, you will need to
install drivers). Once your operating system finishes setting up the NexStar 2,
it will mount your hard drive. On Mac OS systems, the new volume should
appear on the desktop. On a Windows PC, the new volume will appear under
My Computer. If the drive does not appear, you may need to partition your
hard drive first.
5) Your NexStar 2 External Hard Drive is now ready for use.
5.1.2. Driver Installation:
Windows ME/XP/2000 - (NST-355U2, NST-355UF):
1) No drivers are necessary when using Windows ME/XP/2000. If the hard drive
does not appear under My Computer, be sure to partition your hard drive.
Windows 98SE
USB (NST-355U2 – USB only):
1) The first time you plug in the NexStar 2 into a USB port of your computer, the
[Add New Hardware Wizard] dialog box will appears.
2) Click on [Next]. Check the [Search for the best driver for your device] and
click on [Next] again.
3) Insert the device driver CD into your CD-ROM drive if you have not already
done so and click on [Next], a screen should be appears to show which
Storage Device you installed. Click on [Next].
4) After the needed files are copied into your system, click on [Finish].
5) You should now be able to see the new hard drive under My Computer. A
green Unplug or Eject hardware icon will appear in the system tray as well. If
the drive does not appear, you may need to partition your hard drive first.

Installation: NexStar 2 External 3.5” HDD Enclosure
9
Windows 98SE
USB (NST-355UF – Combo Drive):
1) If this is the first time you are using the NexStar 2, unplug the NexStar 2 if you
currently have it connected. If the [Add New Hardware Wizard] dialog box is
open, close it.
2) Insert the driver CD into your CD Rom drive.
3) If the CD does not autoplay, open the drivers CD and run “SETUP.EXE.”
4) Follow the on-screen prompts to complete the installation of the USB drivers
for the NexStar 2.
5) After the install is completely, the install program will create the shortcut
[USB SAFE REMOVER] on your desktop. A green Unplug or Eject hardware
icon will appear in the system tray too. If the drive does not appear under My
Computer, you may need to partition your hard drive first.
6) Repeat the steps listed under “Connecting the NexStar 2 to your computer.”
FireWire (NST-355UF – Combo Drive):
1) If this is the first time you are using the NexStar 2, unplug the NexStar 2 if you
currently have it connected. If the [Add New Hardware Wizard] dialog box is
open, close it.
2) Sign on to the internet and go to the Windows 98 Support website:
http://www.microsoft.com/windows98
3) Under the support section, click on Windows 98 Support Center.
4) Under “Search Support” do a search for “242975”. This will return the article
“Update for 1394 Storage Peripherals in Windows 98 Second Edition.”
5) Click on the link and read the associated information. Follow the directions
listed. It should take you to a download page where you can download the
proper drivers.
6) Follow the directions on the installation page. Please note, you will need
your Windows 98SE Installation CD when installing the drivers.
7) Repeat the steps listed under “Connecting the NexStar 2 to your computer.”
Note: Microsoft has declared that it will extend support for Windows 98 through June 2006.
However, some of the information or links on the Windows 98 support page may be
outdated. Vantec is not responsible for any information, or lack thereof, on Microsoft’s
Windows 98 support page.

Installation: NexStar 2 External 3.5” HDD Enclosure
10
Mac OS 9.0 or later - (NST-355U2, NST-355UF):
1) No drivers are necessary when using Mac OS 9.0 or later. If the hard drive
does not appear on the desktop, be sure to partition your hard drive.
Mac OS 8.6
- (NST-355U2, NST-355UF):
1) Unplug the NexStar 2 if you currently have it connected.
2) USB Mass Storage Support 1.3.5 must be installed on your system. If it is not,
you can download the USB Mass Storage Support 1.3.5 from the Apple
Software Updates website: http://www.apple.com/support
3) Follow the direction associated with the USB Mass Storage Support driver to
install
4) Repeat the steps listed under “Connecting the NexStar 2 to your computer.”
Note: If you are using Toaster as your CD recorder software in Mac OS 9.0 or 9.2, you must
install the USB 2.0 extension driver for Toaster. Please check http://www.roxio.com for
more information.

Installation: NexStar 2 External 5.25” IDE Enclosure
11
5.2. NexStar 2 External 5.25” IDE Enclosure:
5.2.1. Hardware Installation:
Preparing the 5.25” device:
1) Set the jumpers on the device to MASTER (if applicable). Please refer to the
documentation included with your 5.25” device for information on how to
accomplish this.
2) Place the plastic mounting brackets on the 5.25” device as pictured below
and screw it in place. (note: Each bracket is labeled with either an R or L The
bracket with an R on it belongs on the RIGHT side of the device with the front
of the drive facing you. The bracket with an L on it belongs on the LEFT
side.)
“R” Mounting Bracket

Installation: NexStar 2 External 5.25” IDE Enclosure
12
Installing the 5.25” device in the NexStar 2:
1) Remove the top cover of the NexStar 2 (the side with the logo and text).
2) Connect the IDE cable and power cable to the 5.25” device as pictured
below.
3) Connect the audio cable to 5.25” device (if applicable). The RED wire should
line up with the R on the 5.25” device. The WHITE wire will line up with the L.
4) Place the 5.25” device inside the NexStar 2 so that the mounting brackets
with the sides as pictured below.
5) Adjust the placement of the 5.25” device so that the front of the device is
flush with the front of the NexStar 2. Use the provided screws to secure the
drive in place.
6) Place the top cover of the NexStar 2 back on as pictured below.

Installation: NexStar 2 External 5.25” IDE Enclosure
13
7) Screw the cover in place (optional)
8) Install the clamp/stand over the screw holes with the rubber feet on the
bottom (as pictured below).
Connecting the NexStar 2 to your computer:
1) Connect the appropriate interface cable between the NexStar 2 and your
computer
a. USB: Connect the type B connector to the NexStar 2 and the type A
connector to an available USB 1.1/2.0 port on your system.
b. FireWire (NST-525UF only): Connect one end of the FireWire cable to the
NexStar 2 and the opposite end to an available FireWire port.
2) Connect the power cable to the NexStar 2 and plug the cable into an
available outlet.
3) Turn on the NexStar 2 via the power switch.
4) Your operating system should detect the NexStar 2 and automatically install
the necessary drivers (if you have Windows 98SE/MacOS 8.6, you will need to
install drivers). Once your operating system finishes setting up the NexStar 2,
it will mount your new device and assign a drive letter. If the device does not
mount, you may need to install drivers for the 5.25” device (not NexStar 2).
Please refer to the 5.25” device’s instructions on how to install its drivers.
5) The 5.25” device in the NexStar 2 Enclosure is now ready for use.
Using the Audio Jack:
1) If you have connected the audio cable to your 5.25”
device, you can access the audio from that device
through the included Audio Jack, labeled “AUDIO”
as pictured on right. Using a standard 3.5mm plug,
you can connect the NexStar 2 to a pair of
headphones or to a speaker setup.
Note: When removing the 5.25” device from the NexStar 2, be careful not to yank on the IDE
cable or the power cable. To remove the IDE cable, grasp the cable between your thumb
and index finger and gently pull at the sides until the cable comes loose. To remove the
power cable, grasp the sides of the plug and pull.

Installation: NexStar 2 External 5.25” IDE Enclosure
14
5.2.2. Driver Installation:
Windows ME/XP/2000 - (NST-525U2, NST-525UF):
1) No drivers are necessary when using Windows ME/XP/2000. If the device
does not appear under My Computer, you may need to install drivers for the
5.25” device (not NexStar 2). Please refer to the 5.25” device’s instructions on
how to install its drivers.
Windows 98SE
USB (NST-525U2, NST-525UF):
1) If this is the first time you are using the NexStar 2, unplug the NexStar 2 if you
currently have it connected. If the [Add New Hardware Wizard] dialog box is
open, close it.
2) Insert the driver CD into your CD Rom drive.
3) If the CD does not autoplay, open the drivers CD and run “SETUP.EXE.”
4) Follow the on-screen prompts to complete the installation of the USB drivers
for the NexStar 2.
5) After the install is completely, the install program will create the shortcut
[USB SAFE REMOVER] on your desktop. A green Unplug or Eject hardware
icon will appear in the system tray too. If the device does not appear under
My Computer, you may need to install drivers for the 5.25” device (not
NexStar 2). Please refer to the 5.25” device’s instructions on how to install its
drivers.
6) Repeat the steps listed under “Connecting the NexStar 2 to your computer.”
FireWire (NST-525UF - Combo Drive):
1) Unplug the NexStar 2 if you currently have it connected. If the [Add New
Hardware Wizard] dialog box is open, close it.
2) Sign on to the internet and go to the Windows 98 Support website:
http://www.microsoft.com/windows98
3) Under the support section, click on Windows 98 Support Center.
4) Under “Search Support” do a search for “242975”. This will return the article
“Update for 1394 Storage Peripherals in Windows 98 Second Edition.”
5) Click on the link and read the associated information. Follow the directions
listed. It should take you to a download page where you can download the
proper drivers.

Installation: NexStar 2 External 5.25” IDE Enclosure
15
6) Follow the directions on the installation page. Please note, you will need
your Windows 98SE Installation CD when installing the drivers.
7) Repeat the steps listed under “Connecting the NexStar 2 to your computer.”
Mac OS 9.0 or later - (NST-525U2, NST-525UF):
1) No drivers are necessary when using Windows ME/XP/2000. If the device
does not appear under My Computer, you may need to install drivers for the
5.25” device (not NexStar 2). Please refer to the 5.25” device’s instructions on
how to install its drivers.
Mac OS 8.6 - (NST-355U2, NST-355UF):
1) Unplug the NexStar 2 if you currently have it connected.
2) USB Mass Storage Support 1.3.5 must be installed on your system. If it is not,
you can download the USB Mass Storage Support 1.3.5 from the Apple
Software Updates website: http://www.apple.com/support
3) Follow the direction associated with the USB Mass Storage Support driver to
install
4) Repeat the steps listed under “Connecting the NexStar 2 to your computer.”
Note: Microsoft has declared that it will extend support for Windows 98 through June
2006. However, some of the information or links on the Windows 98 support page may be
outdated. Vantec is not responsible for any information, or lack thereof, on Microsoft’s
Windows 98 support page.
Note: If you are using Toaster as your CD recorder software in Mac OS 9.0 or 9.2, you must
install the USB 2.0 extension driver for Toaster. Please check http://www.roxio.com for
more information.

Disconnecting the NexStar 2
16
6. Disconnecting the NexStar 2:
6.1. NexStar 2 External 3.5” HDD Enclosure:
Windows 98SE/ME/XP/2000:
1) Make sure all operations using the hard drive within the NexStar 2 has
ceased.
2) Close any windows and programs pertaining to the NexStar 2.
3) If connected by USB, double click the green “Unplug or Eject Hardware” icon
in the system tray and select [Safely Remove Hardware]. Select the device
you wish to remove and click on [Stop]. The system should prompt, “It is now
safe to remove the USB device.” If not, wait for any programs still using the
device to finish and try again.
4) Turn off the NexStar 2.
5) Unplug the USB/Firewire cable from the system.
Mac OS:
1) Make sure all operations using the hard drive within the NexStar 2 has
ceased.
2) Close any windows and programs pertaining to the NexStar 2.
3) From the Desktop, drag the NexStar 2 hard drive to the trash.
4) Turn off the NexStar 2.
5) Unplug the USB/Firewire cable from the system.
Warning: NEVER remove the NexStar 2 while the hard drive is in use. Doing so
may corrupt the data on the hard drive or damage the hard drive, NexStar 2, or
computer.

Disconnecting the NexStar 2
17
6.2. NexStar 2 External 5.25” IDE Enclosure:
Windows 98SE/ME/XP/2000:
1) Make sure all operations using the hard drive within the NexStar 2 has
ceased.
2) Close any windows and programs pertaining to the NexStar 2.
3) If a CD/DVD drive is installed in the NexStar 2, eject any CD/DVD media in the
tray.
4) If connected by USB, double click the green “Unplug or Eject Hardware” icon
in the system tray and select [Safely Remove Hardware]. Select the device
you wish to remove and click on [Stop]. The system should prompt, “It is now
safe to remove the USB device.” If not, wait for any programs still using the
device to finish and try again.
6) Turn off the NexStar 2.
5) Unplug the USB/Firewire cable from the system.
Mac OS:
1) Make sure all operations using the hard drive within the NexStar 2 has
ceased.
2) Close any windows and programs pertaining to the NexStar 2.
3) If a drive is mounted to the desktop, drag the NexStar 2 drive to the trash. If a
CD/DVD drive is installed in the NexStar 2, eject any CD/DVD media in the
tray.
4) Turn off the NexStar 2.
5) Unplug the USB/Firewire cable from the system.
Warning: NEVER remove the NexStar 2 while the device in the enclosure is in
use. Doing so may damage the device in the enclosure, the NexStar 2, or the
computer.

Creating A New Partition
18
7. Creating A New Partition:
Note: Most hard drives should come with a CD that includes its installation program. If not, a
download should be available on the manufacturers website. The best way to partition a new
hard drive is by using the manufacturers program. However, if that is not possible, please try the
following instead (if using Mac OS 9 or below, please refer to your hard drive documentation for
information on formatting/partitioning the hard drive):
Windows 98SE/ME:
1) You will need to use the FDISK utility that is included under MS-DOS. Please
refer to Microsoft Knowledge Base Article – 255867 for complete instructions
on how to use FDISK.
(http://support.microsoft.com/support/kb/articles/Q255/8/67.ASP)
2) Once complete, you should now be able to see the drive in Windows
Explorer.
Windows XP/2000:
1) Right click on "My Computer" and choose Manage.
2) Under “Storage” on the LEFT pane, select Disk Management
3) Windows should now give you the option to initialize the disk. If not, locate
the new drive, right click on the new disk (where it reads "Disk #") and choose
Initialize. (This step may not be required for some hard drives.)
4) Go through the wizard.
5) Once complete, locate your hard drive in the bottom right pane. Right click
on the area with a status bar (to the right of the “Disk #” area) and choose
New Partition.
6) Follow the directions of the wizard. The recommended partition type is
“primary” and the recommended file system is “NTFS.” Please note that
Windows XP/2000 limits FAT32 partitions to only 32GB. Also, Windows 98 is
not capable of reading the NTFS file system.
7) Once complete, you should now be able to see the drive in Windows
Explorer.
Warning: Doing the following will erase any existing data on the drive. If the
drive is damaged and you wish to recover the data, continuing may overwrite
the existing information!
/