NOTE: The firmware datecode is in the following format: YYYYMMDD XX.XXX.X. The first string
of numbers is the date, where YYYY represents the year, MM represents the month, and DD
represents the date. For example, a firmware datecode that begins with 20040225 represents
February 25, 2004. The second string of numbers represents the revision number of the firmware.
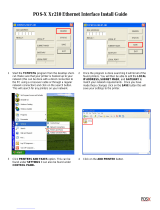
2. Go to Software & driver downloads for your MFP.
a. Go to
http://www.hp.com.
b. Type the MFP model number in the Search text box and press Enter.
c. In the Select a product pane in the Search results window, select the model number of the
specific MFP where the firmware will be installed.
d. In the Product Quick Links pane, click Software & driver downloads.
3. Download the most current firmware.
a. In the Select operating system pane, click Cross operating system (BIOS, Firmware,
Diagnostics, etc.).
b. If the date that is listed in the firmware table is more recent than the datecode that is printed
on the MFP configuration page, click Download next to the appropriate file.
NOTE: Different firmware files are available for the various operating systems.
c. In the File Download dialog box that opens, click Save.
d. In the File Name text box in the Save As window that opens, type the location on your
computer where you want to save the firmware update file.
e. Click Save.
f. After the file has been downloaded, close the File Download dialog box, if necessary.
4. If the CD that came with the MFP or fax accessory is not available, download the MFP Send Fax
driver.
a. Click Back to return to the Select operating system pane.
NOTE: If you do not return to the Select operating system pane when you click Back, see
step 2 for instructions about navigating to it.
b. In the Select operating system pane, click the appropriate operating system.
NOTE: The MFP Send Fax driver is supported in Windows 2000, Windows XP, Windows
XP Professional x64, Windows Server 2003, Windows Server 2003 x64, and Windows Vista.
c. In the Driver table that appears, click Download next to the HP MFP Send Fax driver.
d. In the File Download dialog box that opens, click Save.
e. In the File Name text box on the Save As window that opens, type the location on your
computer where you want to save the MFP Send Fax driver file.
ENWW Installing the MFP Send Fax driver 7