Martin MaxModule Cerebrum Installation guide

Type
Installation guide

This manual is also suitable for

Martin MaxModule Cerebrum is a compact and powerful lighting controller designed for professional use in theaters, concert halls, and other venues. It features a user-friendly interface, extensive connectivity options, and a wide range of powerful features to help you create stunning light shows. With its ability to control up to 8 universes of DMX data, support for multiple protocols, and built-in effects generator, the Cerebrum is a versatile tool for lighting designers of all levels.

Martin MaxModule Cerebrum is a compact and powerful lighting controller designed for professional use in theaters, concert halls, and other venues. It features a user-friendly interface, extensive connectivity options, and a wide range of powerful features to help you create stunning light shows. With its ability to control up to 8 universes of DMX data, support for multiple protocols, and built-in effects generator, the Cerebrum is a versatile tool for lighting designers of all levels.

©2013 Martin Professional A/S. Information subject to change without notice. Martin Professional A/S and all affiliated companies
disclaim liability for any injury, damage, direct or indirect loss, consequential or economic loss or any other loss occasioned by the
use of, inability to use or reliance on the information contained in this manual. The Martin logo, the Martin name and all other
trademarks in this document pertaining to services or products by Martin Professional A/S or its affiliates and subsidiaries are
trademarks owned or licensed by Martin Professional A/S or its affiliates or subsidiaries.
P/N 35000639, Rev. B
Maxxyz Compact™
Retrofit Kit Installation Guide
Introduction
The new M-Series™ software and the Windows 7 Embedded OS require that the Maxxyz
Compact™ and Cerebrum™ modules are upgraded to 2 GB RAM. This Retrofit Kit contains all
the items necessary to carry out the upgrade. The package also contains an SSD hard drive to
speed up booting and to improve vibration resistance.
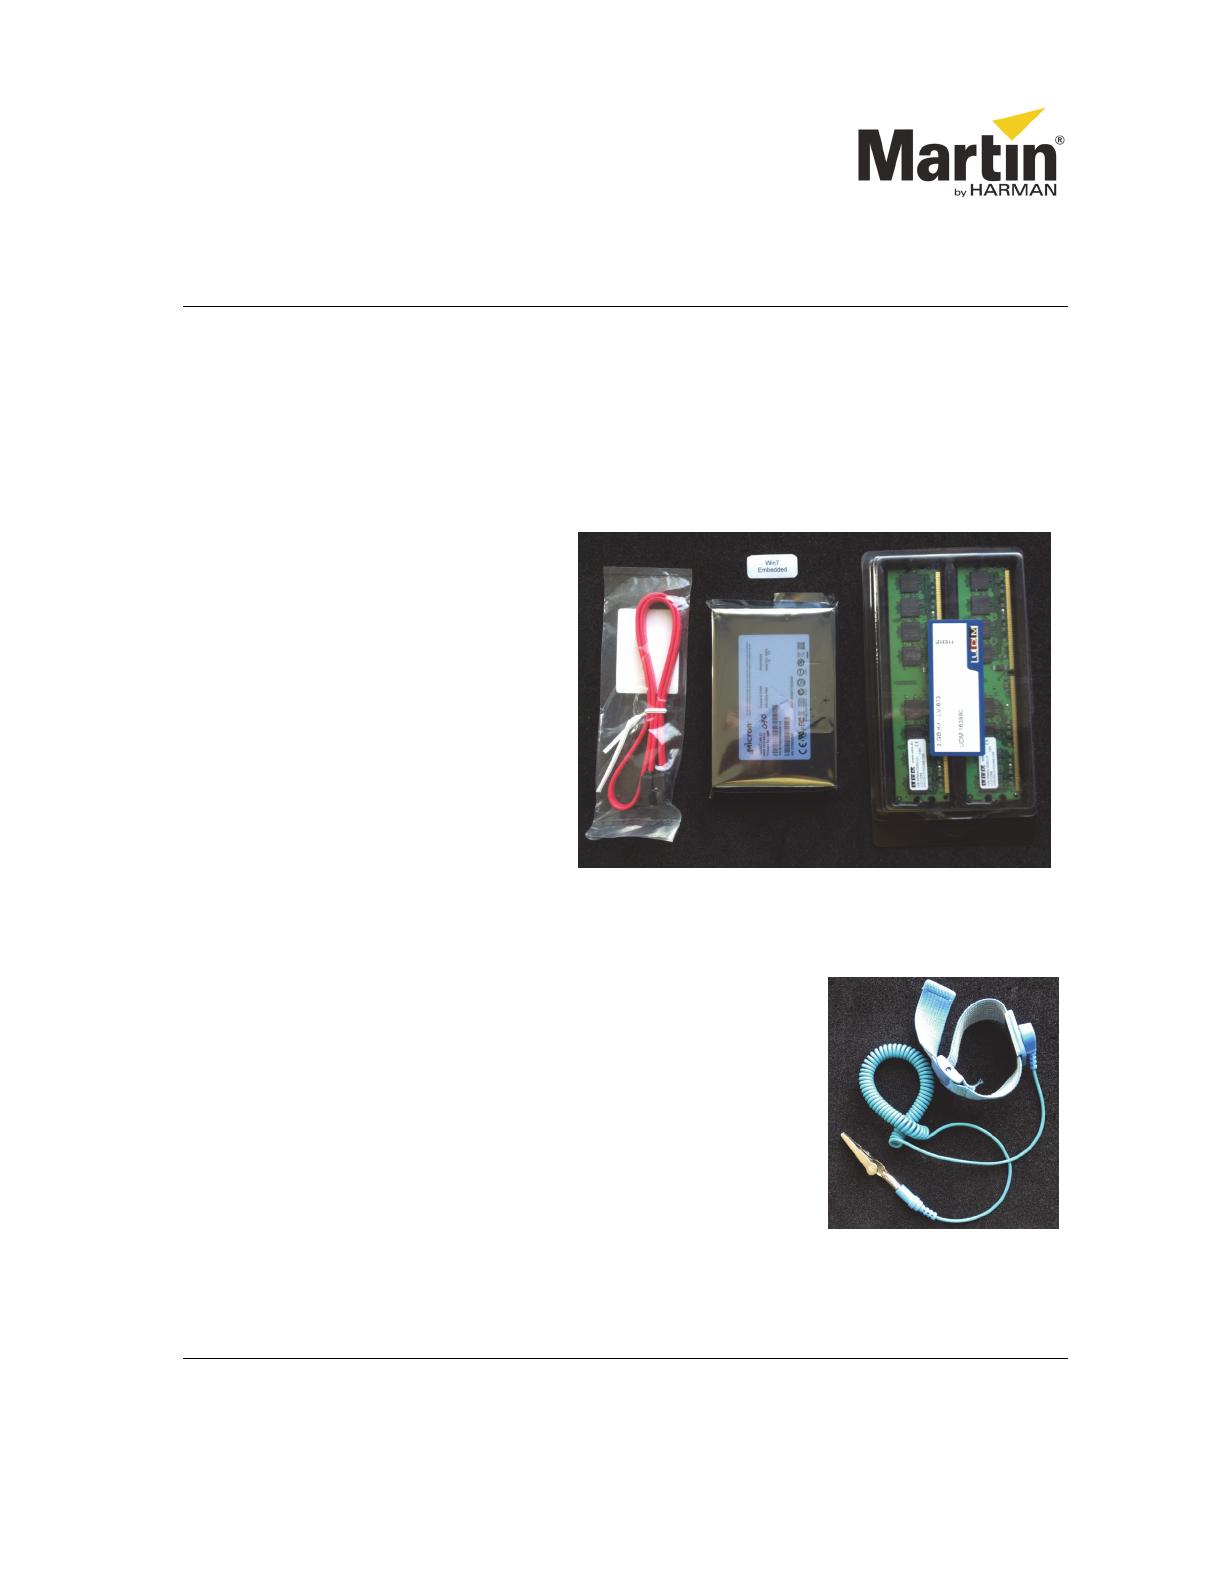
Included items
The Retrofit Kit contains the following
items:
SSD drive
2 RAM modules of 1 GB
SATA cable
Win 7 embedded license sticker
Software installation DVD
2 cable ties
Anti-Static Precautions
Important! Static electricity can destroy electronic
components. Follow these ESD precautions to prevent damage
to the product and injury to the user.
Carry out the upgrade at an anti-static workstation.
Wear a grounded anti-static wristband.
Touch a grounded conductor every few minutes to discharge any
static buildup.
Hold components by their edges only. Do not touch the surfaces or
any of the contacts of the PCBs, memory modules and SSD-drive.
Maxxyz Compact Upgrade Kit Installation Note Page 2 of 11
Hardware upgrade procedure
Important! Make a backup copy of all your show data before you begin this procedure,
because all your show data will be removed when you remove the hard disk from the
Maxxyz Compact.
1. Disconnect power and all data
connections from the Maxxyz
Compact and Cerebrum module.
2. Unscrew the 4 screws that hold the
Cerebrum in the frame. Use Allen key
N° 6 (3 mm).
Maxxyz Compact Upgrade Kit Installation Note Page 3 of 11
3. Place the Cerebrum module gently on
top of the Programmer module, then
disconnect the Power and Centronics
Data cable from the Cerebrum
Module.
4. Put the Cerebrum module on a flat
surface and use a Phillips driver to
unscrew the 2 screws arrowed.
Maxxyz Compact Upgrade Kit Installation Note Page 4 of 11
5. Gently open the Cerebrum module
and place the 2 halves next to each
other.
6. Locate the 2 memory modules on the
mainboard and unplug them by
pushing down on their clips (arrowed).
7. Push the new memory modules into
the slots until the clips snap into the
modules. Check that they are aligned
correctly.
Maxxyz Compact Upgrade Kit Installation Note Page 5 of 11
8. Unscrew both hard disk screws
(arrowed) using a Torx T-10 driver
and gently lift and pull out the hard
disk. Disconnect the SATA cable and
DC power cable from the hard disk.
9. Unscrew the 2 set screws from the
hard disk and install them on the SSD
drive, noting the cable side of the
SSD.
Maxxyz Compact Upgrade Kit Installation Note Page 6 of 11
10. Unclip the SATA cable.
11. Cut the 2 cable ties (arrowed).
12. The SATA cable is glued into its
connector on the mainboard. Taking
care not to damage the PCB and other
components, disconnect and remove
the SATA cable.
13. Connect the new SATA cable. The
new cable clicks more securely into
the connector, so there is no need for
glue.
Maxxyz Compact Upgrade Kit Installation Note Page 7 of 11
14. Route the new SATA cable so that it
sits in the same place as the old cable.
Secure the cables by fastening the
supplied cable ties around them in the
same places as the old cable ties.
Important! Leave some free play in
the SATA cable at the mainboard
end. The cable must not be pulled
tight.
15. Glue the Win7 Embedded sticker next
to the XP sticker.
16. Close the Cerebrum module, fasten it
with its 2 screws, and reassemble the
Maxxyz Compact following steps 1-4
in reverse order.
17. Apply power, then install the new OS
and software following the instructions
in the next section.
Maxxyz Compact Upgrade Kit Installation Note Page 8 of 11
Software upgrade: OS installation
Now that the hardware is successfully installed, it’s time to install the OS and software on your
Maxxyz Console. Afterwards you can load your saved showfiles again.
IMPORTANT! Please be patient during software installation. At some stages, there may
be a black screen for several minutes while the Operating System is deployed internally.
Do not shut down the console until the whole procedure is completed. If you interrupt the
process, you will have to start over again.
1. Disconnect all network and USB connections from the console.
2. Turn on the console and insert the supplied DVD with the OS and software into the DVD
drive.
3. If the console does not boot from the DVD from the first time, then just restart the
console again without removing the disk. Sometimes the drive seems to be too slow to
boot from when you just inserted it.
4. If the console still does not boot, enter
the BIOS by pressing DEL when
starting up. In Advanced BIOS
Features, select Load Maxxyz
Defaults. Then save and restart.
5. When the console boots from the
DVD, it will show you the following
screen. Press ENTER on the console
to continue.
Maxxyz Compact Upgrade Kit Installation Note Page 9 of 11
6. The system will now copy all the
installation files to your console,
expand and install them. This can take
a few minutes.
7. The console will now ask to restart.
Remove the DVD from the drive and
continue.
8. After rebooting, the console will
proceed with the OS installation.
9. Your console may reboot again
automatically and finalize the
installation and setup of the console’s
settings. Finally it will install the
release software automatically.
Maxxyz Compact Upgrade Kit Installation Note Page 10 of 11
10. The system will ask you to calibrate
the integrated touch screen and
optionally also an external (ELO) touch
screen.
11. The console is now ready to use! Load
the training file and verify its operation.
12. You can now load your backup
showfiles into the console. The
console may ask you to save them
again, as they will be updated for use
with this latest version of the MX
software. Save them on the console’s
SSD drive.
www.martin.com • Olof Palmes Allé 18 • DK-8200 Aarhus N • Denmark
Tel. (+45) 8740 0000 • Fax (+45) 8740 0010
License: Upgrading your license to Windows 7
The hardware and software are now successfully updated. Now all you need to do is request a
new license that will be stored on the internal One-Key in you Maxxyz Compact console. This
will include the Windows 7 license that you are now using with version 3 of the MX software.
To make a license request, please send the following items to
License request file (see below)
Serial number of your console
Copy of your purchase order (a scan, or readable picture)
Generating a license request file
To generate a license request file on your console:
1. On the Maxxyz Compact console, go to the menu: System > About
2. In the License section press the Request… button.
3. Press Martin Controller.
4. Save the license request file to an external USB drive.
When you send the 3 items listed above to
[email protected] we will create a license for
you and send you back a new file via e-mail.
You can now add the license using the procedure outlined above, but this time pressing the
Add License button instead of the Request… button.
  • Page 1 1
  • Page 2 2
  • Page 3 3
  • Page 4 4
  • Page 5 5
  • Page 6 6
  • Page 7 7
  • Page 8 8
  • Page 9 9
  • Page 10 10
  • Page 11 11

Martin MaxModule Cerebrum Installation guide

Type
Installation guide
This manual is also suitable for

Martin MaxModule Cerebrum is a compact and powerful lighting controller designed for professional use in theaters, concert halls, and other venues. It features a user-friendly interface, extensive connectivity options, and a wide range of powerful features to help you create stunning light shows. With its ability to control up to 8 universes of DMX data, support for multiple protocols, and built-in effects generator, the Cerebrum is a versatile tool for lighting designers of all levels.

Ask a question and I''ll find the answer in the document

Finding information in a document is now easier with AI