Page is loading ...

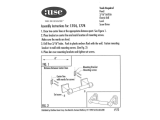
Installation
Instructions
for your Microwave Oven
Installation Instructions
for Cabinet Mounting
Accessory Kit
Pub. No. 4-A019
Safety Instructions p2
Tools you need p2
Cabinet requirements p3
Mounting your oven p4
Save this book with your Use & Care Book

WARNING
This mounting Kit is designed for use
with microwave ovens:
GE Spacemaker II
TM
, Spacemaker III
TM
and Hotpoint CounterSaver
®
models.
Before attempting the installation of
this kit, be sure to unplug the oven
from wall receptacle.
Your oven is designed to be installed
under properly constructed, good
condition wood or metal cabinets that
are sturdy enough to support the items
you have in the cabinet, plus an
additional 90 pounds from the cabinet
bottom.
Empty the contents of your selected
cabinet and the delicate items in
adjoining cabinets.
(NOTE: When drilling the holes, the
vibration could cause damage to
fragile items such as crystal or china.)
Now, you must inspect your cabinets.
If any of the following conditions exist,
then it is your personal responsibility
to test the cabinets or contact a
qualified cabinet maker.
1. Separation of joints between the
bottom shelf and the cabinet structure.
2. Splitting, cracking or other signs of
deterioration.
3. Check the number of screws used to
install your cabinets. If your cabinet is
attached to the wall with only two
screws at the top, then you must add
two screws at the bottom to firmly
secure your cabinets to the wall. When
adding the screws, be sure that they
enter wall studs with at least ½"
(12 mm) penetration.
4. On wood cabinets, the bottom shelf
must be at least
3
/16
" (4 mm) thick
masonite or plywood.
5. Be sure that the underside of the
cabinet is a least 24" (61 cm) wide and
12" (30.5 cm) deep. If the cabinet is
less than 12" (30.5 cm) deep, follow
the cabinet mounting instructions
(page 4) carefully if you desire to
mount your oven under your cabinet.
To test your cabinets, place a 90lb.
(40.8 kg) load, plus the equivalent
weight of items normally stored on this
shelf*, for a minimum of five minutes.
*You may consider using jugs of water,
bricks or books to obtain the test load.
PLEASE NOTE: If your cabinet is
properly constructed and suitably
installed it will withstand this test
without any damage: however, there is
the possibility of damage should the
cabinet be incapable of supporting the
additional load.
Mabe Canada Inc. is NOT
RESPONSIBLE FOR ANY DAMAGE
OR OTHER CONSEQUENCES
resulting from the performance of this
test.
If you are unsure that your cabinets
are suitable for this type of installation
you may use the oven on your
countertop.
Important Safety Instructions
Tools
The following tools are needed for
installation of your unit:
• Drill and ¼" drill bit
• Phillips and flat blade screwdrivers
• Nail or center punch
• Pencil and ruler
• Scissors
• Hammer
Installation Instructions
2

3
Two Mounting Methods
There are two mounting methods
described in this booklet that can be
used.
1. Countertop Method
You can use this method if you decide
not to cabinet mount your oven.
To use your oven as a countertop
model, simply position the oven on
the desired counter and plug the
electrical cord into the three prong
(grounded) wall receptacle. (Fig. 1)
2. Cabinet Mounting Method
This method is for mounting your
oven under a cabinet (Fig. 2, 3, 4, 5, 6)
and uses the template, in-cabinet
mounting straps, rear brackets (if
required) and one set of screws.
Before using this method, the 4 plastic
plug buttons on the top of the oven
must be removed. This can be done by
placing a thin flat blade screwdriver
between the plug button and the oven
top and raising gently, taking care to
avoid scratching the oven top.
Selecting Your Mounting Location
When selecting your mounting
location for your unit, remember the
following:
• For mounting and dismounting
ease, allow adequate space between
the oven and an adjacent wall or
appliance. Installation will be easier if
adequate space is allowed for hand
clearance. (Fig. 4)
FIG. 4
• Installation will be easier if the oven
can be mounted under one cabinet
rather than running under two
cabinets.
• DO NOT BLOCK VENTS AND
OPENINGS.
• DO NOT INSTALL THE OVEN
OVER COOKING OR OTHER
HEATING APPLIANCES SUCH AS A
RANGE OR TOASTER OVEN. THIS
MAY CAUSE DAMAGE TO YOUR
OVEN.
• A flush installation, as shown in
Fig. 5, depends on microwave oven
and cabinet depth. The microwave
oven may extend beyond the front
surface or the cabinet as shown in
Fig. 2 and Fig. 3.
FIG. 5
• Be sure that a three prong
(grounded) wall receptacle is within
reach of the electrical cord when
properly draped. The wall receptacle
cannot be located behind the oven
when installed, because the power cord
plug may hit the back of the oven and
prevent proper installation. (Fig. 6)
FIG. 6
FIG. 1
COUNTERTOP
FIG. 2
COUNTERTOP
CABINET
(SIDE VIEW)
OVEN MAY BE
MOUNTED TO
CABINETS WITH OR
WITHOUT A FRONT
RAIL.
CABINET
(SIDE VIEW)
FIG. 3
COUNTERTOP

4
Cabinet Mounting Method
Preparations
Select the correct template (see
template/rear bracket reference
sheet.) Open the template and detach
both segments along the dashed lines
with scissors. You should have two
separate pieces. (Fig. 7)
• Template 1
• Template 2. Make sure you use the
template properly depending whether
you drill holes from the inside or
bottom side of the cabinet. (Fig. 7)
FIG. 7
Instructions for Drilling
You can drill from inside of the
cabinet if you have adequate space
and your shelves are removable.
If you cannot drill from the inside, go
to Instructions for Drilling from
Bottom.
1. If your cabinet is less then 12"
(30.5 cm) deep, cut off the front edge
of Template 2 the amount by which
the cabinet depth is less than 12"
(30.5 cm), using the template cut lines
as a guide. Place Template 2 inside
cabinet. Cut around door jam and if
necessary, corners to make template
fit. (The front edge of template must
be even with the front edge of the
cabinet). Place Template 2 in cabinet.
Note: For cabinets with a recessed
shelf you must measure the thickness
of the front rail and cut the amount
off the front edge of Template 2 using
the template cut lines as a guide. This
will allow Template 2 to lay flat on the
shelf.
2. If you have a partition you must do
the following:
• Cut Template 2 into two pieces to fit
each side of partition.
• Position one piece of Template 2
inside the cabinet making sure that
the front edge is even with the front
edge of the cabinet.
• Position Template 1 on front of the
cabinet so that the arrow is aligned with
the hole center line on Template 2.
(Fig. 8)
FIG. 8
• Position remaining piece of
Template 2 inside cabinet and align
the hole center lines with arrow on
Template 1 so that the distance from
right hole center to left hole center
measures the distance indicated on
the template. (You will have to cut
excess paper from the middle of
Template 2 to make it lay flat.)
• Position the remaining piece of
Template 2 inside cabinet. (Fig. 9)
FIG. 9
• Check again to make sure that the
hole center lines on Template 2 are
straight and that the distance from
right to left drilling holes measures the
distance indicated on the template.
3. Go to Drilling the Mounting Holes.
Instructions for Drilling
From Bottom
1. If you have a front rail, measure the
thickness and cut that amount off the
front edge of Template 2 using the
template cut lines as a guide.
2. Place cut edge of Template 2 against
the back side of the front rail and
position if flat against the bottom side
of the cabinet.
Note: On some cabinets a small
bracket or glue block is used between
the overhang and the underside of the
cabinet bottom. If this is true of your
cabinets, cut Template 2 to fit around
the bracket of glue block so that it will
be flat on the cabinet bottom when
attached. (Fig. 10)
FIG. 10
3. If you have a partition you must do
the following:
• Cut Template 2 into two pieces to fit
on each side of partition
• Position one piece of Template 2
under the cabinet. (The cut line along
the front edge of Template 2 must be
placed against the back of the front
rail.)
TEMPLATE 1
TEMPLATE 2

Cabinet Mounting Method (cont.)
• Attach Template 1 to rear of cabinet
and align arrow with hole center line
on Template 2. (Fig. 11)
FIG. 11
• Position remaining piece of
Template 2 under the cabinet and
align the hole center lines with arrows
on Template 1 so that the distance
from right hole center to left hole
center measure the distance indicated
on the template. (You may have to cut
excess paper from the middle of
template to make it lay flat.)
• Position Template 2. (The cut line
along the front edge of template must
be placed against the back of the front
rail. (Fig. 12)
FIG. 12
Drilling the Mounting Holes
While drilling, it is recommended that
safety glasses be worn to prevent
possible eye damage from cabinet
shavings.
1. Use a center punch or nail to make
an indentation for centering the drill
bit.
2. Drill through Template 2 at the four
black drilling holes indicated on the
template. (Drill should be held straight
to ensure proper alignment of bolts.)
3. After drilling the four holes, remove
the template and clean the drilled
holes.
***Important***
Selecting Your Mounting Bolts
1. You should have three sets of bolts
of varying lengths in the installation
package. Select on bolt of each size.
2. Hold each bolt against the cabinet
front rail. Pick the bolt that extends
beyond top of the bottom shelf by
3
/
16
"
(4 mm) to ¾" (19 mm). This will be
the bolt length needed for your
cabinets. (Fig. 13)
FIG. 13
Note: It is important to pick the
correct bolt length needed for your
cabinets. If the bolt is too short, it
won't reach the oven. If the bolt is too
long, it will not permit oven to be
drawn up to cabinet snugly and might
damage the microwave oven.
3. From inside the cabinet, insert the
bolts through mounting straps and
then into the drilled holes.
Attaching the Rear Brackets
For models with no rear brackets skip
to Mounting the Oven.
1. Remove the two top case screws on
the back of the oven. (See Template/
Rear Bracket Reference Guide.)
2. Select the two rear brackets for the
model you have and then secure to
the oven back with the two top case
screws. Make sure that the flat top
surface of the rear brackets are level
and flush with the top surface of the
oven case. (Fig. 14)
FIG. 14
Mounting the Oven
To aid installation, we suggest that you
use some solid support such as books
to hold the oven while you are
securing it with the mounting bolts.
(Fig. 15)
FIG. 15
Make sure that whatever you use is
stacked or cut as close as possible to
the height needed for oven to reach
the cabinet bottom.
1. Place the oven on the support and
move into position. Lift oven, aligning
the mounting holes on the oven with
the bolts. Do not grip the door handle
to help lift the oven.
2. Insert bolts into mounting holes on
the oven. Tighten the bolts to secure
oven to the bottom of the cabinet.
(Alternate between bolts so that oven is
drawn up evenly.)
3. Once oven is securely in place, plug
power cord into three prong
(grounded) wall receptacle.
3/16” - 3/4”
(4 - 19 mm)
TOP OF BOTTOM SHELF
5

Part No. 350A4502P534
Pub No. 31-1130 (4)
ATS 04/06
Printed in Malaysia
/