Page is loading ...

HAZARD POTENTIAL CONSEQUENCE PREVENTION
RISK OF INJECTION
OR SEVERE CUTTING
INJURY
Serious injury or death could
occur from high pressure spray
penetrating the skin.
KEEP AWAY FROM THE SPRAY: If an accident does occur, and the spray
appears to have penetrated the skin, SEEK EMERGENCY MEDICAL CARE. DO
NOT TREAT AS A SIMPLE CUT. Be prepared to tell a physician exactly what type
of detergent you are using. This information is provided on the Mi-T-M Detergent
Label and the MSDS (Material Safety Data Sheet) provided with your detergent.
Before attempting to install the injector, make sure the pressure washer is shut off.
Relieve pressure in the system.
NEVER spray at yourself or any one else.
NEVER put your hand, ngers or body directly over the spray nozzle.
Maintain a safe distance from persons while operating this unit.
DO NOT allow children or pets near the area when operating the unit.
RISK OF BODILY
INJURY
Serious injury can occur from
detergent injector applications.
Always wear eye protection when using the Detergent Injector. Other protective
clothing such as a rubber suit, gloves, respirator, etc., may be necessary for
additional protection.
Do not use solvents, highly corrosive detergent or acid type cleaners with this
injector. Do not use this injector to dispense hazardous detergents. Use only
Mi-T-M detergents with the injector and mix these detergents only with water.
Mi-T-M Detergents contain surfactants which may be harmful if swallowed.
Stay alert! Watch what you are doing. Do not operate the unit or injection feature
under the inuence of alcohol or drugs.
If the detergent hose, strainer or components show any sign of damage, replace
before continuing.
Read all instructions in both this manual and the manual accompanying the
pressure washer you are using with this Detergent Injector.
RISK OF EQUIPMENT
DAMAGE
Risk of major repair. Do not alter the injection feature in any manner not prescribed in this manual.
Use only genuine Mi-T-M replacement parts for necessary repairs.
INSTALLATION & PREPARATION
INJECTOR INFORMATION:
1. This injector was designed for use with specially formulated, highly concentrated Mi-T-M Detergents. NEVER mix detergent with
anything but water!
2. Simply follow the instructions on the container for proper dilution. Keep in mind this injector further dilutes the detergent at an
approximate 1 part detergent to 12 parts water ratio. (Detergent siphon ratio may vary depending upon the temperature or viscosity
of the detergent being used.)
NOTE: Before beginning a cleaning job, always spot test the detergent on the area to be cleaned to determine if a detergent reaction
may occur. Be certain to rinse cleaning surface thoroughly with water.
INSTALLATION:
1. Ensure the pressure washer is off, the water supply is off and that all pressure is relieved from the system by pointing the gun in a
safe direction and squeezing the trigger.
2. Disconnect the high pressure discharge hose from the water outlet on the pressure washer.
3. Quick-connect the detergent injector into the water outlet on the pressure washer.
4. Reattach the high pressure discharge hose to the female quick-connect on the detergent injector.
5. Turn the adjustment knob on the detergent injector completely counterclockwise to the fully open position. Siphoning rate can be
adjusted by turning the adjustment knob from a clockwise to a counterclockwise position. Fully clockwise is closed.
6. Fully submerge the strainer end of the detergent hose into the detergent solution.
When using this product, basic precautions should always be observed, including the following.
READ ALL SAFETY WARNINGS BEFORE USING THIS DETERGENT INJECTOR.
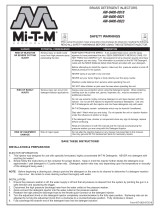
SAFETY WARNINGS
BRASS DETERGENT INJECTORS
AW-8300-0000
!SAVE THESE INSTRUCTIONS!
Form #37-0090-072518

SYMPTOM POSSIBLE CAUSE ACTION
No Detergent Detergent injector not installed. Install Detergent Injector (See installation
instructions).
Detergent nozzle not installed. Install 6540° (black) nozzle.
Detergent strainer not completely submerged
in detergent solution.
Submerge strainer.
Detergent strainer obstructed. Inspect, clean or replace as necessary.
Adjusting knob turned to "closed" position. Turn adjusting knob completely
counterclockwise.
Detergent hose cut or obstructed. Inspect, clean or replace.
Ball in Detergent injector assembly stuck. Disassemble. Clean or replace parts.
Detergent ows back into container. Ball in Detergent injector missing or corroded. Disassemble and replace.
O-ring damaged or missing. Disassemble and replace.
START-UP & OPERATION:
1. Ensure the trigger gun is locked in the "OFF" position and insert a 40° nozzle into the wand assembly.
2. Refer to your pressure washer manual for correct start-up procedures for the pressure washer you are using with this detergent
injector. Be certain to read and follow all Safety Warnings in both the pressure washer manual and in this detergent injector manual,
before starting the unit.
3. Once the pressure washer is started, wet the area to be cleaned using the 40° nozzle.
4. Lock the trigger gun in the "OFF" position and replace the 40° nozzle with the 6540°(black colored) detergent nozzle which was
shipped with your detergent injector. This injector was designed for low pressure application only. It will not allow detergents to be
introduced into the system unless the detergent nozzle is installed.
5. After connecting the detergent nozzle into the end of the wand, unlock the trigger gun and squeeze the trigger. Low pressure water
will spray out of the nozzle, followed shortly by the detergent water mixture.
NOTE: If this does not occur within one minute of triggering the gun, refer to the troubleshooting section.
6. Hold the gun/wand assembly approximately two feet from the surface being cleaned and mist-wet the area with cleaning solution.
Start spraying from the bottom and moving up using long, overlapping strokes. Applying detergents from the bottom up helps avoid
streaking. Allow to soak briey. DO NOT let detergent dry on surface as it will become extremely hard to remove!
7. Lock the gun in the "OFF" position and replace the 6540° nozzle with the desired high pressure nozzle. Point the trigger gun toward
the cleaning surface and squeeze the trigger. Cleaning solution will exit the high pressure nozzle until all the remaining detergent in
the siphon mode is purged from the system. Begin rinsing with the high pressure spray, keeping the nozzle at a 15° angle,
approximately from the surface to "chisel" the dirt off of the area. For best rinsing results, start at the top and work down.
NOTE: DO NOT use the 0° nozzle for rinsing as this can gouge the area being cleaned.
8. If some dirt remains, repeat the procedure outlined above, allowing the detergent to soak a little longer. DO NOT allow detergent to
dry on the surface!
9. When done using the detergent injector, always run a gallon of clean water through the injector to prevent corrosion of parts.
10. When not using the injector, remove it from the unit. This will give the couplers longer life and relieves and stress on internal
components of the injector.
TROUBLESHOOTING:
Optimum performance of detergent injector occurs with 50 ft. high pressure hose and a minimum of 3/8" I.D. The type of hose,
extended lengths, reduced I.D. and ttings may create back pressure in excess of the low pressure nozzle rating and prevent
the injector from drawing detergent. Deduct the hose friction loss from the above PSI nozzle.
FLOW LOW PSI NOZZLE (MAX. INJECTING
PRESSURE LESS HOSE FRICTION LOSS)
MAX. DETERGENT DRAW PRESSURE DROP ACROSS NOZZLE
(DEDUCT FROM HIGH PRESSURE)
3 GPM 225 PSI 54 150
4 GPM 375 PSI 54 250
5 GPM 600 PSI 54 400
Manufactured by Mi-T-M
50 MI-T-M Drive, Peosta IA 52068
563-556-7484/ Fax 563-556-1235
WARNING: This product can expose you to
chemicals including Lead, which is known to
the State of California to cause cancer and birth
defects or other reproductive harm. For more
information go to www.P65Warnings.ca.gov
WARNING
/


