I.C.T.C. Holdings Corporation PW2700-SC User manual

Type
User manual

This manual is also suitable for

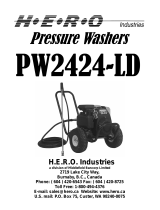
H.E.R.O. Industries Pressure Washer Owners Manual
Page 1
H.E.R.O. Industries
a division of Middlefield Bancorp Limited
2719 Lake City Way,
Burnaby, B.C., Canada
Phone: ( 604 ) 420-6543 Fax: ( 604 ) 420-8725
Toll Free: 1-800-494-4376
E-mail: [email protected] Website: //www.hero.ca
U.S. mail: P.O. Box 75, Custer, WA 98240-0052
H.E.R.O. Industries Pressure Washer Owners Manual
Page 2
Table of Contents
Safety Instructions 3
Important Operating / Maintenance Precautions 4
Start-Up 4-5
Shutting Down 5
Nozzle Selection 6
Trouble Shooting 7
Pump Schematic & Parts List 14 - 16
Unloader and Injector Control Schematic & Parts List, 17 - 18
Pump Service 19
Repair Kits 20
Chassis Parts, Gun, Hose, & Accessories 21 - 22
WARRANTY
This product is warranted to be free from defects in materials and workmanship under normal
use and service, for a period of two years from the date of purchase, when operated and
maintained in accordance with the Maintenance and Operation Instructions supplied with the
unit. The warranty does not cover misuse or negligence.
This warranty is extended only to the original purchaser. Hoses, spray guns, wands and other
accessories are warranted for 30 days. Warranty is void if repairs are attempted by anyone other
than an Authorized Service Center.
H.E.R.O. Industries liability under warranty is limited to repair of product and /or replacement
of parts, and is given to the purchaser in lieu of all other remedies including incidental and
consequent ial charges. There are no expressed warranties other than those specified herein.
H.E.R.O. Industries Pressure Washer Owners Manual
Page 3
IMPORTANT SAFETY PRECAUTIONS
This book has important information for the use and safe operation of this
machine. Read and understand all warnings before you start working.
! Read all the instructions before using machine
! To reduce risk of injury, close supervision is necessary when the machine is used
near children
! Know how to stop the machine and bleed pressure quickly. Be quite familiar with the
controls.
! Stay alert! Watch what you are doing.
! Keep operating area clear of all persons.
! Follow the maintenance instructions specified in the manual.
" Do not operate the machine when fatigued or under the influence of alcohol or drugs.
" Do not overreach or stand on unstable support. Keep good footing and balance at all
times.
" To prevent fire hazard, do not use with or near inflammables such as; gasoline, grain
dust, solvents and thinners.
" Never add gasoline to a hot engine as this can result in a fire or explosion.
" Never direct spray at the pressure washer unit.
Warning
Risk of injection or injury.
Do not direct discharge stream at persons or animals. The high
pressure water stream can cause injury or death!
WARNING - WHEN USING THIS MACHINE:
H.E.R.O. Industries Pressure Washer Owners Manual
Page 4
! Change oil in pump after the first 50 hours, then every 500 hours.
Use SAE30 Non-Detergent Motor oil.
! Change engine oil as specified by the Honda. See Honda owners manual.
" Do Not run washer longer than 3 minutes with gun closed, as this can result in damage to the
seals. Heat generated by the re-circulating water can damage seals.
" Avoid freezing pump. Drain unit prior to storage, or run an antifreeze solution through pump.
Ensure the pump and hoses are completely bleed of all liquid.
1. Verify that the vented YELLOW dip stick is installed in
pressure washer pump. Remove the RED shipping plug
( if present ) from top of the pump and replace it with the
YELLOW oil level dipstick provided. Fig. 1
2. Before first use, check engine and pump oil levels.
Note: For shipping purposes, engine oil has not been
added.
Before each use, check engine oil level by unscrewing
the oil dipstick. Add motor oil (consult Honda manual
for correct grade) as required to bring to proper level,
approximately mid-way on dipstick.
3. Check water supply volume. To operate correctly, the unit
requires a water supply 25% greater than the units output.
( i.e. PW2700SC = 3 GPM, PW2000SC = 3.75 GPM of
water flow).
To test water supply output;
a) Turn water flow to full maximum output.
b) Place a 5 gallon pail or container under water flow for
exactly 1 minute ( 60 seconds).
c) Measure contents to determine water flow.
4. Connect a standard garden hose to the water inlet or
bottom connection on the pump head ( Female hose
connector ). Fig. 2.
5. Connect the high pressure hose to the water “Outlet”
or upper connection on the pump head.
( Male quick connect nipple). Fig. 2.
6. Turn the unloader knob on top of the pump head counter-
clockwise to reduce the pressure prior to starting the
machine.
7. Select the desired tip for the job. Insert tip into wand
IMPORTANT OPERATION / MAINTENANCE PRECAUTIONS
START-UP AND OPERATION INTRODUCTION
Yellow
Red
Fig. 1
Outlet
Inlet
Pressure
Control
Injector
Fig. 2
H.E.R.O. Industries Pressure Washer Owners Manual
Page 5
( quick-connect fittings ). See page 6.
RED-0º, Narrow Fan, Direct or Concentrated Cleaning.
YELLOW - 15º, Medium Fan, General Use.
WHITE - 40º, Wide Fan, Soft Pattern, For Rinsing.
BLACK - 65º, Chemical Injector Tip. Must be used when operating chemical injector
8. If using injector system, insert BLACK spray tip and connect the detergent/chemical suction line to
the fitting marked “Injector” and place the filter end into the chemical/detergent jug. Turn the knob
clockwise to prevent suction until desired.
9. Turn on the water supply and trigger the spray gun to purge all air from the system, PRIOR
to starting engine. VERY IMPORTANT!!
10. Start the engine by following this procedure:
a. Turn the ON/OFF switch to ON.
b. Turn the GAS to ON.
c. Turn the CHOKE to FULL.
d. Push the THROTTLE lever to the ON position.
e. Pull the STARTING cord.
f. Once the engine has started, reduce the CHOKE until it is OFF, and open the THROTTLE to full
ON. Use these instructions in conjunction with instructions provided in the Honda manual.
11. At this point, the gun is triggered to evacuate any remaining air in the system. Then trigger the
gun and begin turning the red unloader knob in a clockwise direction as far as it will turn. You
should now have full pressure.
12. To introduce chemicals/detergent to the spray, do the following;
a. Install “Black” injector tip.
b. Turn the CHEMICAL/DETERGENT adjustment knob counter- clockwise.
c. Trigger the SPRAY GUN and continue to turn the ADJUSTING knob until the desired amount
of chemical flow is achieved.
d. Trigger the SPRAY GUN and continue to turn the ADJUSTING knob until the desired amount
of chemical flow is achieved.
1. Trigger the spray gun and reduce the pressure by turning the unloader knob counter-clockwise.
2. Turn engine switch to the OFF position.
3. Turn the throttle and gas levers to the OFF or Closed positions.
4. Shut OFF the water.
5. Trigger gun to remove any remaining pressure in the system.
6. Disconnect hose.
START-UP AND OPERATION INTRODUCTION
SHUTTING DOWN THE MACHINE AFTER USE
H.E.R.O. Industries Pressure Washer Owners Manual
Page 6
For your convenience, we have provided a selection of nozzles to choose from.
Your machine is equipped with a 0°, 15°, 40°, and a chemical nozzle.
If you require a different cleaning action, we suggest selecting the correct tip for the job.
1. RED = 0° Angle - High impact, solid stream.
2. YELLOW = 15° Angle - Narrow width spray pattern.
3. WHITE = 40° Angle - Wide width spray pattern.
4. BLACK = Chemical Injector
0° Angle 15° Angle 40° Angle
NOZZLE SELECTION
H.E.R.O. Industries Pressure Washer Owners Manual
Page 7
TROUBLE SHOOTING
FAULT CAUSE REMEDY
Pump running normally but
pressure does not achieve rated
pressure.
Pump sucking air.
Valves worn or dirty.
Insufficient water flow.
Unloader valve packing worn.
Nozzle incorrect or worn.
Worn piston packing.
Check that hoses and fittings
are air tight.
Check, clean or replace.
Increase water supply.
Check and replace.
Check and replace.
Check and replace.
Fluctuating pressure Valves worn, dirty or stuck.
Pump sucking air.
Worn piston packing.
Insufficient water flow.
Check, clean or replace.
Check that hoses and fittings
are air tight.
Check and replace.
Increase water supply. May
require new water supply
source.
Pressure drops after period of
normal use.
Nozzle worn.
Valves worn, dirty or stuck.
Unloader valve packing worn.
Worn piston packing.
Check and replace.
Check, clean or replace.
Check and replace.
Pump noisy Pump sucking air.
Valves dirty or worn.
Worn bearings.
Water too hot.
Check that hoses and fittings
are air tight.
Check, clean or replace.
Check and replace if necessary.
Reduce temperature.
Presence of water in oil High humidity in air.
Piston packing and oil seal
worn.
Check and change oil twice as
often.
Check and replace.
Water dripping from under
pump.
Piston packing worn.
The O-rings of piston guide or
retainer worn.
Thermal relief valve opened.
Check and replace.
Check and replace.
Check and replace.
Oil dripping. Oil seal worn. Check and replace.
Engine will not start. Low fuel level.
Low oil level.
Worn spark plug or gap.
Add fuel.
Add oil.
Replace.
H.E.R.O. Industries Pressure Washer Owners Manual
Page 8
HPWD2000LC - TT9071 Pump Assembly
HPWD2700 TT2530 Pump Assembly
M
C
H.E.R.O. Industries Pressure Washer Owners Manual
Page 9
Assembly PW-2535 Pump Only, HPWD2000LC, TT9071
with thermal valve. After 3-1-98,
Assembly PW-2710 Pump / Unloader Assy. HPWD2700, TT2530
without thermal valve.
1 PW-51.0106.22 Crankcase 1
2 PW-98.2100.00 Cap 2
3 PW-90.3833.00 O-Ring 1
4 PW-51.2090.51 Cover 1
5 PW-90.1565.00 Oil Seal Kit 83 3
6 PW-98.2041.00 Cap 1
M PW-51.1200.41 Manifold, HPWD2000, TT9071 1
M PW-51.1201.41 Manifold, HPWD2700, TT2530 See page 19 1
8 PW-96.6938.00 Washer 8
9 PW-99.1943.00 Screw 8
10 PW-90.3841.00 O-Ring Kit 1 6
11
Sold Only In Kit 1 Kit 1 6
12
Sold Only In Kit 1 Kit 1 6
13
Sold Only In Kit 1 Kit 1 6
14
Sold Only In Kit 1 Kit 1 6
15 PW-90.3847.00 O-Ring Kit 84 6
16 PW-98.2218.00 Cap Kit 84 6
17 PW-36.7032.01 Valve Unit Kit 1 6
18 PW-51.1000.51 Head Ring Kit 96-97 3
19 PW-90.2620.00 Packing Kit 96-97 3
20 PW-51.0800.70 Packing Retainer Kit 86-96 3
21 PW-90.3604.00 O-Ring Kit 86-96-97 3
22 PW-90.3835.00 O-Ring Kit 86-96-97 3
23 PW-97.5968.00 Oil Level Indicator 1
24 PW-91.8014.00 Bearing 1
25 PW-98.2103.00 O-Ring 1
26 PW-92.2216.00 Nut 3
27 PW-96.7008.00 Washer 3
28 PW-51.0400.09 3 Piston
REF # PART # DESCRIPTION QTY
H.E.R.O. Industries Pressure Washer Owners Manual
Page 10
REF # PART # DESCRIPTION QTY
29 PW-90.3572.00 O-Ring 3
30 PW-90.5022.00 Anti- Extrusion Ring 3
31 PW-96.7070.00 Washer 3
32 PW-97.7310.00 Piston Pin 3
33 PW-51.1600.22 Crankcase Cover 1
34 PW-99.1867.00 Screw 4
35 PW-90.3917.00 O-Ring 1
36 PW-51.0300.22 Connecting Rod 3
37 PW-51.0500.56 Valve Guide 3
60 PW-99.2730.00 Screw 4
61 PW-96.7014.00 Washer 4
62 PW-10.0346.22 Flange, Motor Mounting 1
63 PW-99.1867.00 Screw 4
64 PW-96.6938.00 Washer 4
65 PW-50.2115.51 Spacer 1
66 PW-90.4097.00 O-Ring 1
67 PW-90.1644.00 Oil Seal 1
68 PW-90.0667.00 Circlip 1
69 PW-91.8373.00 Bearing 1
C PW-51.0211.35 Crankshaft, HPWD2000LC, TT9071 1
C PW-51.0221.65 Crankshaft, HPWD2700, TT2530 1
71 PW-1077 Valve, Thermal Protection, 1/2, w/ Barb
HPWD2000LC & HPWD2700 Only
1
72 PW-1405 Tubing, Pressure Relief Valve 1
H.E.R.O. Industries Pressure Washer Owners Manual
Page 11
UNLOADER AND INJECTOR CONTROLS - PW-1130
HPWD2000 Only
( Model WP10
Unloader With
Injector)
REF # PART # DESCRIPTION QTY
1 - 31 PW-1130 Unloader, With Chemical Injector, Less Intake Fitting,
HPWD2000LC Only, After 3-1-98
1
2 PW-60.0821.35 Lower Body 1
3 PW-14.4100.00 Washer 4
4 PW-10.3109.96 O-Ring 1
5 PW-60.0396.31 Connector 1
6 PW-10.3066.01 O-Ring 3
7 PW-10.3005.00 O-Ring 1
8 PW-60.0311.51 Seat 1
9 PW-60.0333.21 Ball Holder 1
10 PW-60.0315.84 Adjustment Knob 1
Unloader Service
The unloader is made up of may
small o-rings, springs and check
balls. Repair kits are available to
replace these “Soft Goods”.
Repairs requiring the
replacement of valve bodies or
“Hard Goods” may be more
economically solved through the
replacement of the entire “Bolt
On” unloader. Shop labor may
make an unloader repair a poor
economical choice.
H.E.R.O. Industries Pressure Washer Owners Manual
Page 12
REF # PART # DESCRIPTION QTY
11 PW-60.0801.35 Valve Body 1
12 PW-10.4006.00 Seal 1
13 PW-10.3051.01 O-Ring 1
14 PW-60.0303.31 Connector 1
15 PW-60.0317.31 1
16 PW-10.3055.00 O-Ring 1
17 PW-10.4008.00 1
18 PW-60.0331.51 Piston 1
19 PW-60.0310.61 Spring Support 1
20 PW-60.0313.61 Spring 1
21 PW-60.0304.31 Valve Cap 1
22 PW-21.0212.51 Nozzle 1
23 PW-21.0211.31 Injector Body 1
24 PW-21.0160.51 Spring 1
25 PW-14.7420.01 Ball 1
26 PW-10.3049.00 O-Ring 1
27 PW-21.0161.31 Nipple 1
28 PW-21.0158.31 Spring 1
29 PW-10.3043.01 O-Ring 1
30 PW-21.0155.31 Injector Nipple, Hose 1
31 PW-21.0156.31 Knob 1
33 PW-1055 Outlet Plug, Quick-Disconnect, 3/8” Female 1
34 PW-1400 Inlet, Garden Hose, Female 1
35 PW-1060 Washer, Filter 1
H.E.R.O. Industries Pressure Washer Owners Manual
Page 13
BUILT-IN UNLOADER AND INJECTOR CONTROLS HPWD2700
PW-1077
Inlet fittings
M
Outlet Quick
Disconnect
51
50
52
*
*
*
*
*
*
*
*
*
* = Kit 94
PW-RKI094
Kit 102
PW-RKI102
H.E.R.O. Industries Pressure Washer Owners Manual
Page 14
REF # PART # DESCRIPTION QTY
1 PW-36.3187.51 Knob 1
2 PW-92.2218.00 Nut 1
3 PW-99.3054.00 Screw 1
4 PW-99.3598.00 O-Ring 1
5 PW-36.3185.70 Valve Cap 1
6 PW-36.3169.70 Valve Plate 1
7 PW-94.7436.00 Spring 1
8 – 23 PW-RKI102 Repair Kit, Parts only sold in Kit PW-RKI102. Kit
26 PW-98.2100.00 Cap 1
29 PW-98.2041.00 Cap 1
M PW-51.1201.41 Manifold, Refer to diagram on page 14 for internal parts. 1
31 PW-10.0078.70 Nipple 1
34 PW-10.0151.66 Nozzle 1
33, 35 to
40, 42, 46
PW-RKI094 Repair Kit, Parts only sold in Kit – PW-RKI094. Kit
41 PW-36.3181.51 Body 1
43 PW-36.2563.70 Valve Seat 1
44 PW-36.2564.70 Shutter 1
45 PW-36.2565.51 Knob 1
47 PW-36.2566.70 Injector Nipple 1
50 4-667-70 Inlet, Garden Hose Connector, Female 1
51 PW-1060 Filter Washer 1
52 PW-1055 Outlet Nipple, Quick-Disconnect, 3/8” Female 1
BUILT-IN UNLOADER AND INJECTOR CONTROLS HPWD2700
H.E.R.O. Industries Pressure Washer Owners Manual
Page 15
PUMP SERVICE
All inlet and discharge valves can be serviced without disrupting the inlet or discharge plumbing. The
inlet and discharge valves are identical on all H.E.R.O. models. See pages 8-10 and 14-16.
VALVE ASSEMBLIES
1. To service any valve, remove valve cap ( ref # 10 ) and extract valve assembly ( ref # 4-A-D-9 ).
2. Examine o-rings and replace if there is any evidence of cuts, abrasions or distortion.
3. Remove valve assembly ( ref # A-D ) from valve cavity.
4. Remove o-ring ( ref # 4 ) from valve cavity.
5. Only one valve kit is necessary to repair all the valves in the pump. The kit includes new o-rings,
valve seat, poppet, spring and retainer, ( ref # 4, A-D ) all pre-assembled.
6. Install new o-ring in valve cavity.
7. Insert assembly into valve cavity.
8. Replace valve cap ( ref # 10 ) and torque to 74 foot pounds.
50
4
A
10
9
D
C
B
11
11
9
10
1
3
2
H.E.R.O. Industries Pressure Washer Owners Manual
Page 16
REPAIR KITS
Part
Number
Description Kit # Ref# Included Page # # Pieces
PW-RKI001 Repair Kit, Valve, 1500 / 2000LC 1 10,11,12,13,14,17 12,15 6
PW-RKI023 Repair Kit, Oil Seal, 2500, 3000 23 17 9 3
PW-RKI083 Repair Kit, Oil Seal, 1500 83 5 15 3
PW-RKI084 Valve Cap & O-ring, TT9091 84 15, 16 15 6
PW-RKI086 High & Low Pressure Seals,
TT9091
86 20, 21, 22 15 3
PW-RKI088 Repair Kit, High-Low Pressure
Seals / Restop. 2500, 3000
88 43, 44, 51 10 3
PW-RKI089 Brass Ring, High Pressure Seals,
WW960, WW961
89 42 10 3
PW-RKI090 High Pressure Seal,
WW960, WW961
90 45 10 6
PW-RKI093 Repair Kit, Unloader, Complete
Part # PW-1140
93 5, 10, 11, 15, 16, 18, 19,
20, 21, 22, 23, 24, 29,
36, 37, 38, 39
12 1
PW-RKI094 Repair Kit, Unloader, Soft Parts
Only, Part # PW-1140
94 18, 32, 41, 43, 46, 47,
53, 54, 55, 56
12 1
PW-RKI096 Repair Kit, Seal Kit Complete
TT9091, 3 Kits needed per unit
96 18, 19, 20, 21, 22 15 1
PW-RKI097 Repair Kit, Packing 97 18, 19, 21, 22 15 3
PW-RKI123 Repair Kit, Valve, 123 4,5,6,7,8,11 9 6
PW-RKI124 Valve Cap ( Brass ) & O-ring,
WW960, WW961
124 9, 10 9 6
PW-RKI125 Low Pressure Brass Ring & O-
Ring
125 40, 41 10 3
PW-RKI130 Repair Kit, Packing, 15mm,
2500, 3000
130 40, 41, 42, 43, 44, 45,
51
10 1
H.E.R.O. Industries Pressure Washer Owners Manual
Page 17
PART # DESCRIPTION QTY
PW-4290 Cart Base, c/w Axle 1
PW-4255 Handle, Rear 1
PW-4260 Handle, Front 1
PW-4080 Assembly, Rubber foot 2
67/16A Wheel, Pneumatic 2
HW6088 Cap, Axle Hat, 5/8 2
PW-4075 Grommet, Tip Holding 4
PW-2715 Engine, Gas, Honda, c/w Oil Alert, HPWD2700 1
PW-1515 Engine, Gas, Honda, c/w Oil Alert, HPWD2000 1
PW-1020 Strainer, Chemical Suction, c/w Tubing, less fitting 1
PW-1430 Gun / Wand Assembly. C/W: PW-1000, 1010, 1045, 1055 ASSY
PW-1055 Plug, Quick-Disconnect, 3/8 Steel, Male 1
PW-1435 Assembly, Pressure Washer Hose, 50’ with 2 female quick
connect fittings, After 3-1-98 ( PW-1030 & 2x PW-1050 )
Assembly
PW-1100-0001 Spray Nozzle, 0 Degree, RED, HPWD2000 Only 1
PW-1100-00035 Spray Nozzle, 0 Degree, RED, HPWD2700 Only 1
PW-1100-00045 Spray Nozzle, 0 Degree, RED 1
PW-1100-1504 Spray Nozzle, 15 Degree, Yellow, HPWD2000 Only 1
PW-1100-15035 Spray Nozzle, 15 Degree, YELLOW, HPWD2700 Only 1
PW-1100-15045 Spray Nozzle, 15 Degree, YELLOW 1
PW-1100-4004 Spray Nozzle, 40 Degree, White, HPWD2000 Only 1
PW-1100-40035 Spray Nozzle, 40 Degree, WHITE, HPWD2700 Only 1
PW-1100-40045 Spray Nozzle, 40 Degree, WHITE 1
PW-1100-6540 Wash Nozzle, 65 Degree, BLACK, ALL MODELS 1
97B Decal Quality By Design 1
PW-4085 Decal, Warning, Pressure Washing 1
CHASSIS PARTS, GUN, HOSE & ACCESSORIES
H.E.R.O. Industries Pressure Washer Owners Manual
Page 18
ACCESSORIES
PW-1430 ..............Pressure washer gun/wand assembly
PW-1000 ..............Gun, less fittings,
PW-1010 ..............Wand, w/insulator, 30',
PW-1012 ..............Wand, w/ insulator, 48',
PW-1014 ..............Wand, w/insulator, 79',
PW-1015 ..............Wand, twin- lance, less fittings,
PW-1020 ..............Strainer, chemical suction,
..............................c/w tubing, less fitting,
PW-1022 ..............Fitting, chemical suction
PW-1415 ..............Assembly, chemical injector hose,
..............................c/w brass fitting
PW-1435 ..............Assembly, pressure washer hose
..............................w/ 2 female q/c, after 3-1-98
PW-1025 ..............Hose assembly, pressure washer,
..............................25', less quick connect fittings
PW-1030 ..............Hose assembly, pressure washer,
..............................50', less quick connect fittings
PW-1035 ..............Socket assembly, swivel/quick- disconnect
PW-1045 ..............Body, quick-disconnect, 1/4 brass, female
PW-1050 ..............Body, quick-disconnect, 3/8 brass, female
PW-1055 ..............Plug, quick-disconnect, 3/8 steel, male
PW-1057 ..............Plug, quick-disconnect, 3/8 steel, female
PW-1065 ..............Gauge, 0-3000 psi
PW-1070 ..............Gauge, 0-4000 psi
PW-1105 ..............Nozzle, rotating, 2000 psi, less q/c fitting,
..............................HPWD-1500 only
PW-1110 ..............Nozzle, rotating, 3000 psi, less q/c fitting,
..............................HPWD 2500/3000 only
PW-1115 ..............Assembly, sandblast head, HPWD 1500
PW-1116 ..............Assembly, sandblast head, HPWD 2500
PW-1117 ..............Assembly, sandblast head, HPWD 3000
PW-1120 ..............Plug, quick-disconnect, 1/4 male,
..............................for rotating nozzle
10-WW-18 ...........Whirl-a-way, 18'
10-WW-24 ...........Whirl-a-way, 24'
PW-1430
PW-1000
PW-1012, PW-1012, PW-1014
HOSE
PW-1050
PW-1055 PW-1057
ROTATING
NOZZLE
SANDBLAST HEAD
PW-1415
SPRAY NOZZLES
WHIRL-A-WAY
H.E.R.O. Industries Pressure Washer Owners Manual
Page 19
DATE SERVICE PREFORMED CHECK
SERVICE RECORDS
NOTES
H.E.R.O. Industries Pressure Washer Owners Manual
Page 20
MODEL # ___________________________________________________________
SERIAL # ___________________________________________________________
PURCHASED ON ____________________________________________________
PURCHASED FROM: _________________________________________________
  • Page 1 1
  • Page 2 2
  • Page 3 3
  • Page 4 4
  • Page 5 5
  • Page 6 6
  • Page 7 7
  • Page 8 8
  • Page 9 9
  • Page 10 10
  • Page 11 11
  • Page 12 12
  • Page 13 13
  • Page 14 14
  • Page 15 15
  • Page 16 16
  • Page 17 17
  • Page 18 18
  • Page 19 19
  • Page 20 20

I.C.T.C. Holdings Corporation PW2700-SC User manual

Type
User manual
This manual is also suitable for

Ask a question and I''ll find the answer in the document

Finding information in a document is now easier with AI