Xerox SmartSend Installation guide
- Category
- Software
- Type
- Installation guide

Cov-
Release 2.0
Installation and
Administration Guide
Installation and
Administration Guide

Cover-ii
October 5, 2005
Xerox Corporation
Global Knowledge and Language Services
800 Phillips Road, Bldg. 0845-17S
Webster, New York 14580
USA
Copyright © 2001–2006 by Xerox Corporation. All rights reserved.
XEROX
®
, The Document Company
®
, the stylized X
®
, CentreWare
®
, Document Centre
®
, WorkCentre
®
Pro, DocuShare
®
, FlowPort
®
, PaperWare, SMARTsend, and FreeFlow are trademarks of or licensed to
Xerox Corporation in the United States and other countries.
DataGlyph
®
is a trademark of Palo Alto Research Center, Inc.
Adobe and Acrobat are registered trademarks of Adobe Systems, Incorporated.
IBM, Lotus, Domino, and Domino.Doc are registered trademarks of IBM Corporation.
NetWare is a registered trademark of Novell, Inc.
Flash is a trademark of Macromedia, Inc.
Microsoft, Microsoft Windows, Microsoft Word, Microsoft Excel, Microsoft PowerPoint, Microsoft Internet
Explorer, Microsoft Office, Exchange 2000, SharePoint, and Internet Information Services (IIS) are
registered trademarks of Microsoft Corporation.
Netscape Navigator is a registered trademark of Netscape Communications Corporation.
WordPerfect is a registered trademark of Corel Corporation.
WorkSite is a trademark of Interwoven, Inc.
Hummingbird DM is a trademark of Hummingbird, Ltd.
Documentum is a registered trademark of EMC Corporation.
LiveLink is a registered trademark of Open Text Corporation.
Xerox PDF Reader Powered by Foxit Software Company http://www.foxitsoftware.com

SMARTsend Installation and Administration Guide iii
Chapter 1 Welcome to SMARTsend . . . . . . . . . . . . . . . . . . . . . . . . . . . . . . . . . . .1-1
What is Included in This Release? . . . . . . . . . . . . . . . . . . . . . . . . . . . . . . . . . . . . . . . . . . . . . . . . . . . . .1-2
What is New in This Release? . . . . . . . . . . . . . . . . . . . . . . . . . . . . . . . . . . . . . . . . . . . . . . . . . . . . . . . .1-3
SMARTsend Overview . . . . . . . . . . . . . . . . . . . . . . . . . . . . . . . . . . . . . . . . . . . . . . . . . . . . . . . . . . . . .1-4
SMARTsend Documentation . . . . . . . . . . . . . . . . . . . . . . . . . . . . . . . . . . . . . . . . . . . . . . . . . . . . . . . . .1-5
SMARTsend Installation and Administration Guide . . . . . . . . . . . . . . . . . . . . . . . . . . . . . . . . . .1-5
SMARTsend User Guide . . . . . . . . . . . . . . . . . . . . . . . . . . . . . . . . . . . . . . . . . . . . . . . . . . . . . . . .1-5
Help . . . . . . . . . . . . . . . . . . . . . . . . . . . . . . . . . . . . . . . . . . . . . . . . . . . . . . . . . . . . . . . . . . . . . . . .1-5
Quick Reference Cards . . . . . . . . . . . . . . . . . . . . . . . . . . . . . . . . . . . . . . . . . . . . . . . . . . . . . . . . .1-5
Readme.txt . . . . . . . . . . . . . . . . . . . . . . . . . . . . . . . . . . . . . . . . . . . . . . . . . . . . . . . . . . . . . . . . . . .1-5
Customer Support . . . . . . . . . . . . . . . . . . . . . . . . . . . . . . . . . . . . . . . . . . . . . . . . . . . . . . . . . . . . . . . . .1-7
Telephone Support . . . . . . . . . . . . . . . . . . . . . . . . . . . . . . . . . . . . . . . . . . . . . . . . . . . . . . . . . . . . .1-7
Internet Support . . . . . . . . . . . . . . . . . . . . . . . . . . . . . . . . . . . . . . . . . . . . . . . . . . . . . . . . . . . . . . .1-7
Chapter 2 Prepare for Installation . . . . . . . . . . . . . . . . . . . . . . . . . . . . . . . . . . . . .2-1
Advance Planning Considerations . . . . . . . . . . . . . . . . . . . . . . . . . . . . . . . . . . . . . . . . . . . . . . . . . . . . .2-2
Security . . . . . . . . . . . . . . . . . . . . . . . . . . . . . . . . . . . . . . . . . . . . . . . . . . . . . . . . . . . . . . . . . . . . .2-2
Scanning Device and Application Migration . . . . . . . . . . . . . . . . . . . . . . . . . . . . . . . . . . . . . . . .2-3
Network Configuration and Logistics . . . . . . . . . . . . . . . . . . . . . . . . . . . . . . . . . . . . . . . . . . . . . .2-4
SMARTsend Configuration Requirements . . . . . . . . . . . . . . . . . . . . . . . . . . . . . . . . . . . . . . . . . . . . . .2-5
SMARTsend Computer Configuration Requirements . . . . . . . . . . . . . . . . . . . . . . . . . . . . . . . . .2-7
Verifying the SMARTsend Computer DNS Configuration . . . . . . . . . . . . . . . . . . . . . . . . . . . . .2-8
Enable File and Printer Sharing . . . . . . . . . . . . . . . . . . . . . . . . . . . . . . . . . . . . . . . . . . . . . . . . . . .2-9
Install and Configure IIS / FTP . . . . . . . . . . . . . . . . . . . . . . . . . . . . . . . . . . . . . . . . . . . . . . . . . .2-10
Enable ASP.NET . . . . . . . . . . . . . . . . . . . . . . . . . . . . . . . . . . . . . . . . . . . . . . . . . . . . . . . . . . . . .2-12
Create Administrator, User, and Device Accounts . . . . . . . . . . . . . . . . . . . . . . . . . . . . . . . . . . .2-13
Obtain and Install a Security Certificate . . . . . . . . . . . . . . . . . . . . . . . . . . . . . . . . . . . . . . . . . . .2-16
Additional Requirements for Destinations . . . . . . . . . . . . . . . . . . . . . . . . . . . . . . . . . . . . . . . . .2-19
Client and Browser Configuration . . . . . . . . . . . . . . . . . . . . . . . . . . . . . . . . . . . . . . . . . . . . . . . . . . . .2-25
Modifying Proxy Server Settings . . . . . . . . . . . . . . . . . . . . . . . . . . . . . . . . . . . . . . . . . . . . . . . .2-25
User Authentication Settings . . . . . . . . . . . . . . . . . . . . . . . . . . . . . . . . . . . . . . . . . . . . . . . . . . . .2-26
Language Settings . . . . . . . . . . . . . . . . . . . . . . . . . . . . . . . . . . . . . . . . . . . . . . . . . . . . . . . . . . . .2-27
Scanning Device Configuration . . . . . . . . . . . . . . . . . . . . . . . . . . . . . . . . . . . . . . . . . . . . . . . . . . . . . .2-28
Xerox Multifunction Device Requirements . . . . . . . . . . . . . . . . . . . . . . . . . . . . . . . . . . . . . . . .2-28
Internet Fax and E-mail Enabled Device Requirements . . . . . . . . . . . . . . . . . . . . . . . . . . . . . . .2-31
Prepare Information for Installation . . . . . . . . . . . . . . . . . . . . . . . . . . . . . . . . . . . . . . . . . . . . . . . . . . .2-33
Next Steps . . . . . . . . . . . . . . . . . . . . . . . . . . . . . . . . . . . . . . . . . . . . . . . . . . . . . . . . . . . . . . . . . . . . . .2-34
Chapter 3 Install SMARTsend . . . . . . . . . . . . . . . . . . . . . . . . . . . . . . . . . . . . . . . .3-1
Installer Overview . . . . . . . . . . . . . . . . . . . . . . . . . . . . . . . . . . . . . . . . . . . . . . . . . . . . . . . . . . . . . . . . .3-2
Upgrade SMARTsend . . . . . . . . . . . . . . . . . . . . . . . . . . . . . . . . . . . . . . . . . . . . . . . . . . . . . . . . . . . . . .3-3
Upgrade Eligibility . . . . . . . . . . . . . . . . . . . . . . . . . . . . . . . . . . . . . . . . . . . . . . . . . . . . . . . . . . . .3-3
Install SMARTsend . . . . . . . . . . . . . . . . . . . . . . . . . . . . . . . . . . . . . . . . . . . . . . . . . . . . . . . . . . . . . . . .3-5
Installing and Configuring Optional Components . . . . . . . . . . . . . . . . . . . . . . . . . . . . . . . . . . . . . . . . .3-7
Configuration Requirements for Optional Components . . . . . . . . . . . . . . . . . . . . . . . . . . . . . . . .3-7
Installation Instructions for Optional Components . . . . . . . . . . . . . . . . . . . . . . . . . . . . . . . . . . .3-12
Migrate SMARTsend to a Replacement Computer . . . . . . . . . . . . . . . . . . . . . . . . . . . . . . . . . . . . . . .3-14
Table of Contents

iv SMARTsend Installation and Administration Guide
Repair a SMARTsend Installation . . . . . . . . . . . . . . . . . . . . . . . . . . . . . . . . . . . . . . . . . . . . . . . . . . . 3-15
Uninstall SMARTsend . . . . . . . . . . . . . . . . . . . . . . . . . . . . . . . . . . . . . . . . . . . . . . . . . . . . . . . . . . . . 3-16
Chapter 4 Site Configuration . . . . . . . . . . . . . . . . . . . . . . . . . . . . . . . . . . . . . . . . .4-1
Accessing SMARTsend . . . . . . . . . . . . . . . . . . . . . . . . . . . . . . . . . . . . . . . . . . . . . . . . . . . . . . . . . . . . 4-2
Administration Home Page . . . . . . . . . . . . . . . . . . . . . . . . . . . . . . . . . . . . . . . . . . . . . . . . . . . . . . . . . . 4-3
Site Configuration . . . . . . . . . . . . . . . . . . . . . . . . . . . . . . . . . . . . . . . . . . . . . . . . . . . . . . . . . . . . . . . . . 4-4
Status Icons . . . . . . . . . . . . . . . . . . . . . . . . . . . . . . . . . . . . . . . . . . . . . . . . . . . . . . . . . . . . . . . . . . 4-4
Review Security Settings . . . . . . . . . . . . . . . . . . . . . . . . . . . . . . . . . . . . . . . . . . . . . . . . . . . . . . . . . . . 4-5
General Site Security . . . . . . . . . . . . . . . . . . . . . . . . . . . . . . . . . . . . . . . . . . . . . . . . . . . . . . . . . . 4-5
Device Scan Template Security . . . . . . . . . . . . . . . . . . . . . . . . . . . . . . . . . . . . . . . . . . . . . . . . . . 4-6
Add/Update Xerox Devices . . . . . . . . . . . . . . . . . . . . . . . . . . . . . . . . . . . . . . . . . . . . . . . . . . . . . . . . . 4-8
Manage Xerox Devices . . . . . . . . . . . . . . . . . . . . . . . . . . . . . . . . . . . . . . . . . . . . . . . . . . . . . . . . . 4-8
Adding and Discovering Devices . . . . . . . . . . . . . . . . . . . . . . . . . . . . . . . . . . . . . . . . . . . . . . . . 4-9
Using the Xerox Multifunction Device List . . . . . . . . . . . . . . . . . . . . . . . . . . . . . . . . . . . . . . . . 4-11
Device Configuration and Status Icons . . . . . . . . . . . . . . . . . . . . . . . . . . . . . . . . . . . . . . . . . . . 4-12
Configuring a Device for use with SMARTsend . . . . . . . . . . . . . . . . . . . . . . . . . . . . . . . . . . . . 4-13
Deleting Devices . . . . . . . . . . . . . . . . . . . . . . . . . . . . . . . . . . . . . . . . . . . . . . . . . . . . . . . . . . . . . 4-14
Manage Device Accounts . . . . . . . . . . . . . . . . . . . . . . . . . . . . . . . . . . . . . . . . . . . . . . . . . . . . . . 4-15
Configure Discovery Settings - Subnets . . . . . . . . . . . . . . . . . . . . . . . . . . . . . . . . . . . . . . . . . . . 4-17
Configure Discovery Settings - SNMP Credentials . . . . . . . . . . . . . . . . . . . . . . . . . . . . . . . . . . 4-17
Edit Device Configuration Defaults . . . . . . . . . . . . . . . . . . . . . . . . . . . . . . . . . . . . . . . . . . . . . . 4-18
Edit Xerox Device Properties . . . . . . . . . . . . . . . . . . . . . . . . . . . . . . . . . . . . . . . . . . . . . . . . . . . 4-22
Configure PaperWare Internet Fax Settings . . . . . . . . . . . . . . . . . . . . . . . . . . . . . . . . . . . . . . . . . . . . 4-24
Setup E-mail and Address Book . . . . . . . . . . . . . . . . . . . . . . . . . . . . . . . . . . . . . . . . . . . . . . . . . . . . . 4-25
SMTP Server Configuration . . . . . . . . . . . . . . . . . . . . . . . . . . . . . . . . . . . . . . . . . . . . . . . . . . . . 4-25
LDAP Server Configuration . . . . . . . . . . . . . . . . . . . . . . . . . . . . . . . . . . . . . . . . . . . . . . . . . . . . 4-26
Publish the My E-mail Workflow . . . . . . . . . . . . . . . . . . . . . . . . . . . . . . . . . . . . . . . . . . . . . . . . . . . . 4-27
Schedule a Backup . . . . . . . . . . . . . . . . . . . . . . . . . . . . . . . . . . . . . . . . . . . . . . . . . . . . . . . . . . . . . . . 4-28
Configure Service Settings . . . . . . . . . . . . . . . . . . . . . . . . . . . . . . . . . . . . . . . . . . . . . . . . . . . . . . . . . 4-29
Configure Service Options . . . . . . . . . . . . . . . . . . . . . . . . . . . . . . . . . . . . . . . . . . . . . . . . . . . . . 4-29
Configuring a Service . . . . . . . . . . . . . . . . . . . . . . . . . . . . . . . . . . . . . . . . . . . . . . . . . . . . . . . . . 4-32
Service Setting Descriptions . . . . . . . . . . . . . . . . . . . . . . . . . . . . . . . . . . . . . . . . . . . . . . . . . . . . 4-32
Additional Service Configuration Requirements and Restrictions . . . . . . . . . . . . . . . . . . . . . . . 4-33
Manage Application Account . . . . . . . . . . . . . . . . . . . . . . . . . . . . . . . . . . . . . . . . . . . . . . . . . . . . . . . 4-34
Changing the Application Account Password . . . . . . . . . . . . . . . . . . . . . . . . . . . . . . . . . . . . . . 4-34
General Settings . . . . . . . . . . . . . . . . . . . . . . . . . . . . . . . . . . . . . . . . . . . . . . . . . . . . . . . . . . . . . . . . . 4-35
Update Administrator Contact Information . . . . . . . . . . . . . . . . . . . . . . . . . . . . . . . . . . . . . . . . 4-35
Choose Error Handling Scheme . . . . . . . . . . . . . . . . . . . . . . . . . . . . . . . . . . . . . . . . . . . . . . . . . 4-35
Review Publication / Workflow Defaults . . . . . . . . . . . . . . . . . . . . . . . . . . . . . . . . . . . . . . . . . . 4-36
Document Type Properties . . . . . . . . . . . . . . . . . . . . . . . . . . . . . . . . . . . . . . . . . . . . . . . . . . . . . 4-39
Configure PaperWare Form Forwarding Settings . . . . . . . . . . . . . . . . . . . . . . . . . . . . . . . . . . . 4-40
Next Steps . . . . . . . . . . . . . . . . . . . . . . . . . . . . . . . . . . . . . . . . . . . . . . . . . . . . . . . . . . . . . . . . . . . . . . 4-42
Appendix A - Job Log Export Support . . . . . . . . . . . . . . . . . . . . . . . . . . . . . . . . . . . . . . . . . . . . . . . . 4-43
Appendix B - External Application Connection . . . . . . . . . . . . . . . . . . . . . . . . . . . . . . . . . . . . . . . . . 4-44
Chapter 5 Site Management . . . . . . . . . . . . . . . . . . . . . . . . . . . . . . . . . . . . . . . . . .5-1
Site Management Overview . . . . . . . . . . . . . . . . . . . . . . . . . . . . . . . . . . . . . . . . . . . . . . . . . . . . . . . . . 5-2
Manage Workflows and Publications . . . . . . . . . . . . . . . . . . . . . . . . . . . . . . . . . . . . . . . . . . . . . . . . . . 5-3
Sorting and Viewing Workflows . . . . . . . . . . . . . . . . . . . . . . . . . . . . . . . . . . . . . . . . . . . . . . . . . 5-3
Workflow/Publication Management Tasks . . . . . . . . . . . . . . . . . . . . . . . . . . . . . . . . . . . . . . . . . 5-3

SMARTsend Installation and Administration Guide v
Managing Xerox Devices . . . . . . . . . . . . . . . . . . . . . . . . . . . . . . . . . . . . . . . . . . . . . . . . . . . . . . . . . . . .5-6
View Xerox Devices . . . . . . . . . . . . . . . . . . . . . . . . . . . . . . . . . . . . . . . . . . . . . . . . . . . . . . . . . . .5-6
Manage Device Accounts . . . . . . . . . . . . . . . . . . . . . . . . . . . . . . . . . . . . . . . . . . . . . . . . . . . . . . .5-6
Configure Discovery Settings . . . . . . . . . . . . . . . . . . . . . . . . . . . . . . . . . . . . . . . . . . . . . . . . . . . .5-6
Device Configuration Defaults . . . . . . . . . . . . . . . . . . . . . . . . . . . . . . . . . . . . . . . . . . . . . . . . . . .5-6
Backup Status . . . . . . . . . . . . . . . . . . . . . . . . . . . . . . . . . . . . . . . . . . . . . . . . . . . . . . . . . . . . . . . . . . . . .5-8
Chapter 6 Scan to Home . . . . . . . . . . . . . . . . . . . . . . . . . . . . . . . . . . . . . . . . . . . . .6-1
Scan to Home Overview . . . . . . . . . . . . . . . . . . . . . . . . . . . . . . . . . . . . . . . . . . . . . . . . . . . . . . . . . . . .6-2
Managing Scan to Home Templates . . . . . . . . . . . . . . . . . . . . . . . . . . . . . . . . . . . . . . . . . . . . . . .6-2
Requirements . . . . . . . . . . . . . . . . . . . . . . . . . . . . . . . . . . . . . . . . . . . . . . . . . . . . . . . . . . . . . . . . .6-2
Installing the SMARTsend Scan to Home Utility . . . . . . . . . . . . . . . . . . . . . . . . . . . . . . . . . . . . .6-3
Uninstalling the SMARTsend Scan to Home Utility . . . . . . . . . . . . . . . . . . . . . . . . . . . . . . . . . .6-4
Getting Started with Scan to Home . . . . . . . . . . . . . . . . . . . . . . . . . . . . . . . . . . . . . . . . . . . . . . . . . . . .6-5
Advance Planning Considerations . . . . . . . . . . . . . . . . . . . . . . . . . . . . . . . . . . . . . . . . . . . . . . . . .6-5
Adding Scan to Home Users From a Windows NT Domain . . . . . . . . . . . . . . . . . . . . . . . . . . . .6-6
Adding Scan to Home Users from a Microsoft Active Directory Server . . . . . . . . . . . . . . . . . . .6-6
Adding Scan to Home Users From an LDAP Directory Service . . . . . . . . . . . . . . . . . . . . . . . . .6-7
Adding Scan to Home Users From the Local Computer . . . . . . . . . . . . . . . . . . . . . . . . . . . . . . . .6-8
Scan to Home Utility . . . . . . . . . . . . . . . . . . . . . . . . . . . . . . . . . . . . . . . . . . . . . . . . . . . . . . . . . . . . . . .6-9
Accessing the Scan to Home Utility . . . . . . . . . . . . . . . . . . . . . . . . . . . . . . . . . . . . . . . . . . . . . . .6-9
Obtaining a List of Available Users . . . . . . . . . . . . . . . . . . . . . . . . . . . . . . . . . . . . . . . . . . . . . . .6-9
Choosing a Server . . . . . . . . . . . . . . . . . . . . . . . . . . . . . . . . . . . . . . . . . . . . . . . . . . . . . . . . . . . . .6-9
Enter Source Information Dialog . . . . . . . . . . . . . . . . . . . . . . . . . . . . . . . . . . . . . . . . . . . . . . . .6-10
Active Directory or LDAP Mappings . . . . . . . . . . . . . . . . . . . . . . . . . . . . . . . . . . . . . . . . . . . . .6-11
Showing Users . . . . . . . . . . . . . . . . . . . . . . . . . . . . . . . . . . . . . . . . . . . . . . . . . . . . . . . . . . . . . . .6-11
Adding Users and Groups . . . . . . . . . . . . . . . . . . . . . . . . . . . . . . . . . . . . . . . . . . . . . . . . . . . . . .6-12
Status Bar . . . . . . . . . . . . . . . . . . . . . . . . . . . . . . . . . . . . . . . . . . . . . . . . . . . . . . . . . . . . . . . . . . .6-13
Progress Bar . . . . . . . . . . . . . . . . . . . . . . . . . . . . . . . . . . . . . . . . . . . . . . . . . . . . . . . . . . . . . . . . .6-13
User Menu Commands . . . . . . . . . . . . . . . . . . . . . . . . . . . . . . . . . . . . . . . . . . . . . . . . . . . . . . . .6-13
Tools Menu Commands . . . . . . . . . . . . . . . . . . . . . . . . . . . . . . . . . . . . . . . . . . . . . . . . . . . . . . .6-18
File Menu Commands . . . . . . . . . . . . . . . . . . . . . . . . . . . . . . . . . . . . . . . . . . . . . . . . . . . . . . . . .6-19
Exit Utility . . . . . . . . . . . . . . . . . . . . . . . . . . . . . . . . . . . . . . . . . . . . . . . . . . . . . . . . . . . . . . . . . .6-19
Editing User Properties . . . . . . . . . . . . . . . . . . . . . . . . . . . . . . . . . . . . . . . . . . . . . . . . . . . . . . . .6-20
SMARTsend Scan to Home Application Features . . . . . . . . . . . . . . . . . . . . . . . . . . . . . . . . . . . . . . . .6-21
Importing Users into the SMARTsend Scan to Home User Database . . . . . . . . . . . . . . . . . . . .6-21
Managing the SMARTSend Scan to Home Users Database . . . . . . . . . . . . . . . . . . . . . . . . . . . .6-22
Managing Master Filing Credentials . . . . . . . . . . . . . . . . . . . . . . . . . . . . . . . . . . . . . . . . . . . . . .6-24
Publishing Scan to Home Templates . . . . . . . . . . . . . . . . . . . . . . . . . . . . . . . . . . . . . . . . . . . . . . . . . .6-25
Publish Page . . . . . . . . . . . . . . . . . . . . . . . . . . . . . . . . . . . . . . . . . . . . . . . . . . . . . . . . . . . . . . . .6-26
Adding Scan to Home Publications to Additional Devices . . . . . . . . . . . . . . . . . . . . . . . . . . . . .6-27
Viewing Scan to Home Publications . . . . . . . . . . . . . . . . . . . . . . . . . . . . . . . . . . . . . . . . . . . . . .6-27
Deleting Scan to Home Publications . . . . . . . . . . . . . . . . . . . . . . . . . . . . . . . . . . . . . . . . . . . . . .6-27
About Scan to Home Template Publishing Options . . . . . . . . . . . . . . . . . . . . . . . . . . . . . . . . . .6-27
Chapter 7 Problem Solving . . . . . . . . . . . . . . . . . . . . . . . . . . . . . . . . . . . . . . . . . .7-1
Troubleshooting a Problem . . . . . . . . . . . . . . . . . . . . . . . . . . . . . . . . . . . . . . . . . . . . . . . . . . . . . . . . . .7-2
SMARTsend Confirmations and Error Logs . . . . . . . . . . . . . . . . . . . . . . . . . . . . . . . . . . . . . . . . . . . . .7-3
Common Issues . . . . . . . . . . . . . . . . . . . . . . . . . . . . . . . . . . . . . . . . . . . . . . . . . . . . . . . . . . . . . . . . . . .7-4
Server Unavailable Errors . . . . . . . . . . . . . . . . . . . . . . . . . . . . . . . . . . . . . . . . . . . . . . . . . . . . . . .7-4
403 "Forbidden" Error . . . . . . . . . . . . . . . . . . . . . . . . . . . . . . . . . . . . . . . . . . . . . . . . . . . . . . . . . .7-4

vi SMARTsend Installation and Administration Guide
SMARTsend does not recognize IIS FTP service . . . . . . . . . . . . . . . . . . . . . . . . . . . . . . . . . . . . 7-4
Unable to install MSDE during installation of SMARTsend . . . . . . . . . . . . . . . . . . . . . . . . . . . . 7-4
Login Failure Message . . . . . . . . . . . . . . . . . . . . . . . . . . . . . . . . . . . . . . . . . . . . . . . . . . . . . . . . . 7-5
SMARTsend Inaccessibility within an Intranet . . . . . . . . . . . . . . . . . . . . . . . . . . . . . . . . . . . . . . 7-5
Windows 95/98/Me Client and Non-Microsoft Browser Access Problems . . . . . . . . . . . . . . . . . 7-5
Missing Icons on Document Destinations Page . . . . . . . . . . . . . . . . . . . . . . . . . . . . . . . . . . . . . . 7-5
Page Could Not be Displayed Error . . . . . . . . . . . . . . . . . . . . . . . . . . . . . . . . . . . . . . . . . . . . . . . 7-5
Pop-up Blocker Problems . . . . . . . . . . . . . . . . . . . . . . . . . . . . . . . . . . . . . . . . . . . . . . . . . . . . . . . 7-5
Device Communication and Configuration Issues . . . . . . . . . . . . . . . . . . . . . . . . . . . . . . . . . . . . 7-6
Template Refresh Failure at Devices . . . . . . . . . . . . . . . . . . . . . . . . . . . . . . . . . . . . . . . . . . . . . . 7-9
SharePoint Portal Server 2001 Compatibility with Windows Server 2003 . . . . . . . . . . . . . . . . 7-10
Frequently Asked Questions . . . . . . . . . . . . . . . . . . . . . . . . . . . . . . . . . . . . . . . . . . . . . . . . . . . . . . . . 7-14
Chapter 8 SMARTsend Utilities . . . . . . . . . . . . . . . . . . . . . . . . . . . . . . . . . . . . . . .8-1
Requirements . . . . . . . . . . . . . . . . . . . . . . . . . . . . . . . . . . . . . . . . . . . . . . . . . . . . . . . . . . . . . . . . . . . . . 8-2
Template Importer . . . . . . . . . . . . . . . . . . . . . . . . . . . . . . . . . . . . . . . . . . . . . . . . . . . . . . . . . . . . . . . . . 8-3
File Format and Language Support . . . . . . . . . . . . . . . . . . . . . . . . . . . . . . . . . . . . . . . . . . . . . . . 8-4
Exceptions List . . . . . . . . . . . . . . . . . . . . . . . . . . . . . . . . . . . . . . . . . . . . . . . . . . . . . . . . . . . . . . . 8-7
Importing CentreWare Templates to SMARTsend Workflows . . . . . . . . . . . . . . . . . . . . . . . . . . 8-8
Reconfiguring Devices for CentreWare Network Scanning Services . . . . . . . . . . . . . . . . . . . . 8-11
Restore Tool . . . . . . . . . . . . . . . . . . . . . . . . . . . . . . . . . . . . . . . . . . . . . . . . . . . . . . . . . . . . . . . . . . . . 8-12
Conditions for using the Restore Tool . . . . . . . . . . . . . . . . . . . . . . . . . . . . . . . . . . . . . . . . . . . . 8-12
Using the Restore Tool . . . . . . . . . . . . . . . . . . . . . . . . . . . . . . . . . . . . . . . . . . . . . . . . . . . . . . . . 8-12
Exporting Job History . . . . . . . . . . . . . . . . . . . . . . . . . . . . . . . . . . . . . . . . . . . . . . . . . . . . . . . . . . . . . 8-14
Chapter 9 SMARTsend Security . . . . . . . . . . . . . . . . . . . . . . . . . . . . . . . . . . . . . .9-1
Security Overview . . . . . . . . . . . . . . . . . . . . . . . . . . . . . . . . . . . . . . . . . . . . . . . . . . . . . . . . . . . . . . . . . 9-2
HTTPS/SSL Certificates . . . . . . . . . . . . . . . . . . . . . . . . . . . . . . . . . . . . . . . . . . . . . . . . . . . . . . . . . . . . 9-3
Secure Password Entry . . . . . . . . . . . . . . . . . . . . . . . . . . . . . . . . . . . . . . . . . . . . . . . . . . . . . . . . . 9-3
Secure Web Site Configuration . . . . . . . . . . . . . . . . . . . . . . . . . . . . . . . . . . . . . . . . . . . . . . . . . . 9-3
Site Security Policies . . . . . . . . . . . . . . . . . . . . . . . . . . . . . . . . . . . . . . . . . . . . . . . . . . . . . . . . . . . . . . . 9-5
General Site Security . . . . . . . . . . . . . . . . . . . . . . . . . . . . . . . . . . . . . . . . . . . . . . . . . . . . . . . . . . 9-5
Device Scan Template Security . . . . . . . . . . . . . . . . . . . . . . . . . . . . . . . . . . . . . . . . . . . . . . . . . . 9-7
PaperWare Forms . . . . . . . . . . . . . . . . . . . . . . . . . . . . . . . . . . . . . . . . . . . . . . . . . . . . . . . . . . . . . 9-8
Workflow Access Level Control . . . . . . . . . . . . . . . . . . . . . . . . . . . . . . . . . . . . . . . . . . . . . . . . . . . . . . 9-9
Security Policy Interactions . . . . . . . . . . . . . . . . . . . . . . . . . . . . . . . . . . . . . . . . . . . . . . . . . . . . . . . . 9-10
Scenarios . . . . . . . . . . . . . . . . . . . . . . . . . . . . . . . . . . . . . . . . . . . . . . . . . . . . . . . . . . . . . . . . . . . 9-10
SMARTsend Authentication . . . . . . . . . . . . . . . . . . . . . . . . . . . . . . . . . . . . . . . . . . . . . . . . . . . . . . . . 9-12
Accessing SMARTsend . . . . . . . . . . . . . . . . . . . . . . . . . . . . . . . . . . . . . . . . . . . . . . . . . . . . . . . 9-12
SMARTsend Application Account . . . . . . . . . . . . . . . . . . . . . . . . . . . . . . . . . . . . . . . . . . . . . . . 9-12
Setting the Password for the Application Account . . . . . . . . . . . . . . . . . . . . . . . . . . . . . . . . . . . 9-12
SMARTsend Device Accounts . . . . . . . . . . . . . . . . . . . . . . . . . . . . . . . . . . . . . . . . . . . . . . . . . . 9-13
Credentials . . . . . . . . . . . . . . . . . . . . . . . . . . . . . . . . . . . . . . . . . . . . . . . . . . . . . . . . . . . . . . . . . . . . . . 9-14
Index . . . . . . . . . . . . . . . . . . . . . . . . . . . . . . . . . . . . . . . . . . . . . . . . . . . . . . . . . . . INDEX-1

1-1
1
Welcome to SMARTsend
This chapter describes the features and functions of the Xerox FreeFlow
TM
SMARTsend
TM
software and the
support services available through both application documentation and Xerox customer support services.
What is in this chapter:
What is Included in This Release? . . . . . . . . . . . . . . . . . . . . . . . . . . . . . . . . . . . . . . . . . . . . . . . . 1-2
What is New in This Release? . . . . . . . . . . . . . . . . . . . . . . . . . . . . . . . . . . . . . . . . . . . . . . . . . . . 1-3
SMARTsend Overview . . . . . . . . . . . . . . . . . . . . . . . . . . . . . . . . . . . . . . . . . . . . . . . . . . . . . . . . . 1-4
SMARTsend Documentation. . . . . . . . . . . . . . . . . . . . . . . . . . . . . . . . . . . . . . . . . . . . . . . . . . . . . 1-5
Customer Support. . . . . . . . . . . . . . . . . . . . . . . . . . . . . . . . . . . . . . . . . . . . . . . . . . . . . . . . . . . . . 1-7

1-2 Welcome to SMARTsend
What is Included in This Release?
SMARTsend is available in Standard and Professional Editions.
Features common to both versions
Workflow creation features that define the conversion and transmission of paper-based documents from
Xerox Multifunction Devices to the following destinations:
DocuShare server
Domino server
Domino.Doc server
FTP location
Microsoft Exchange 2000 Web Folder
Microsoft SharePoint Portal Server 2001
Microsoft SharePoint Portal Server 2003
NetWare Folder
Network Folder
Remote Printer
URL location
External Application Connection
Workflow publication and management features
Backup and Restore Tools—to save SMARTsend workflows, credentials, user preferences, device
configurations, and general settings.
Template Importer—to import CentreWare Network Scanning Services templates into SMARTsend.
Job History Exporter—to create a job history text file for analysis and reporting.
Professional Edition features
The Professional Edition includes the following additional features:
Optical Character Recognition (OCR)
Scanning with PaperWare cover sheets
Optional components for Standard or Professional versions
The following components can be purchased from Xerox and added to either version of SMARTsend:
Documentum version 5.2 destination support
Hummingbird version 5.1.0.5 destination support
Interwoven WorkSite version 8 destination support
LiveLink version 9.5.0 support
Optional components for Professional version
The following components can be added to SMARTsend Professional Edition:
TrueMatch—a patented Xerox technology that enables you to locate electronic documents by scanning
portions of the original paper document.

What is New in This Release? 1-3
What is New in This Release?
The current release of SMARTsend provides many new and improved features. The most significant
changes include:
The SMARTsend installer has been updated to provide seamless upgrades from previous versions.
SMARTsend can now be installed on any of the supported operating systems in conjunction with
VMware (GSX Server version 3.2.0, Workstation 4.5) or Microsoft Virtual PC 2004/Virtual Server
2005.
SMARTsend now supports installation on Windows XP computers.
Numerous file format and enhanced file compression options have been added. Users can now create a
single workflow that will create unique file formats for each destination.
DocuShare credentials can now be defined at the server level. Previous SMARTsend versions required
credentials for each DocuShare collection.
SharePoint Portal Server 2003 destinations no longer require installation of the SharePoint Backward-
Compatible Document Libraries.
SMARTsend now offers improved integration with newer Xerox devices. This improved integration
restricts changes to certain settings at scan time in order to avoid undesired results or scanning failures.
Document Attribute (metadata) fields can now be masked and/or designated as required fields. These
changes enhance security and help to ensure that scanned documents are processed properly.
Support for SNMP v3 has been added to provide advanced device discovery and security options.
Support for the HTTP and HTTPS data transfer protocols has been added to provide additional device
configuration options and advanced security.
SMARTsend now provides PaperWare forms forwarding capabilities. PaperWare forms forwarding
enables you to configure SMARTsend computers to process PaperWare cover sheets that were created
on other SMARTsend or Xerox Flowport computers. This option improves usability and extends the
power of SMARTsend within the enterprise by effectively increasing the number of devices that can be
used to initiate scan jobs from a single PaperWare cover sheet.
The default scan template can now be configured to work with PaperWare cover sheets.
The SMARTsend computer can now be configured as a secure website. This configuration option
makes HTTPS and SSL encrypted data transmission a requirement for all communications between
SMARTsend and the devices and clients it serves.
A new External Application Connection destination has been added that permits users to scan
documents and process the resulting files with external applications. This feature is intended for use by
advanced users and system integrators.
Workflows now provide a mechanism for customizing and exporting Job Logs to FTP and Network
Folder destinations.
The following new features are optional components that can be added to the base SMARTsend
configuration:
Documentum version 5.2 support
Hummingbird version 5.1.0.5 support
Interwoven WorkSite version 8 support
LiveLink version 9.5.0 support
TrueMatch... a patented Xerox technology that enables you to locate electronic documents by
scanning portions of the original paper document. (The SMARTsend Professional Edition is
required for this component.)

1-4 Welcome to SMARTsend
SMARTsend Overview
SMARTsend combines and enhances many of the powerful features of two Xerox products—FlowPort™
and CentreWare™ Network Scanning Services—to deliver one integrated software application. Built on the
Microsoft .NET platform, SMARTsend software works with new and legacy Xerox advanced multifunction
systems, as well as many types of Internet Fax devices from Xerox and other manufacturers.
Using SMARTsend, paper documents can be scanned in full color and converted into a variety of industry
standard digital formats, including PDF, JFIF/JPEG, TIFF, and Multi-Page TIFF formats. SMARTsend can
also convert scanned documents into editable files such as Excel, Word, PowerPoint or searchable PDF. The
resulting files can then be edited, manipulated, saved and shared. SMARTsend also allows the user to add
descriptive information (also known as metadata) that will accompany the scanned documents. These
versatile features make it simple to categorize, search and retrieve scanned documents.
Web-based application
SMARTsend is a web-based application that requires no additional client software. Users can easily create
workflows that define the type of scanned document, the distribution locations and processes, and the
methods and devices that can be used to submit SMARTsend scan jobs. The workflow is then published to
make it available to users as device scan templates, or as PaperWare cover sheets. These publications make
it simple for anyone to scan a document and distribute the resulting electronic file(s) to a wide variety of
destinations, including e-mail addresses, network folders, FTP folders, remote printers, external
applications, Web URLs, Domino and Domino.doc repositories, Microsoft SharePoint Portal Server
repositories, and Xerox DocuShare respositories. Additional destinations, such as advanced document
management repositories, can be added as optional components.
Ease of use
SMARTsend is designed for ease of use, versatility, and security. Wizards assist users with complex tasks,
and descriptive instructions, status messages, and help system information accompany all SMARTsend
screens. Users can set up e-mail and printed confirmation reports, and administrators can create job logs to
track usage and obtain audit trails in support of legal and regulatory requirements. Where security is
important, SMARTsend stands above the competition with support for the latest secure protocols and secure
web site configuration options. In addition, the open and flexible .NET architecture permits easy integration
with other programs and provides the flexibility to expand capabilities and features as Xerox makes future
enhancements available.

SMARTsend Documentation 1-5
SMARTsend Documentation
Several forms of documentation are available with SMARTsend, including printable guides that are
provided as Adobe Acrobat PDF format documents. The documentation components can be accessed from
the links that are provided on the SMARTsend Home Pages, or from the links in the CD autorun program.
SMARTsend administrators can also access the Readme file and the Installation and Administration Guide
from the Start Menu on the SMARTsend computer.
The Adobe Acrobat Reader is required to view and print the guides. Obtain the reader from the Adobe Web
site,
www. adobe.com.
SMARTsend Installation and Administration Guide
The SMARTsend Installation and Administration Guide includes step-by-step instructions for installing and
configuring the SMARTsend computer, clients, and supported scanning devices.
SMARTsend User Guide
The SMARTsend User Guide introduces SMARTsend to new users. It includes overviews of all the main
SMARTsend pages and features, as well as step-by-step instructions for key tasks users perform with
SMARTsend.
Help
SMARTsend contains extensive online Help that covers the use of the application beyond installation and
initial configuration. Help links are included in the upper right corner of any SMARTsend page.
Quick Reference Cards
SMARTsend documentation includes the following Quick Reference Cards:
Administrator Quick Reference—Contains requirements, basic installation procedures, and site
configuration information for SMARTsend administrators.
User Quick Reference—Contains basic overview and getting started information for general
SMARTsend users.
Readme.txt
Readme.txt provides product support information that was not available when the other documentation
components were released for publication. This information is intended primarily for SMARTsend
administrators, and it can be accessed by administrators using the following methods:
After SMARTsend is installed:
On a Windows 2000 server, click Start > Programs > Xerox > SMARTsend > View ReadMe.txt;
- OR -
On a Windows XP Professional computer or server running Windows Server 2003, click Start > All
Programs > Xerox > SMARTsend > View ReadMe.txt.
Insert the SMARTsend CD into your CD drive. Click the README File link from the CD Installer
program.
NOTE: The Administrator Quick Reference is not recommended for first-time installations of the product.
Please use the Installation and Administration Guide for detailed planning and installation instructions.

1-6 Welcome to SMARTsend
Click the View Readme file button during installation.

Customer Support 1-7
Customer Support
You can contact Xerox for support either by telephone or Internet.
Telephone Support
For additional assistance, contact Xerox by telephone to speak with a Customer Support Representative.
Before you call, locate the SMARTsend Serial Number by clicking the About link in the upper right corner
of any SMARTsend page. For future reference, be sure to record the Serial Number in the space provided
below. The Serial Number is required to obtain technical support from Xerox.
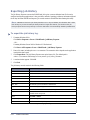
The Xerox customer support telephone numbers are listed in the following table. If the telephone number for
your country is not listed, please contact your local Xerox representative to obtain the number. If necessary,
please record the telephone number in the space provided below.
Internet Support
Additional tips and technical information are available from the Support & Drivers link on the Xerox Web
site,
www.xerox.com. Locate or search for your product and access the product support resources. The
documents in this section cover specific issues that may require special procedures or application notes
regarding the operation and configuration of your Xerox product.
Xerox SMARTsend Serial Number:
NOTE: SMARTsend permits the management of a limited number of devices. To identify the number of
supported devices, click the About link on any SMARTsend page and locate the product serial number.
The last set of digits appended to the serial number indicate the number of supported devices. License
packs permitting the management of additional devices are available for purchase.
Xerox Customer Support Telephone Numbers:
UNITED STATES 800-821-2797
UNITED STATES (TTY)
800-855-2880
CANADA 800-939-3769 (800-93-XEROX)

1-8 Welcome to SMARTsend

2-1
2
Prepare for Installation
This chapter describes the hardware, software, network, and security issues that must be considered before
the SMARTsend application is installed on a computer. These tasks and considerations are essential
elements of a successful installation.
Please read this chapter thoroughly and perform all required configuration tasks before proceeding to
Chapter 3, Install SMARTsend.
TIP: Print the Administrator Quick Reference card for use as a configuration checklist. The Administrator
Quick Reference is available from the SMARTsend CD autorun program.
What is in this chapter:
Advance Planning Considerations. . . . . . . . . . . . . . . . . . . . . . . . . . . . . . . . . . . . . . . . . . . . . . . . 2-2
SMARTsend Configuration Requirements . . . . . . . . . . . . . . . . . . . . . . . . . . . . . . . . . . . . . . . . . . 2-5
Client and Browser Configuration. . . . . . . . . . . . . . . . . . . . . . . . . . . . . . . . . . . . . . . . . . . . . . . 2-25
Scanning Device Configuration . . . . . . . . . . . . . . . . . . . . . . . . . . . . . . . . . . . . . . . . . . . . . . . . . 2-28
Prepare Information for Installation . . . . . . . . . . . . . . . . . . . . . . . . . . . . . . . . . . . . . . . . . . . . . 2-33
Next Steps . . . . . . . . . . . . . . . . . . . . . . . . . . . . . . . . . . . . . . . . . . . . . . . . . . . . . . . . . . . . . . . . . . 2-34
NOTE: If you are upgrading from a Trial Version or a previous version of SMARTsend, simply follow the
upgrade procedures in Chapter 3, Install SMARTsend, to upgrade your software. The SMARTsend
installation program will automatically upgrade a current Trial Version to the current licensed version. All
workflows generated while using the Trial Version or a previous version will be accessible after the
upgrade is completed. If you have a Trial Version of SMARTsend that has expired, you can upgrade to the
retail version and retain all workflows. The retail version can be ordered through your Xerox sales
representative, and installed as an upgrade to your existing Trial Version.
See Upgrade Eligibility on page
3-3 for additional information.

2-2 Prepare for Installation
Advance Planning Considerations
This section contains information and issues that should be considered before you attempt to install and use
the SMARTsend application. Please allow adequate lead time to address these issues.
Security
A security certificate can be installed on the SMARTsend computer if secure password entry or secure data
transfer is required within the SMARTsend operating environment. Security certificates are used to enable
encryption of sensitive information. Security certificates can be obtained within the network by using
software bundled with the network operating system or by using an open-source product. Externally, they
can be obtained through the services of a third party for a fee. Which option to choose, if any, depends on
factors such as these:
Security policies and requirements that govern the use of network and physical resources within your
organization must be reviewed in advance of your SMARTsend installation. Please consider how your
security policies apply to SMARTsend and configure your computer, clients, and scanning devices
accordingly. Refer to
Chapter 9, SMARTsend Security, for additional security information.
The latest Xerox multifunction devices, such as WorkCentre Pro 232/238/245/255/265/275 or newer
devies, offer additional security capabilities such as authentication and more secure communication
protocols such as SNMP v3 and HTTPs. These enhanced capabilities can further enhance end-to-end
security when devices are configured for use with SMARTsend.
SMARTsend makes the use of security certificates optional to accommodate installations where other
security measures are employed or where security is not a concern. When a security certificate is
installed on the SMARTsend computer, it will provide secure password entry when users access
SMARTsend. Furthermore, if the Require Secure Channel (SSL) option and the security certificate are
properly configured on the SMARTsend computer, all data transfer between SMARTsend users and
devices will be encrypted.
See To configure the SMARTsend computer to require HTTPS/SSL: on page
9-3 for additional information.
If the use of SMARTsend will be limited to the local network or intranet, the most cost-effective
approach may be to use the SelfSSL option, or set up a Certificate Authority in-house. A local
Certificate Authority can be implemented by using Microsoft Certificate Services, which is included on
each Microsoft operating system CD. The SelfSSL option is available in the Microsoft Internet
Information Services (IIS) Resource Kit. Go to
http://www.microsoft.com/downloads for additional
information.
If SMARTsend will be available on the Internet, using a third party for certificate services may be
preferable.
See Obtain and Install a Security Certificate on page 2-16 for more information.
NOTE: The process of obtaining a third party security certificate may take several days. If secure
password entry is required within SMARTsend, you should plan and initiate this activity in advance of your
SMARTsend installation to avoid the need to reconfigure the computer and SMARTsend at a later time.

Advance Planning Considerations 2-3
Scanning Device and Application Migration
Skip this section if network scanning applications are not currently in use within your organization.
If other scanning applications or services are being used at your site, you should consider the various
impacts that a new SMARTsend installation will have on your existing scanning resources. Consider the
following factors when determining your migration strategy:
SMARTsend cannot be installed on the same computer as Xerox FlowPort.
The SMARTsend computer cannot be a domain controller.
SMARTsend can import templates that were created with CentreWare Network Scanning Services. See
Template Importer on page 8-3 for additional information.
Xerox Multifunction Devices cannot be configured for simultaneous use with both SMARTsend and
CentreWare Network Scanning Services because each application must use the Default Repository.
Therefore, each application must manage a different set of devices.
During device configuration, SMARTsend overwrites the Default Repository and Template Pool scan
settings of a Xerox Multifunction Device. If you have existing applications that use the Default
Repository, reconfigure the device to use an Alternate Repository for those applications before
configuring the device to use SMARTsend.
For example, to use a Xerox Multifunction Device with both FlowPort and SMARTsend, you must
reconfigure the device to use an Alternate Repository for FlowPort before configuring the device with
SMARTsend. Likewise, templates created using CentreWare Internet Services must also be modified if
they currently utilize the Default Repository.
TIP: If any Xerox Multifunction Devices intended for use with SMARTsend are already configured for use
with other scanning applications, then you should print and save a configuration sheet for those devices
before you configure them for use with SMARTsend. The configuration sheet lists the current network
scanning configuration, which may be useful in the future if the device needs to be reverted back to a
previous configuration.
If FlowPort and SMARTsend are configured in the same office environment on different computers,
care must be taken to select the correct template at the device when using FlowPort or SMARTsend.
Under these circumstances, the FlowPort computer should be assigned an alternate repository when
configuring the Xerox Multifunction Device. Users must also ensure they select a SMARTsend
template at the device when scanning. PaperWare users must select the SMARTsend PaperWare
template.
Beginning with Release 2.0, SMARTsend can process PaperWare forms that were created on other
SMARTsend or Xerox Flowport computers. This option improves usability and extends the power of
SMARTsend within the enterprise by effectively increasing the number of devices that can be used to
initiate scan jobs from a single PaperWare cover sheet.
See Configure PaperWare Form Forwarding
Settings on page 4-40 for additional information.

2-4 Prepare for Installation
Network Configuration and Logistics
SMARTsend is a Web site designed to service multiple users simultaneously. The following factors may
impact the ability to service SMARTsend users within your organization:
Physical sites and network bandwidth, including such factors as the number and proximity of supported
scanning devices, anticipated network traffic, availability of e-mail services for notifications, and
workflow processing. Analyze these factors to determine the best location for the SMARTsend
computer.
Network configuration, security practices, and scanning device capabilities may limit the use of certain
SMARTsend features. Some examples include:
If SMB is blocked on a router or is not available on a particular device, you will be limited to using
FTP as the SMARTsend filing protocol.
If scanning devices are located on a different subnet, DNS must be properly configured and
functional.
See Verifying the SMARTsend Computer DNS Configuration on page 2-8 for more
information.
If SNMP Broadcast is not enabled across routers, you will not be able to utilize the SMARTsend
automated device discovery features.
If the SMARTsend workflow authentication features (private workflows, scan to my e-mail) will be
used, the configured scanning devices must be in the same domain (or trusted domain) as the
SMARTsend computer. The Xerox Multifunction devices must also support authentication, and
authentication must be configured and enabled on each device.
Additional information concerning network and device configuration is provided throughout this guide. If
problems are encountered after your installation, please refer to
Chapter 7, Problem Solving for additional
support information.

SMARTsend Configuration Requirements 2-5
SMARTsend Configuration Requirements
Computer configuration is the foundation for a successful SMARTsend installation. Please follow and
confirm all the guidelines and requirements in this chapter
before you install SMARTsend to ensure that the
computer is properly configured to support SMARTsend. Detailed explanations and configuration details are
provided in the sections following this checklist.
For best performance, install SMARTsend on a dedicated computer with a minimum of a 1.0 GHz or
faster CPU, at least 750 MB of free disk space, 512 MB RAM (1 GB or more is recommended), and a
single network adapter (multiple adapters are not supported). The computer cannot be a domain
controller.
SMARTsend can be installed on the following platforms: Windows 2000 Server or Advanced Server
(SP4 or later), Windows Server 2003 with all critical operating system software updates installed, or a
Windows XP Professional computer (SP2 or later).
SMARTsend may also be installed on any of the supported operating systems in conjunction with
VMware (GSX Server version 3.2.0, Workstation 4.5) or Microsoft Virtual PC 2004/Virtual Server
2005.
TCP/IP must be enabled and functional.
Confirm that the ports required for each supported protocol are not blocked by filtering at a switch,
router, or firewall. See TCP/IP Port Configuration on page 2-29.
If using DNS, it must be properly configured. If the PaperWare Form Forwarding options are used
(Professional Edition), DNS must also be configured on all SMARTsend and FlowPort computers that
will be receiving forwarded forms. See Verifying the SMARTsend Computer DNS Configuration on page
2-8 and Configure PaperWare Form Forwarding Settings on page 4-40.
File and Printer Sharing must be enabled on the network adapter and port 139 must be available. See
Enable File and Printer Sharing on page 2-9.
Internet Information Services (IIS) 5.0, or higher, must be installed and configured with the Common
Files, Internet Information Services Manager, and World Wide Web Service. If using FTP for filing, the
FTP Server component must also be enabled. See Install and Configure IIS / FTP on page 2-10. Please
note that IIS is part of the Windows operating system, and its components can be installed using the
Windows Add/Remove Programs options.
NOTE: For large installations, multiple users, managing of many devices, a Windows 2000 or 2003
installation is recommended.
NOTE: SMARTsend performance may degrade when it is run on a shared file/print server, or when
using VMware or Microsoft Virtual PC/Virtual Server. Performance degradation is likely to be more
significant when using SMARTsend Professional OCR features.
NOTE: The SMARTsend installation program will install the .NET Framework if it is not present on
the computer. However, IIS must be installed before
the .NET Framework is installed on a Windows
2000 Server/Advanced Server, or on a Windows XP Professional computer. If the .NET Framework
and IIS are currently installed on the computer and you are not certain if IIS was installed first, then
these components should be uninstalled and reinstalled in the proper sequence.

2-6 Prepare for Installation
Confirm that the Default Web Site and the FTP server are running under IIS before using SMARTsend.
Confirm that the Windows Authentication Methods are properly configured in IIS before installing
SMARTsend. Integrated Windows authentication is always required, and Basic Authentication is
also needed when Windows 95/98/Me clients and non-Microsoft browsers are used with
SMARTsend.
See Windows Authentication Methods Configuration on page 2-11.
ASP.NET must be enabled (Windows Server 2003 only). See Enable ASP.NET on page 2-12.
If SMARTsend is being installed on a Windows XP Professional computer, then Simple File Sharing
must be disabled. Please consult the Microsoft web site,
www.microsoft.com, for Simple File Sharing
configuration instructions.
SMARTsend administrator, user, and device accounts must be configured. See Create Administrator,
User, and Device Accounts on page 2-13.
If secure password entry is required, a security certificate must be installed (Optional). See Obtain and
Install a Security Certificate on page 2-16.
Additional configuration is required to manage the SMARTsend computer as a secure web site. See
Secure Web Site Configuration on page 9-3.
Additional configuration is required on the SMARTsend computer when using Domino.doc, SharePoint
Portal Server 2001, Novell NetWare, Remote Printers, DocuShare, and other optional destinations. See
Additional Requirements for Destinations on page 2-19.
Page is loading ...
Page is loading ...
Page is loading ...
Page is loading ...
Page is loading ...
Page is loading ...
Page is loading ...
Page is loading ...
Page is loading ...
Page is loading ...
Page is loading ...
Page is loading ...
Page is loading ...
Page is loading ...
Page is loading ...
Page is loading ...
Page is loading ...
Page is loading ...
Page is loading ...
Page is loading ...
Page is loading ...
Page is loading ...
Page is loading ...
Page is loading ...
Page is loading ...
Page is loading ...
Page is loading ...
Page is loading ...
Page is loading ...
Page is loading ...
Page is loading ...
Page is loading ...
Page is loading ...
Page is loading ...
Page is loading ...
Page is loading ...
Page is loading ...
Page is loading ...
Page is loading ...
Page is loading ...
Page is loading ...
Page is loading ...
Page is loading ...
Page is loading ...
Page is loading ...
Page is loading ...
Page is loading ...
Page is loading ...
Page is loading ...
Page is loading ...
Page is loading ...
Page is loading ...
Page is loading ...
Page is loading ...
Page is loading ...
Page is loading ...
Page is loading ...
Page is loading ...
Page is loading ...
Page is loading ...
Page is loading ...
Page is loading ...
Page is loading ...
Page is loading ...
Page is loading ...
Page is loading ...
Page is loading ...
Page is loading ...
Page is loading ...
Page is loading ...
Page is loading ...
Page is loading ...
Page is loading ...
Page is loading ...
Page is loading ...
Page is loading ...
Page is loading ...
Page is loading ...
Page is loading ...
Page is loading ...
Page is loading ...
Page is loading ...
Page is loading ...
Page is loading ...
Page is loading ...
Page is loading ...
Page is loading ...
Page is loading ...
Page is loading ...
Page is loading ...
Page is loading ...
Page is loading ...
Page is loading ...
Page is loading ...
Page is loading ...
Page is loading ...
Page is loading ...
Page is loading ...
Page is loading ...
Page is loading ...
Page is loading ...
Page is loading ...
Page is loading ...
Page is loading ...
Page is loading ...
Page is loading ...
Page is loading ...
Page is loading ...
Page is loading ...
Page is loading ...
Page is loading ...
Page is loading ...
Page is loading ...
Page is loading ...
Page is loading ...
Page is loading ...
Page is loading ...
Page is loading ...
Page is loading ...
Page is loading ...
Page is loading ...
Page is loading ...
Page is loading ...
Page is loading ...
Page is loading ...
Page is loading ...
Page is loading ...
Page is loading ...
Page is loading ...
Page is loading ...
Page is loading ...
Page is loading ...
Page is loading ...
Page is loading ...
Page is loading ...
Page is loading ...
Page is loading ...
Page is loading ...
Page is loading ...
Page is loading ...
Page is loading ...
Page is loading ...
Page is loading ...
Page is loading ...
Page is loading ...
Page is loading ...
Page is loading ...
Page is loading ...
Page is loading ...
Page is loading ...
Page is loading ...
Page is loading ...
Page is loading ...
Page is loading ...
Page is loading ...
Page is loading ...
Page is loading ...
Page is loading ...
Page is loading ...
Page is loading ...
Page is loading ...
Page is loading ...
Page is loading ...
Page is loading ...
Page is loading ...
Page is loading ...
Page is loading ...
Page is loading ...
Page is loading ...
Page is loading ...
Page is loading ...
Page is loading ...
Page is loading ...
Page is loading ...
-
 1
1
-
 2
2
-
 3
3
-
 4
4
-
 5
5
-
 6
6
-
 7
7
-
 8
8
-
 9
9
-
 10
10
-
 11
11
-
 12
12
-
 13
13
-
 14
14
-
 15
15
-
 16
16
-
 17
17
-
 18
18
-
 19
19
-
 20
20
-
 21
21
-
 22
22
-
 23
23
-
 24
24
-
 25
25
-
 26
26
-
 27
27
-
 28
28
-
 29
29
-
 30
30
-
 31
31
-
 32
32
-
 33
33
-
 34
34
-
 35
35
-
 36
36
-
 37
37
-
 38
38
-
 39
39
-
 40
40
-
 41
41
-
 42
42
-
 43
43
-
 44
44
-
 45
45
-
 46
46
-
 47
47
-
 48
48
-
 49
49
-
 50
50
-
 51
51
-
 52
52
-
 53
53
-
 54
54
-
 55
55
-
 56
56
-
 57
57
-
 58
58
-
 59
59
-
 60
60
-
 61
61
-
 62
62
-
 63
63
-
 64
64
-
 65
65
-
 66
66
-
 67
67
-
 68
68
-
 69
69
-
 70
70
-
 71
71
-
 72
72
-
 73
73
-
 74
74
-
 75
75
-
 76
76
-
 77
77
-
 78
78
-
 79
79
-
 80
80
-
 81
81
-
 82
82
-
 83
83
-
 84
84
-
 85
85
-
 86
86
-
 87
87
-
 88
88
-
 89
89
-
 90
90
-
 91
91
-
 92
92
-
 93
93
-
 94
94
-
 95
95
-
 96
96
-
 97
97
-
 98
98
-
 99
99
-
 100
100
-
 101
101
-
 102
102
-
 103
103
-
 104
104
-
 105
105
-
 106
106
-
 107
107
-
 108
108
-
 109
109
-
 110
110
-
 111
111
-
 112
112
-
 113
113
-
 114
114
-
 115
115
-
 116
116
-
 117
117
-
 118
118
-
 119
119
-
 120
120
-
 121
121
-
 122
122
-
 123
123
-
 124
124
-
 125
125
-
 126
126
-
 127
127
-
 128
128
-
 129
129
-
 130
130
-
 131
131
-
 132
132
-
 133
133
-
 134
134
-
 135
135
-
 136
136
-
 137
137
-
 138
138
-
 139
139
-
 140
140
-
 141
141
-
 142
142
-
 143
143
-
 144
144
-
 145
145
-
 146
146
-
 147
147
-
 148
148
-
 149
149
-
 150
150
-
 151
151
-
 152
152
-
 153
153
-
 154
154
-
 155
155
-
 156
156
-
 157
157
-
 158
158
-
 159
159
-
 160
160
-
 161
161
-
 162
162
-
 163
163
-
 164
164
-
 165
165
-
 166
166
-
 167
167
-
 168
168
-
 169
169
-
 170
170
-
 171
171
-
 172
172
-
 173
173
-
 174
174
-
 175
175
-
 176
176
-
 177
177
-
 178
178
-
 179
179
-
 180
180
-
 181
181
-
 182
182
-
 183
183
-
 184
184
-
 185
185
-
 186
186
-
 187
187
-
 188
188
-
 189
189
-
 190
190
-
 191
191
-
 192
192
-
 193
193
-
 194
194


Xerox SmartSend Installation guide
- Category
- Software
- Type
- Installation guide
Ask a question and I''ll find the answer in the document
Finding information in a document is now easier with AI
Related papers
Other documents
-
Lexmark Scanner MX6500E User manual
-
Brother OmniJoin User guide
-
KYOCERA CS 3051ci User guide
-
Suzuki SCAN CLIENT CERTIFICATE - Installation guide
-
-
 Wiley 978-0-470-58716-4 Datasheet
-
Microsoft Computer Accessories 2007 User manual
-
KYOCERA TASKalfa 550c User manual
-
 BOOST SOLUTIONS Excel Import User guide
-
 Bowers & Wilkins ASW3000 User manual


