The Craftsman Mailbox Post Kit – Installation Instructions Model PP340
WARNING: CHECK FOR UNDERGROUND CABLES OR PIPES; COMPLETELY READ OVER INSTRUCTION SHEET BEFORE BEGINNING PROJECT.
RECOMMENDED TOOLS & SUPPLIES: POST HOLE DIGGER, LEVEL, SCREWDRIVER, AND 4 X 4 (50” in length) TREATED PINE POST (NOT INCLUDED).
PARTS LIST: (1) Craftsman Post (1) Mailbox Door (2) Mailbox Door Pins (4) #10-24 x 1 Threaded Screws
(1) Mailbox (1) Mailbox Mounting Bracket (8) #12 x 1 Self Tap Screws (4) #10-24 Nuts
NOTE: CUSTOMERS ARE REQUIRED TO CONTACT THE LOCAL POST OFFICE BEFORE INSTALLING THE MAILBOX TO ENSURE ITS CORRECT PLACEMENT AND HEIGHT AT THE STREET. GENERALLY, MAILBOXES ARE INSTALLED
AT THE HEIGHT OF 41-45 INCHES FROM THE ROAD SURFACE TO INSIDE FLOOR OF MAILBOX OR POINT OF MAIL ENTRY (LOCKED DESIGNS) AND ARE SET BACK 6-8 INCHES FROM FRONT FACE OF CURB OR ROAD EDGE TO
THE MAILBOX DOOR.
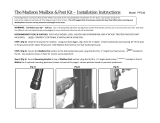
STEP 1 (Fig 1): Determine location for Mailbox. Using post hole digger, dig a hole 24 inches in depth. Install treated pine post burying 24 inches of the post in
the ground - leaving 26 inches of the post above the ground. Use level to insure treated pine post is in correct vertical position. Stabilize the treated pine post by
firmly tamping down loose soil around post base. Slide Mailbox Post section over 4x4 treated pine post.
STEP 2: Secure the Mailbox Post section to the 4x4 treated pine post using the (4) 12 x 1 screws included in the kit. The Plastic post has (4) Mounting Holes
located approximately 23 inches above bottom of post.
STEP 3 (Fig 2): Attach Mounting Bracket to top of Post using the (4) 12 x 1 screws
STEP 4 (Fig 3): Attach Door to Mailbox with (2) Hinge Pins. 1 pin per side. Place door over front of mailbox and align holes. Push Pin in until it clicks.
STEP 5 (Fig 4): Place Mailbox on to top of Mailbox Post Bracket, align holes of mailbox & bracket and secure with (4) 10-24 threaded screws and nuts.
1 2 3
IF YOU HAVE ANY PROBLEM WITH THIS PRODUCT, PLEASE DO NOT RETURN TO RETAILER. CALL OR EMAIL OUR CUSTOMER SERVICE DEPARTMENT
AND WE WILL PROVIDE IMMEDIATE ASSISTANCE.
CONTACT CUSTOMER SERVICE CREATIVE SOLUTIONS, LLC HATTIESBURG, MISSISSIPPI
Email: customerservice@creativesolutionscp.com Phone: (877)544-5220 WEBSITE: POSTALPROMAILBOXES.COM


