Page is loading ...

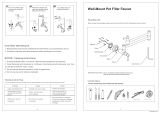
Tools/Outils/Herramientas
Before You Begin
NOTE: For service parts information, visit http://www.kohler.com/serviceparts.
CAUTION: Risk of property damage. Before finishing the wall, ensure the supply
lines are connected to the mixer valve with the cold supply line plumbed on the left
and the hot supply line plumbed on the right. Doing so will avoid replacing the
finished wall due to error.
IMPORTANT! Unless otherwise indicated, the diagrams in this document show the
installation for a handle located to the right of the spout. The valve is designed for
handle installation on the right side. Special steps will need to be performed to
position the handle to the left of the valve.
NOTICE: For exterior wall installations, be sure proper wall insulation is installed to
prevent frozen pipes.
Observe all local plumbing and building codes.
Shut off the main water supply.
Carefully inspect supply tubing for any sign of damage.
The supplied plaster guard will also be used to assemble the valve. The supplied
spout tool will also be used for alignment of the spout escutcheon.
Kohler Co. reserves the right to make revisions in the design of faucets without
notice, as specified in the Price Book.
2x4 Lumber
Lambourde de 2x4
Listones de 2x4
#10 Wood Screws
Vis à bois #10
Tornillos para madera
del #10
Plumbers Putty
Mastic de plombier
Masilla de plomería
Level
Niveau à bulle
Nivel
Hex Wrenches
Clés hexagonales
Llaves hexagonales
Tape Measure
Mètre ruban
Cinta para medir
Solder
Fer à souder
Suelda
Propane Torch
Torche au propane
Soplete de propano
Pencil
Crayon
Lápiz
Tube Cutter
Coupe-tubes
Cortatubos
1-3/16" and 2-3/16" Hole Saw
Scie circulaire de 1- 3/16" et 2-3/16"
Corona perforadora de 1-3/16" y 2-3/16"
5/64"
3/32"
1095311-2-H 2 Kohler Co.

1. Prepare the Site
Install the Framing
IMPORTANT! The diagram illustrates hole locations for a right side handle. Reverse
the holes for installations with a left side handle.
NOTE: The mixer valve requires special framing and support.
Construct the framing for the faucet installation. A suggested framing example is
illustrated.
Verify the constructed framing is level and will be parallel to the finished wall.
Adjust as needed.
Attach the Mixer Valve
Loosely attach the mixer valve to the framing with one or two wood screws (not
provided).
Using the flat portion of the mixer valve as a guide, level the mixer valve.
Fully tighten the wood screw(s).
Préparer le site
Installer le cadrage
IMPORTANT! Le diagramme illustre les emplacements des trous pour une poignée
sur le côté droit. Inverser les trous pour les installations avec une poignée sur le côté
gauche.
Ø 1-3/16" (30 mm)
1-3/4"
(44 mm)
1-1/2" (38 mm)
3-1/2" (89 mm)
These surfaces to
be flush.
Ces surfaces
doivent être égales.
Estas superficies
deben quedar al ras.
These surfaces to
be flush.
Ces surfaces
doivent être égales.
Estas superficies
deben quedar al ras.
1095311-2-H 4 Kohler Co.

2. Install the Supplies
IMPORTANT! The diagram illustrates a right side handle installation. The supply
can also be installed with the handle on the left side.
CAUTION: Risk of property damage. When installing the handle on the right side,
connect the supplies to the mixer valve with the cold supply line plumbed on the left
and the hot supply line plumbed on the right. When installing the handle on the left
side, connect the supplies to the mixer valve with the cold supply line plumbed on
the left and the hot supply line plumbed on the right. Disregard the cold label on the
mixer valve.
Install 1/2″ supply lines to the mixer valve with the cold supply on the left and
the hot supply on the right.
Temporarily remove and retain the plaster guard/retaining ring tool and spout
plug.
Position a bucket in front of the spout shank, then turn on the water supplies to
the mixer valve.
Slowly open the mixer valve stem. Allow hot and cold water to flow from the
water supplies for approximately one minute to remove any debris.
Close the mixer valve stem. Carefully inspect all connections for leaks.
Reattach the plaster guard/retaining ring tool and spout plug.
Installer les alimentations
IMPORTANT! Le diagramme illustre une installation de poignée sur le côté droit.
L’alimentation peut également être installée avec la poignée sur le côté gauche.
Cold Supply
Alimentation froide
Suministro de agua fría
Plaster Guard/
Retaining Ring Tool
Renfort en plâtre/
Outil d'anneau de retenue
Herramienta para protector de
yeso/anillo de retención
Spout Plug
Bouchon de bec
Tapón del surtidor
Mixer Valve Assembly
Mitigeur
Montaje de la válvula mezcladora
Hot Supply
Alimentation chaude
Suministro de agua caliente
1095311-2-H 6 Kohler Co.

3. Complete the Finished Wall
NOTE: Reverse the hole location for left side handle installations.
Measure and mark the hole centers 6″ (152 mm) apart from one another.
Using a hole saw, drill a 1-3/16″ (30 mm) hole for the spout and a 2-3/16″ (58
mm) hole for the handle.
Complete the finished wall.
Terminer le mur fini
REMARQUE: Inverser l’emplacement des orifices pour les installations de la poignée
sur le côté gauche.
Mesurer et marquer les centres des orifices à 6″ (152 mm) d’écart les uns des
autres.
Avec une scie cylindrique, percer un orifice de 1-3/16″ (30 mm) pour le bec et un
orifice de 2-3/16″ (58 mm) pour la poignée.
Terminer le mur fini.
Termine la pared acabada
NOTA: Invierta el lugar de los orificios para instalaciones con manija a la izquierda.
Mida y marque los centros de los orificios con 6″ (152 mm) de separación uno del
otro.
Utilizando una corona perforadora, taladre un orificio de 1-3/16″ (30 mm) para el
surtidor y un orificio de 2-3/16″ (58 mm) para la manija.
6" (152 mm)
Ø 2-3/16" (56 mm)
Ø 1-3/16"
(30 mm)
Finished Wall
Mur fini
Pared acabada
1095311-2-H 8 Kohler Co.

Termine la pared acabada (cont.)
Termine la pared acabada.
4. Install the Spout
NOTE: When installing to finished wall materials that will not support fasteners,
anchors are required. These materials include glass, mirror, and ceramic tile. The
anchors and fasteners are not supplied. Select appropriate fasteners and anchors for
the finished wall material.
If Anchors Are Required
Position the wall flange over the spout plug, with the three holes at the 2, 6, and
10 o’clock positions. Mark the location of the holes in the flange on the wall
material.
Drill holes at each of the marks, using the size and drill bit type appropriate for
the finished wall material.
All Installations
Confirm there are three setscrews pre-installed in the wall flange. Make sure they
do not protrude into the inside diameter of the wall flange. Adjust as necessary
using a 3/32″ hex wrench.
Apply plumbers putty or other suitable sealant to the back surface of the wall
flange. Refer to the putty manufacturer’s application instructions.
Slide the wall flange over the spout plug (not shown).
Setscrew
Vis de retenue
Tornillo de fijación
Escutcheon/Applique/Chapetón
Setscrew/Vis de retenue/Tornillo de fijación
Setscrew/Vis de retenue/Tornillo de fijación
Spout
Bec
Surtidor
Apply plumbers
putty.
Appliquer du
mastic de
plombier.
Aplique masilla
de plomería.
Wall Flange/Bride murale/Brida mural
Setscrew
Vis de retenue
Tornillo de fijación
Wood Screws/Vis à bois/Tornillos para madera
Level
Niveau à bulle
Nivel
Kohler Co. 9 1095311-2-H

Install the Spout (cont.)
Position the three holes on the wall flange at the 2, 6, and 10 o’clock positions,
then secure the wall flange with three wood screws or other appropriate fasteners
(not provided).
Remove the spout plug.
Temporarily place the escutcheon on the wall flange.
Thread the spout onto the mixer valve until the spout is fully seated. If necessary,
unthread the spout for adjustment.
Slide the escutcheon away from the finished wall so that the setscrew holes of the
wall flange can be accessed.
Using a 3/32″ hex wrench, tighten the three setscrews in the wall flange until the
setscrews contact the spout. Fully tighten the setscrews.
Slide the escutcheon back against the finished wall and onto the wall flange.
With the escutcheon setscrew hole at the 6 o’clock position, use a 5/64″ hex
wrench to secure the escutcheon with a setscrew.
Installer le bec
REMARQUE: Lors d’une installation sur les matériaux du mur fini qui ne supportent
pas les pièces de fixation, des dispositifs d’ancrage sont requis. Ces matériaux
incluent le verre, le miroir et la tuile céramique. Les dispositifs d’ancrage et de
fixation ne sont pas fournis. Choisir des dispositifs de fixation et d’ancrage adéquats
pour le matériau de mur fini.
Si des dispositifs d’ancrage sont requis
Positionner la bride murale par-dessus le bouchon du bec, avec les trois orifices
aux positions de 2, 6 et 10 heures. Marquer l’emplacement des orifices dans la
bride sur le matériau du mur.
Percer des trous sur chaque repère, en utilisant la taille et le type de foret
appropriés pour le matériau de mur fini.
Toutes les installations
Confirmer qu’ilyatroisvisded’arrêt préinstallées dans la bride murale.
S’assurer que les vis ne dépassent pas dans le diamètre intérieur de la bride
murale. Ajuster selon les besoins en utilisant une clé six pans de 3/32″.
Appliquer du mastic de plombier ou un autre mastic approprié sur la surface
arrière de la bride murale. Se référer aux instructions d’application du fabricant
du mastic.
Faire glisser la bride murale par-dessus le bouchon du bec (non illustré).
Positionner les trois orifices sur la bride murale aux positions de 2, 6 et 10 heures,
puis sécuriser la bride murale avec trois vis à bois ou d’autres dispositifs de
fixation appropriés (non fournis).
Retirer le bouchon du bec.
Placer temporairement l’applique sur la bride murale.
Visser le bec sur le robinet mélangeur jusqu’à ce que le bec soit entièrement en
place. Si nécessaire, dévisser le bec pour l’ajuster.
Faire glisser l’applique à l’écart du mur fini de manière à pouvoir accéder aux
trous des vis d’arrêt de la bride murale.
Serrer les trois vis d’arrêt dans la bride murale en utilisant une clé six pans de
3/32″, jusqu’à ce que les vis d’arrêt entrent en contact avec le bec. Serrer
entièrement les vis d’arrêt.
Refaire glisser l’applique contre le mur fini et sur la bride murale.
1095311-2-H 10 Kohler Co.

5. Flush the Water Lines
NOTE: The spray must be removed and the lines flushed or debris may block the
water flow.
Remove the button cover from the spray assembly.
Push the button on the sprayhead in while sliding the tube down from the spout.
The setscrew will be visible.
Using a 5/64″ hex wrench, loosen the setscrew on the spout until the sprayhead
releases from the spout.
Open the valves and run water through the spout for about a minute to remove
any debris. Check for leaks.
Check that the setscrew will not interfere with the sprayhead. If the setscrew
protrudes into the area the sprayhead will be inserted, loosen it until it is flush or
behind the interior surface of the spout.
Align the groove at the top of the tube with the pin on the end of the spout.
Slide the tube up until it stops and hold it in place.
While holding the tube up, push the sprayhead into the spout.
Retighten the setscrew.
Slide the tube up and reinstall the button cover.
Check the button for correct operation.
5/64" Hex Wrench
Clé hexagonale 5/64"
Llave hexagonal de 5/64"
Sprayhead
Tête de vaporisateur
Cabeza del rociador
Setscrew
Vis de retenue
Tornillo de fijación
Button Cover
Cache-bouton
Tapa de botón
1095311-2-H 12 Kohler Co.

6. Adjust the Valve - Right Handle
CAUTION: Risk of property damage. The water supply must be shut off before
performing these steps.
Shut off the water supply.
Remove the plaster guard/retaining ring tool.
Position a bucket at the spout outlet, then open the valve handle to relieve water
pressure. Leave the handle open.
Loosen the threaded retaining ring using the plaster guard/retaining ring tool
until the valve body disengages from the mixer valve.
CAUTION: Risk of property damage. At the maximum valve body extension, a
detent will be encountered. To avoid leakage, do not extend the valve beyond this
detent. If the valve body needs to be extended further, installation of the deep
rough-in valve body kit (1107027) is required. If the valve needs to be recessed
further, installation of the shallow rough-in valve body kit (1107026) is required.
Using a straight edge, adjust and hold the valve body flush with the finished wall.
NOTE: A screwdriver inserted through the holes in the plaster guard/retaining ring
tool can serve as a handle.
With the valve body flush with the finished wall, retighten the retaining ring with
the plaster guard/retaining ring tool.
Close the valve handle.
Turn on the water supply and check that the valve is functioning properly.
Threaded Retaining Ring
Anneau de retenue fileté
Anillo de retención roscado
Plaster Guard/
Retaining Ring Tool
Renfort en plâtre/
Outil d'anneau de retenue
Herramienta para
protector de yeso/
anillo de retención
1095311-2-H 14 Kohler Co.

7. Adjust the Valve - Left Handle
IMPORTANT! Perform these steps when the handle will be located on the left side of
the spout.
CAUTION: Risk of property damage. The water must be shut off before performing
these steps.
Shut off the water supply.
Remove the plaster guard/retaining ring tool.
Position a bucket at the spout outlet, then open the valve handle to relieve water
pressure. Leave the handle open.
Loosen the threaded retaining ring using the plaster guard/retaining ring tool
until it disengages from the mixer valve body.
Pull out the valve body. The plaster guard/retaining ring tool can be threaded
onto the valve body to get a better grip on the valve body when pulling it out.
Rotate the valve body 180 degrees from the original position. This allows the
handle to move up when turning the water on.
Verify the O-rings on both the valve body and the mixer valve are undamaged.
Verify the spring plunger is installed and is flush with the surface of the valve
body.
Reinstall the valve body into the mixer valve and fully seat the valve body into
the mixer valve.
CAUTION: Risk of property damage. At the maximum valve body extension, a
detent will be encountered. To avoid leakage, do not extend the valve beyond this
detent. If the valve body needs to be extended further, installation of the deep
Threaded Retaining Ring
Anneau de retenue fileté
Anillo de retención roscado
180˚
Plaster Guard/Retaining Ring Tool
Renfort en plâtre/Outil d'anneau de retenue
Herramienta para protector de yeso/anillo de retención
Valve Body
Corps de valve
Cuerpo de válvula
O-Rings
Joints-toriques
Arosellos
Spring Plunger
Plongeur de Ressort
Émbolo de resorte
1095311-2-H 16 Kohler Co.

8. Install the Handle
Apply plumbers putty or other suitable sealant to the back surface of the
escutcheon. Refer to the putty or sealant manufacturer’s application instructions.
Thread the escutcheon tight against the finished wall.
Slide the following components onto the valve stem: bearing, sliding disk, friction
cup, ball joint, and spring.
Hold the components in place on the valve stem, then thread the handle onto the
valve stem until fully seated.
Unthread the handle until the setscrew hole is pointed at the 6 o’clock position.
Use a 5/64″ hex wrench to fully tighten the setscrew into the handle.
Turn on the water supply.
Check for leaks.
Installer la poignée
Appliquer du mastic de plombier ou un autre agent d’étanchéité approprié sur la
surface arrière de l’applique. Se référer aux instructions d’application du fabricant
du mastic ou de l’agent d’étanchéité.
Visser l’applique de manière serrée contre le mur fini.
Faire glisser les composants suivants sur la tige de la vanne: coussinet, disque
coulissant, bague de friction, joint sphérique, et ressort.
Maintenir les composants en place sur la tige de la vanne, puis visser la poignée
sur la tige de la vanne jusqu’à ce qu’elle soit entièrement en place.
Valve Stem
Tige de valve
Espiga de la válvula
Ball Joint/Rotule/Articulación de bola
Setscrew/Vis de retenue/Tornillo de fijación
Handle
Poignée
Manija
Spring/Ressort/Resorte
Bearing/Bague/Cojinete
Escutcheon/Applique/Chapetón
Friction Cup
Récipient de friction
Copa de fricción
Sliding Disk/Disque coulissant/Disco deslizante
Threaded Retaining Ring
Anneau de retenue fileté
Anillo de retención roscado
Kohler Co. 19 1095311-2-H

Adjust the Faucet (cont.)
NOTE: Adjustment may be needed if the faucet is difficult to move or does not
remain in place after use.
Insert the adjustment tool onto the joint that requires adjustment.
To tighten the joint, turn the tool clockwise. To loosen the joint (faucet will move
more freely), turn the tool counterclockwise.
Ajuster le robinet
REMARQUE: Un ajustement pourrait être nécessaire si le déplacement du robinet est
difficile ou s’il ne reste pas en place après utilisation.
Insérer l’outil de réglage sur le joint qui nécessite un ajustement.
Pour serrer le joint, tourner l’outil dans le sens des aiguilles d’une montre. Pour
desserrer le joint (le robinet se déplacera plus librement), tourner l’outil dans le
sens contraire des aiguilles d’une montre.
Ajuste la grifería
NOTA: Puede ser necesario hacer ajustes si es difícil mover la grifería o si no
permanece en su lugar después de utilizarla.
Inserte la herramienta de ajuste en la junta que requiera ajuste.
Para apretar la junta, gire la herramienta hacia la derecha. Para aflojar la junta, (la
grifería se moverá más libremente), gire la herramienta hacia la izquierda.
Warranty
KOHLER
®
Faucet Lifetime Limited Warranty
Kohler Co. warrants its Faucets* manufactured after January 1, 1997, to be leak and drip
free during normal residential use for as long as the original consumer purchaser owns
his or her home. If the Faucet should leak or drip during normal use, Kohler Co. will,
free of charge, mail to the purchaser the cartridge necessary to put the Faucet in good
working condition. This warranty applies only to Kohler Faucets installed in the United
States of America, Canada or Mexico (″North America″).
Kohler Co. also warrants all other aspects of the faucet or accessories (″Faucet″)*, (except
gold, non-Vibrant
®
, non-chrome finishes) to be free of defects in material and
workmanship during normal residential use for as long as the original consumer
purchaser owns his or her home. This warranty applies only to Kohler Faucets installed
in North America. If a defect is found in normal residential use, Kohler Co. will, at its
election, repair, provide a replacement part or product, or make appropriate adjustment.
Damage to a product caused by accident, misuse, or abuse is not covered by this
warranty. Improper care and cleaning will void the warranty**. Proof of purchase
(original sales receipt) must be provided to Kohler Co. with all warranty claims. Kohler
Co. is not responsible for labor charges, installation, or other incidental or consequential
costs. In no event shall the liability of Kohler Co. exceed the purchase price of the
Faucet.
If the Faucet is used commercially or is installed outside of North America, or if the
finish is gold, non-Vibrant or a painted or powder coated color finish, Kohler Co.
warrants the Faucet to be free from defects in material and workmanship for one (1) year
from the date the product is installed, under Kohler Co.’s standard one-year limited
warranty.
If you believe that you have a warranty claim, contact Kohler Co., either through your
Dealer, Plumbing Contractor, Home Center or E-tailer, or by writing Kohler Co., Attn.:
Customer Care Center, 444 Highland Drive, Kohler, WI 53044, USA. Please be sure to
Kohler Co. 21 1095311-2-H

Warranty (cont.)
provide all pertinent information regarding your claim, including a complete description
of the problem, the product, model number, color, finish, the date the product was
purchased and from whom the product was purchased. Also include your original
invoice. For other information, or to obtain the name and address of the service and
repair facility nearest you, call 1-800-4-KOHLER (1-800-456-4537) from within the USA
and Canada, and 001-800-456-4537 from within Mexico, or visit www.kohler.com within
the USA, www.ca.kohler.com from within Canada, or www.mx.kohler.com in Mexico.
KOHLER CO. AND/OR SELLER ARE PROVIDING THESE WARRANTIES IN LIEU
OF ALL OTHER WARRANTIES, EXPRESSED OR IMPLIED, INCLUDING BUT NOT
LIMITED TO THE IMPLIED WARRANTIES OF MERCHANTABILITY AND
FITNESS FOR A PARTICULAR PURPOSE. KOHLER CO. AND/OR SELLER
DISCLAIM ALL LIABILITY FOR SPECIAL, INCIDENTAL OR CONSEQUENTIAL
DAMAGES. Some states/provinces do not allow limitations of how long an implied
warranty lasts or the exclusion or limitation of such damages, so these limitations and
exclusions may not apply to you. This warranty gives the consumer specific legal
rights. You may also have other rights that vary from state/province to state/province.
This is Kohler Co.’s exclusive written warranty.
*Trend
®
faucets, MasterShower
®
tower, BodySpa systems and components; WaterHaven
®
tower, systems and components; Tripoint
®
faucets, Polished Gold, non-Vibrant and
painted or powder coated finishes, fittings; all items within the ″Fixture Related″ section
of the Kohler Faucets Price Book, drains, Duostrainer
®
sink strainers, soap/lotion
dispensers; and faucets used in commercial settings, and outside North America, are
covered by Kohler Co.’s one-year limited warranty.
**Never use cleaners containing abrasive cleansers, ammonia, bleach, acids, waxes,
alcohol, solvents or other products not recommended for chrome. This will void the
warranty.
Garantie
Garantie limitée à vie du robinet KOHLER
®
Kohler Co. garantit que les robinets* fabriqués après le 1er janvier 1997 ne fuient pas et
ne gouttent pas lors d’une utilisation domestique normale, aussi longtemps que
l’acquéreur d’origine demeure propriétaire de son domicile. Si le robinet goutte ou
présente des fuites lors d’une utilisation normale, Kohler Co. enverra par courrier à
l’acheteur, sans frais, la cartouche nécessaire pour réparer le robinet. La présente garantie
s’applique uniquement aux robinets Kohler installés aux États-Unis, au Canada ou au
Mexique (″Amérique du Nord″).
Kohler Co. garantit également toutes les autres caractéristiques du robinet ou des
accessoires (″Robinet″)*, (à l’exception des finitions dorées, non-Vibrant
®
, non chromées)
contre tout vice de matériau et de fabrication lors d’une utilisation domestique normale,
aussi longtemps que l’acquéreur d’origine demeure propriétaire de son domicile. La
présente garantie s’applique uniquement aux robinets Kohler installés en Amérique du
Nord. Si un vice est décelé lors d’une utilisation domestique normale, Kohler Co.
choisira, à sa discrétion, la réparation, le remplacement ou la rectification appropriée.
Cette garantie n’offre pas de protection contre les dommages dus à un accident, une
mauvaise utilisation ou un mauvais traitement. Un entretien et un nettoyage inadéquats
annulent la garantie**. Une preuve d’achat (ticket de caisse d’origine) doit être présentée
à Kohler Co. avec toutes les réclamations au titre de la garantie. Kohler Co. n’est pas
responsable des frais de main-d’œuvre, d’installation ou de tout autre frais particulier,
accessoire ou indirect. La responsabilité de Kohler Co. ne dépassera en aucun cas le prix
d’achat du robinet.
Si le robinet est utilisé dans un commerce ou s’il est installé en dehors d’Amérique du
Nord, ou si la finition est dorée, non-Vibrant, peinte ou revêtue d’une poudre, Kohler Co.
garantit le robinet contre tout vice de matériau et de fabrication pendant un (1) an à
1095311-2-H 22 Kohler Co.

Care and Cleaning (cont.)
•
Do not allow cleaners to sit or soak on the surface.
•
Wipe surfaces clean and rinse completely with water immediately after cleaner
application. Rinse and dry any overspray that lands on nearby surfaces.
•
Use a soft, dampened sponge or cloth. Never use an abrasive material such as a
brush or scouring pad to clean surfaces.
For detailed cleaning information and products to consider, visit www.kohler.com/clean.
To order Care & Cleaning information, call 1-800-456-4537.
Entretien et nettoyage
Pour obtenir les meilleurs résultats possibles, prendre ce qui suit en considération lors de
l’entretien de votre produit KOHLER:
•
Utiliser un détergent doux comme du liquide pour vaisselle et de l’eau chaude
pour nettoyer. Ne pas utiliser de nettoyants abrasifs qui pourraient rayer ou ternir
la surface.
•
Lire l’étiquette du produit de nettoyage avec le plus grand soin pour assurer que
celui-ci peut être utilisé sans danger sur le matériau.
•
Toujours tester la solution de nettoyage sur une surface non visible avant de
l’appliquer sur l’ensemble de la surface.
•
Ne pas laisser les nettoyants reposer ou tremper sur la surface.
•
Essuyer les surfaces et rincer complètement avec de l’eau immédiatement après
l’application du nettoyant. Rincer et sécher tout éclaboussement sur les surfaces
avoisinantes.
•
Utiliser une éponge ou un chiffon doux et humide. Ne jamais utiliser de matériau
abrasif tel qu’une brosse ou une éponge à récurer pour nettoyer les surfaces.
Pour obtenir des informations détaillées sur le nettoyage et les produits à considérer,
consulter le site www.kohler.com/clean. Pour commander des informations sur
l’entretien & le nettoyage, appeler le 1-800-456-4537.
Cuidado y limpieza
Para obtener los mejores resultados, tenga presente lo siguiente al limpiar su producto
KOHLER:
•
Para la limpieza, utilice solamente un detergente suave como el jabón líquido para
lavar platos y agua tibia. No utilice limpiadores abrasivos que puedan rayar u
opacar la superficie.
•
Lea atentamente la etiqueta del producto de limpieza para asegurar que no
presente riesgos al usarse en el material.
•
Siempre pruebe la solución de limpieza en un área oculta antes de aplicarla a toda
la superficie.
•
No deje por tiempo prolongado los limpiadores en la superficie.
•
Limpie con un trapo y enjuague completa e inmediatamente con agua después de
aplicar limpiadores. Enjuague y seque las superficies cercanas que se hayan
rociado.
•
Utilice una esponja o trapo suave y húmedo. Para limpiar las superficies, nunca
utilice materiales abrasivos como cepillos o estropajos de tallar.
Para obtener información detallada de limpieza y los limpiadores a considerar, visite
www.kohler.com/clean. Para solicitar información sobre el cuidado y la limpieza, llame
al 1-800-456-4537.
Kohler Co. 25 1095311-2-H
/