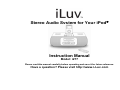
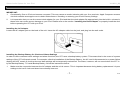
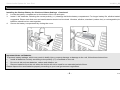
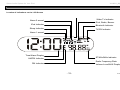
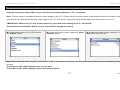
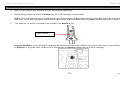
iLuv i277 is an audio system for your iPod that offers a variety of features for enjoying your music. It has a built-in AM/FM tuner, an alarm clock, and a remote control for easy operation. The system also includes an AC adapter and a backup battery for clock and alarm settings. With its stylish design and powerful sound, the iLuv i277 is the perfect way to enhance your listening experience.
iLuv i277 is an audio system for your iPod that offers a variety of features for enjoying your music. It has a built-in AM/FM tuner, an alarm clock, and a remote control for easy operation. The system also includes an AC adapter and a backup battery for clock and alarm settings. With its stylish design and powerful sound, the iLuv i277 is the perfect way to enhance your listening experience.


-
 1
1
-
 2
2
-
 3
3
-
 4
4
-
 5
5
-
 6
6
-
 7
7
-
 8
8
-
 9
9
-
 10
10
-
 11
11
-
 12
12
-
 13
13
-
 14
14
-
 15
15
-
 16
16
-
 17
17
-
 18
18
-
 19
19
-
 20
20
-
 21
21
-
 22
22
-
 23
23
-
 24
24
-
 25
25
-
 26
26
-
 27
27
-
 28
28
-
 29
29


iLuv i277 is an audio system for your iPod that offers a variety of features for enjoying your music. It has a built-in AM/FM tuner, an alarm clock, and a remote control for easy operation. The system also includes an AC adapter and a backup battery for clock and alarm settings. With its stylish design and powerful sound, the iLuv i277 is the perfect way to enhance your listening experience.
Ask a question and I''ll find the answer in the document
Finding information in a document is now easier with AI
Related papers
Other documents
-
EARISE T65 Portable PA System User manual
-
Ye!! Clearholic BTS800 User manual
-
Sanyo DMP-P7 User manual
-
TEAC SR-L7XI Owner's manual
-
iHome iHC5 User manual
-
Insignia NS-CLBT01 User manual
-
AOKE 2.4G Wireless Remote Control User manual
-
Headphones 64B User manual
-
Pyle PHPNC15 User guide
-
SCOTT CMX 130 User manual