iLuv i199 User manual

Category
Alarm clocks
Type
User manual
Stereo Audio System for Your iPod
®
Instruction Manual
Model: i199
Please read this manual carefully before operating and save it for future reference.
Have a question? Please visit www.i-Luv.com
Stereo Audio System for Your iPod V11M11_IM_EN_01122007
www.i-Luv.com
- 1 -
Stereo Audio System for Your iPod V11M11_IM_EN_01122007
www.i-Luv.com
- 2 -
USER SAFETY GUIDE
INSTRUCTIONS ON ENVIRONMENT PROTECTION
Do not dispose of this product in the usual household garbage at the end of its life cycle; bring it to a collection point for the recycling of
electrical and electronic appliances. This symbol on the product means the instructions for use or the packing will inform about the methods
for disposal. The materials are recyclable as mentioned in its marking. By recycling, material recycling, or other forms of re-utilization of old
appliances, you make an important contribution to protect the environment. Please inquire at your local community administration for the
authorized disposal location.
FCC RULES
This device complies with Part 15 of the FCC Rules. Operation is subject to the condition that this device does not cause harmful interference.
Do not make changes or modify the device in any way. Changes or modifications not expressly approved by the party responsible for compliance
could void the user’s authority to operate the equipment.
IMPORTANT SAFETY WARNINGS
1. Before using the player, please ensure that your local AC voltage is suitable for this unit.
2. To prevent fire or electric shock, do not expose the unit to rain or moisture.
3. Never attempt to open the cabinet. Always refer servicing to a qualified technician.
IMPORTANT SAFETY INSTRUCTIONS
1. READ INSTRUCTIONS – All the safety and operating instructions should be read before the appliance is operated.
2. RETAIN INSTRUCTIONS – The safety and operating instructions should be retained in a secure place for future reference.
3. HEED WARNINGS – All warnings on the appliance and in the operating instructions should be observed.
4. FOLLOW INSTRUCTIONS – All operating and use instructions should be followed.
5. WATER AND MOISTURE – The appliance should not be used near water. For example: near a bathtub, kitchen sink, laundry tub, and/or swimming
pool.
6. HEAT – The appliance should be situated away from heat sources such as radiators, heat registers, stoves, or other appliances (including amplifiers)
that produce heat.
Stereo Audio System for Your iPod V11M11_IM_EN_01122007
www.i-Luv.com
- 3 -
USER SAFETY GUIDE
IMPORTANT SAFETY INSTRUCTIONS – CONTINUED
7. POWER SOURCES – The appliance should be connected to a power supply only of the type described in the operating instructions or as marked on
the appliance itself.
8. CLEANING – The appliance should be cleaned with a dry cloth.
9. OBJECT AND LIQUID ENTRY – Care should be taken so that objects do not fall and liquids are not spilled into the device’s openings.
10. CARTS AND STANDS – The appliance should be used only with a cart or stand that is recommended by the manufacturer. An
appliance and cart combination should be moved with care. Quick stops, excessive force, and uneven surfaces may cause the
appliance and cart combination to overturn.
11. DAMAGE REQUIRING SERVICE – The appliance should be serviced by qualified service professional when:
a. The power supply cord or plug has been damaged.
b. Objects have fallen into, or liquid has been spilled into the appliance’s apertures.
c. The appliance has been exposed to rain.
d. The appliance has been dropped and suffered damage.
e. The appliance does not appear to operate normally or exhibits a change in performance.
12. SERVICING – The user should not attempt to service the appliance beyond what is described in the user's operating instructions. All other servicing
should be referred to qualified service professional.
13. BATTERY USAGE – To prevent battery leakage, which may result in bodily injury, property damage or damage to the unit, follow these instructions:
a. Install all batteries correctly according to the polarity (+/-) as marked on the unit.
b. Do not mix old and new batteries, carbon and alkaline, etc.
c. Remove batteries from the unit when the device will not be used for an extended period of time.
14. LEAD AND MERCURY – This product may contain lead and/or mercury. Disposal of these materials may be regulated by your local authorities due to
environmental considerations. For more detailed disposal or recycling information, please contact your local authorities or the EIA (Electronic Industries
Alliance) – http://www.eiae.org
Stereo Audio System for Your iPod V11M11_IM_EN_01122007
www.i-Luv.com
- 4 -
USER SAFETY GUIDE
FCC NOTICE (USA)
This equipment has been tested and found to comply with the limits for a Class B digital device, pursuant to Part 15 of the FCC Rules. These limits are
designed to provide reasonable protection against harmful interference in a residential installation. This equipment generates, uses, and can radiate radio
frequency energy and, if not installed and used in accordance with the instructions, may cause harmful interference to radio communications. However,
there is no guarantee that interference will not occur in a particular installation. If this equipment does cause harmful interference to radio or television
reception, which can be determined by turning the equipment off and on, the user is encouraged to try to correct the interference by one or more of the
following measures:
1. Reorient or relocate the receiving antenna.
2. Increase the separation between the equipment and receiver.
3. Connect the equipment into an outlet on a circuit different from that to which the receiver is connected.
4. Consult the dealer or an experienced radio/TV technician for help.
IC NOTICE (CANADA)
This digital apparatus does not exceed the Class B limits for radio noise emissions from digital apparatus as set out in the Radio Interference Regulations of
Industry Canada. These limits are designed to provide reasonable protection against harmful interference in a residential installation. This equipment
generates, uses, and can radiate radio frequency energy and, if not installed and used in accordance with the instructions, may cause harmful interference
to radio communications. However, there is no guarantee that interference will not occur in a particular installation. If this equipment does cause harmful
interference to radio or television operation (which can be determined by turning the equipment off), the user is encouraged to try to correct the interference
by one or more of the following measures:
Reorient or relocate the receiving antenna.
Increase the separation between the equipment and receiver.
Connect the equipment into an outlet on a circuit different from that to which the receiver is connected.
Consult the dealer or an experienced radio/TV technician for help.
Stereo Audio System for Your iPod V11M11_IM_EN_01122007
www.i-Luv.com
- 5 -
USER SAFETY GUIDE
About Electromagnetic Interference (EMI)
This device is designed and manufactured not to exceed the exposure limit for radio frequency energy, which is set by the Federal Communications
Commission of the U.S government.
The term “EMI” is short for the electromagnetic interference caused by the electromagnetic field generated by electronic devices. In fact, most electrical
appliances and devices emit electric and magnetic fields, and most of modern electronic devices are susceptible to the EMI if they are inadequately shielded
or designed.
If you use any personal medical device, such as a pacemaker, please consult the manufacture of your medical device to determine if it is adequately
shielded from EMI. Your physician might assist you in obtaining this information.
Please turn off this device if you are instructed to do so, especially on an airplane or in a hospital.
Please keep away from medical instruments in a hospital or medical unit while using this device.
IMPORTANT NOTES ON HEARING
Your hearing is very important to you and to us. We strongly recommend you to follow the guideline below in order to prevent possible damage to or loss of
hearing. Hearing experts caution that listening to loud sounds can damage hearing over time. With continuous listening to loud sounds, hearing adapts and
will give the impression that volume has reduced. What seems normal may, in fact, be harmful. To guard against this before hearing adapts, set the volume
at a low level and slowly increase the volume level until sound can be heard comfortably and clearly without distortion. Damage to hearing is cumulative and
irreversible. Ringing or discomfort in the ears indicates that the volume is too loud. Once a comfortable listening level has been established, do not increase
the volume level further.
Cautions
If you experience a ringing sound in your ear, lower the volume or discontinue the use of this product.
Do not use the headphones while driving or cycling. Because this product reduces the external noises, you might not be able to hear the warning sounds,
such as an automobile horn, and might result in a traffic accident. Additionally, listening to headphones while driving is illegal in many places
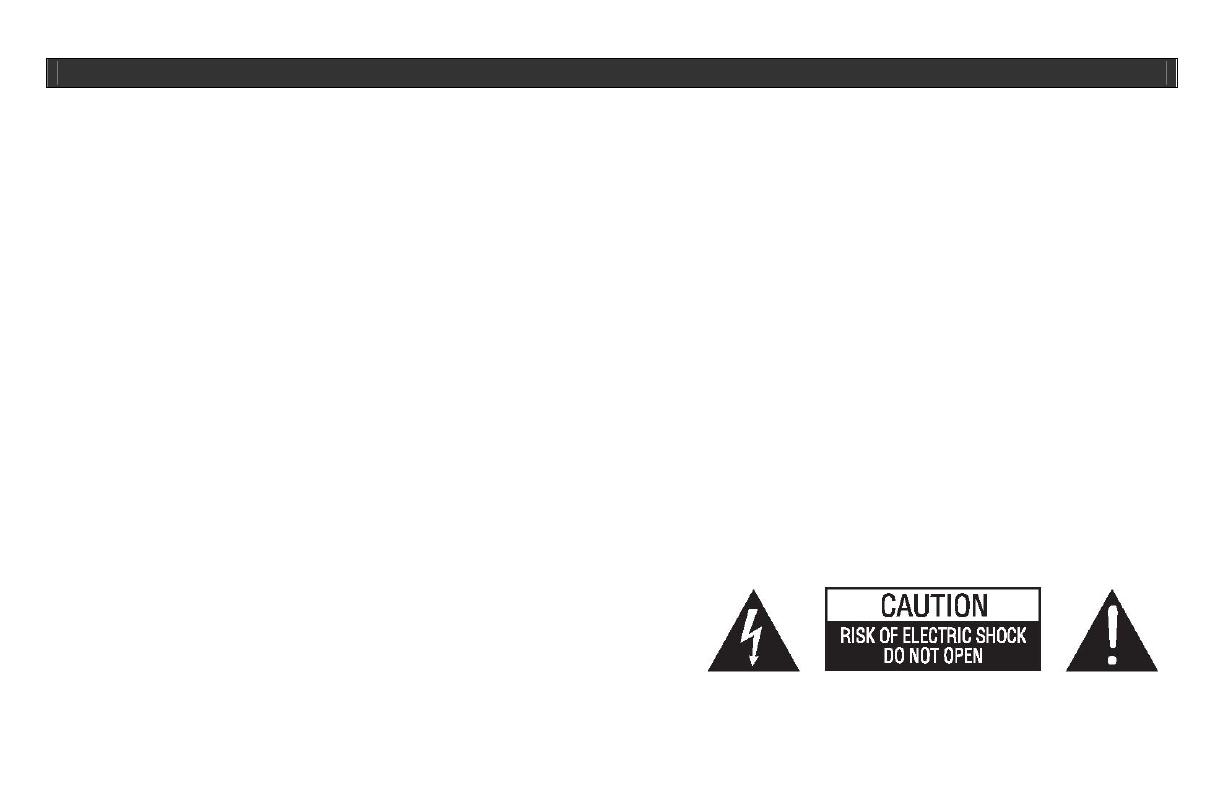
Warning: to prevent fire or shock hazard, don’t expose this appliance to rain or moisture.
These markings are located on the bottom, side or back of the unit.
Stereo Audio System for Your iPod V11M11_IM_EN_01122007
www.i-Luv.com
- 6 -
Stereo Audio System for Your iPod V11M11_IM_EN_01122007
www.i-Luv.com
- 7 -
TABLE OF CONTENTS
Getting Started
General features ……………………………………………………………………………………………………………………………………………...… 8
Installing the AC Power …………….……………………………………………………………..…………………………………………………………… 9
Installing the backup battery for clock and alarm settings ………………..……………………….………………………………………………………. 9
Installing the remote control battery ….....………………………………………………………………………………………………………….………… 11
Installing the AM loop antenna ………………………………………………………………………………………………………………………….…….. 11
Installing the dock adapter …………………………………………………………………………………………………………………………………….. 11
Location of controls on the main unit ……………………………………………………………………………………………………………….…...…… 12
Location of controls on the remote control …………………………………………………………………………………………………………………... 13
Location of indications on the LCD screen …...……………………………………………………………………………………………………………... 14
Operational Instructions
Setting the clock …….....……………………………………………………………………….………………………………………………………………. 15
Setting the alarm ………..………….………………………………………………………………………………………………………………….……..… 15
Using the alarm function ……..………………………………………………………………………………………………………………………………... 15
Adjusting the brightness of the LCD screen………………………………………………………………………………………………………………….. 16
Setting the sleep time ……………………….…………………………………………………………………………………………………………………. 17
Listening to your favorite radio stations …….………………………………………………………………………………………………………………... 17
Listening to your favorite songs on your iPod ..…….……………………………………………………………………………………………………….. 18
Listening to CDs/MP3-CDs…………………………………………………………………………………………………………………………………….. 19
Listening to your favorite music on a USB storage device…………………………………………………………………………………………………. 22
Using the AV out port to watch videos from your iPod on an external monitor or TV …….…………………………………………………………….. 22
Listening to other audio devices using the line-out port……………………………………………………………………………………………………. 24
Charging your iPod …………………………………………………………………………………………………………………………………………….. 24
BluePin Setup and operating Instructions ………………………………………………………………………………………………………..………….. 25
Maintenance & Troubleshooting Guide ……………………………………………………………………………………………………………..………….. 30
Specifications ……………………………………………………………………………………………………………………………………………………….. 33
Stereo Audio System for Your iPod V11M11_IM_EN_01122007
www.i-Luv.com
- 8 -
Congratulations on your purchase of the new iLuv i199 for your iPod. Uniquely designed to work with your iPod, this iLuv stereo audio system with built-in
universal dock provides advanced audio and radio performance that brings out the best in your music. Remember to keep this manual for future reference.
Maximize Your Enjoyment of the Music on Your iPod with the iLuv Stereo Audio System
Enjoy Wireless freedom with new BluePin
TM
adapter w/ Bluetooth Wireless Technology
Enhance the richness of your iPod sound with jAura
TM
acoustic speaker technology
Powerful built-in speakers allow you to hear music with depth and clarity
Watch your favorite videos on your TV if your iPod has the video capability
Digital clock display with dual alarm
Fall asleep or wake up to your iPod, CD, USB device, AM/FM radio, or buzzer
Charges your iPod
Integrated universal dock for your iPod
MP3 CD / Audio CD playback with ESP anti-shock system
Capable of playing MP3 files on USB devices, such as MP3 player, flash memories, etc
Auxiliary line input for 1
st
, 2
nd
and 3
rd
generations of the iPod and other audio devices
AM/FM radio with PLL digital tuning technology
External loop antenna provides better AM reception
Liquid crystal display with white backlight
Remote control included
What’s included?
BluePin
TM
Adapter
Stereo audio system
Remote control (Battery included)
Dock adapters
AM loop antenna
AV (3.5mm to RCA) cable
Instruction manual
Warranty card
Made for iPod with video (30GB, 60GB, 80GB), iPod nano (1
st
generation, 2
nd
generation), iPod mini, iPod 4G only.
Note: All iPod shuffle or other device users have to use the Line-In feature of i199 to listen to music stored on these players.
GETTING STARTED
Stereo Audio System for Your iPod V11M11_IM_EN_01122007
www.i-Luv.com
- 9 -
GETTING STARTED
IMPORTANT:
1. Occasionally, files on your iPod can become corrupted. This may cause an erratic behavior with your iLuv products. Apple Computer recommends that
you visit their website www.apple.com to obtain instructions on resetting or restoring your iPod to factory settings.
2. It is imperative that you use the correct dock adapter for your iPod and that the dock adapter fits appropriately into the built-in universal dock. Ignoring
these rules can cause severe damage to your iPod. Please refer to the section “Installing the Dock Adapter” to properly install the dock adapter before
operating the i199 with your iPod.
Using AC Power
Locate the AC power plug on the back of the unit. Insert the end of the supplied power cord into the wall outlet.
Installing the Backup Battery for Clock and Alarm Settings
In order to offer consistent clock settings and alarm functions, the i199 uses a Backup Battery system. This means that in the event of a power failure, all the
settings of the i199 will remain saved. For example, after the installation of the Backup Battery, the AC cord is disconnected or a power failure occurs, the
display will NOT remain lit, but the time and date settings will be temporarily maintained. The alarm, however, will not sound when the i199 is powered only
by the Backup Battery. To install Backup Battery, follow the instructions below:
1. Make sure the connection between the AC power supply and the unit is secure. This is important because during battery replacement it is possible for
all settings to be lost if the clock and alarm have already been set.
Stereo Audio System for Your iPod V11M11_IM_EN_01122007
www.i-Luv.com
- 10 -
GETTING STARTED
Installing the Backup Battery for Clock and Alarm Settings -Continued
2. Locate the battery compartment on the bottom of the unit and open.
3. Insert two (2) “AA” batteries, following the correct polarity (+/-) drawings inside the battery compartment. For longer battery life, alkaline batteries are
suggested. Please note that new and used batteries should not be mixed. Likewise, alkaline, standard (carbon-zinc) or rechargeable (nickel-cadmium)
batteries should not be used together.
4. Secure the battery compartment by closing the cover.
Important Notes on Batteries
To prevent battery leakage, which may result in bodily injury, property damage or damage to the unit, follow these instructions.
Install all batteries correctly according to the polarity (+/-) as marked on the unit.
Do not mix old and new batteries, carbon and alkaline, etc.
Remove batteries from the unit when the device will not be used for an extended period of time.
Please dispose the used batteries properly according to your local government regulations.
Stereo Audio System for Your iPod V11M11_IM_EN_01122007
www.i-Luv.com
- 11 -
GETTING STARTED
Installing the Remote Control Battery
The remote control battery is included. Before operation, please install it to the battery compartment of remote
control.
1. Locate the battery compartment on the bottom of remote control and open.
2. Insert a “CR2025” 3V lithium battery. Make certain to follow the correct polarity, following the directions of the
corresponding symbols (+/-) as marked.
3. Secure the battery compartment by closing the cover.
Installing the AM Loop Antenna
For AM radio operation, locate the AM antenna jack on the back of the unit. Plug the AM loop antenna into the connector. To achieve the best reception
possible, a distance of 12” between the AM antenna, the unit and the iPod is recommended.
Installing the Dock Adapter
To ensure that your iPod will fit properly into the built-in universal dock, several detachable dock adapters for old iPod players
are included with this product. Please check the bottom of dock adapters to determine compatibility with your iPod.
1. Inserting the dock adapter
a. Choose a dock adapter that corresponds with the iPod you would like to dock. Using the correct dock adapter
ensures a proper fit.
b. Gently push the dock adapter down into the universal dock.
c. Carefully place your iPod into the universal dock. Please note that iPod must not be in a case or “Skin”.
2. Removing the dock adapter
a. Remove your iPod, grasp the dock adapter and carefully lift upwards.
Stereo Audio System for Your iPod V11M11_IM_EN_01122007
www.i-Luv.com
- 12 -
GETTING STARTED
Location of Controls on the Main Unit
1. MULTI/DISPLAY 2. EJECT 3. iPod Dock
4. USB port 5. BluePin dock 6. ID3/ST.
7. Docking door OPEN 8. SLEEP 9. FUNCTION
10. VOLUME+/-( ) 11. Power ON/OFF/ Alarm off 12. SNOOZE/DIMMER
13. WAKE TO 14. FF/Up 15. STOP
16. FR/Down 17. PLAY/PAUSE PRESET 18. AM/FM
19. ALARM 1 20. ALARM 2 21. MEMORY
22. TIME SET 23. PLAY MODE 24. DOCKING DOOR
Stereo Audio System for Your iPod V11M11_IM_EN_01122007
www.i-Luv.com
- 13 -
GETTING STARTED
Location of Controls on the Main Unit- continued
25. AC Power cord 26. FM Antenna 27. Aux In Socket
28. AM Loop Antenna Socket 29. iPod AV Out Socket 30. Backup Battery Compartment
Location of Controls on the Remote Control
1. POWER 2. ALBUM +/-
3. PLAY/PAUSE PRESET 4. FR /Down
5. VOLUME +/- 6. MEMORY
7. SLEEP 8. FUNC
9. STOP/ AM/FM 10. FF/Up
11. PLAY mode 12. MUTE
Stereo Audio System for Your iPod V11M11_IM_EN_01122007
www.i-Luv.com
- 14 -
GETTING STARTED
Location of Indications on the LCD Screen
Stereo Audio System for Your iPod V11M11_IM_EN_01122007
www.i-Luv.com
- 15 -
OPERATIONAL INSTRUCTIONS
Setting the Clock
1. To set the time, locate the TIME SET button. Press and hold the TIME SET button down until the Time display begins to flash. Set desired hour by
using or control button on the unit. Once desired hour is selected, press the TIME SET button once more to set Minutes. Use or control
button until the desired time is displayed. (NOTE: AM / PM indicator displays are located on the left side of the time.)
2. To secure the time setting and move to next setting, press the TIME SET button which will set the time and move you to date setting
3. To set the correct month, you may use or control button until the desired month is displayed or press the TIME SET button to secure month
setting and move to next setting.
4. Use same method to set desired day/year.
5. Once these steps are complete, Press the TIME SET button to secure time and date setting.
Setting the Alarm
This unit supports dual alarm feature.
1. Press and hold either ALARM 1 or the ALARM 2 button until the display begins to flash. Use or control button until the desired alarm time is
displayed, press ALARM 1 or ALARM 2 button to confirm and enter to next setting.
(NOTE: AM/PM indicator displays are located on the left side of the
time.)
2. After setting the time, Use or control button and select the option for desired source for the alarm. Choose from iPod, USB, CD, AM / FM Radio or
buzzer. For AM/FM radio sources, you need to select the desired preset station.
3. Press ALARM 1 or ALARM 2 button to pre-set the volume level when the Alarm(s) is (are) activated. Use or control button to adjust the volume
level from 1 to 30. When the Alarm(s) is (are) activated, the volume will gradually rise from low to the pre-set setting.
4. Press the ALARM 1 or ALARM 2 buttons again to secure the setting and exit the alarm setting mode.
Notes: Make sure the alarm volume level set to desired level and the i199’s display has icon indicating alarm armed.
Using the Alarm Function
1. To preview the alarm setting, press Wake to Button and display will scroll through current alarm setting.
Stereo Audio System for Your iPod V11M11_IM_EN_01122007
www.i-Luv.com
- 16 -
OPERATIONAL INSTRUCTIONS
Using the Alarm Function –Continued
2. To activate or deactivate the alarm, press the ALARM 1 or ALARM 2 button once.
Notes: To preview alarm setting, the alarm must be activated before pressing Wake To Button.
3. To snooze, press the SNOOZE / DIMMER button on the i199, following the sounding of the alarm. The alarm will then shut off and will sound again in
approximately 9 minutes. You will have the opportunity to repeat this cycle many times during a 1 hour allotted alarm cycle.
4. To turn the alarm off, press the POWER button on the i199 (or the POWER button on the Remote Control). If all settings remain the same, the alarm
will turn on the following day at the same time. When the alarm is not turned off after it sounds, it will then play for approximately 60 minutes and turns
off automatically. This cycle will repeat every 24 hours unless the controls are changed.
5. To prevent the alarm from coming on daily, press the ALARM 1 or ALARM 2 buttons and set to off. The Alarm Icon will disappear.
Notes on Alarm Function:
Set your iPod to the repeat mode if you’ve selected Wake to iPod, and your iPod has less than one hour of songs.
If you have selected the Wake To iPod, CD or USB setting, yet no iPod, CD or USB is present at the alarm time, the i199 will automatically switch to
the BUZZER mode.
In the event of a power outage or if AC power is disconnected, when the i199 is powered by the Backup Battery, the alarm will NOT sound and time
and date will not be displayed. Time and date settings, however, will be temporarily saved.
All alarm functions will be activated in standby mode, if you already turned on the i199, alarm function will be deactivated.
Adjusting the Brightness of LCD Screen
To adjust the brightness of the LCD screen, press the SNOOZE / DIMMER button on the unit during normal or standby mode. Each press will change the
brightness level of the LCD screen.
Stereo Audio System for Your iPod V11M11_IM_EN_01122007
www.i-Luv.com
- 17 -
OPERATIONAL INSTRUCTIONS
Setting the Sleep Time
1. To enter sleep mode, press the SLEEP button while the i199 is on. The unit will automatically turn off after the selected time. The sleep mode also has
a feature called the “Gentle Sleep”, which gradually decreases the volume.
2. To adjust the sleep time, press the SLEEP button again and choose from 120, 90, 60, 30, and 15 minutes.
3. To view the sleep time, wait until the display returns to the current time and press the SLEEP button once. It will display the sleep time remaining. Press
again to change the sleep time to the next lowest increment.
4. To stop listening at any time, press the POWER button or the POWER button on the Remote Control.
5. To cancel the sleep setting, continuously press the SLEEP button until SLEEP icon disappears on LCD.
Listening to Your Favorite Radio Stations
For the best FM radio clarity, fully extend the pig-tail wire antenna, located on the rear of the i199. It is important not to alter, obstruct or attach other
antennas to this wire antenna. To achieve the best AM reception, a distance of 12” between the AM antenna, the unit and iPod is recommended. Rotate the
AM loop antenna to have the better reception.
1. To turn the radio on, press the FUNC button on the i199 (or on the Remote Control). Once on, the radio frequency
will appear in the lower right corner of the display.
2. To select AM or FM, press the FUNC button on the i199 or STOP/AM/FM on the Remote Control.
3. To tune in to a desired station, use or buttons on the i199 or use or buttons on the Remote Control.
4. To scan the next clear station, press and hold or buttons on the i199 or Remote Control for 4 seconds.
5. To adjust the volume, use
(VOLUME+) and (VOLUME-) on the i199 or and buttons on the
remote control.
6. To power OFF, press the POWER button (or the POWER button on the Remote Control).
Stereo Audio System for Your iPod V11M11_IM_EN_01122007
www.i-Luv.com
- 18 -
OPERATIONAL INSTRUCTIONS
Programming Preset Stations
1. Select AM or FM using AM/FM button on the i199 unit.
2. Tune to the desired station using or buttons on the i199 unit or remote control.
3. Select between Stereo or Mono by pressing ID3/ST button. (FM ONLY)
4. Press MEMORY button to start programming. You will notice flashing preset number next to station you’ve just selected.
5. Press MEMORY button again to store current flash preset station number (When MEMORY is pressed again the preset number will increase by one).
6. To assign preset station number use PRESET button and press MEMORY button again to store.
Note: Please note that FM has 30 presets and AM have 10 presets.
7. Display with read “STORED”, which indicates station setting has been saved and stored in the memory.
8. Repeat above steps to store other presets into the memory.
Listening to Your Favorite Songs on Your iPod
1. To listen to music, make sure that your iPod is in play mode.
NOTE: If the i199 fails to play or you do not hear any sound coming out from the unit, make sure your iPod is securely docked in the Built-In Universal
dock and press the PLAY/PAUSE button on the i199 or on the Remote Control for music play to begin.
2. To play music when your iPod is already in the dock and in the standby mode, press the PLAY/PAUSE button on the i199 or the PLAY/PAUSE button
on the Remote Control. When your iPod is in the play mode, an iPod icon will appear on the LCD screen of the i199.
3. To pause music, press the PLAY/PAUSE button during the play mode. To resume playback, press it again.
4. To adjust the volume, either use
(VOLUME+) and (VOLUME-) on the i199, or use the (VOLUME+) and (VOLUME-) buttons on the
remote.
5. To go to the Previous or Next track, use or button on the i199 or on the remote control. To search the current track using high speed rewind or
forward, press and hold or buttons while track is playing.
6. To power the unit off, press the POWER OFF button on the i199 or on the remote. Your iPod will continue to charge when left in the universal dock.
Stereo Audio System for Your iPod V11M11_IM_EN_01122007
www.i-Luv.com
- 19 -
OPERATIONAL INSTRUCTIONS
Listening to CDs/MP3-CDs
The i199 features a slide-in mechanism for easy loading and unloading
1. Press FUNC. button to select the CD mode.
2. Insert the MP3-CD/CD disc in the loading bay.
FOR CD
After a few seconds, the total playing time and number of tracks appear on the display.
FOR MP3-CD
After a few seconds, the total number tracks, album of MP3 and STOP appear on the display.
Note: Press EJECT button next to CD load bay, the MP3-CD/CD disc will be loaded or unloaded.
Playing the Entire Disc
1. Press Play / Pause (PRESET) button on the unit.
• Play starts with the first track.
• The display shows the current track number and its elapsed playing time.
• When all tracks have played, the MP3-CD/CD will stop and return to initial display.
2. To stop play, press STOP button.
3. To pause play, press Play / Pause (PRESET) button.
4. To resume play, press Play / Pause (PRESET) button again.
Selecting a Different Track during Play
1. Press or buttons until the required track number appears in the display.
2. MP3-CD mode only: Press ALBUM +/- button (on remote only) once or more to find your desired album.
  • Page 1 1
  • Page 2 2
  • Page 3 3
  • Page 4 4
  • Page 5 5
  • Page 6 6
  • Page 7 7
  • Page 8 8
  • Page 9 9
  • Page 10 10
  • Page 11 11
  • Page 12 12
  • Page 13 13
  • Page 14 14
  • Page 15 15
  • Page 16 16
  • Page 17 17
  • Page 18 18
  • Page 19 19
  • Page 20 20
  • Page 21 21
  • Page 22 22
  • Page 23 23
  • Page 24 24
  • Page 25 25
  • Page 26 26
  • Page 27 27
  • Page 28 28
  • Page 29 29
  • Page 30 30
  • Page 31 31
  • Page 32 32
  • Page 33 33
  • Page 34 34
  • Page 35 35
  • Page 36 36

iLuv i199 User manual

Category
Alarm clocks
Type
User manual

Ask a question and I''ll find the answer in the document

Finding information in a document is now easier with AI