Page is loading ...

Polaroid
Service
Centers
and Offices
Mexico
N4ichelmex
S.A.*
Apartado
Postal
+I
6-352
N¡exico
6
D.F.
Tel.:5761914
Nederland
Polaroid Neder and
Kant o
o
r:
De Boelelaan 32
1083 HJ
Amsterdam
Postbus 7949
1008 AC Amsterdam
Tel.:
020
-
46 201 1
Klantenservice
020
-
46 08 09
Reparaties:
Parallelweg 37b
7511 EE Enschede
New Zealand
Polaroid New Zealand
Lid
Augustus
House
15 Augustus Terrace
Parnell, Auckland 1
Tel.:71-682
Mailing
address
P.O. Box 37-046
Parnell
Auckland 1
Norge
Polarold
(Norge)
Ai S
lndustriveien 8B
Postboks
80
1473
Skárer
Tel.:
(O2)
70
4714
Ósterreich
Polaroid
Ges.m.b.H.
Postfach 66
Eitnergasse 1 3
1233
Wien
rel.:
(Q222)
86
43
46
Panama
Polaroid lnteramerican.
S.A.
P.O. Box 2167
Colon Free Zone
felr 47-7285
Puerto
Rrco
=a
z'a a a,,'::aa^
Corporation
a-.',-
'a-:'.',-
PatR
,:':
_a
__ai_
'.;a
-
=
aa a'.-
a,
:'a:::-:t:::
-
-
=-\
¿-:1
a1'.
-
z aaaaa
Schweiz/Suise/Svizzera
Poiarc d
S,¡gapore
(Pte)
Ltd
[4-4
The
Orchard
290 Orchard Road
Singapore I
Te
:
(65)
235'9611
lry'ai!ing
address:
Bax 22
Paslr
Panjang Post
OfJlce
Singapore 5
Sverige
Polaroid
AB
Ekholmsvágen
34
gox
204
127 24
Skárholmen
Tel.:
08/71 0 08
50
U.S,A.
Polarold
Corporation
Cambrldge ¡/ass..
02139
Tel.r
(61
7) 864-4568
Repai rs
89 Second Avenue
Waltham,
¡,4ass.
02154
Tel.:
(617)
890-1414
'
Authorized lndependent
Repair
Station
*
Centre de Réparation
lndépendant
Autorisé
'Polaroid'and'SX-70'are
trademarks of Polaroid
Corporat on Cambridge. Nrass.,
U.S.A
'Polaro¡d'et'SX-70'sont
des marques de
commerce de Po
aro d
Corporation,
Cambridge, Mass,
E.U. Printed in
U.S.A. / lmprimé aux E.U PX 1471
1At7A
Polaroid

English
Polaroid introduces
sonar focusing
-
the
ultimate in
One-Step
photography.
The instant
you
see
your
picture,
just
aim
and shoot. With
sonar
focusing,
the camera
sets the lens instantly,
automatically.
How
sonar focusing works
As
you
begin to
press
the
shutter button,
your
camera releases
sound waves to the
central
part
of the scene.
The frequencies
are far beyond
our
range
of hearing
and travel at l-:
speed of sound.
The
split second it takes for the
sound to reach
your
subject and tl'.
echo to return is fed
into a tiny
electronic computer inside
the
camera.
The
computer uses this
time measurement
to calculate the
distanc:
between the camera lens
and
your
subject, then
signals a motor tc
turn the lens
until
your
subject is
in sharp focus.
This
extraordinary chain of
events takes
place
in less than
1/3 of a
second.
.,.
:,.:
lr
,t
i.
MA
I
q
I
AE___]
.ti .l,t ,,:
YA,
A
I
+t
(.fJ__l
li
English
Features
o
Automatic
and
precise
focusing
in
any light,
even
total
darkness
o
Built-in
"use
flash
or tripod',
indicator.
o
Pictures
from
g0
cm/3
feet
to infinity
(flash
to 4
mtl2feet).
o
Can
shoot
as fast
as
every
1 .S
seconds.
o
3-element,
114
mm lens.
o
Variable
aperture
from
f/9.S
lo
f 124.
o Variable
shutter
speed
from
1/1g0
of
a second
to
1 second.
o
Flash
in
daylight
to
eliminate
shadows.
.
Automatic
time
exposures
to 1
second.
Camera
Parts
A Lens
B
a
D
E
F
G
H
I
J
K
L
N4
N
o
(3-element,
114
mm,
f/9.5)
Transducer (sends.
the
sound
waves
and receives
the
echo)
Shutter
button
Cable release
socket
Film
door
latch
Film
door
Film
shade
(shields
the
film
from
light;
if
it does
not
roll
back
after
the film
is
ejected,
genily
lift
its
front
end)
Picture
exit
slot
Electric
eye
Sensor
(for
the
"use
flash
or
tripod"
indicator)
Lighten/Darken
control
Focus
switch
Socket for
a future
accessory
FIashBar
socket
Viewfinder
"Use
flash
or
tripod"
indicator
Neckstrap
Tripod
socket
Thumb
grip
Picture
counter
(goes
to 1O
when_you
load
a new
or
parfly
used
film
pack
into
the
cámera,
counts
down
to
show
how
many
pictures
are
left)
P
o
R
S
T

English
English
Film and
flash
Your
camera
uses
Polaroid
SX-70
Land
film, and
FlashBars.
Each
r
-
oack orovides
ten color
pictures
and contains
a battery
that
powe-
ihe cámera.
Each
FlashBar
has ten
bulbs.
You will
never
waste
a flash
or
film with
this
camera
lt will not
let
a
bulb
fire
when a
fllm
pack
is empty
and
will
not take
a
picture
whe'
áll
the
bulbs on
the side
of
the
FlashBar
facing
the subject
have
bee'
fired.
Your camera
also
finds
the
next
good
bulb
in a
partly
used
FlashBar.
To
load
the film
Push
the
latch
(1,
A)
f
orward.
The
f ilm door
will
drop open.
Hold
the
film
pack
by
its edges
only.
Push
the film
pack
irito
the óamera
until
the narrow
strip
(1,
B)
snap:
open.
ilose the
film
door.
The camera
will
immediately
eject
the
film cove'
To remove
an empty
pack,
pull
the
yellow
tab.
To hold
the camera
Grio it
firmlv
in the
palm
of
your
left
hand.
Pla'ce
your
i¡ght
tnümn
on
the
thumb
grip,
index
f.inger on
the shutte-
button,
and
curl
the
other
fingers
into
your palm
(2)'
Never
put
your
tingers
¡n front
of the
picture
exit
slot.
Look
through
the
viewfinder
eyepiece.
Be sure
you
can
see
all four
corners
of
the
image
area
inside.
To
take
the
Picture
Soueeze
the
shutter
button.
The camera
automatically
sets
the
lens
Hóld
the camera
steady
until
the
film
is ejected
(3).
nemore
and
handle
thé
developing
picture
by
its wide
white
border
Use flash for
most indoor
pictures
lnsert
a FlashBar into
the FlashBar
socket
(4).
Always
do this
with
the
camera
pointing
away from
you.
You
can take flash
pictures
of
subjects
(90
cm-4m/3
-12
feet)
from
the
camera
(no
more, no less).
Yo_u-will
get particularly
good
flash
pictures
of
people
when
they
are
1 .2-2m
(4-6
feet)
away
and near
a colorful
background.
Flash
pictures
should
not be taken
where
the atmosphere
contains
gases
or dust that may
be ignited
by a spark.
The
"use
flash
or
tripod"
indicator
When
you
are not using
flash,
a red light
may appear
under
the
view-
finder
(5)
as
you
begin to
press
the
shutter
button.
It
warns that
the lighting
on the
scene is not
bright
enough for
picture
taking
without
a tripod or
other firm
support.
Release
the shutter
button.
Use flash or
place
the
camera
on a tripod
for
a time
exposure.
You
can use flásh in
daylight
This
feature,
called
"fill-flash",
can
correct lighting
situations
that
might
otherwise
produce
disappointing
results.
Aithough
you
can
use
"fill-flash"
when
your
subjects
are
90 cm-4
m
(3-12
feet) from
the camera
(no
more,
no less),
you
will
get
particular-
ly
good
results
when they
are 1.2-2m
(4-6
feet)-away.
Here
is how
"till-flash"
can help in
daylight:
l¡
strong sunlight,
flash
can fill in harsh
facial
shadows
with
even,
flattering
light.
ln
bright sunlight,
your
subject
may be forced
to
squint.
Take
your
subject
out
of
the
direct
sunlight
and use flash.
Whén the
sun.is behindyour
subject
(but
not
shining
direcfly into
the
lens)
your
subject usually
will be
too dark in
the
picture.
"Fill:flash,,
can
provide
the
added light
your
subject
needs.

English
lndoor flash hints
Watch the background
To
assure
that it will
be
well
lit by the flash, the
background should
:
=
colorful and near
your
subject.
When the background is
dark, or beyond the flash range,
it will be
::
-
dark in the
picture.
To avoid a flash reflection
When shooting toward
a
reflective
object or background
(mirror,
window,
eyeglasses, etc.), stand to
one side of
your
subject
and
shoot
from
an angle to avoid a flash reflection in
the
p¡cture.
However, when the reflective
surface is smooth and flat
and
is
the
central
part
of
your
main
subject
(glass-enclosed
art,
wall
hanging,
etc.), shoot¡ng at an angle may
cause the sound waves to reflect
away
f rom the
camera. lf this happens, the lens will
be set incorrect
and
your picture
may
be unsharp.
To avoid this,
you
can set the lens manually
(see
To set the lens
manually).
Ar r
ange
gr
ou
ps
c aref u I ly
All the
people
in a
group
should be about the same distance from th:
camera. Then
everyone
will
be lit evenly by the flash.
Picture hints
.
Outdoors,
in
bright sunlight, stand
so
the
sun is behind
you
or to
the side.
. Move in close. You will
get particulary good
results when
your
subject
is
about 1.2-1.5 m
(4-5
feet) from
the ca,nera.
o
Bright sunlit days are especially suitable for act¡on
pictures.
Your
camera's shutter will work at top
speed, stopping all but extremely
fast
action.
For best results,
have
your
subjects move toward
you.
rather than
across
the
picture.
o
Watch
the background. lt
should complement
your
subjects, not
distract from them. Keep it simple.
Time
exposures
Your
camera
can make
automatic
time
exposures
up to
one
second.
Kee.p
the
camera
sleady py
ptacing
it
on
á
firm
sup[ort
-
a tripoO
iJ
best
-
and
use the Polaroid
Cable Release
To
take the
picture,
hold
the
cable
release
button
down
until
the
film
is
ejected.
For
best results
indoors,
stand
so bright
lights
are
behind
you
or to
the
side.
Tips
on outdoor
lighting
Outdoors,
your
camera's.electric
eye
controls
the
lens
opening
and
shutter
speed to
let
just
the
right
amount
of light
reach
tñe filmi.
The
electric
eye works
best
when
the
scene
ié
evenly lit.
It
can
be
"fooled"
by
uneven
lighting
as described
below.
Bright
backgrounds:
When
a bright
background
is
a large
part
of
the
scene
and reflects
more light
than
your
subject,
the
elettiic
eye
séti
the.camera
for
the background,
caúsing
yoúr
subject
to
appeártoo
-
dark
in the
picture.
ln
th¡s
situation,
either
.
move
closer to
your
subject
to reduce
the
effect
of the
back-
ground;
or
o
turn
the
Lighten/Darken
control
toward
Lighten
(6,A)
to lighten
your
subject.
Dark
backgrounds;
When
a dark
background
is
a large
part
of the
scene
and reflects less
light
than
your
subject,
the
electric
eye will
again
set the
camera for
the background.
Now,
your
subject
may
appear too
light.
This time,
either move
closer
to
your
subject
or
set the Lighten/-
Darken
control toward Darken
(6,
B) to darken
your
subjeót.
English

English
English
11
To set
the
lens
manually
A few
special
situations
call
for setting
the
lens manually:
o When shooting
straight-on
through
glass,
it
will block
the sound
waves
from reáching
your
subject.
The
lens
will focus
on the
glass
and
your picture
maÍ-be
unsharp.
Screens
or bars could
cause
the
same
result.
o
When
shooting
at an
angle
toward a
flat, smooth
surface
(glass-
enclosed
art, wall
hanging,
etc.),
the sound
waves
may
reflect
away
from the camera.
lf this
happens,
your
picture
may be
unsharp.
fo set
the
lens manually;
Set
the
focus switch
(7,
A) to
the manual
position.
Then estimate
the camera-to-subject
distance
and
turn
the manual
focus
wheel
(7,
B) until
that distance
is opposite
the
white
polnter
(7,
C).
The
yellow
broken
line shows
your
camera's
flash range:
90 cm-4
m
(3-12
feet).
When
you
have
finished using
the
manual
focus
system,
remember
to flip
the focus
switch
back
tc the automatic
position.
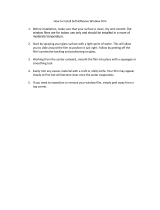
Picture
problems
and
the¡r solutions
Repeated
spots;
lf a repeated
spot
or bar
pattern
appears
on the
oiiture,
the
rollers inside
the camera
need cleaning.
it is best
to check
the
rollers each
time
you
load
film.
To clean
the rollers:
ln
dim light, open
the
film door
and
rotate the
rollers
(8,
A).
Remove
any specks
of
dirt with
a clean,
lint-free
cloth,
moisteñed
with water
if needed.
Check
the
raised ends
(8,
B) on the
top roller;
dirt can
collect
there
too.
Part of the
picture
is fogged;
White areas
on
the
picture
mean light
reached
the film
beforé1he
picture
was
taken.
This can
happen
when
you
remove and
reinsert
a f
ilm
pack
in the
light. The
top.picture
will
álways
be fogged;
others
may be
fogget
in one
corner.
lt is best
to
remove
and
reinsert
a film
pack
in dim
light.
Part of the
picture
rs missing: This happens
when
you
damage the
film
by squeezing the
pack
above and below the
yellow
tab. As
you
load
the camera, remember to hold the film
pack
by its
edges.
Causes
oÍ
luzzy
pictures
o Moving the camera during
picture
taking. Hold
the camera
steady
until the film is ejected from the camera.
o Taking
a
p¡cture
in
dim
light.
When the red light
appears in the
viewfinder, remember to use flash
or
a tripod.
o
Shooting
through
g/ass.
The
glass
will block the
sound waves from
reaching
your
subject and the lens will focus
on the
glass.
Set
the
lens manually.
.
Forgetting lo reset the
focus
switch to the automatic
position
after
setting
the lens manually.
o
The sound
waves str¡k¡ng
a
foreground
object and not reach¡ng
your
subiect
As
you press
the
shutter button, the sound waves travel to
the central
part
of the scene. Be
sure they
have
a clear
path
to
your
subject.
o
Shooting at an
angle toward
a smooth,
flat
surface. The sound
waves will reflect away from the
camera. Set the lens manually.
o Your
subject
was
c/oser fo the camera than 90
cm
(3
teet).
o Your
subject
moved
during
picture
ta4ng.You will
get
the
best
action
pictures
when
your
subject is moving toward
you,
rather
than
across the
picture.
Camera
problems
and their
solutions
It
the camera does not eject the film
cover:
1. Press the
shutter button. lf the cover ¡s not
ejected, in dim light
remove
the
film
pack,
then reinsert it.
2. lf the
cover still is not ejected, remove the
pack (its
battery
may
be dead) and insert a new one.
lf
the film is not ejected when
you
press
fhe shutter button:
1.
Check the
picture
counter; the film
pack
may be empty.
2. Check the FlashBar.

English
3.
ln dim
light,
pull
the film
pack
out"
Reinsert the
pack.
The film
should
come
out
when
you
close the door.
lf the top
piece
of
filr
is
pushed
forward when
you
reinsert the
pack, pull
that
piece
ou:
Then, close
the
door.
4. lf the above
fail to
get your
camera
working, insert a new film
pac«"
The battery in the
first
pack
may be dead.
lf the lilm
cover
or
film is
ejected only
part
way:
1. Release
the film shade so
it
snaps back.
2.
ln dim light, open
the film door
and
pull
the cover or
film
out.
3. lf the camera still
does not work
properly,
remove the film
pack
(its
battery
may be weak) and
insert a new one.
lf these
remedies fail to
get
the camera operating,
call Customer
Service
at the nearest
Polaroid Off¡ce.
Care
of
your
system
The camera
Treat
your
camera
with
care.
Rough handling
may damage delicate
parts.
The lens and viewfinder will seldom
need cleaning.
lf they do,
blow off any
dust, then wipe them
gently
with a clean,
lint-free
cloth,
From
time to time clean the
rollers inslde the film door
with
a similar
cloth,
moistened with water if
necessary.
The tilm
Polaroid SX-70
Land film, like all
film,
should
be kept cool. lf
possible.
store
below 24"C
(75"F).
For longer storage,
keep
below
18oC
(65"F).
ln
its
sealed
box, the film can be
refrigerated
(not
frozen).
Let
it reach room temperature before
using it. This will take at
least
an
hour.
To
preserve
its
freshness, keep the film sealed
in its
protective
box
until
ready for use.
Then, take the same care of a
loaded camera as
you
do of
your
film. Keep the camera
in a
cool
place
(but
not
a
refrigerator).
English
The
pictures
When
your
SX-70
picture
comes out of the
camera, handle it
by
its
wide white
border.
Do not
bend,
crush, or
fold
the
picture.
Do not
cut
the
picture's
borders, this can ruin the
picture.
The
brilliant
pictures
made with
your
SX-70 system are
among the
most
stable and resistant to fading
ever known in
photography.
Fingerprints
on
your pictures
can be
easily
removed.
Simply
"mist"
ihe
surface with
your
breath, then lightly
polish
with a tissue
or a soft
clean
cloth.
Electronic
flash
Your
camera
was designed to
use FlashBars and with
a FlashBar it
will
produce
well
exposed
pictures
over the full flash range
from
about 90 cm-4 m
(3-12
feet).
Because of the
special electronic circuitry in
your
camera, an
electronic flash unit must have matching
electronic
characteristics
in
order to
give good picture
results with this
camera.
See
your
Polaroid
Customer Service office for information
on
electronic flash
units
designed
to work with
your
camera.
Electronic
flash units other than those recommended
by Customer
Service may not
give
consistently
good
results
and may
cause
your
camera to malfunction-
There is
a
general
rule that applies to
any electronic flash
unit. lf
you
get
poor p¡cture
results with it,
try a FlashBar. lf
you
get good
pictures
with
a
FlashBar,
but not with
electronic flash, the
cause of
the
problem
is the
electronic
flash,
not the camera
or the film.
To obtain information and
help
lf
you
are unable to
get good
pictures,
review
this instruction
book.
lncorrect
operation of the camera may be the
cause. lf
you
need
further
help, and before
you
return
your
camera for repair,
please
see
your
dealer or contact the nearest Polaroid
Office. lf
you
write
about
a
problem, please
state the
camera
model,
explain the
problem
and,
if
possible,
enclose sample
pictures.
lnclude
your
return
address.
13

Accessories
o Polaroid
Cable Release
2327
o Polaroid 138
Carrying
Case
o Polaroid
SX-70 Photo Album 129
For information,
see
your
dealer or
contact the
nearest
polaroid
Office.
Gopies and enlargements
the nearest
Polaroid
Office.
Beautiful
popies
and
enlargements
can be made
f rom
your
favorite
SX-70
piciures.
For
copy service information,
contact
your
dealer c
!t
English
'4
Warranty
'
'
lf
this
eamera
proves
defectlve
wjthin threE
years
of the
original
purchase
date;
we wil,l repair
or,
at:oúf
option; replace
it free of
charge. We
will
make
no
charges for labor;servise.or
parts:
We
will
also
supply
one
pack
of film,,to
r.eplace:pictures
spoiled
before the defect
was identified.-This
warranty
does
not
cover
damage caused by
accident, misuse
or tamper:ingtwith
the
eamera.
Repairs to corl'ect
such damage
will be made
at
a
reasonable char§e.
.
To take
advantage
of this
wa(anty,-the
camera
must be
.
returned to,
and
repaired
by,
one of the
P¡faroid
Service
Centers.
I'.
.
.
:.
The above:-warranty
and
provisions
do not
affect
your.statutory
rights.
/