Page is loading ...

ZonePrint
http://www.suncourt.com/ZoneMasterPrint.html[1/16/2012 3:22:55 PM]
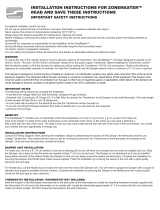
INSTALLATION INSTRUCTIONS FOR
ZONEMASTER™
READ AND SAVE THESE INSTRUCTIONS
IMPORTANT SAFETY INSTRUCTIONS
For general ventilation control use only.
Do not use to control the flow of hazardous, corrosive, flammable or explosive materials
and vapors.
Never expose this product to temperatures exceeding 140°F (60°C).
Always leave this product accessible for maintenance, cleaning and repair.
Before installing or servicing this product, switch power off at the service panel
and lock service to prevent power from being switched on accidentally.
Suncourt® Inc. assumes no responsibility for the installation of the ZoneMaster™.
Suncourt® does not provide electrical connection information beyond what is provided
herein.
If in doubt, contact a competent contractor.
For your safety and protection follow all instructions and adhere to applicable building and
electrical codes.
WARNING
To reduce the risk of fire, electric shock or injury to persons, observe all instructions. The
ZoneMaster™ has been designed to operate on 24 Volt AC, 60 Hz. The only 110/120 Volt
AC connection needed is for the power supply Transformer. Before installing the
Transformer, confirm that the electric power is off at the junction box where you will be
making the Transformer 110/120 Volt connections. Observe the following clearance to
combustible materials or surfaces: For both the Transformer and the Damper electric motor:
a minimum of 4” (10 cm) is required.
This damper is designed to control the flow of heated or cooled air in air distribution
systems only. Never close more than 20% of the air ducts leading to registers. The restricted
airflow through a furnace or central air conditioner may cause failure of that equipment.This
damper must never be used to control the flow of combustion air, flue gas or other toxic or
hazardous gases or applications where failure of the damper can cause damage to persons,
property or equipment and/or create a risk of fire, suffocation or death.

ZonePrint
http://www.suncourt.com/ZoneMasterPrint.html[1/16/2012 3:22:55 PM]
IMPORTANT NOTES
The following will be required to complete the installation:
• A standard low voltage Heat-Cool wall thermostat, designed for gas furnaces.
• Electrical wire, 2-conductor, 20 Gauge (CL-2 or Bell Wire) to connect the Transformer to
the Damper via the wall
thermostat. If the total length of wire exceeds 80 feet (25 m), use 18 Gauge wire.
• A cover plate with knockout for the electrical box that the Transformer will be mounted
on.
• If you are mounting the Damper between floor joists in flexible duct, you will need two
duct supports.
• Duct tape.
BENEFITS
The ZoneMaster™ will allow you to individually control the temperature of a room in your
home. e.g. An unused room does not have to be heated or cooled to the same temperature
as the remainder of the home. In the winter you may want a bedroom a little cooler than the
rest of the home. The baby’s room you may want a little warmer than the rest of the home
in the summertime. You control your comfort and save significantly on energy use.
INSTALLATION INSTRUCTIONS
Consult the Wiring Diagram when planning the installation. Begin by determining the
location of the Damper, the thermostat and the Low Voltage Transformer. Then determine
the route you will be running the wires from the Transformer to the thermostat and onwards
to the Damper. Once you have this planned, proceed as follows.
DAMPER UNIT INSTALLATION
For metal duct, remove a 6” (15 cm) section of duct at an existing joint so you will have
one crimped duct end and one straight duct end. Slide the Damper unit in place so that the
ends are inserted at least 1” (2.5 cm) at each end. The Damper is non-directional so it may
be installed facing either direction of the airflow. Rotate the Damper so that you can easily
access the electric terminal block. Complete the installation by securing the Damper with
the #6 sheet metal screws supplied. Then wrap each joint with a good quality duct tape to
avoid air leakage.
For flexible duct, cut the flexible duct and slide the ends over the ends of the Damper unit.
You will need to support the Damper with a couple of standard duct supports available at
Home Centers. Finish the installation by wrapping a good quality duct tape over the seams
at both ends of the Damper to minimize air leaks.
THERMOSTAT INSTALLATION: (THERMOSTAT
NOT INCLUDED)
Mark the location of the thermostat mounting hole in the
back plate of the thermostat and install the fastening

ZonePrint
http://www.suncourt.com/ZoneMasterPrint.html[1/16/2012 3:22:55 PM]
hardware normally supplied with the thermostat. Do not
mount the thermostat on an outside wall. Locate the
thermostat approximately 5’ (1.5 m) above the floor and
away from drafts and direct sunlight. DO NOT screw the
thermostat to the wall at this time.
Transformer installation:
IMPORTANT WARNING: Locate the breaker on your
house power panel that controls the 110/120 Volt AC
supply to the wires in the junction box that you selected
to mount the Transformer on. Use a voltage detector,
voltmeter or other suitable instrument to make sure that
all power to that junction box is OFF. Identify an existing
wiring junction box near the location desired. Verify that
the correct wires are available in this box. There needs to
be: Black wire (line or hot), White wire (neutral) and a
Green or bare copper wire (ground). The cover plate of
that junction box must have a “knockout”. This
“knockout” must be removed to make the hole for the
stud of the Transformer to mount through. Thread the
Transformer leads through the hole and securely mount
the Transformer to the cover plate. Tighten the nut snug
only.
WARNING: Over-tightening will break the plastic stud of the Transformer. DO NOT
connect the Transformer wires at this time.
Low voltage wiring:
Refer to the wiring diagram below for electrical connections. It is recommended that you
leave at least 1’ (30 cm) of slack wire at each component wired to ease future servicing.

ZonePrint
http://www.suncourt.com/ZoneMasterPrint.html[1/16/2012 3:22:55 PM]
1. Run one wire from either Transformer low voltage
terminal to either terminal on the Damper.
2. Run one wire from the other Transformer low voltage
terminal to the terminal marked “R” on the thermostat.
3. Run one wire from the other terminal on the Damper
to the terminal marked “W” on the thermostat.
4. Connect the terminals “W” and “Y” on the thermostat
together with a short piece of wire (jumper).
THE WIRING IS NOT POLARITY SENSITIVE.
CONNECT EITHER SCREW ON TERMINAL
BLOCK OR TRANSFORMER.
The final steps:
Screw the thermostat to the wall. Connect the Transformer 110/120 Volt wires
inside the junction box. See IMPORTANT WARNINGS above!
Connect the GREEN wire from the Transformer to the GREEN or bare copper
wire inside the junction box.
Connect either of the BLACK wires of the Transformer to the WHITE wire
inside the junction box.
Connect the remaining BLACK wire of the Transformer to the BLACK wire
inside the junction box.
Place the cover (with the Transformer mounted to it) on the junction box,
making sure that no wires are pinched between the cover and the junction box.
Now review your installation. If you are positive that everything has been

ZonePrint
http://www.suncourt.com/ZoneMasterPrint.html[1/16/2012 3:22:55 PM]
installed safely and securely, you may turn on the breaker on your house power
panel.
MAINTENANCE
Suncourt® recommends that you clean your damper at regular intervals to keep
it free from lint, dust and debris. The damper must never be exposed to
temperatures over 140°F (60°C).
OPERATING INSTRUCTIONS
1. Set the switch on the thermostat marked ‘ON-AUTO’, ‘ON-OFF-AUTO’,
‘ON-OFF’ or similar wording, to the ‘ON’ position.
2. Heating Season: Set the thermostat to ‘HEAT’. Then adjust the thermostat to
the chosen temperature (e.g. 55°F). As long as the temperature in the room is
55°F or higher, the damper will be closed. If the temperature in the room falls
below 55°F, the damper will open.
3. Cooling Season: Set the thermostat to ‘COOL’. Then adjust the thermostat to
the chosen temperature (e.g. 85°F). As long as the temperature in the room is
85°F or lower, the damper will remain closed. If the temperature in the room
goes higher than 85°F, the damper will open.
THREE (3) YEAR WARRANTY
Subject to the following limitations, Suncourt® Inc. (manufacturer) warrants
that the ZoneMaster™ will, for 3 (three) years from date of original retail
purchase, remain free from appearance of defects in workmanship or materials.
This warranty is subject to the following limitations: (a) manufacturer’s liability
is limited to the replacement or repair of the unit, as decided by the
manufacturer; (b) a defective unit must be returned, prepaid, with proof of
purchase, to the point of purchase or as instructed below; and (c) this warranty
does not apply to defects resulting from the alteration, abuse, accidental
damage, unauthorized repair or misuse of the unit. This warranty is given in
lieu of all other warranties, guarantees and conditions on manufacturer’s part,
and the manufacturer shall have no tortious or other liability in respect to this
ZoneMaster™.
Actual product appearance may differ from illustrations.
Suncourt reserves the right to modify any or all of its products’ features,
designs, components and specifications without notice.
SUNCOURT INC.
500 W. SECOND AVENUE
P.O. BOX 40
DURANT, IOWA 52747-0040
1-800-999-FANS (3267)
Copyright 1998-2007 Suncourt Inc. All Rights Reserved

ZonePrint
http://www.suncourt.com/ZoneMasterPrint.html[1/16/2012 3:22:55 PM]
/
