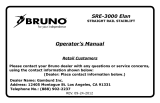
REV. 08-16-2010
CRE-2110
ELECTRA-RIDE™ III
STAIRWAY ELEVATOR
Operator’s Manual
Retail Customers
Please contact your Bruno dealer with any questions or service concerns,
using the contact information shown below:
(Dealer: Place contact information below.)
Dealer Name:
Address:
Telephone No.:
Dealer Name: Gamburd Inc.
Address: 12405 Montague St. Los Angeles, CA 91331
Telephone No.: (888) 902-2237

©2010,2009 Bruno Independent Living Aids, Inc.® CRE-2110 Operator 08-16-2010
2
PRODUCT REGISTRATION FORM
Bruno is pleased to provide you with this
mobility-enhancing product.
The Product Registration Form is shipped in
a plastic bag with this manual. It is very
important that you ll out and return this
form at your earliest convenience so that we
may complete the warranty registration process
for your unit.
The serial number is found on labels afxed
to the manual, as well as on the unit itself.
Serial and model numbers must be provided
when ling a warranty claim, requesting service
or ordering parts. We encourage you to keep
this information readily available at all times.
Please Note: The warranty for the CRE-2110
Stairway Elevator is rendered null
and void if the unit is installed by
anyone other than an authorized
Bruno dealer.
Best wishes from the Bruno Team.
Product Registration Form
Please print in
CAPITAL
letters.
*First Name ______________________________________________________ M.I._____
*Last Name _______________________________________________________________
*Street Address ________________________________________________ Apt. No._____
*City _____________________________________________ *State/Province _________
*Zip/Postal Code ___________________________________________________________
Email Address _____________________________________________________________
Telephone No. _____________________________________________________________
Date of Purchase (mm/dd/yy) _________________________________________________
Model No._________________
*Serial No._________________
Please be assured that Bruno does not share or sell the information you provide.
©2007,2005 Bruno Independent Living Aids, Inc.®
Please rate your satisfaction with your Bruno dealer:
excellent good average poor
Please rate your satisfaction with your Bruno product:
excellent good average poor
Bruno reserves the right to use information indicated on this form in its online, video, audio and printed
materials. Names will be abbreviated to ensure the privacy and anonymity of the individual.
Online registration available at http://www.bruno.com/warranty.html
P/N PROD REG STD
Rev. 04-01-07
* = required fi eld
SAMPLE

©2010,2009 Bruno Independent Living Aids, Inc.® CRE-2110 Operator 08-16-2010
3
Table of Contents
Regulatory Information and Specications . . . . . . . . . . . . . 4
Safety . . . . . . . . . . . . . . . . . . . . . . . . . . . . . . . . . . . . 5-6
Parts of the CRE-2110 . . . . . . . . . . . . . . . . . . . . . . . . . . . 7
Circuit Breaker . . . . . . . . . . . . . . . . . . . . . . . . . . . . . . . . 8
Seating . . . . . . . . . . . . . . . . . . . . . . . . . . . . . . . . . . . . . 9
Operation . . . . . . . . . . . . . . . . . . . . . . . . . . . . . . . . 10-21
Standard Swivel Seat . . . . . . . . . . . . . . . . . . . . 10-11
Power Swivel Seat. . . . . . . . . . . . . . . . . . . . . . . . . . 12
Optional Mid-Park Position. . . . . . . . . . . . . . . 13-14
Power Footrest . . . . . . . . . . . . . . . . . . . . . . . . . . . . 15
Folding Rail . . . . . . . . . . . . . . . . . . . . . . . . . . . 16-17
Optional Power Folding Rail . . . . . . . . . . . . . . 18-21
Diagnostic Codes . . . . . . . . . . . . . . . . . . . . . . . . . . . . . . 22
Charging . . . . . . . . . . . . . . . . . . . . . . . . . . . . . . . . . . . 23
Battery Charger. . . . . . . . . . . . . . . . . . . . . . . . . . . . 24-25
Maintenance/Transmitter Battery Replacement . . . . . . . . . 26
Troubleshooting. . . . . . . . . . . . . . . . . . . . . . . . . . . . 27-28
Vacation and Long-Term Storage . . . . . . . . . . . . . . . . . . . 29
Warranty . . . . . . . . . . . . . . . . . . . . . . . . . . . . . . . . 30-31

©2010,2009 Bruno Independent Living Aids, Inc.® CRE-2110 Operator 08-16-2010
4
FCC REGULATIONS
This equipment has been tested and found to comply with the limits for a Class B digital
device, pursuant to Part 15 of the FCC rules. These limits are designed to provide
reasonable protection against harmful interference in a residential installation. This
equipment generates, uses, and can radiate radio frequency energy, and if not installed
and used in accordance with the instructions, may cause harmful interference to radio
communications. However, there is no guarantee that interference will not occur in a
particular installation. If this equipment does cause harmful interference to radio or
television reception, which can be determined by turning the equipment off and on, the
user is encouraged to try to correct the interference by one or more of the of the
following measures:
• Reorient or relocate receiving antenna.
• Increase separation between equipment and receiver.
• Consult your dealer.
SPECIFICATIONS
Weight Capacity: 400 lbs. (181 kg)
Control: constant pressure (armrest and two remotes)
Maximum Incline: 45 degrees
Seat Swivel: 0, 60 and 90 degrees at top
Power Supply: 24VDC battery charger powered by 120V outlet

©2010,2009 Bruno Independent Living Aids, Inc.® CRE-2110 Operator 08-16-2010
5
FOR YOUR SAFETY
• Read and understand the operating instructions, and all safety precautions prior to
using the CRE-2110.
• Be sure stairs are clear of objects before operating the stairway elevator.
• Always be aware of the surface onto which you are stepping as you get on and off the
stairway elevator.
• Avoid carrying items with you on the stairway elevator which could hinder movement
of the elevator up and down the stairs.
• Do not wear LOOSE clothing that could interfere with elevator movement.
• Fasten your positioning belt before operating the stairway elevator.
• Make sure the seat is locked in the correct riding position.
• Be certain the seat swivel is locked in place before attempting to get on or off the
stairway elevator.
• NON-AMBULATORY USERS: Bruno recommends carrying a cellular or cordless
telephone or an emergency communication device when riding the stairway elevator
while alone in the house.

©2010,2009 Bruno Independent Living Aids, Inc.® CRE-2110 Operator 08-16-2010
6
FOR YOUR SAFETY
Each stairway elevator is designed to travel down the stairway at a slightly slower speed
than is the case when travelling UP.
The footrest is equipped with obstruction sensors which stop the carriage if an obstacle is
encountered on the stairs.
If this should occur, press the opposite side of the UP/DOWN rocker control switch (on
the armrest) to run the carriage in the opposite direction. Clear the obstacle from the
stairway or rail then resume travel in the desired direction.
Your CRE-2110 is battery powered and will continue to operate for some time during a
power outage. The length of operation will depend on the battery condition, the length of
the stairs and the weight of the rider.
Only in the event of a prolonged power outage (more than one hour) will it be necessary
to turn the power off (circuit breaker switch on the carriage) and unplug the charger from
the wall outlet to conserve battery charge.
The power swivel seat option is equipped with current overload sensing to prevent
further seat swivel if a jam is detected.
The power footrest option is equipped with current overload sensing that will cause
the footrest to return to its last position if a jam is detected.

©2010,2009 Bruno Independent Living Aids, Inc.® CRE-2110 Operator 08-16-2010
7
CRE-2110
armrest
positioning belt
UP-DOWN
rocker switch
swivel release
handle
footrest lever
obstruction
sensors

©2010,2009 Bruno Independent Living Aids, Inc.® CRE-2110 Operator 08-16-2010
8
CIRCUIT BREAKER
The CRE-2110 includes an ON/OFF switch
with a built-in circuit breaker.
The circuit breaker protects the battery,
controller and motor circuits in the stairway
elevator carriage.
It is unlikely that this circuit breaker will trip
during normal use. However, if the elevator
becomes inoperative, check the circuit breaker
as a rst troubleshooting step. Reset it, if
necessary.
Possible causes of circuit breaker tripping:
• foreign object jamming the rail or gear
rack;
• exceeding the rated weight capacity of the
stairway elevator.
ON/OFF switch
with built-in
circuit breaker

©2010,2009 Bruno Independent Living Aids, Inc.® CRE-2110 Operator 08-16-2010
9
The CRE-2110 seat assembly (with standard
armrests) is designed to swivel a total of
135 degrees.
It locks in the center (home) position, and
in positions 60 and 90 degrees to the up
side and 45 degrees to the down side.
Lift up on the swivel release lever located
under the seat (either side) to swivel the
seat to a convenient position for transferring
into or out of the seat.
Once you release the swivel lever, the seat
will lock in the closest of the four positions
indicated above.
The seat also ips up to facilitate storage.
SEATING
swivel release
handle

©2010,2009 Bruno Independent Living Aids, Inc.® CRE-2110 Operator 08-16-2010
10
OPERATION
The CRE-2110 includes a
“soft-start” feature which
prevents the unit from moving
abruptly the instant the
UP/DOWN switch is pressed.
Press and hold the switch for
a moment to begin the gentle
acceleration of the stairway
elevator to operating speed.
STANDARD SWIVEL SEAT
1. Position yourself in the seat.
2. Fasten the positioning belt.
3. Raise and hold the seat swivel lever.
4. Rotate the seat so that you are at right
angles to the rail (with your back to the
stairway wall).
5. Release the seat swivel lever to secure the
seat in that position.
A safety switch prevents operation of the
CRE-2110 unless the seat is locked in
position at right angles to the rail (the
“riding” position).
6. Position both feet securely on the footrest and
place your arms on the armrest cushions.
7. Press and hold the rocker switch (located
on the front edge of one of the armrests) to
travel UP / DOWN the rail.
Depressing and holding the
rocker switch will cause the
carriage to move until the
carriage stops automatically at
the upper or lower end of the
stair rail, or until the switch is
released.

©2010,2009 Bruno Independent Living Aids, Inc.® CRE-2110 Operator 08-16-2010
11
OPERATION
8. Once you have reached the top or
bottom landing, release the rocker
switch.
9. Raise and hold the seat swivel lever as
you rotate to the position for transfer-
ring from the seat.
10. Release the seat swivel lever and allow
the seat to lock in this position.
11. Unbuckle the positioning belt and
carefully exit the seat.
Two (2) remote call / send
transmitters enable you
to move the carriage to or
from either end of the stair
rail.

©2010,2009 Bruno Independent Living Aids, Inc.® CRE-2110 Operator 08-16-2010
12
OPERATION
POWER SWIVEL SEAT
1. Position yourself in the seat.
2. Fasten the positioning belt.
3. Position both feet securely on the footrest and
place your arms on the armrest cushions.
4. Press and hold the rocker switch (located
on the front edge of one of the armrests) to
travel UP / DOWN the rail.
5. Once you have reached the top or bottom
landing, release the rocker switch.
6. To rotate the seat at the top landing, press
the rocker switch again on the same side.
7. Release the rocker switch when you have fully
rotated out.
8. Unbuckle the positioning belt and carefully exit
the seat.

©2010,2009 Bruno Independent Living Aids, Inc.® CRE-2110 Operator 08-16-2010
13
OPERATION
Optional Mid-Park Position
The mid-park is available as an option. This
feature will let you park and charge the unit
at a position between the two ends of the rail.
This allows for more room at the top and
bottom of the stairs.
1. Push either the seat rocker switch or the
remote call/send to move the stairway
elevator up or down the rail.
NOTE: The seat will always stop and beep
once when it reaches the mid-park
position.
2. To resume travel to the end of the rail (top
or bottom), release the switch (or remote
button).
3. Press again and hold until the unit arrives
at the top or bottom of the rail.
NOTE: The seat will again stop and beep once
to indicate end of travel.

©2010,2009 Bruno Independent Living Aids, Inc.® CRE-2110 Operator 08-16-2010
14
OPERATION
Optional Mid-Park Position
POWER SWIVEL SEAT
NOTES:
1. You may use the remote call/send transmitters
to return the rotated power seat back to the
ride position.
2. If the unit stops unexpectedly while traveling,
check for obstructions or excessive loading. You
will only be able to run the unit in the opposite
direction until the overload is cleared.

©2010,2009 Bruno Independent Living Aids, Inc.® CRE-2110 Operator 08-16-2010
15
OPERATION
POWER FOOTREST
If your unit is equipped with an optional power
footrest, follow the operating instructions indicated
below.
1. Raise the seat to raise the footrest to its stored
position.
2. Lower the seat to lower the footrest to the ride
position.
NOTES:
• Do not try to manually raise or lower the footrest.
Always raise/lower the footrest by raising/lowering the
seat. Failure to follow this instruction could damage
the unit.
• If a jam occurs while raising or lowering the footrest,
the footrest will attempt to return to its last position.
This will produce a sequence error.
To restore normal footrest operation:
▫ Clear the jam.
▫ Move the seat up and down until the footrest moves
again.
▫ If normal footrest operation is not restored, contact
a Bruno Service Representative.

©2010,2009 Bruno Independent Living Aids, Inc.® CRE-2110 Operator 08-16-2010
16
DIAGNOSTIC CODES
(UNDER SEAT)
A2 Seat in UP Position (Seat Fold Switch Closed)
A3 Seat Out of Riding Position (Swivel Limit Open)
A6 Seat Jammed (Actuator Stalled)
A7 Footrest Jammed (Actuator Stalled)
C1 Charging
C2 Off Charge
C3 Off Charge and Not Parked
C4 Parked and Charger Not Detected
C5 Battery Voltage Critical
C6 Battery Voltage Low
L1 Seat Safety Switch Open
L2 Up Limit Switch Open
L3 Down Limit Switch Open
L6 Mid-Rail Park Active
L8 Soft Stop Switch

©2010,2009 Bruno Independent Living Aids, Inc.® CRE-2110 Operator 08-16-2010
17
Keep the batteries charged to ensure optimal operation
of your CRE-2110.
The batteries are charging whenever the carriage is parked
tightly against the brackets at either end of the rail. When-
ever the carriage does not contact the upper or lower charge
bracket, the batteries will slowly discharge.
Failure to keep the batteries charged, or allowing them
to fully discharge, will signicantly shorten the life of the
batteries.
Therefore, when the stairway elevator is not in use, park the
carriage at either end of the rail, making sure it touches the
charge bracket contacts.
The yellow LED light on the upper and lower charge brack-
ets glows when the carriage is correctly parked against the
contacts.
If your application prevents parking the carriage at one or
the other end of the stairs (for example, a door at the top of
the stairs), ALWAYS use the call/send transmitter to move
the carriage to the end of the rail where the carriage can
contact the charge bracket. Using the transmitter, call it
back to the other end of the stairs when needed.
CHARGING
LED
glowing LED = charging

©2010,2009 Bruno Independent Living Aids, Inc.® CRE-2110 Operator 08-16-2010
18
BATTERY CHARGER LED’S
charging
power
on
ready
RED YELLOW GREEN STATUS
ON ON (< 1 sec.)
OFF
OFF charger not connected to
battery
ON (<5 sec.)
ON
ON
ON (<5 sec.)
OFF
OFF
ON (<5 sec.)
BLINK (5 sec.)
OFF
battery disconnect situation
detected; 5-second delay
until yellow and green LED’s
completely off
ON ON OFF charger delivering maximum
current (2.2A)
ON ON OFF charger at maximum voltage;
current continues to drop
ON OFF ON batteries fully charged;
yellow LED occasionally turns
off
ON BLINKS
ALTERNATELY
BLINKS
ALTERNATELY
low voltage indication
BLINKS
ALTERNATELY
BLINKS
ALTERNATELY
OFF battery defective or
heavily sulfated
ON OFF FAST BLINK partially open circuit; bad
contact or battery sulfation

©2010,2009 Bruno Independent Living Aids, Inc.® CRE-2110 Operator 08-16-2010
19
BATTERY CHARGER FUSE REPLACEMENT
If the charger is subject to a power line
surge, the AC input fuse may blow. Refer to
the illustration to the left for fuse location.
To replace fuse:
1. Turn OFF the battery charger power
switch.
2. Remove power cord from wall outlet.
3. Twist the fuseholder cap and pull out to
remove the fuse.
4. Replace with the same size and type
fuse: (Bussmann GMD-2A or equivalent)
2A, Slo-Blow, 5 x 20mm.
fuse
charger power switch

©2010,2009 Bruno Independent Living Aids, Inc.® CRE-2110 Operator 08-16-2010
20
MAINTENANCE
Your CRE-2110 is designed to provide many years of reliable
service with minimal maintenance.
For best service life:
• Keep the rail channel clean and free of debris.
• Always park the carriage at one end of the rail so that the
batteries charge when the elevator is not in use.
• Keep the battery charger plugged into a live outlet at all
times.
• At least once a year, have the elevator examined, cleaned
and lubricated by a qualied, authorized Bruno service
technician.
TRANSMITTER BATTERY REPLACEMENT
• Detach the transmitter from the wall.
• From the back of the transmitter, remove the battery access
cover.
• Remove the old battery and replace with a new one.
One 9V battery required. Change batteries annually.
• Put the access cover back on the transmitter.
• Reposition the transmitter on the wall.
back of transmitter
with battery access
cover removed
9V battery
Page is loading ...
Page is loading ...
Page is loading ...
Page is loading ...
Page is loading ...
Page is loading ...
Page is loading ...
Page is loading ...
/