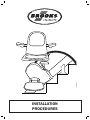
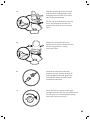
Brooks Stairlift
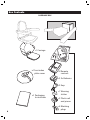
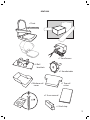
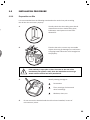
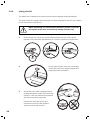
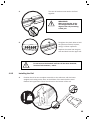
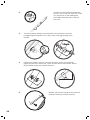
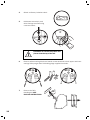
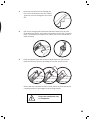
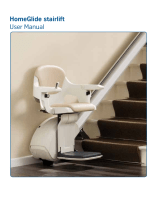
The Brooks Stairlift is a safe and reliable way to regain your independence and get around your home with ease. It’s designed to fit most staircases and can be installed in just a few hours. The Stairlift features a comfortable seat with a padded backrest and armrests, and a footrest that can be adjusted to your height. It also comes with a remote control so you can operate it from anywhere on the stairs.
The Stairlift is powered by a rechargeable battery, so you don’t have to worry about cords or wires. It also has a built-in safety sensor that will stop the lift if it encounters any obstacles.
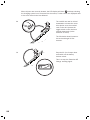
Brooks Stairlift
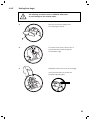
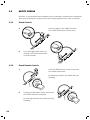
The Brooks Stairlift is a safe and reliable way to regain your independence and get around your home with ease. It’s designed to fit most staircases and can be installed in just a few hours. The Stairlift features a comfortable seat with a padded backrest and armrests, and a footrest that can be adjusted to your height. It also comes with a remote control so you can operate it from anywhere on the stairs.
The Stairlift is powered by a rechargeable battery, so you don’t have to worry about cords or wires. It also has a built-in safety sensor that will stop the lift if it encounters any obstacles.


-
 1
1
-
 2
2
-
 3
3
-
 4
4
-
 5
5
-
 6
6
-
 7
7
-
 8
8
-
 9
9
-
 10
10
-
 11
11
-
 12
12
-
 13
13
-
 14
14
-
 15
15
-
 16
16
-
 17
17
-
 18
18
-
 19
19
-
 20
20
-
 21
21
-
 22
22
-
 23
23
-
 24
24
-
 25
25
-
 26
26
-
 27
27
-
 28
28
-
 29
29
-
 30
30
-
 31
31
-
 32
32


Brooks Stairlift
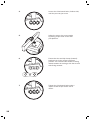
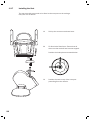
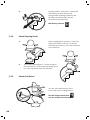
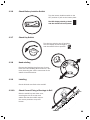
The Brooks Stairlift is a safe and reliable way to regain your independence and get around your home with ease. It’s designed to fit most staircases and can be installed in just a few hours. The Stairlift features a comfortable seat with a padded backrest and armrests, and a footrest that can be adjusted to your height. It also comes with a remote control so you can operate it from anywhere on the stairs.
The Stairlift is powered by a rechargeable battery, so you don’t have to worry about cords or wires. It also has a built-in safety sensor that will stop the lift if it encounters any obstacles.
Ask a question and I''ll find the answer in the document
Finding information in a document is now easier with AI
Other documents
-
 Amora Lighting AM340WL10 Operating instructions
-
Warehouse of Tiffany TG70W1 Operating instructions
-
American Pro Decor 5APD10783 Installation guide
-
Acorn Superglide 130 User manual
-
 Stannah 260 User manual
-
Platinum Curve Stairlift User manual
-
Bison Bison 50 User manual
-
 ThyssenKrupp HomeGlide User manual
-
 Bruno SRE-3000 Elan User manual
-
Well Traveled Living 2110 User manual


