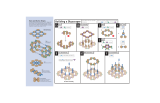
Building a Castle
Turret Wall: A
STEP
1
Turret Wall: B
STEP
2
Turret Wall: C
STEP
4
Turret Wall: D
STEP
5
STEP
3
Double Plane Matrix
Using 3-way and
2-way connectors
Sold Matrix
Using 2-way and
4-way connectors
(64) 90°(406) 2-way
Coins needed to build your castle:
(342) pennies (44) nickels
Coinstruction connectors needed to build your castle:
Turret Walls: A & B
A
B
STEP
6
Top View
40 pennies
4
Turret Top: A
STEP
8
16 pennies
16
32
20
48
(48) 3-way (84) 4-way
40 pennies
4
20
48
40 pennies
20
52
40 pennies
20
52
Turret Walls: C & D
C
D
A
B
STEP
7
Turret Walls Assembly: A, B, C, & D
D
A
B
C
Turret Assembly
STEP
9
16
32 nickels16
Single Plane Matrix
Using 2-way connectors
Cube
Using 2-way and
90° connectors
Hub
Using 2-way connectors
Hub
Using 2-way connectors,
attach coin-to-connector
and connector-to-connector.
Extra Strength
By doubling connectors you can
strengthen any connection.
(This shows two 4-way connectors.)
Basic and Starter Shapes
Use these illustrations to build basic and “starter” shapes. Once
you know how to build these basic shapes, you will be able to
build anything your imagination allows! Remember, not all kits
have every kind of connector. Check the description to the right
to see which connectors are included in this kit.
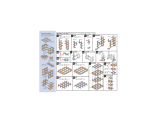
STEP
10
Back Wall Assembly
STEP
12
Front Gate and Drawbridge
STEP
11
Side Wall Assembly
Turret
Top
Turret
Walls
Back Wall
27 pennies
51
36 pennies
60
Wall
Back Wall Base
26 pennies
16
26
Front Gate
Side Walls
24 pennies
8
Drawbridge
4
8
12 nickels
2
17
12 pennies
Front Gate
Top B
12
12
9 pennies
Front Gate
Top A
Wall Base
32 pennies
16
Turret Top: B
Place these connectors
high on the nickels.
Tip!
Place these
connectors
high on
the nickels.
Tip!
4X
4X
4X
4X
4X
2X
4X
4X
4X
4X
4X
2

Side Wall
Turret
Turret
Turret
Turret
Front Gate
Drawbridge
Side Wall
Front Wall
Front Wall
Back Wall
Drawbridge
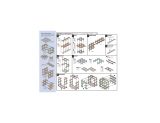
STEP
13
Front Gate and Drawbridge Assembly
Building a Castle
EI-4026 Helicopter
Kit includes over 200 pieces
Build more fun with these additional Coinstruction kits.
VISIT OUR WEBSITE: www.educationalinsights.com
We welcome your comments or questions about our products and service.
CALL: (800) 995-4436 toll-free Monday-Friday 8:30 am to 5:00 pm CST
©
2003 Educational Insights, Inc., Rancho Dominguez, CA 90220 (USA)
All rights reserved. Made in China. Conforms to: ASTM F 963.
Please retain this information.
EI-4041 Skyscraper
Kit includes over 100 pieces
EI-4028 Robot
Kit includes over 400 pieces
EI-4039 Biplane
Kit includes over 100 pieces
Ages 5+EI-4030
-
 1
1
-
 2
2
Educational Insights Coinstruction: Castle User manual
- Type
- User manual
- This manual is also suitable for
Ask a question and I''ll find the answer in the document
Finding information in a document is now easier with AI
Related papers
-
 Educational Insights Coinstruction: Skyscraper Product Instructions
-
 Educational Insights CoinStruction EI-4039 User manual
-
 Educational Insights CoinStruction EI-4028 Robot User manual
-
 Educational Insights Coinstruction: Helicopter Product Instructions
-
 Educational Insights Big Money™ 3-D Magnetic Coins and Bills Product Instructions
Other documents
-
Accu-Scope EXI-410-FL Inverted Microscope Operating instructions
-
Accu-Scope EXI-410 Series Installation guide
-
Hasbro Lincoln Logs Castle Fortress Playset Operating instructions
-
Harbor Freight Tools Planer 94840 User manual
-
Disney Bolt for Xbox 360 User manual
-
 Hobbico SKY RUNNER R/C Assembly Instruction Manual
-
Disney Episode #332 User manual
-
 BEAULIEU R16 Automatic User manual
-
Princeton IsoPlane User manual
-
Playskool Dream Town Sweet Lily Castle User manual


