Hampton Bay Templeton Electric Fireplace Operating instructions
- Category
- Docking speakers
- Type
- Operating instructions
This manual is also suitable for
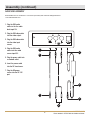
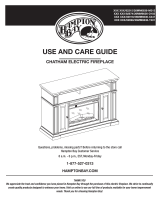
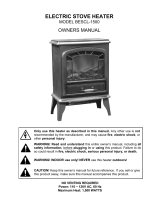
Hampton Bay Templeton Electric Fireplace brings warmth and ambiance to your home with its realistic flame effect and adjustable heat settings. The built-in audio/video dock lets you enjoy your favorite music, movies, and TV shows while you relax in front of the fire.
Product highlights:
- Realistic flame effect creates the ambiance of a real fire without the mess and danger
- Adjustable heat settings allow you to customize the temperature to your liking
- Built-in audio/video dock lets you enjoy your favorite music, movies, and TV shows
- Remote control for convenient operation
Possible use cases:


-
 1
1
-
 2
2
-
 3
3
-
 4
4
-
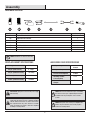 5
5
-
 6
6
-
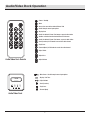 7
7
-
 8
8
-
 9
9
-
 10
10
-
 11
11
-
 12
12
-
 13
13
-
 14
14
-
 15
15


Hampton Bay Templeton Electric Fireplace Operating instructions
- Category
- Docking speakers
- Type
- Operating instructions
- This manual is also suitable for
Hampton Bay Templeton Electric Fireplace brings warmth and ambiance to your home with its realistic flame effect and adjustable heat settings. The built-in audio/video dock lets you enjoy your favorite music, movies, and TV shows while you relax in front of the fire.
Product highlights:
- Realistic flame effect creates the ambiance of a real fire without the mess and danger
- Adjustable heat settings allow you to customize the temperature to your liking
- Built-in audio/video dock lets you enjoy your favorite music, movies, and TV shows
- Remote control for convenient operation
Possible use cases:
Ask a question and I''ll find the answer in the document
Finding information in a document is now easier with AI
Related papers
-
 Hampton Bay 741.707.001 Operating instructions
-
 Hampton Bay 1500T3-WH Operating instructions
-
 Hampton Bay 03179-4 Installation guide
-
 Hampton Bay 82315 User manual
-
 Hampton Bay 82704 Operating instructions
-
 Hampton Bay FWS00588C User guide
-
 Hampton Bay FRS01567C-Z Operating instructions
-
 Hampton Bay 89543 Installation guide
-
 Hampton Bay FE30-DM User guide
-
 Hampton Bay FT-01C User guide


Other documents
-
 T'nB IPT26B Datasheet
-
 Walker Edison Furniture Company HD8758 User manual
-
 Estate Design BESCL1500 User manual
-
 Estate Design HYWN-23 User manual
-
Nordfolk Electric Fireplace User manual
-
Home Decorators Collection 1457FM-33-201 User manual
-
StyleWell HDFP48-45 User manual
-
 C3 C3P23C9-2067W Operating instructions
-
 Excelair EOHA22GR User manual
-
 RG Plug-N-Heat Personal Wall Heater User manual


