Coriolis Flow Meters
RCT1000 with RCS018…300 Sensors for Hazardous Locations
CRL-QS-01552-EN-05 April 2019
Quick Start Guide

CONTENTS
Purpose of this Document. . . . . . . . . . . . . . . . . . . . . . . . . . . . . . . . . . . . . . . . . . . . . . . . . . . . . . . . . . . . . . . . .5
Safety . . . . . . . . . . . . . . . . . . . . . . . . . . . . . . . . . . . . . . . . . . . . . . . . . . . . . . . . . . . . . . . . . . . . . . . . . . . . . .5
Safety Symbol Explanations . . . . . . . . . . . . . . . . . . . . . . . . . . . . . . . . . . . . . . . . . . . . . . . . . . . . . . . . . . . . .5
Electrical Symbol Explanations . . . . . . . . . . . . . . . . . . . . . . . . . . . . . . . . . . . . . . . . . . . . . . . . . . . . . . . . . . . 5
Safety Precautions . . . . . . . . . . . . . . . . . . . . . . . . . . . . . . . . . . . . . . . . . . . . . . . . . . . . . . . . . . . . . . . . . . . 5
Product Label . . . . . . . . . . . . . . . . . . . . . . . . . . . . . . . . . . . . . . . . . . . . . . . . . . . . . . . . . . . . . . . . . . . . . . . . .6
Hazardous Location . . . . . . . . . . . . . . . . . . . . . . . . . . . . . . . . . . . . . . . . . . . . . . . . . . . . . . . . . . . . . . . . . . 6
Integral Sensor and Transmitter . . . . . . . . . . . . . . . . . . . . . . . . . . . . . . . . . . . . . . . . . . . . . . . . . . . . . . . 6
Remote Transmitter. . . . . . . . . . . . . . . . . . . . . . . . . . . . . . . . . . . . . . . . . . . . . . . . . . . . . . . . . . . . . . . 6
Remote Sensor. . . . . . . . . . . . . . . . . . . . . . . . . . . . . . . . . . . . . . . . . . . . . . . . . . . . . . . . . . . . . . . . . . 6
Dimensions . . . . . . . . . . . . . . . . . . . . . . . . . . . . . . . . . . . . . . . . . . . . . . . . . . . . . . . . . . . . . . . . . . . . . . . . . . 7
RCS018…RCS300 Sensor Dimensions . . . . . . . . . . . . . . . . . . . . . . . . . . . . . . . . . . . . . . . . . . . . . . . . . . . . . . 7
RCTX Remote Mount Electronics Enclosure Dimensions . . . . . . . . . . . . . . . . . . . . . . . . . . . . . . . . . . . . . . . . . . .8
RCTX Remote Mount Conduit Outlet Box Dimensions . . . . . . . . . . . . . . . . . . . . . . . . . . . . . . . . . . . . . . . . . . . . 8
Installation Overview . . . . . . . . . . . . . . . . . . . . . . . . . . . . . . . . . . . . . . . . . . . . . . . . . . . . . . . . . . . . . . . . . . . . 9
Product Unpacking and Inspection . . . . . . . . . . . . . . . . . . . . . . . . . . . . . . . . . . . . . . . . . . . . . . . . . . . . . . . . . . . 9
Transporting the Meter. . . . . . . . . . . . . . . . . . . . . . . . . . . . . . . . . . . . . . . . . . . . . . . . . . . . . . . . . . . . . . . . . . .9
Sensor Installation . . . . . . . . . . . . . . . . . . . . . . . . . . . . . . . . . . . . . . . . . . . . . . . . . . . . . . . . . . . . . . . . . . . . .10
Preinstallation Considerations . . . . . . . . . . . . . . . . . . . . . . . . . . . . . . . . . . . . . . . . . . . . . . . . . . . . . . . . . . 10
Sensor Mounting Positions and Locations . . . . . . . . . . . . . . . . . . . . . . . . . . . . . . . . . . . . . . . . . . . . . . . . . . .11
Vertical Mounting with Tubes to the Side, Flow Going Down . . . . . . . . . . . . . . . . . . . . . . . . . . . . . . . . . . . .11
Horizontal Mounting with Tubes Down . . . . . . . . . . . . . . . . . . . . . . . . . . . . . . . . . . . . . . . . . . . . . . . . . .11
Horizontal Mounting with Tubes Up . . . . . . . . . . . . . . . . . . . . . . . . . . . . . . . . . . . . . . . . . . . . . . . . . . . .12
Horizontal Position with Flexible Armored Hoses . . . . . . . . . . . . . . . . . . . . . . . . . . . . . . . . . . . . . . . . . . . .12
Horizontal Position with Flexible Armored Hose Loops . . . . . . . . . . . . . . . . . . . . . . . . . . . . . . . . . . . . . . . .12
Vertical Mounting with Tubes to the Side, Flow Going Up . . . . . . . . . . . . . . . . . . . . . . . . . . . . . . . . . . . . . .13
Transmitter Installation. . . . . . . . . . . . . . . . . . . . . . . . . . . . . . . . . . . . . . . . . . . . . . . . . . . . . . . . . . . . . . . . . .14
RCTX Transmitters . . . . . . . . . . . . . . . . . . . . . . . . . . . . . . . . . . . . . . . . . . . . . . . . . . . . . . . . . . . . . . . . . . 14
RCTX with Display ONLY. . . . . . . . . . . . . . . . . . . . . . . . . . . . . . . . . . . . . . . . . . . . . . . . . . . . . . . . . . . .14
RCTX Transmitters with Integral Mount . . . . . . . . . . . . . . . . . . . . . . . . . . . . . . . . . . . . . . . . . . . . . . . . . .15
RCTX Transmitters with Remote Mount . . . . . . . . . . . . . . . . . . . . . . . . . . . . . . . . . . . . . . . . . . . . . . . . . .15
Locking the Transmitter Cover . . . . . . . . . . . . . . . . . . . . . . . . . . . . . . . . . . . . . . . . . . . . . . . . . . . . . . . . . . 16
Ground/Earth Connection . . . . . . . . . . . . . . . . . . . . . . . . . . . . . . . . . . . . . . . . . . . . . . . . . . . . . . . . . . . . . . . .16
Coriolis Flow Meters, RCT1000 with RCS018…300 Sensors for Hazardous Locations
Page ii April 2019CRL-QS-01552-EN-05

Earthing Using Rigid Pipe . . . . . . . . . . . . . . . . . . . . . . . . . . . . . . . . . . . . . . . . . . . . . . . . . . . . . . . . . . . . . 16
EU Earthing Without Rigid Pipe. . . . . . . . . . . . . . . . . . . . . . . . . . . . . . . . . . . . . . . . . . . . . . . . . . . . . . . . . .16
Opening the Cover and Removing the Display Board . . . . . . . . . . . . . . . . . . . . . . . . . . . . . . . . . . . . . . . . . . . . . . 17
DC Power Connections . . . . . . . . . . . . . . . . . . . . . . . . . . . . . . . . . . . . . . . . . . . . . . . . . . . . . . . . . . . . . . . . . .18
TB100 . . . . . . . . . . . . . . . . . . . . . . . . . . . . . . . . . . . . . . . . . . . . . . . . . . . . . . . . . . . . . . . . . . . . . . .18
Inputs / Outputs . . . . . . . . . . . . . . . . . . . . . . . . . . . . . . . . . . . . . . . . . . . . . . . . . . . . . . . . . . . . . . . . . . . . . . 19
RCTX TB100 Interface . . . . . . . . . . . . . . . . . . . . . . . . . . . . . . . . . . . . . . . . . . . . . . . . . . . . . . . . . . . . . . . . 19
HART Module TB1 Interface . . . . . . . . . . . . . . . . . . . . . . . . . . . . . . . . . . . . . . . . . . . . . . . . . . . . . . . . . . . . 19
RCTX TB101 Interface . . . . . . . . . . . . . . . . . . . . . . . . . . . . . . . . . . . . . . . . . . . . . . . . . . . . . . . . . . . . . . . . 19
RCTX Interface Diagrams. . . . . . . . . . . . . . . . . . . . . . . . . . . . . . . . . . . . . . . . . . . . . . . . . . . . . . . . . . . . . .20
Replacing the Display Board. . . . . . . . . . . . . . . . . . . . . . . . . . . . . . . . . . . . . . . . . . . . . . . . . . . . . . . . . . . .21
Replacing the Covers . . . . . . . . . . . . . . . . . . . . . . . . . . . . . . . . . . . . . . . . . . . . . . . . . . . . . . . . . . . . . . . . 21
Sensor Connections . . . . . . . . . . . . . . . . . . . . . . . . . . . . . . . . . . . . . . . . . . . . . . . . . . . . . . . . . . . . . . . . . . . .22
Remote RCTX Terminal Boxes . . . . . . . . . . . . . . . . . . . . . . . . . . . . . . . . . . . . . . . . . . . . . . . . . . . . . . . . . . .22
Transmitter Setup . . . . . . . . . . . . . . . . . . . . . . . . . . . . . . . . . . . . . . . . . . . . . . . . . . . . . . . . . . . . . . . . . . . . . 23
Basic Operation. . . . . . . . . . . . . . . . . . . . . . . . . . . . . . . . . . . . . . . . . . . . . . . . . . . . . . . . . . . . . . . . . . . .24
Using the Keypad . . . . . . . . . . . . . . . . . . . . . . . . . . . . . . . . . . . . . . . . . . . . . . . . . . . . . . . . . . . . . . . .24
Conventions . . . . . . . . . . . . . . . . . . . . . . . . . . . . . . . . . . . . . . . . . . . . . . . . . . . . . . . . . . . . . . . . . . .24
The Active Line . . . . . . . . . . . . . . . . . . . . . . . . . . . . . . . . . . . . . . . . . . . . . . . . . . . . . . . . . . . . . . . . .24
Meter Checks . . . . . . . . . . . . . . . . . . . . . . . . . . . . . . . . . . . . . . . . . . . . . . . . . . . . . . . . . . . . . . . . . . . . . 25
Startup Screens. . . . . . . . . . . . . . . . . . . . . . . . . . . . . . . . . . . . . . . . . . . . . . . . . . . . . . . . . . . . . . . . . . . .25
Menu Map . . . . . . . . . . . . . . . . . . . . . . . . . . . . . . . . . . . . . . . . . . . . . . . . . . . . . . . . . . . . . . . . . . . . . . . . . .26
Keyboard Lock . . . . . . . . . . . . . . . . . . . . . . . . . . . . . . . . . . . . . . . . . . . . . . . . . . . . . . . . . . . . . . . . . . . . . . . 27
System Passwords . . . . . . . . . . . . . . . . . . . . . . . . . . . . . . . . . . . . . . . . . . . . . . . . . . . . . . . . . . . . . . . . . . . . . 27
Default Passwords . . . . . . . . . . . . . . . . . . . . . . . . . . . . . . . . . . . . . . . . . . . . . . . . . . . . . . . . . . . . . . . . . . 27
Sensor Check . . . . . . . . . . . . . . . . . . . . . . . . . . . . . . . . . . . . . . . . . . . . . . . . . . . . . . . . . . . . . . . . . . . . . . . . 28
Initial Zeroing Procedure. . . . . . . . . . . . . . . . . . . . . . . . . . . . . . . . . . . . . . . . . . . . . . . . . . . . . . . . . . . . . . . . .28
Priming for Zero . . . . . . . . . . . . . . . . . . . . . . . . . . . . . . . . . . . . . . . . . . . . . . . . . . . . . . . . . . . . . . . . . . . 28
Zeroing the System . . . . . . . . . . . . . . . . . . . . . . . . . . . . . . . . . . . . . . . . . . . . . . . . . . . . . . . . . . . . . . . . . 28
Home Screen Setup . . . . . . . . . . . . . . . . . . . . . . . . . . . . . . . . . . . . . . . . . . . . . . . . . . . . . . . . . . . . . . . . . . . .29
Enable/Disable Hidden Menus . . . . . . . . . . . . . . . . . . . . . . . . . . . . . . . . . . . . . . . . . . . . . . . . . . . . . . . . . . 29
H M I Examples . . . . . . . . . . . . . . . . . . . . . . . . . . . . . . . . . . . . . . . . . . . . . . . . . . . . . . . . . . . . . . . . . . . . . . . 30
Editing Parameter Units, Values and Resolution . . . . . . . . . . . . . . . . . . . . . . . . . . . . . . . . . . . . . . . . . . . . . . . . . . 30
Flow Direction . . . . . . . . . . . . . . . . . . . . . . . . . . . . . . . . . . . . . . . . . . . . . . . . . . . . . . . . . . . . . . . . . . . . . . . 31
Backing Up the Transmitter . . . . . . . . . . . . . . . . . . . . . . . . . . . . . . . . . . . . . . . . . . . . . . . . . . . . . . . . . . . . . . . 31
Quick Start Guide
CRL-QS-01552-EN-05 Page iii April 2019

Automatic Transmitter Backup . . . . . . . . . . . . . . . . . . . . . . . . . . . . . . . . . . . . . . . . . . . . . . . . . . . . . . . . . . 31
Manual Transmitter Backup . . . . . . . . . . . . . . . . . . . . . . . . . . . . . . . . . . . . . . . . . . . . . . . . . . . . . . . . . . . . 31
Transmitter Backup Using RCT Console Software . . . . . . . . . . . . . . . . . . . . . . . . . . . . . . . . . . . . . . . . . . . . . . 31
Output Conguration. . . . . . . . . . . . . . . . . . . . . . . . . . . . . . . . . . . . . . . . . . . . . . . . . . . . . . . . . . . . . . . . . . .32
Current Outputs . . . . . . . . . . . . . . . . . . . . . . . . . . . . . . . . . . . . . . . . . . . . . . . . . . . . . . . . . . . . . . . . . . . 32
Example . . . . . . . . . . . . . . . . . . . . . . . . . . . . . . . . . . . . . . . . . . . . . . . . . . . . . . . . . . . . . . . . . . . . . .32
Test Current. . . . . . . . . . . . . . . . . . . . . . . . . . . . . . . . . . . . . . . . . . . . . . . . . . . . . . . . . . . . . . . . . . . .32
Monitor Current . . . . . . . . . . . . . . . . . . . . . . . . . . . . . . . . . . . . . . . . . . . . . . . . . . . . . . . . . . . . . . . . .32
Frequency, Pulse and PWM Outputs. . . . . . . . . . . . . . . . . . . . . . . . . . . . . . . . . . . . . . . . . . . . . . . . . . . . . . .33
Frequency Output . . . . . . . . . . . . . . . . . . . . . . . . . . . . . . . . . . . . . . . . . . . . . . . . . . . . . . . . . . . . . . .33
Pulse Output . . . . . . . . . . . . . . . . . . . . . . . . . . . . . . . . . . . . . . . . . . . . . . . . . . . . . . . . . . . . . . . . . . .33
Communication Wiring and Setup . . . . . . . . . . . . . . . . . . . . . . . . . . . . . . . . . . . . . . . . . . . . . . . . . . . . . . . . . . 34
EIA-485 Port . . . . . . . . . . . . . . . . . . . . . . . . . . . . . . . . . . . . . . . . . . . . . . . . . . . . . . . . . . . . . . . . . . . . . . 34
USB Programming Port . . . . . . . . . . . . . . . . . . . . . . . . . . . . . . . . . . . . . . . . . . . . . . . . . . . . . . . . . . . . . . 34
EIA-485 / Modbus RTU . . . . . . . . . . . . . . . . . . . . . . . . . . . . . . . . . . . . . . . . . . . . . . . . . . . . . . . . . . . . . . . 34
Optional HART Communication Card . . . . . . . . . . . . . . . . . . . . . . . . . . . . . . . . . . . . . . . . . . . . . . . . . . . . . . 34
Optional Ethernet Communication Card . . . . . . . . . . . . . . . . . . . . . . . . . . . . . . . . . . . . . . . . . . . . . . . . . . . .34
Troubleshooting . . . . . . . . . . . . . . . . . . . . . . . . . . . . . . . . . . . . . . . . . . . . . . . . . . . . . . . . . . . . . . . . . . . . . . 35
Navigation During an Alarm Condition. . . . . . . . . . . . . . . . . . . . . . . . . . . . . . . . . . . . . . . . . . . . . . . . . . . . .35
WARNING Help . . . . . . . . . . . . . . . . . . . . . . . . . . . . . . . . . . . . . . . . . . . . . . . . . . . . . . . . . . . . . . . . . . . . 35
Identifying System Faults. . . . . . . . . . . . . . . . . . . . . . . . . . . . . . . . . . . . . . . . . . . . . . . . . . . . . . . . . . . . . .35
Red/Green LED Diagnostics . . . . . . . . . . . . . . . . . . . . . . . . . . . . . . . . . . . . . . . . . . . . . . . . . . . . . . . . . . . . 35
Startup. . . . . . . . . . . . . . . . . . . . . . . . . . . . . . . . . . . . . . . . . . . . . . . . . . . . . . . . . . . . . . . . . . . . . . .35
Blink Code . . . . . . . . . . . . . . . . . . . . . . . . . . . . . . . . . . . . . . . . . . . . . . . . . . . . . . . . . . . . . . . . . . . .35
Indicated Error Levels . . . . . . . . . . . . . . . . . . . . . . . . . . . . . . . . . . . . . . . . . . . . . . . . . . . . . . . . . . . . .36
Error Messages . . . . . . . . . . . . . . . . . . . . . . . . . . . . . . . . . . . . . . . . . . . . . . . . . . . . . . . . . . . . . . . . . . . . 37
Troubleshooting Symptoms. . . . . . . . . . . . . . . . . . . . . . . . . . . . . . . . . . . . . . . . . . . . . . . . . . . . . . . . . . . .38
Coriolis Flow Meters, RCT1000 with RCS018…300 Sensors for Hazardous Locations
Page iv April 2019CRL-QS-01552-EN-05

PURPOSE OF THIS DOCUMENT
The purpose of this document is to provide you with an overview of the installation, wiring and basic configuration of the
Coriolis RCT1000 flow meter. For detailed information, see the "Coriolis Flow Meters User Manual" and the "Coriolis RCTX
Control Drawing", both of which can be found on the USB memory stick included with the meter or downloaded from
www.badgermeter.com.
SAFETY
Safety Symbol Explanations
Indicates a hazardous situation, which, if not avoided, will result in death or serious personal injury.
WARNING
Indicates a hazardous situation, which, if not avoided, could
result in death or serious personal injury.
Indicates a hazardous situation, which, if not avoided, could result in minor or moderate personal injury or
damage to property.
Electrical Symbol Explanations
Electrical Symbols
Function
Direct
Current
Alternating
Current
Earth
(Ground)
Protective
Ground
Chassis
Ground
Symbol
RCT1000 transmitters employ modular construction and provide electrical safety for the operator.
Safety Precautions
DANGER
THE POWER SUPPLY BOARD CAN HAVE LINE VOLTAGES APPLIED TO IT. DISCONNECT ELECTRICAL POWER BEFORE
OPENING THE INSTRUMENT ENCLOSURE. USE WIRING PRACTICES THAT CONFORM TO LOCAL AND NATIONAL CODES
WITHIN THE REGION WHERE THE PRODUCT IS INSTALLED. FOR EXAMPLE: THE NATIONAL ELECTRICAL CODE®
HANDBOOK IN THE U.S.; CANADIAN ELECTRIC CE CODE IN CANADA.
IF THE EQUIPMENT IS USED IN A MANNER NOT SPECIFIED BY THE MANUFACTURER, THE PROTECTION PROVIDED BY
THE EQUIPMENT MAY BE IMPAIRED.
DANGER OF BREAKAGE DUE TO CORROSIVE OR ABRASIVE FLUIDS.
• VERIFY THE COMPATIBILITY OF THE PROCESS FLUID WITH THE SENSOR MATERIAL.
• ENSURE THE RESISTANCE OF ALL FLUID-WETTED MATERIALS IN THE PROCESS.
• KEEP WITHIN THE SPECIFIED PRESSURE AND TEMPERATURE RANGE.
Purpose of this Document
Page 5 April 2019 CRL-QS-01552-EN-05

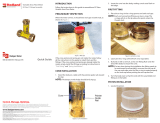
PRODUCT LABEL
Hazardous Location
Integral Sensor and Transmitter
Sensors with integral mount transmitters have a single tag
on the sensor. The specific certifications listed on the tag
depend on the sensor part number.
Certications
Ambient/Fluid Temp
Maximum Pressure
Figure 1: Hazardous location sensor tag examples
Remote Transmitter
Certications
Figure 2: Remote transmitter tag example
Remote Sensor
Certications
Ambient/Fluid Temp
Maximum Pressure
Compatible
Transmitter
Figure 3: Remote sensor tag example
Product Label
Page 6 April 2019CRL-QS-01552-EN-05

DIMENSIONS
RCS018…RCS300 Sensor Dimensions
End Fitting
(See NOTE)
A
B
C
D
E
Figure 4: Large sensor dimensions
Sensor
Nominal
Size
A
1
B C D E (Standard) E (Remote)
RCS018
1/2 in.
13.6 in. (346 mm)
1
7.1 in. (180 mm)
1
8.5 in. (217 mm)
2
4.4 in. (113 mm)
2
19.3 in. (489 mm) 18.3 in. (464 mm)
RCS025 1/2 in.
16.0 in. (406 mm)
1
9.0 in. (228 mm)
1
9.9 in. (253 mm)
2
4.4 in. (113 mm)
2
20.7 in. (525 mm) 19.7 in. (500 mm)
RCS050 1/2 in.
18.5 in. (470 mm)
1
11.6 in. (296 mm)
1
15.9 in. (405 mm)
2
5.1 in. (131 mm)
2
24.2 in. (615 mm) 23.2 in. (590 mm)
RCS100 1 in.
23.2 in. (590 mm)
1
16.8 in. (426 mm)
1
27.6 in. (700 mm)
2
6.4 in. (163 mm)
2
34.3 in. (870 mm) 33.3 in. (845 mm)
RCS200 2 in.
26.4 in. (670 mm)
2
18.5 in. (472 mm)
2
28.6 in. (726 mm)
3
7.9 in. (203 mm)
3
33.4 in. (848 mm) 32.4 in. (823 mm)
RCS300 3 in. 40.9 in. (1040 mm)
2
28.7 in. (728 mm)
2
40.4 in. (1028 mm)
3
9.5 in. (243 mm)
3
45.3 in. (1150 mm) 44.3 in. (1125 mm)
1
± 0.12 in (3 mm)
2
± 0.15 in (4 mm)
3
± 0.24 in (6 mm)
4
± 0.39 in (10 mm)
OTE:N End fittings can be NPT (shown), Class 150 or Class 300 ANSI flanges, or other; dimensions A and C do not change.
Dimensions
Page 7 April 2019 CRL-QS-01552-EN-05

RCTX Remote Mount Electronics Enclosure Dimensions
A
B
C
F
E
D
2×Ø 0.31 in. (7.8 mm)
Figure 5: RCTX remote mount dimensions
A B C D E F
6.57 in. (167 mm) 5.20 in. (132 mm) 13.43 in. (341 mm) 5.85 in. (148.7 mm) 4.57 in. ± 0.12 in. (116 mm ± 3 mm) 1.37 in. (35 mm)
RCTX Remote Mount Conduit Outlet Box Dimensions
2X 1/2" FNPT
A
C
D
B
Figure 6: Conduit outlet box for remote mount
A B C D
4.5 in. (116 mm) 3.75 in. (95 mm) 2.4 in. (62 mm) 0.75 in. (19 mm)
Dimensions
Page 8 April 2019CRL-QS-01552-EN-05

INSTALLATION OVERVIEW
In general, the following steps are required to install and put the meter into service.
1. Unpack meter components and transport to the installation location.
2. Install the transmitter and sensor.
3. Connect the signal cable between the transmitter and the sensor, if required.
4. Install any required I/O wiring.
5. Wire power to the transmitter.
6. Power up the transmitter.
7. Perform initial zeroing of the meter.
8. Perform rmware setup starting at the Home screen.
9. Put the meter into service.
PRODUCT UNPACKING AND INSPECTION
Upon receipt of the product, perform the following unpacking and inspection procedures.
OTE:N If damage to the shipping container is evident upon receipt, request the carrier to be present when the product
is unpacked.
Carefully open the shipping package and follow any instructions that may be marked on the exterior. Remove all cushioning
material surrounding the product and carefully lift the product from the package.
Retain the package and all packing material for possible use in reshipment or storage.
Visually inspect the product and applicable accessories for any physical damage such as scratches, loose or broken parts or
any other sign of damage that may have occurred during shipment.
OTE:N If damage is found, request an inspection by the carrier’s agent within 48 hours of delivery and file a claim with the
carrier. A claim for equipment damage in transit is the sole responsibility of the purchaser.
TRANSPORTING THE METER
The following instructions apply to transporting the meter to its final installation point:
• Transport the devices in the shipping containers in which they came.
• Do not remove covers or caps fitted to the process connections until immediately before installation. The covers prevent
mechanical damage to the sealing faces and the ingress of foreign matter into the measuring tube during transportation
and storage.
• Do not lift assembled metering systems by the transmitter housing. Use webbing slings attached around the two process
connections. Do not use chains, as they could damage the housing.
THERE IS A RISK OF INJURY IF THE MEASURING DEVICE SLIPS. THE CENTER OF GRAVITY OF
THE ASSEMBLED MEASURING DEVICE MIGHT BE HIGHER THAN THE POINTS AROUND WHICH
THE SLINGS ARE ATTACHED. AT ALL TIMES, THEREFORE, MAKE SURE THE DEVICE DOES NOT
UNEXPECTEDLY TURN AROUND ITS AXIS OR SLIP.
Figure 7: Transport sling
Installation Overview
Page 9 April 2019 CRL-QS-01552-EN-05

SENSOR INSTALLATION
Before installation, configuration or operation, familiarize yourself with the equipment and operating requirements by
reading all sections of this manual. Make sure the site has been thoroughly prepared and is suitable for installation.
Preinstallation Considerations
MPORTANTI
Remove all process connection caps and make sure process connections are open.
• Support and align piping connections to prevent side loading of the mating surfaces.
• RCS018 and larger sensors are designed to be supported by the process flange connection. No additional supports are
needed for meter housing.
• To reduce the influence of pipe vibration on RCS018 and larger meters, use Stauff style clamps to help with supporting
process piping.
• Mount full port ball valves (isolation valves) on either side of the meter
for zero calibration purposes.
• Mount control valves downstream of the flow meter to prevent possible
cavitation, especially when measuring liquids with low boiling points
(see Figure 8).
• Install the sensor in a section of the piping where it always remains full,
unless the application is designed to drain with no flow.
• Vertical piping installations should have the flow going up through the
sensor. See Figure 13 on page 12.
Control Valve
Flow
Figure 8: Control valve location
• When using hose connections, use a short section of rigid pipe on each side of the sensor for proper support. The sensor
should not hang from hose connections. See Figure 16 on page 13 and Figure 14 on page 12).
• Use caution with fluids that harden or solidify at rest. Do not pass fluids that react together through the same flow sensor.
Do not cover transmitter with insulation material.
• If heat tracing is used, be aware of the maximum temperature limits of the meter.
• Use of armored hoses as sensor vibration isolators may be required when a high amount of ambient vibration is present
(see Figure 14 on page 12 and Figure 15 on page 12).
• Verify that particulate matter is small enough to pass through the flow sensor. Add a filter to the system, if necessary.
• Verify that the flow sensor is earthed/grounded at the earth connector located
on the sensor side. An AWG #10 or larger protective ground must be connected
to the side grounding terminal for the system to work correctly (see Figure 12 on
page 11, Figure 13 on page 12 and Figure 16 on page 13).
• Avoid high sources of EMF that can be produced by large transformers, large
motors and VFDs without chokes.
THE SENSOR IS PURGED WITH DRY NITROGEN AT THE FACTORY. THE TWO
PURGE PLUGS SHOULD NOT BE REMOVED. IF THEY ARE REMOVED FOR ANY
REASON, RETURN THE UNIT TO THE FACTORY TO BE REPURGED AND SEALED.
CONSULT FACTORY FOR SUPPORT.
1
Figure 9: Purge ports
1
Port Nitrogen purge
Sensor Installation
Page 10 April 2019CRL-QS-01552-EN-05

Sensor Mounting Positions and Locations
• Always mount the sensor downstream of the flow.
• Use vibration-reducing pipe supports approximately 3 and 6 pipe diameters from the end of the sensor in all applications.
• Install the sensor in a section of the piping where it always remains full, unless the application is designed to drain
with no flow. See Figure 16 on page 13.
Vertical Mounting with Tubes to the Side, Flow Going Down
The mounting orientation shown in Figure 11 is recommended for installation in an open vertical pipeline. If you MUST use
this configuration, make sure to use an isolation valve or other pipe restriction to prevent the sensor from running empty
while measurement is being taken.
Flow
Flow
1
2
3
4
5
Flow
1 Supply Tank
2 Sensor
3 Pipe Restriction
4 Valve
5 Batching Tank
Figure 10: Mounting positions and locations Figure 11: Tubes to the side with flow going down)
Horizontal Mounting with Tubes Down
The mounting orientation shown in Figure 12 is recommended for liquid applications.
1 1
2 2
3
Flow Flow
Figure 12: Tubes down (liquids)
1 Supports—Customer supplied Rigid pipe supports approximately 3 and 6 pipe diameters from the end of the sensor
2 Isolation Valves—Customer supplied Full port ball
3 Ground Protective (earth), 10 AWG (4 mm
2
) minimum
Sensor Installation
Page 11 April 2019 CRL-QS-01552-EN-05

Horizontal Mounting with Tubes Up
The mounting orientation shown in Figure 13 is recommended for gas or slurry applications where condensate may
be present.
1
2 2
3
1
Flow
Flow
Figure 13: Tubes up (gases and slurries)
1 Supports—Customer supplied Rigid pipe supports approximately 3 and 6 pipe diameters from the end of the sensor
2 Isolation Valves—Customer supplied Full port ball
3 Ground Protective (earth), 10 AWG (4 mm
2
) minimum
Horizontal Position with Flexible Armored Hoses
Flow Flow
1 1
2 2
3
3
Figure 14: Flexible armored hoses
1 Supports—Customer supplied Rigid pipe supports approximately 3 and 6 pipe diameters from the end of the sensor
2 Hose—Customer supplied Flexible armored
3 Isolation Valves—Customer supplied Full port ball
Horizontal Position with Flexible Armored Hose Loops
Flow Flow
1 1
3
3
22
Figure 15: Flexible armored hose loops
1 Supports—Customer supplied Rigid pipe supports approximately 3 and 6 pipe diameters from the end of the sensor
2 Hose—Customer supplied Flexible armored
3 Isolation Valves—Customer supplied Full port ball
Sensor Installation
Page 12 April 2019CRL-QS-01552-EN-05

Vertical Mounting with Tubes to the Side, Flow Going Up
The mounting orientation shown in Figure 16 is recommended for self-draining configurations.
1
1
3
2
2
Flow
Flow
Figure 16: Tubes to the side with flow going up (self-draining)
1
Supports—Customer supplied Rigid pipe supports approximately 3 and 6 pipe diameters from the end of the sensor
2
Isolation Valves—Customer supplied Full port ball
3
Ground Protective (earth), 10 AWG (4 mm
2
) minimum
Sensor Installation
Page 13 April 2019 CRL-QS-01552-EN-05

TRANSMITTER INSTALLATION
For wiring details, see the "Coriolis Flow Meters RCTX Control Drawing" included with this product or download it
from www.badgermeter.com.
RCTX Transmitters
The RCTX transmitter is either integrated into the sensor or mounted remotely from the sensor. Install the transmitter in an
area convenient for observing the LCD readout (RCTX with Display ONLY), programming and servicing.
• Transmitter/Sensor for hazardous locations
• Mount where little vibration exists
• Mount where protected from corrosive fluids
• Transmitter’s ambient temperature limits – 4…140° F (–20…60° C)
• Keep out of direct sunlight. Direct sunlight may increase transmitter temperature above maximum temperature
• Allow enough room for maintenance and conduit entrances
RCTX with Display ONLY
OBSERVE PRECAUTIONS FOR HANDLING ELECTROSTATICSENSITIVE DEVICES.
The display is designed to be oriented in any 90-degree position based on the orientation of the transmitter/sensor.
To rotate the orientation of the display board:
1. Turn o power to the unit.
2. Turn the cover counterclockwise to unscrew it.
3. Use a Phillips screwdriver to remove the 4 screws holding the display board (hold display board as the last screw is
removed so the board does not drop down when mounted vertically).
4. Re-position the display board and secure with the four screws.
5. Install the cover.
OTE:N Use 3/4 inch 14NPT fittings/plugs to maintain the explosion-proof integrity of the enclosure.
Figure 17: Display board rotated 90°
Transmitter Installation
Page 14 April 2019CRL-QS-01552-EN-05

RCTX Transmitters with Integral Mount
To rotate the orientation of the transmitter
relative to the sensor:
1. Loosen the 1-3/4 in. union hex nut. Be
careful to not loosen the feedthrough to
the enclosure.
2. Turn the transmitter. Do not turn beyond
180 degrees.
3. When the orientation is correct, tighten the
nut to wrench tight.
To route the power cables:
Route the power and I/O cables into the
transmitter via the explosion-proof conduit holes
located on each side of transmitter housing.
RCTX Transmitter
Wired Feedthrough
End Fitting
Coriolis Sensor
Hex Nut
Conduit Hole
Conduit Hole
End Fitting
Figure 18: Sensor with integrated RCTX transmitter
RCTX Transmitters with Remote Mount
Route the power and I/O cables into the transmitter via the explosion-proof conduit holes located on each side of
transmitter housing.
OTE:N Use 3/4 inch 14NPT fittings/plugs to maintain the explosion-proof integrity of the enclosure.
Remote Sensor Assembly
Remote Transmitter Assembly
Transmitter-to-Sensor TFE Cable
RCTX Transmitter
Wired Feedthrough
Hex Nut
Conduit Entry
Conduit Entry
Conduit Outlet Box
Ground Lug
Figure 19: Sensor with remote RCTX transmitter
Transmitter Installation
Page 15 April 2019 CRL-QS-01552-EN-05

Locking the Transmitter Cover
To prevent the cover from loosening due to vibration, tighten the setscrew into the enclosure. See Figure 20.
To lock the cover on the transmitter housing, remove the setscrew and thread a customer-supplied chain or cable through the
setscrew hole and the hole on the nearest tab. See Figure 20.
Setscrew
Cable
Figure 20: Securing the enclosure cover
GROUND/EARTH CONNECTION
Earthing Using Rigid Pipe
FOR RCTX TRANSMITTERS, USE A POSITIVE GROUNDING RIGID PIPE CONNECTOR. THIS CONNECTOR ACTS AS A
PROTECTIVE GROUND AND MUST BE CONNECTED TO AN APPROPRIATE GROUNDING LOCATION.
EU Earthing Without Rigid Pipe
General
All wiring practices should comply to the NEC Article 500 or Canadian Electrical Code (CEC) Part I and Part II or
IEC 60079–14 as required by local and/or national codes.
Connecting or disconnecting devices:
• Make sure the supply voltage is switched off and the transmitter is in a non-hazardous area.
• Use connecting cables rated for a continuous service temperature of –10…95° C (Tamb max +20° C).
• Use only certified (conforming to IEC 60079–14 Electrical Installations in Hazardous Areas) cable glands and conduit
hole plugs.
• Seal unused entry holes with approved sealing plugs that correspond to the type of protection NEMA 4 or IP-66 as
required for the installation area. The sealing plugs included with the transmitter meet this requirement and are compliant
to both standards.
Potential equalization (earth bonding)
As a condition of safe use, both an internal and external earth bond are required.
• Internal earth bond is made at the protective earth terminal on terminal block TB101 (for RCTX). Earth bond conductors
must be the same gauge or larger than the power supply conductors.
• The external bond is satisfied by connecting the enclosure chassis through hard conduit or a ground lug.
Ground/Earth Connection
Page 16 April 2019CRL-QS-01552-EN-05

OPENING THE COVER AND REMOVING THE DISPLAY BOARD
OBSERVE PRECAUTIONS FOR HANDLING ELECTROSTATICSENSITIVE DEVICES.
1. Turn o power to the unit.
2. Grasp the enclosure cover and turn it counter-clockwise until it separates from the enclosure body. Set the cover aside.
3. Use a Phillips screwdriver to remove the 4 screws holding the display board to the standos (hold display board as the last
screw is removed so the board does not drop down when mounted vertically). See Figure 21.
4. Gently turn over the display board.
5. Open the tabs on the header assembly to release the cable ribbon connector. See Figure 22.
6. Remove the display board.
Remove ScrewsRemove Screws
Cable
Ribbon
Header
Assembly
Tabs
Figure 21: Phillips head screws
Figure 22: Release cable ribbon
Opening the Cover and Removing the Display Board
Page 17 April 2019 CRL-QS-01552-EN-05

DC POWER CONNECTIONS
OTE:N Use a small bladed screwdriver to secure wires to the connectors.
The RCTX operates from a 18…28V DC Class 2 source, as long as the source is capable of supplying a minimum of 7W.
1. Connect an 18…28V DC Class 2 power source as illustrated in the schematic in Figure 23. Terminal blocks in the RCTX
accommodate wire gauges up to 16 AWG.
2. A switch or circuit breaker is required in the installation.
a. The switch or circuit breaker must be in close proximity of the RCTX and within easy reach of the operator.
b. The switch or circuit breaker must be marked as the disconnect device for the RCTX.
OTE:N DC power input is protected with an internal 1.5 Amp, Slo-Blo, surface mount (non-field serviceable) fuse. This fuse
protects only for a catastrophic failure and must be returned to factory for servicing if blown.
OTE:N User shall provide external circuit breaker at the source for normal operation.
OTE:N RCTX with Display: Must remove display board for terminal block access. See "" on page 16.
TB100
See Figure 23.
1 VIN (Power Source 18…28V DC)
2 VCOM (Power Source Common)
Figure 23: Wiring reference: RCTX with display, shown with display board removed for clarity
DC Power Connections
Page 18 April 2019CRL-QS-01552-EN-05

INPUTS / OUTPUTS
The transmitter powers the current loop. Applying power from any other external device or load will result in damage to
the transmitter.
OTE:N The IOut1 (HART Option), IOut2, and IOut3 designations can represent any parameters. Units of measure are
(appropriately) different.
The frequency/pulse output signal is available as open drain (100 mA sinking max).This channel is user-selected to operate as
a straight frequency output, a pulse output or a PWM output suitable for totalizing.
The two digital output signals are available as open drain (100 mA sinking max.). Each open drain output requires a pullup
resistor to DC voltage of 5…28V DC to form a positive voltage pulse. Make this connection in the users' equipment, since the
preferred voltage should be available there.
The three digital inputs (DC voltage of 5…28V DC) are used to initiate many of the transmitter's advanced functions.
The analog input (0…5V maximum) is used to form a ratio between the analog input and an analog signal from other devices.
RCTX TB100 Interface
Terminal Signal Name Dir Signal Description
1 18-28Vdc In 18…28V DC, 15W max.
2 Vdc Common In
Power Source Common
NOTE: This is NOT same signal as GND. This signal is isolated by an internal common mode filter choke from GND
3 RS485+ I/O RS485+ Communications (Diff Pair)
4 RS485- I/O RS485- Communications (Diff Pair)
5 In_Status_1 In Digital Input (Low: 0V DC, Active High: 5…28V DC)
6 In_Status_2 In Digital Input (Low: 0V DC, Active High: 5…28V DC)
7 In_Status_3 In Digital Input (Low: 0V DC, Active High: 5…28V DC)
8 GND — Signal GND (GND for all signals with the exception of power in)
9 Out_Status_1 Out
Digital Open Drain Output. Requires an external pullup resistor to 5…28V DC max. to provide a positive voltage
level (100 mA max. sink current)
10 Out_Status_2 Out
Digital Open Drain Output. Requires an external pullup resistor to 5…28V DC max. to provide a positive voltage
level (100 mA max. sink current)
11
Frequency
Output
Out
Digital Open Drain Output. Requires an external pullup resistor to 5…28V DC max. to provide a positive voltage
level. (10k Hz max. frequency)
12 Analog In1 In Analog Input, 0…5V max.
13 IOut2 Out Analog Output, 4…20mA (500 Ohm load max.) active
14 IOut3 Out Analog Output, 4…20mA (500 Ohm load max.) active
HART Module TB1 Interface
Transmitter must be ordered with HART card installed.
Terminal Signal Name Dir Signal Description
1 IOut1 Out Analog Output, 4…20mA (500 Ohm load max.)/HART communications
2 GND — Signal GND (GND for all signals with the exception of power in)
RCTX TB101 Interface
Terminal Signal Name Dir Signal Description
1 CHASSIS GND — Electrical conductivity via internal standoffs to RCTX enclosure. Termination for cable shields
2 CHASSIS GND — Electrical conductivity via internal standoffs to RCTX enclosure. Termination for cable shields
Inputs / Outputs
Page 19 April 2019 CRL-QS-01552-EN-05

RCTX Interface Diagrams
TYPICAL STATUS_IN 1, 2, & 3 INTERFACE
RCTX
1.00 K, 1W
Vf: Typ 1.25V
GND
TB100
5, 6, & 7
EXTERNAL EQUIPMENT
V DC
5…28V DC
GND
8
A
K
Figure 24: Typical status_in 1, 2 and 3 interface
EXTERNAL EQUIPMENT
V DC
(5…28V DC)
R
TO INPUT LOGI
C
9, 10, & 11
TB100
RCTX
100 mA Max.
8
GND
GND
FREQUENCY OUTPUT
Figure 25: Typical status_out 1, 2 and frequency output interface
EXTERNAL EQUIPMENT
RCTX
CURRENT
+15V DC
4…20 mA
TB100
13, 14
TO INPUT LOGI
C
R
500 Ohm Max. Load
GND
GND
8
Figure 26: Typical lOut2 and lOut3 current interface
HART MODULE
EXTERNAL EQUIPMENT
+15V DC
4…20 mA
TB1
1
2
GNDGND
R
TO INPUT LOGI
C
500 Ohm Max. Load
Figure 27: Typical lOut1 HART interface
Inputs / Outputs
Page 20 April 2019CRL-QS-01552-EN-05
Page is loading ...
Page is loading ...
Page is loading ...
Page is loading ...
Page is loading ...
Page is loading ...
Page is loading ...
Page is loading ...
Page is loading ...
Page is loading ...
Page is loading ...
Page is loading ...
Page is loading ...
Page is loading ...
Page is loading ...
Page is loading ...
Page is loading ...
Page is loading ...
Page is loading ...
Page is loading ...
/