Page is loading ...

Assembly Instructions
Item# L-FT765PCO-A
Warnings and cautions:
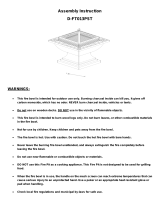
FOR OUTDOOR USE ONLY! Burning charcoal inside can kill you. It gives off carbon monoxide, which has no
odor. NEVER burn charcoal inside, vehicles or tents.
NEVER LEAVE FIRE UNATTENDED!
The charcoal fire pit is HOT! DO NOT TOUCH or allow children to play near the Fire Pit when it is in use. Hot
embers can fly out of the basin in breezy conditions. A fire extinguisher should be readily available.
When the fire pit is in use, the handle on the mesh screen can reach extreme temperatures that can cause
serious injury to an unprotected hand. Use a poker or an appropriate heat resistant glove or pad when handling.
To avoid destroying the finish, please handle the surface by using a soft cloth instead of your bare hands.
DO NOT TOUCH the surface of the iron fire grate or the Fire Bowl while in use, as burns may result.
CARBON MONOXIDE HAZARD!
This unit has been designed to burn charcoal or untreated wood only. DO NOT use gasoline or kerosene to
light your fire.
DO NOT use on wood deck.
DO NOT use in the vicinity of flammable objects.
DO NOT use this Fire Pit as a cooking appliance. This Fire Pit is not designed to be used for grilling food.
Care & Maintenance:
1. Before using, clean the product completely with a soft dry towel.
2. To extend the life of your fire pit, clean the bowl after each use and cover the unit to protect it from the
elements, cover is not included. Due to natural properties of steel material, if rust develops, please clean rust area
by sanding slightly, then wipe thoroughly and apply touch-up paint if possible.

Preparation:
Before beginning assembly of product, make sure all parts are present. Compare parts with package contents list
and diagram above. If any part is missing or damaged, do not attempt to assemble the product. Contact customer
service for replacement parts.
Tools Required for Assembly: Wrench (Included) and Philips Screwdriver (Not included)
Assembly instructions:
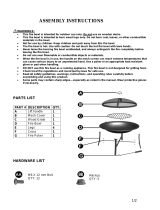
No.
Description
Qty
A
Handle
1
B
Fire screen
1
C
Grate
1
D
Fire bowl
1
E
Ash catcher
1
F
Slate top
1
G
Tiki panel
4
H
Poker
1
AA
Flanged nut M6
1
BB
Bolt M5*10
3
CC
Flanged nut M5
3
DD
Bolt M6*35
8
EE
Bolt M6*20
4
FF
Nut M6
8
GG
Flat washer
20
HH
Wrench M6
1
Step 1: Connect handle (A) and fire screen (B), tighten
with flanged nut (AA).
Step 2: Connect ash catcher (E) and fire bowl (D),
tighten with bolt (BB) and flanged nut (CC).
Parts List:

Limited Warranty:
This limited warranty is extended to the original purchaser and applies to defects in materials and workmanship of
your item provided the item is maintained with care and used only for personal, residential purposes.
The item is warranted to be free from defects in material or workmanship for a period of 6 months. If any defect is
found, please call our customer service department at 1-866-578-6569 for help. The manufacturer will not cover
transportation or delivery costs, or compensate the individual or any outside party for assembling or
disassembling the product. This warranty gives you specific legal rights, and you may also have other rights
which vary from state to state.
Service:
For technical assistance on assembly or replacement parts call Sunjoy Industries at 1(866) 578-6569 from 8:30
AM to 5:30 PM EST or Email customer.care@sunjoydirect.com or visit www.sunjoydirect.com to place your order
or fax your parts replacement order form together with your purchase receipt to 1 (740) 283-3549 for assistance.
Made in China
Step 4: Put slate top (F) upside down on a soft,
non-abrasive surface, connect assembled tiki panel
base to slate top (F) with bolt (EE) and washer (GG).
Tighen all bols here.
Step 5: Turn over the whole assembled piece. Place Fire bowl
(D), Grate (C) and Fire screen (B) in order. Use Poker (H) as
necessary.
Now, your firepit is perfect ready for use.
Step 3: Connect tiki panel G1,G2,G3,G4 orderly with
bolt (DD), flat washer (GG) and nut (FF). Please do
not tighten the bolt here!
/


