Made in America Lifetime Guarantee
Thank you for purchasing this instrument from Intellitronix. We value our customers!
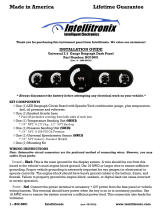
INSTALLATION GUIDE
LED Digital Transmission Temperature Gauge
Part Number: M9107
* Always disconnect the battery before attempting any electrical work on your vehicle.*
KIT COMPONENTS
◊One (1) LED Gauge
◊One (1) S8013 temperature sender
WIRING INSTRUCTIONS
Note: Automotive circuit connectors are the preferred method of connecting wires. However,
you may solder if you prefer.
Ground - Black Connect directly to an engine ground such as the engine block. For the most
accurate readings, connect to the same ground as the sending unit.
Power – Red Connect to a switched +12V source such as the ignition switch.
Dimmer - Purple Connect to the parking lights to dim the LEDs 50% when the headlights are
on. However, do not connect to the headlight rheostat control wire; the dimming feature will not
work properly. Otherwise, connect to ground for permanent 100% brightness.
Temperature - Blue Connect to the output of the temperature sending unit.
# # #