Page is loading ...

Audio
Embedder
3GSDI
Release A8
User Manual
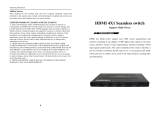
EXT-HD-MVSL-441
Multiview
Seamless
Switcher

Important Safety Instructions
ii
GENERAL SAFETY INFORMATION
1. Read these instructions.
2. Keep these instructions.
3. Heed all warnings.
4. Follow all instructions.
5. Do not use this product near water.
6. Clean only with a dry cloth.
7. Do not block any ventilation openings. Install in accordance with the manufacturer’s
instructions.
8. Do not install or place this product near any heat sources such as radiators, heat
registers, stoves, or other apparatus (including ampliers) that produce heat.
9. Do not defeat the safety purpose of the polarized or grounding-type plug. A polarized
plug has two blades with one wider than the other. A grounding type plug has two
blades and a third grounding prong. The wide blade or the third prong are provided for
your safety. If the provided plug does not t into your outlet, consult an electrician for
replacement of the obsolete outlet.
10. Protect the power cord from being walked on or pinched particularly at plugs,
convenience receptacles, and the point where they exit from the apparatus.
11. Only use attachments/accessories specied by the manufacturer.
12. To reduce the risk of electric shock and/or damage to this product, never handle or
touch this unit or power cord if your hands are wet or damp. Do not expose this
product to rain or moisture.
13. Unplug this apparatus during lightning storms or when unused for long periods of time.
14. Refer all servicing to qualied service personnel. Servicing is required when the
apparatus has been damaged in any way, such as power-supply cord or plug is
damaged, liquid has been spilled or objects have fallen into the apparatus,
the apparatus has been exposed to rain or moisture, does not operate normally,
or has been dropped.
15. Batteries that may be included with this product and/or accessories should never be
exposed to open ame or excessive heat. Always dispose of used batteries
according to the instructions.
4x1 Multiview Seamless Switcher for HDMI

Warranty Information
Gefen warrants the equipment it manufactures to be free from defects in material and
workmanship.
If equipment fails because of such defects and Gefen is notied within two (2) years from
the date of shipment, Gefen will, at its option, repair or replace the equipment, provided
that the equipment has not been subjected to mechanical, electrical, or other abuse or
modications. Equipment that fails under conditions other than those covered will be
repaired at the current price of parts and labor in effect at the time of repair. Such repairs
are warranted for ninety (90) days from the day of reshipment to the Buyer.
This warranty is in lieu of all other warranties expressed or implied, including without
limitation, any implied warranty or merchantability or tness for any particular purpose, all of
which are expressly disclaimed.
1. Proof of sale may be required in order to claim warranty.
2. Customers outside the US are responsible for shipping charges to and from Gefen.
3. Copper cables are limited to a 30 day warranty and cables must be in their original
condition.
The information in this manual has been carefully checked and is believed to be accurate.
However, Gefen assumes no responsibility for any inaccuracies that may be contained
in this manual. In no event will Gefen be liable for direct, indirect, special, incidental, or
consequential damages resulting from any defect or omission in this manual, even if
advised of the possibility of such damages. The technical information contained herein
regarding the features and specications is subject to change without notice.
For the latest warranty coverage information, refer to the Warranty and Return Policy under
the Support section of the Gefen Web site at www.gefen.com.
PRODUCT REGISTRATION
Please register your product online by visiting the Register Product page under the
Support section of the Gefen Web site.
iii
4x1 Multiview Seamless Switcher for HDMI

iv
3GSDI Audio Embedder
Gefen, LLC
c/o Customer Service
20600 Nordhoff St.
Chatsworth, CA 91311
Telephone: (818) 772-9100
(800) 545-6900
Fax: (818) 772-9120
Visit us on the Web: www.gefen.com
Technical Support Hours: 8:00 AM to 5:00 PM Monday - Friday, Pacic Time
4x1 Multiview Seamless Switcher for HDMI is a trademark of Gefen, LLC.
Important Notice
Gefen, LLC reserves the right to make changes in the hardware, packaging, and any
accompanying documentation without prior written notice.
HDMI, the HDMI logo, and High-Denition Multimedia Interface are trademarks or
registered trademarks of HDMI Licensing in the United States and other countries.
© 2015 Gefen, LLC. All Rights Reserved.
All trademarks are the property of their respective owners.
Contacting Gefen Technical Support
iv
4x1 Multiview Seamless Switcher for HDMI


3GSDI Audio Embedder
vi
Licensing
4x1 Multiview Seamless Switcher for HDMI
This product uses software that is subject to open source licenses, including one or more
of the General Public License Version 2 and Version 2.1, Lesser General Public License
Version 2.1 and Version 3, BSD, and BSD-style licenses. Distribution and use of this
product is subject to the license terms and limitations of liability provided in those licenses.
Specic license terms and Copyright Notications are provided in the source code.
For three years from date of activation of this product, any party may request, and we
will supply, for software covered by an applicable license (e.g. GPL or LGPL), a complete
machine-readable copy of the corresponding open source code on a medium customarily
used for software interchange. The following software and libraries are included with this
product and subject to their respective open source licenses:
• lwIP
• jQuery
lwIP is licenced under the BSD licence:
Copyright (c) 2001-2004 Swedish Institute of Computer Science.
All rights reserved.
Redistribution and use in source and binary forms, with or without modication,
are permitted provided that the following conditions are met:
1. Redistributions of source code must retain the above copyright notice, this list of
conditions and the following disclaimer.
2. Redistributions in binary form must reproduce the above copyright notice, this list of
conditions and the following disclaimer in the documentation and/or other materials
provided with the distribution.
3. The name of the author may not be used to endorse or promote products derived from
this software without specic prior written permission.
THIS SOFTWARE IS PROVIDED BY THE AUTHOR ``AS IS’’ AND ANY EXPRESS
OR IMPLIED WARRANTIES, INCLUDING, BUT NOT LIMITED TO, THE IMPLIED
WARRANTIES OF MERCHANTABILITY AND FITNESS FOR A PARTICULAR PURPOSE
ARE DISCLAIMED. IN NO EVENT SHALL THE AUTHOR BE LIABLE FOR ANY DIRECT,
INDIRECT, INCIDENTAL, SPECIAL, EXEMPLARY, OR CONSEQUENTIAL DAMAGES
(INCLUDING, BUT NOT LIMITED TO, PROCUREMENT OF SUBSTITUTE GOODS OR
SERVICES; LOSS OF USE, DATA, OR PROFITS; OR BUSINESS INTERRUPTION)
HOWEVER CAUSED AND ON ANY THEORY OF LIABILITY, WHETHER IN
CONTRACT, STRICT LIABILITY, OR TORT (INCLUDING NEGLIGENCE OR
OTHERWISE) ARISING IN ANY WAY OUT OF THE USE OF THIS SOFTWARE, EVEN IF
ADVISED OF THE POSSIBILITY OF SUCH DAMAGE.

3GSDI Audio Embedder
vii
Features
• Seamless switcher scales and sizes each of the four inputs, and outputs them one at
a time or as windows on a single display
• Input and Output resolutions up to 1080p Full HD and 1920x1200 (WUXGA)
• HDCP compliant
• Seamless switching ensures no switching delay and no picture loss during transitions
• Default pre-congured Multiview window arrangements can be accessed via ve front
panel preset push-buttons
• Custom user-congurable Multiview window layouts can be accessed via ve front
panel preset push-buttons
• User-selectable playback of HDMI audio content from any of the four inputs
• Controllable via front panel controls, IR, IP (web server interface, Telnet, and UDP),
and RS-232
• Easy to use on-screen Graphical User Interface (GUI) and web server interface
• Handheld IR remote control and IR Extender input on back panel
• Field-upgradable rmware via web server interface
• USB port (reserved for future product enhancements)
• Locking power supply connector
• 1U tall rack-mountable enclosure, rack ears included
Packing List
The 4x1 Multiview Seamless Switcher for HDMI ships with the items listed below. If any of
these items are not present in your box when you rst open it, immediately contact your
dealer or Gefen.
• 4x1 Multiview Seamless Switcher for HDMI
• 4 x 6 ft. Locking HDMI Cables
• 1 x 6 ft. DB-9 Cable
• 1 x 12V DC Power Supply
• 1 x IR Extender Module
• 1 x IR Remote
• 1 x Set of Rack Ears
• 1 x Quick-Start Guide
Features and Packing List
1080P
®
4x1 Multiview Seamless Switcher for HDMI

3GSDI Audio Embedder
Table of Contents
viii
4x1 Multiview Seamless Switcher for HDMI
01 Getting Started
Panel Layout ......................................................................................................... 2
Front .............................................................................................................. 2
Back .............................................................................................................. 3
IR Remote Control Unit ......................................................................................... 4
Top ................................................................................................................ 4
Bottom ........................................................................................................... 6
Battery Cover ........................................................................................................ 6
Installing the Batteries ................................................................................... 7
Battery Cover ........................................................................................................ 7
Setting the IR Channel .................................................................................. 8
Installation ............................................................................................................. 9
Connecting the 4x1 Multiview Seamless Switcher for HDMI ........................ 9
Sample Wiring Diagram ................................................................................ 9
Network Conguration using Syner-G ......................................................... 10
02 Operating the 4x1 Multiview Seamless Switcher
for HDMI
Introduction.......................................................................................................... 14
Standby Mode ............................................................................................. 14
Turning on the 4x1 Multiview Seamless Switcher for HDMI ....................... 14
Window Basics .................................................................................................... 15
Selecting a Window Conguration .............................................................. 15
Single Window Nomenclature ..................................................................... 16
Changing the Routing State (Single Window) ............................................. 19
Multiple Window Nomenclature ................................................................... 21
Masking / Unmasking Outputs .................................................................... 25
Window Priority ........................................................................................... 26
Assigning Window Priority ........................................................................... 27
Video Effects ....................................................................................................... 28
Using Fade .................................................................................................. 28
Using Chroma Key ...................................................................................... 29
Using Mirror ................................................................................................. 31
Locking / Unlocking the Switcher ........................................................................ 32
Using the IR Extender ......................................................................................... 34
Menu System ...................................................................................................... 35
Accessing the Menu System ....................................................................... 35
Setting the Output Resolution ..................................................................... 38
Adjusting the Brightness ............................................................................. 40
Adjusting the Contrast ................................................................................. 42
Adjusting the Saturation .............................................................................. 44
Adjusting the Hue ........................................................................................ 46
OSD Settings .............................................................................................. 48

3GSDI Audio Embedder
Contents
ix
Table of Contents
4x1 Multiview Seamless Switcher for HDMI
EDID Management ...................................................................................... 51
Mirror ........................................................................................................... 53
Fade In-Out ................................................................................................. 55
Chroma Key ................................................................................................ 57
Changing the IP Settings ............................................................................ 59
Changing the Telnet Settings ...................................................................... 62
Changing the UDP Settings ........................................................................ 64
System Settings .......................................................................................... 67
Web Interface ...................................................................................................... 68
Using the built-in Web Interface .................................................................. 68
Main ► Routing .......................................................................................... 69
Main ► I/O Status ....................................................................................... 77
Main ► Display Info .................................................................................... 79
I/O Setup ► Settings .................................................................................. 80
I/O Setup ► HPD Control ........................................................................... 82
I/O Setup ► HDCP ..................................................................................... 83
Window Setup ............................................................................................. 85
Presets ........................................................................................................ 88
EDID ► Assign ........................................................................................... 90
EDID ► Bank Names ................................................................................. 94
EDID ► Upload / Download ........................................................................ 95
Network ....................................................................................................... 97
System ...................................................................................................... 101
03 Advanced Operation
RS-232 and IP Conguration ............................................................................ 106
Using Telnet .............................................................................................. 106
Using RS-232 ............................................................................................ 106
UDP Conguration .................................................................................... 107
Commands ........................................................................................................ 108
04 Appendix
Default Settings ................................................................................................. 188
Upgrading the Firmware .................................................................................... 189
Specications .................................................................................................... 190

This page left intentionally blank.

01 Getting Started
Multiview
Seamless
Switcher

page | 2
Introduction
Front
ID Name Description
1 Input Indicators These LED indicators display the state of
each input. See Window Basics for more
information.
2 Window Buttons Press these buttons to display up to four
windows on a single display.
3 Window Presets Use these buttons to select the desired
window conguration. Five default presets
and 5 user-denable window presets are
available. See Window Basics for more
information.
4 Menu System Controls Use these buttons to select and change
settings within the built-in menu system.
See Menu System for details.
5 IR This IR sensor receives signals from the
included IR remote control unit.
6 Lock Use this button to lock the 4x1 Multiview
Seamless Switcher for HDMI and prevent
accidental changes. See Locking
/ Unlocking the Switcher for more
information on this feature.
7 Standby LED Indicator This LED will remain illuminated when the
4x1 Multiview Seamless Switcher for HDMI
is powered OFF.
8 Power This button is used to power ON and power
OFF the 4x1 Multiview Seamless Switcher
for HDMI. This button will remain illuminated
while the switcher is powered ON.
Getting Started
Panel Layout
1 3 4 6 8
52 7

page | 3
Chapter
Back
ID Name Description
1 IR Ext Connect the included IR Extender (Gefen
part no. EXT-RMT-EXTIRN) to this port.
2 In (1 - 4) Connect up to four Hi-Def sources to these
inputs using HDMI cables.
3 HDMI Out Connect an HDMI cable from this port to an
HD display.
4 IP Cont. Connect a shielded CAT-5e (or better)
cable between this jack and a LAN to
use IP control. Refer to RS-232 and IP
Conguration for more information on
setting up IP control.
5 USB Not used. Reserved for future expansion.
6 RS-232 Connect an RS-232 cable from this port
to an RS-232 device. See RS-232 and
IP Conguration for more information on
setting up RS-232 control.
7 12V DC Connect the included 12V DC power
supply from this power receptacle to an
available AC electrical outlet. Do not
overtighten the locking connector on the
power receptacle.
Panel Layout
Getting Started
2 3 4 6
5 7
1

page | 4
Chapter
Top
ID Name Description
1 Info Used to toggle notications on all outputs.
2 Audio (1 - 4) Selects the audio source to be used on the
output.
IR Remote Control Unit
1
2
3
4
6
7
5
9
8
14
10
11
12
13
Getting Started

page | 5
Chapter
IR Remote Control Unit
ID Name Description
3 Menu Press this button to display the built-in
menu system.
4 ◄ /►/▲/▼/OK Used to access and change features within
the menu system. Use the arrow buttons
to move around within the menu system or
change a value. Press the OK button to
make a selection within the menu system.
5 Exit Press this button to exit the main menu or
exit from sub-menus.
6 Default Presets Use these button to select the desired
window conguration. See Window
Basics for information on selecting window
congurations.
7 User Presets These buttons are used to store custom
window conguration presets. See Window
Basics for more information.
8 In (1 - 4) Use this buttons to select the input.
9 Power Press this button to power-ON or power-OFF
the Multiview Seamless Switcher.
10 Window (1 - 4) Use these buttons to select the desired
window. Each of these buttons is
associated with the buttons on the front
panel (Window A - D). See Window Basics
for more information on working with
windows and inputs.
11 Lock Press this button to lock or unlock the 4x1
Multiview Seamless Switcher for HDMI.
12 Mute Mutes the audio on all outputs.
13 Rotate Press this button to cycle through right-90°,
180°, left 90°, and no rotation. Only single-
window mode can be rotated.
14 Mirror Applies a horizontal transformation (rotated
180° about the y-axis) to window output A.
Getting Started

page | 6
Chapter
Bottom
ID Name Description
1 Battery slot
(shown without batteries)
Holds the batteries for operating the
IR remote. Use only 1.5V “AAA”-type
batteries. See Installing the Batteries for
information on battery installation.
2 DIP switch bank Use these DIP switches to set the IR
channel of the remote. See Setting the IR
Channel for details.
IR Remote Control Unit
Battery Cover
1
2
Getting Started

page | 7
Chapter
Installing the Batteries
1. Remove the battery cover on the bottom of the IR remote control unit.
2. Make sure that the batteries are installed with the correct polarity, as shown in the
illustration, below. Always use two 1.5V AAA-type batteries.
3. Replace the battery cover.
_
+
_
+
IR Remote Control Unit
WARNING: Risk of explosion if battery is replaced by an incorrect
type. Dispose of used batteries according to the instructions.
Battery Cover
Getting Started

Chapter
page | 8
Setting the IR Channel
In order to function correctly, both the switcher and the IR remote control must be set to the
same IR channel. To set the IR channel of the switcher, use the #set_ir command or use
the IR Channel setting under the System page of the Web interface.
IR Channel DIP settings
0
1 2
ON
1
1 2
ON
1 2
2
1 2
ON
3
1 2
ON
IR Remote Control Unit
DIP switches
Getting Started

Chapter
page | 9
Installation
Connecting the 4x1 Multiview Seamless Switcher for HDMI
1. Connect up to four Hi-Def sources to the input ports (In 1 - In 4) ports on the 4x1
Multiview Seamless Switcher for HDMI.
2. Connect an HD display to the HDMI Out port on the 4x1 Multiview Seamless Switcher
for HDMI.
3. OPTIONAL: Connect an RS-232 cable from the RS-232 port on the 4x1 Multiview
Seamless Switcher for HDMI to the RS-232 connector on the automation controller.
4. OPTIONAL: Connect a CAT-5e (or better) cable from the IP Control port on the 4x1
Multiview Seamless Switcher for HDMI to a Local Area Network (LAN).
5. OPTIONAL: Connect the included IR extender to the IR Ext port on the 4x1 Multiview
Seamless Switcher for HDMI.
6. Connect the included 12V DC locking power supply to the power receptacle
on the 4x1 Multiview Seamless Switcher for HDMI. Do not overtighten the locking
power connector.
7. Connect the power supply to an available electrical outlet.
Sample Wiring Diagram
Getting Started
HDMI CABLE
RS-232 CABLE
HD Display
Multiview Seamless
Switcher for HDMI
HD Source
HD Source
HD Source
HD Source
CAT-5 CABLE
IR EXTENDER
LAN
(for IP Control)
Automation
Control Device
EXT-HD-MVSL-441

Getting Started
Network Conguration using Syner-G
1. Launch the Gefen Syner-G application.
Download the application here: http://www.gefen.com/synerg/
2. Select the EXT-HD-MVSL-441 from the list of products.
3. Under the Device Settings section, select either Static or DHCP from the IP Mode
drop-down list.
► Select Static to manual enter the IP address, subnet mask, and gateway IP.
Consult with your network administrator, if necessary.
► Select DHCP to let the DHCP server automatically assign the IP address,
subnet mask, and gateway IP.
page | 10
Installation
/